




Likes
1
Share


@Pestitel
Follow
Amazing experience with the Mix Pack, I will try it again next summer for sure. Love the variety.

Likes
7
Share

@Weedprinzessin
Follow
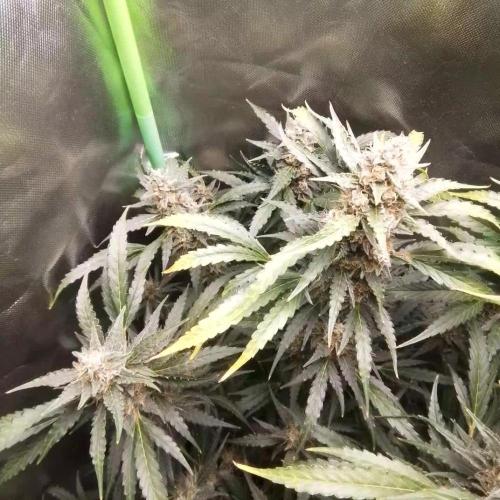
Das Zelt ist voll 😊 Gertrud hat sich sehr gut gemacht und mit Biotabs bin ich mehr als zufrieden, war mal echt einfach 👌👍
Denke mal so 2 Wochen noch?.
So fette buds hatte ich auch noch nicht, vielen Dank an Fast Buds 😘
Likes
9
Share


Likes
Comments
Share


@BruWeed
Follow
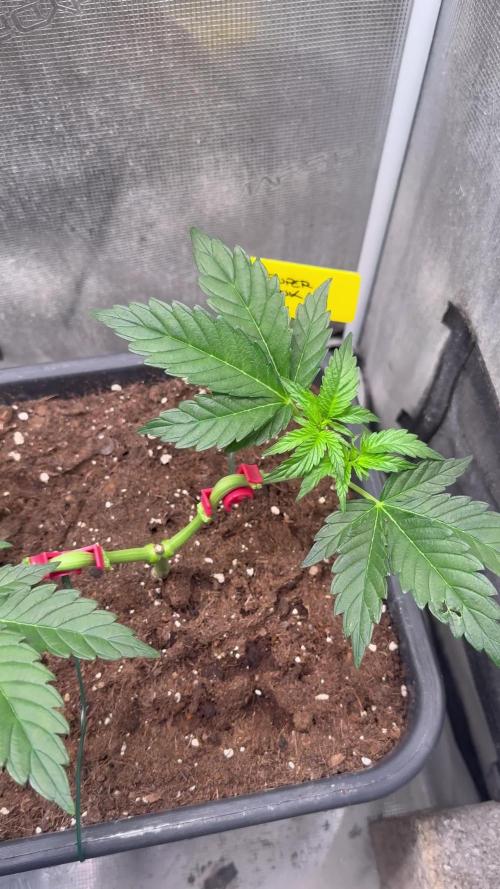
10/04 - Cumple tres semanas en etapa de crecimiento.
Se encuentra perfecta, sus chalas estan impecalbles.
Le realice la poda apical y en unos dias voy a realizar LST.
Con lo que corte lo clone y lo puse en una maceta pequeña.
Voy a dejarla en crecimiento 5 semanas asi se desarrolla bien.
En estos dias estare publicando mas imagenes de como viene.
13/04 - Realice LST.
Podes seguirme en Instagram @bruweed_arg

Likes
6
Share


@WeedM8
Follow
I forgot to say at the begging I have a bought a dehumidifier because in my home there is no ventilation to put inside took one a plant place thath i had to keep in vegetation period any way this week th plants are pumping good i did stop for a week with the nutrients but now I’ll put a bit les 2 times a weekas normal

Likes
9
Share


@Kayotic
Follow
*Day 29
#1 is 3 inches
#2 is 6 inches
*1 tsp Trifecta Myco Supreme
*1 tsp Cal Mag
*Seem happy , going to LST #2 and leave #1 alone

Likes
6
Share


@I_Identify_As_A_Dan
Follow
Week 13 for Space Panda by atlasseed,
The strain that hates topping 😂 Shes slowly slowly coming back from her topping/ last training session.
Hopefully in a week or so she gets her shit together.
Being fed once/twice a week.

Likes
4
Share

@zobiwan
Follow
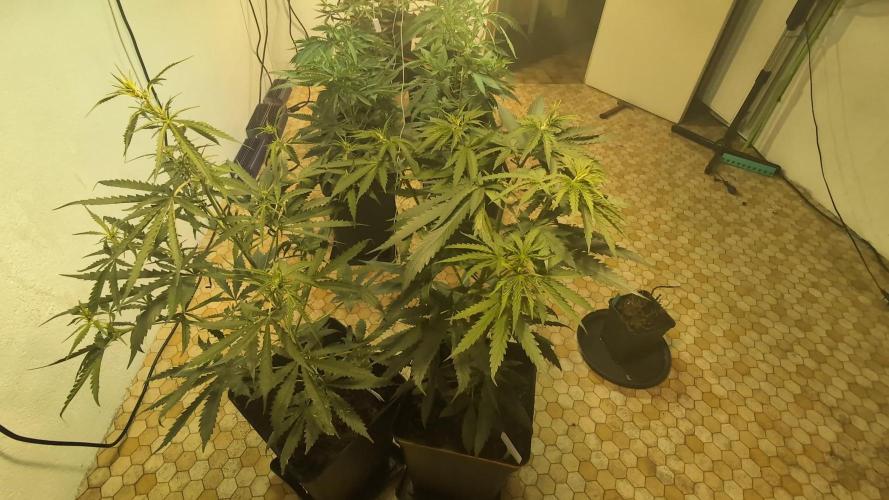
Très bonne semaine, aucun problème de chaleur et hygrométrie au top...
Orange sherbet :
Toujours aucune différence réel entre les engrais utilisé, 2 des 3 spécimens sont d'une taille gigantesque, l'une dépasse les 65 cm et l'autre est quelques peu plus petite de 3 ou 4 cm 👌.
Le 3iem plants que j'ai façonné pour être plus court mais plus dense avec de grosses feuilles bien épaisse, c'est très bien comporté et ne subit pas de réelle stresse face aux techniques utilisées pour créer ce type de résultat (plante basse et massive a la limite du bonsaï 💪), bien sûr le test ici est de voir si ce type de culture pour cette variété est rentable ou non 😉.
2 plants taillé et un plant pincé.
Le plant pincé a eu une réaction d'activation de pré-floraison, les deux autres n'ont subit aucun stress dû a la taille 👌.
Afghani :
Je suis plus que satisfait de mon résultat de fin de croissance pour mes 3 plants, il font une taille resonable de 45 cm et devrait donc si tout est ok avoir une progression en fin de floraison a 120 voir 130 cm 👍.
Le plant sous Monster Bud' est plus robuste que les 2 autres, mais reste a voir si en floraison il sera aussi abondant, de plus je crains d'avoir un goût plus suave et acide dû au fait que les engrais organiques reste dans le sol et qu'il devient alors impossible de rincer la plante en fin de période 🤔.
2 plants taillé et un plant pincé... Réaction normal avec l'un ou l'autre mais une légère préférence pour le pinçage plutôt que la taille pour des raisons évidentes de structure.
Permanent marker :
Très belle structure du tronc, feuillage bien épais et plante travaillé pour rester a niveau des autres variétés.
Le plant a été taillé car le tronc est bien large et devrait pouvoir supporter ce type de structure sans trop intervenir dans son maintient... A voir !
Je suis bien déçu de ne pas avoir un deuxième sujets pour tester et faire des comparaisons 😡, si cette variété fait ce qu'elle promet je reprendrai des graines mais chez Zamné (je boycotte Blimburn, pour leur incompétence dans ce domaine).
Girl scoot cookies :
Toujours ce léger retard qui en fait une plante trop basse, j'ai donc tenté une taille abusive a laquelle elle a très bien réagi 😋.
J'ai tout de même surélevé sont pot pour la ramener à hauteur des 2 autres plants.
Je vois déjà le résultat que cela vas donner en fin de floraison 😁😁😁... Celà me rappelle mes premiers essais il y a 10 ans !
La plante ce porte très bien et a une amplitude massive dû a ces belles feuilles bien verte et très très épaisse 😊.
Elle présente un tronc hors norme et bien agencé dans ça structure, j'ai hâte de voir sont évolution 😁.
S.plant :
J'ai un faible pour cette plante qui n'a rien a faire ici 😍.
Elle est magnifique avec des feuilles extrêmement longue et finement taillé en pointe (Sativa ❤️).
Je l'ai taillé car étonnamment elle est restée très basse et a bien entendu donné de très belles branches secondaires avec une levé extraordinaire en 3 jours 👍, c'est comme si elle m'écoutais pour me donner le meilleur d'elle-même 🤩.
Vous l'aurez compris c'est devenu la chouchoute 😉.
Le plant fait pile poil la taille des autres plants mis sous cette lampe, je ne pouvais pas espérer mieux 👌.
Bon ça va être sportif en floraison mais on va s'adapter et si elle me pose problème, je rajouterai deux autres lampes en 400W pour ne pas gâcher 😁.
Nous voilà donc en fin de croissance, je voulais prendre 1 semaine de plus mais Orange sherbet en a décidé autrement 🤗, je respecte son choix 😁👌.
Zoo, 36 heures dans le blackout total 🤣😂 pour activer la floraison via un léger stresse, je taf a l'ancienne sur cette culture Oui Oui 🤣😂.
Bien entendu je ne compte pas ces 36 heures dans ma 1ere semaine de floraison, donc nous aurons un décalage pour le prochain post ✌️.
D'ici-là bonne culture a tous 😉.


Likes
57
Share


@MrHightimes
Follow
Plants looking great as we sail into the last leg!
I ordered more Mephisto b/c I love how well this and past grows have gone!
Need to defoliate and clean em up more this week
The change in humidity def stresses em out. I think i need to try and bring em down naturally

Likes
17
Share


@HowtoBubatz
Follow
It’s the third week of flowering, and the plants are starting to show some exciting progress! 🌿
The buds have begun to build mass, and the first signs of trichome development are visible, giving them a light nice, frosty look. ✨
I did notice a few nutrient deficiencies on the leaves, likely due to underfeeding, as I’m using a medium with 50% coco.
To fix this, I adjusted the nutrient levels, and the plants seem to be responding well. 🌱
The plant that wasn’t trained with LST is about a week ahead in development compared to the LST version, showing more advanced bud growth.
Also, the smell is becoming more pronounced, with the first hints of that classic, sweet aroma filling the tent. 🍬🌿
I’m excited to see how things continue to unfold in the coming weeks! 😁✨
Likes
9
Share


@Wenz004
Follow
experiment explanation see week 1
this week gelato Auto made the grow in the tent...the others (tropicanas in living soils)
have many problems.
Gelato Auto in royal mix from plagron and the following nutrients...
Plagron sugar royal...power buds...alga grow and aptus all purpose...aptus regulator and aptus calmag booster and once a week some magig minerals from TA a bit powder around tge plant stem
Likes
9
Share


@2Stones1Bird
Follow
Start of week 3 flower - days 29 to 4 October/November
Light is at 100w and it will remain on the top of the tent for the entire grow.
--------------------------------------------------------------------
30/10/2020 - Increased the light to 115w.
4/11/2020 - Watered #2 added Bud Candy 1ml/L and Great White.


Likes
17
Share


@Gardengobblin
Follow
Vu que les tête étai un peut flufy sur les plant je ne m'attendais pas a ce résultat. Les tête son recouverte de trichome ses très collant au touché, les doigt reste coller ensemble .
Odeur est divine , sa sent vraiment les fraise 🍓🤤🤤 et ça goûte toute autant en bouche . Un délice tout simplement au risque de me répéter .
Je la recommande au la main.


Likes
2
Share


@inversi0n
Follow
Hello, growers!
3) I changed the solution at the middle of the week
4) Decided to FIM this grow and see, where it goes. And it was very hard to do it,since new level didn't formed yet, but i didn't want to wait longer
7)By the end of week leaves showed nutrient, will fix.
I suggest P


Likes
5
Share


@Landomagic
Follow
This week is going great. Buds are becoming dense, pretty sure by the end of the week I’m gonna have to add a few bamboo sticks for support. The smell has definitely increased tri comb development has gone crazy new amber ones has already started forming and by the end of the week I’ll look at tri comb development again to see if more has gotten cloudy or amber as I will start to flush when I see 70% amber

Likes
2
Share

@Bud_vista
Follow
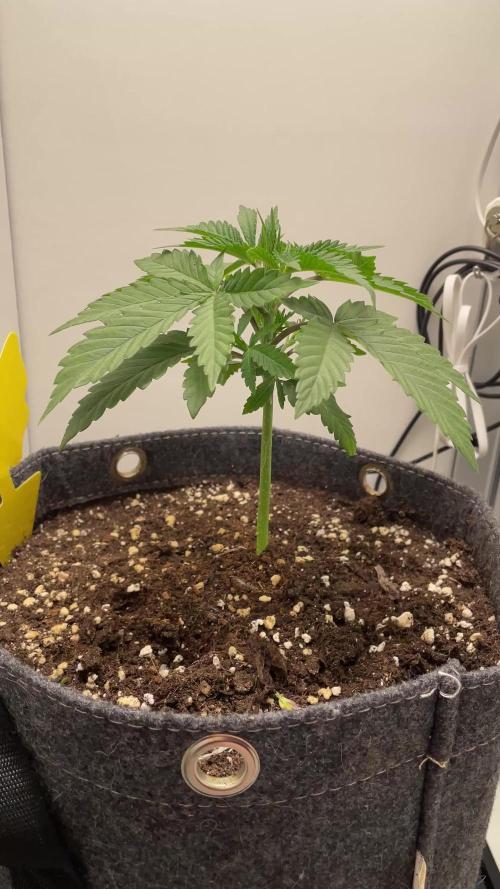
Welcome to week 2 of my white truffle auto grow!
On last weekend I transplanted the little girl into a bigger pod. Size: 11liter (3gallon). She’s doing great I her new home and look vivid.
In this week she also get her first watering with nutrients, let’s see how she reacts.
Likes
2
Share


@grungedetox
Follow
We still here!
Flowering starts now
A fairly esasy growing experience so far, plants are doing really well even with the intense heat were we live.
Love you
