Likes
Comments
Share
@mingokoon
Follow
WEEK 6 – MARCH 7 - 13 week 6 for all but the younger 24 (which is the only one that is not flowering). I'm getting frost on the DG. I sacrificed the weaker DG- it got light burn and never recovered. it was growing but sickly. . I now have a light meter and they are all getting the proper PPFD. I am increasing the nutes faster in the young 24 and it seems to be taking it. I am trying to keep an eye on my ppm. So far no signs of lock out or nute burn - I will increase the levels quicker next grow.

Likes
5
Share
Estas chicas llevan 48 días, comenzaron con un color extraño en las hojas, ahora se encuentran mas recuperas pero ha sido un comienzo lento, fueron trasplantadas el miercoles 24 de marzo 2021 a una maceta geotextil de 1 galon (3.8lts)
Likes
31
Share
got them all in there 10 gallon pots , I don't like too start autos in peat pots in a cup but needs must as I was waiting for the soil too arrive , these first two weeks always seem like watching paint dry , very slow and boring and nothing much seems too happen 😀😴😴😴
Likes
16
Share
The situation is coming to an end, the flowering is fast and our two Green Cure CBD F1 are very very promising both in terms of scent and resin and will give a good yield as well, it seems. Great CBD strain this guys, write it down, try it and then come and tell me. Don't forget to consume a little bit of CBD during the day and before going to sleep, the high THC things that we smoke and vaporize are softened in the (already few) negative effects if we use a little CBD. I advise you to do it if you don't like smoking and vaporizing it. Zamnesia.com offers an incredible series of formats in different percentages that satisfy all tastes. Very often one 30% oil before going to sleep for example. The plant that has been left to grow free and beautiful is practically ready, we are flushing copiously with an intensive flush. By intensive flush I mean when the plant is too dark at the time of flushing, before it gets too mature I do a flush with about 20 liters of pH adjusted water that I let drain in the toilet. Look at the color, it's very black to clean the soil and reuse it and to clean the plant from fertilizers and smoke clean, the flush is an essential moment. I also often arrived with the plant colored at the end and it's not good, it's a mistake, the plant must discharge becoming at least partially yellow. The plant worked with the main lining is really very beautiful. The two ends of the main lining with their ramifications are the main ones, but there is good stuff everywhere. Really great resin guys on both and great smell. These plants, like all the F1 Hybrids, have started to color the pistils red a little earlier, while the bud was still swelling. This makes me die of heartbreak because every time I think that the flowers will remain small but it is not so, we can already notice beautiful inflorescences. The shape is very very beautiful as is the structure of this plant indeed. We are still using soil, fertilizers and all the additives recommended by Plagron 100% organic. With her We have switched to the late flowering program that wants the additives Sugar Royal, Pure Zym for another week and adds the flowering stimulant Power Buds and the myth Green Sensation. Obviously the basic fertilizer is now Alga Bloom. ---- Decide on the right soil and calculate your fertilization program based on the soil on the official website. -- www.plagron.com Try a seed of this variety that drives us crazy.. ---- https://www.zamnesia.io/en/10672-zamnesia-seeds-green-cure-cbd-f1-automatic.html Description Zamnesia // Zamnesia's breeding team has harnessed F1 genetics to bring you Green Cure CBD F1 Automatic. This autoflowering cultivar is easy to grow, accessible and reliable for all levels of experience. Ready in just 11 weeks, growers can expect impressive yields of tasty buds with a clear-headed effect that's ideal for meditative moments. All the best that mother nature can offer is on ---- www.zamnesia.com
Likes
7
Share
She's starting to get taller and growing each and every day! I'm currently struggling with maintaining humidity during the night, but she seems to be holding up pretty nicely. I'm waiting for her to hit 6 nodes so I can do my first topping (doing a total of 2 toppings for this grow as recommended by the breeder). I have added 3% of silica to every one of my waterings and I have noticed a much heartier and thicker stem as well as big, beautiful leaves. I'll keep y'all updated on the next post, growmies!
Likes
4
Share
@Erich2025
Follow
The smell that comes out of the tent is absolutely insane. The buds are starting to swell and you can absolutely see the difference every day. I do feeding- feeding- watering. They seem to like it and responded well to the nutrients. The 2 bigger plants also started to be purple. They are beautiful. 🌴🍪⛽️🌲🍊
Likes
21
Share
Lots of grass, in a very short time with a sure success without equal. This is the Watermelon Candy F1 Hybrid. No joke guys, no false advertising, here we are doing serious tests, I am a good grower but what I can do you can do too nothing humanly alien here the aliens are the vegetables. Here we should try to understand what a great job the breeder has done and notice the differences from the common mortal plants. The first is the speed, guys the plants were born the night between the sixth and seventh of April and were both harvested on the eighth of June. Do some calculations, it is very little really very little time. What is not little is the grass, look at the result on the scale, cleaned to the maximum of all the stems trimmed well. The scent is fruity, sweet and inebriating, the resin is really abundant despite the harvest in June with 35 degrees in the growbox... These plants resist very well to heat and probably also to cold other plants would have made open flowers, airy without sense... Here they are tough guys, very tough and heavy, compact. I am very happy with these two plants, one is slightly more mature but you can see from the trichomes that more or less we are on both. I am not one who likes to harvest the super mature plant, but before teams of big growers arrive to explain the rule of trichomes to me I tell you: there are many milky trichomes, some amber and purple in the areas where there was a bit of foliage and still some transparent but few and all milky. So here we are guys we have many plants to harvest we also have to decide what to do first. The similarity between the two plants is evident, they are not identical, exactly twins, but that would have been disturbing, here we have great similarities in height, type of flower and many little things in their place. For me, a successful experiment, try to grow these plants respecting at least the basic rules of cultivation and even if you are a beginner you will be happy. You can come and look for me or talk to me at any time, now I have grown these plants and I know how they behave I can give all the answers you want. I waited to try as you can see before speaking and on these plants I put my signature. Very suitable for: growth with topping, given the speed, it is recovered very well, rapid growth and infinite continuous cycles (do some calculations, how many cycles you can do with a plant that you harvest in 60 days, it is not difficult!), beginner (little fertilizer in the veg phase and a lot in the flower swelling phase, they swell quickly, it is normal), indoor and outdoor. Really fast and profitable plants like I had never seen before. I have to compliment Zamnesia I am thrilled with these performances, autoflowering plants are getting better and better guys don't be afraid and don't listen too much to the wise old hippies or at least learn to take them with a pinch of salt, cannabis has gone light years ahead of the first super worthy anarchist research. Now we are ahead let's adapt to the times. In flowering I used Plagron fertilizers because with other brands I was going into deficiency, so the health in addition to the good genetics that gave us beautiful and healthy girls is also thanks to those who make the food. I recommend to everyone these plants have a fast growth and if in any case they do not need a lot of fertilizer in the vegetative phase, when they swell the flowers like crazy they really need fertilizers for flowering give them right in the quantity recommended by Plagron and you will have no problems. Fertilizers and soil are therefore Plagron https://plagron.com/en The light is wonderfully functional and powerful and is made in https://www.viparspectra.com/ The growbox is not sponsored but I love it, I love the brand and especially the Ducting Flange air circulation system best of all. https://www.secretjardin.com/ You can find these Watermelon Candy seeds, all the F1 Hybrids and much more on the Zammi website https://www.zamnesia.io/it/ N.B. Collaborations with all other seed brands are stopped at the last plants that I am finishing, kindly do not ask me for sponsorships for seeds, all other forms of collaboration are open (Lights, growbox, fertilizers, soil, tools) thanks. Follow me on instagram @bread_n_buds Music of the week www.radionula.com +++ 432 hz frequencies to keep in line my Girls to Gaia. Site Description ZAMNESIA SEEDS - WATERMELON CANDY F1 HYBRID AUTOMATIC: BUDS BURSTING WITH FLAVOR If you've been looking for a flavorful strain with superb genetics that's effortless to cultivate, the hunt is over. Thanks to reliable F1 hybrid genetics, Watermelon Candy F1 Automatic showcases the highest degree of productivity and efficiency. This strain takes everything you know and love about the original, and packages it in a plant with even greater potential. GROWING WATERMELON CANDY F1 HYBRID AUTOMATIC Derived from Watermelon, Candy Kush, and ruderalis, Watermelon Candy F1 Automatic is a finely tuned medley of genetics. This cultivar is fast to flourish and reliable to grow, no matter where you choose to grow. Taking just 9–10 weeks from germination to harvest, she provides a uniform growing experience culminating in a huge haul of buds for her size. Reaching heights of 65–80cm, Watermelon Candy F1 Automatic stays pretty grounded, making her perfect for smaller growing areas where space is a commodity. It also means you can fit more plants in if you have the room! Once ready to yield, growers will see a return of 400–450g/m² indoors and up to 100g/plant outdoors. Moreover, Watermelon Candy F1 Automatic is highly resistant to pests and disease, making it an ideal strain for newcomers and fans of low-maintenance cultivation. AROMAS, FLAVORS, AND EFFECTS OF WATERMELON CANDY F1 HYBRID AUTOMATIC If we haven't already sold you on the power of F1 hybrid genetics, the proof is in the pudding. Watermelon Candy F1 Automatic is teaming with terpenes and cannabinoids, making for a lively high coupled with huge flavors. Just one hit is all it takes to sample rich fruitiness mixed with sweet candies and a slight earthiness to back it up. And with an average THC content of 23%, the effects are euphoric at the start but settle into deep relaxation soon after. Whether you're chilling alone or with friends, Watermelon Candy F1 Automatic will see you right. So seeds of all brands, in addition to these great F1 Hybrids and the entire Zamnesia line, fertilizers and everything related to the world of cannabis, you should buy them from the best online store in the sector www.zamnesia.io
Likes
22
Share
@Slobasian
Follow
Love every plant each one is growing differently stacking different even the visual difference of one strain growin two different ways combined smells of diesel, pez candy and lemons
Likes
21
Share
@NSABND
Follow
Start of Week 9 🙌 I plan to use fertilizer for bud growth from day 64 to day 70+... depending on when the harvest time occurs 😉😄👍 Started working with fertilizer today, every 2 days a mixture of 10ml per liter as long as the buds have not properly developed trichomes 😵 I hope this works 😵😲😱 Day 68 with fertilizer again
Likes
56
Share
Day 14 Flowering: Hi all . I hope we all had great Christmas fun with those that matter to us and that we had plenty of close personal contact and shared emotions. The Ladies have been treating me to an amazing floral display this week with all of them in full flowering mode now. Gorilla Girl # is a bushy lady in need of a good defoliate once the stretch has finished. she is mid stretch now by the look of her and i am hoping that her stretch will open her up a little more. #2 is the furthest ahead in her floral development and bud size but again needs some leaf stripping out to get the light to the many forming buds. They are like mini golf balls now and I love this part of the cycle. The pics speak for themselves of the hairy little beasts. #3 is feeling the restraints of the 30L pots over her sisters. she is a lot smaller in general although stretching nicely too. She is forming nice bud sets and has great potential if the stretch can boom her size a little more. I used low stress training on these 3 ladies to keep their height low enough for my restriction but I decided the next two could be a little bit of an experiment while I try to establish a perpetual grow operation with autos. Having only grown 1 crop of these in the past , I felt I needed to find what worked for me in this space so I have pulled #4 over using her 5th node only, into an arc shape amd the sweet cheese has been left to do her own thing with little interference from me. Gorilla girl#4 looks the largest of theb group now with her frame set in this way. Her lower branches have shot updating her stretch to surpass the main node quite a bit. she is filling her 60L pot with ease and has some great looking colas starting to form up. Seeing her move slightly ahead thisbway is a real shock as she seemed to struggle to get going initially and I worried about the transplanting shock. this is clearly not the case now for sure. Sweet Cheese is looking great too now. Her natural shape and size are really workable in my space. Genetically she is a smaller strain on paper too so I am interested to see how she ends up and will have a better understanding hopefully of how autos can differ in different combos. All in all a great week with new seedlings hitting the air too !. more to come on that one soon . Thanks for the visit , please feel free to comment , giggle , smile or whatever your fancy takes. be safe and well growmies. until next time. peace and blessings. welcome to The Age of Aquarius xx
Likes
13
Share
@Chubbs
Follow
What up Fam, weekly updates on these lovely ladies. This week it's been warm and such a bad time for my AC to go out but overall temps been in the mid it's inside the tent and the plants seem to not mind at all. They're still getting fed 16oz daily. I'd say from the looks, maybe 2-3 more weeks until harvest. Happy Growing.
Likes
43
Share
@Sabac
Follow
Semana 13 y última para algunas plantitas de este cultivo. Último Riego con Fertilizantes próximo riegos con final flush para limpiar raíces y luego machete. Plantitas con excelente resultado
Likes
12
Share
@cboyaki
Follow
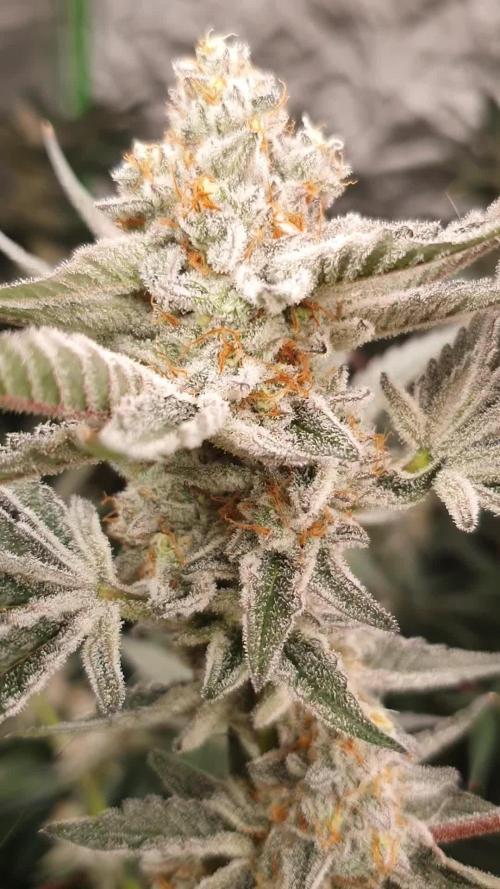
Another great strain by fastbuds my favourite so far , the flower structure the look the colours and the smell what more could you ask for ! I’m sure it’s going to taste amazing if the smell is Anything to go by ! And the trichromes glistening oh Lord Can’t wait for the dryNcure to smoke this bad boy Sorry for lack of updates life’s crazy atm wasn’t able to weigh it wet I will update once dried maybe a couple Zs I’d say Couldn’t upload more then 3 kept on crashing
Likes
10
Share
@barlobruz
Follow
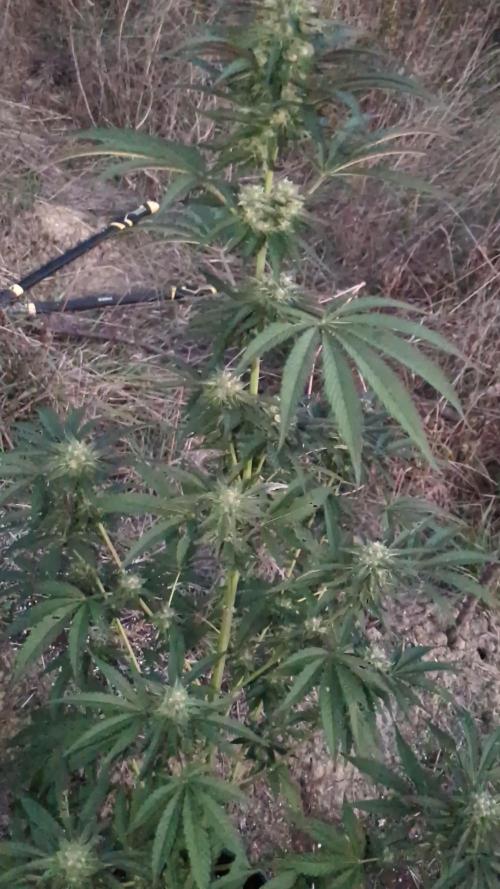
8/22/2021 - Did some mid-flower defoliation to increase airflow and to prevent mold and mildew. - Split the top right main from trying to train her down and spread out the canopy, supporting with tape and twist ties. 8/23/2021 - Top right main is still vigorous after split.
Likes
10
Share
@nonick123
Follow
Bienvenidos al diario de Gorilla Cookies Auto por FastBuds Día -4 (02/05): Se coloca la semilla en tubo de ensayo con 15 ml de agua (EC 0,5) + 3 gotas agua oxigenada (H2O2) en un lugar oscuro a 25 ºC durante 48 horas Día -2 (04/05): Se prepara una maceta (11L) con 8,8 Litros (80%) de sustrato PRO-MIX HP BACILLUS+MYCORRHIZAE + 2,2 Litros de Insect Frass (20%) + 110 gramos de Earth Vibes Super Soil (10 g/L substrato) Se mezcla con el agua del 1er riego (EC 0,4) la parte proporcional de la probeta de microorganismos y se riega muy lentamente hasta percolación profunda Se hace un agujero de 1 cm de profundidad, se coloca la semilla al azar en el agujero, se tapa con un poco de sustrato y se humedece ligeramente con agua en spray Se coloca parte superior botella en la zona de germinación para mantener humedad relativa alta Se introduce en el armario con la lampara ENCENDIDA para mantener la temperatura 20-21 ºC en las horas nocturnas Día -1 (05/05): Se intuye que la semilla empieza a romper el top del sustrato! NO LA TOQUES! 😡🤣 💦Nutrients by Lurpe Solutions - www.lurpenaturalsolutions.com 🌱Substrate PRO-MIX HP BACILLUS + MYCORRHIZAE - www.pthorticulture.com/en/products/pro-mix-hp-biostimulant-plus-mycorrhizae
Likes
4
Share
Today marks the start of Week 6, Day 2 for the grow, and I’ve got a few updates. The PPMS aren’t quite where I want them after the last couple of feeds, so I’ll be continuing with higher feeds to bring those levels back up. It’s a bit of a balancing act, but I’m staying on top of it. I also made the decision to flip the light schedule from 16/8 to 12/12 today to initiate the flowering phase. I’m excited to see the plants start stretching and showing their full potential. It’s a big step, and I’m feeling good about the direction things are heading. Happy growing! 🌱💡🌿
Likes
27
Share
@Hydronaut
Follow
Big healthy plant for the most part, but the flowering just won’t kick in! This is the week that says she’s running behind or that she’s going to be on a cocaine diet till the end? Need some bulk, it’s week 8 already. I don’t like my girls fast anyways, so I’ll be a patient gent. Day 51: Early AM: It seems that the flowers are starting to fatten up at a familiar rate now. Stretch is definitely over to boot. Feels like a week or so behind my other Auto grows, but I am gathering from the peeps on GD that grow times can be all over the place with Autos; even with seeds front the same plant. I won't be a Debbie-downer, but I cant help but think what this thing would have done in a bigger space. I left her alone a couple days ago as her stretch slowed noticeably. A pluck here and there moving forward, but that's about it for the sadistic stuff. Day 51: Late Afternoon: She's about to take off in the flower it feels. 6 hours passed, and I was like "oh, hello there!" If nothing goes too crazy, I'm hoping she'll be a good one regardless of her 3.8 sf living quarters. I never did move the top shelf, so the light is less than 8 inches from the canopy. I'll keep an eye on the "crispy effect" out of complete laziness and fear of dropping the light on the plant! Tallest branches are around the perimeter and still hitting their DLI. The center/down the plant is getting blasted by the light, so I suspect about 6 or so runners to hit the canopy and hang out with the FIM family in the next week or so? Day 51: Evening: Bigger bucket = bigger plant in hydro? One heck of a root mass going on in her trough. I tried pushing the roots to the back of the bucket so I could ph without getting roots directly. Nope! That bucket is filled with roots, and its an 8 gallon bucket. I would have never thought an auto would have enough time to grow into an 8 gallon bucket. I was banking on some extra nutrient volume, so I could go out of town for 4-5 days. Hard to say on bucket size though, I have grown 10 foot tomato monsters in 3 gallon Ebb/Flow pots so maybe she would have grown the same in a 5 gallon bucket? I don't think that much root volume could grown in an 5 gallon bucket, so bigger bucket = bigger plant here? Things that make you go "hmmm..." Day 53: A lot of undesirable undergrowth that blew up during stretch. Like a ton of it, but I’m done messing with her. Took out the top shelf and reconfigured exhaust. What a pain. I didn’t drop the light but the IP cam took a nose dive on a branch. Now the light is about 12-14” from canary instead of 6-8'. She started to get some light burn so I had to do the deed. Wider IP camera view with added distance so that's a plus! Plant is very happy at 550-575ppm. 600ppm seems to be the number without burning plants? Humidity, temp, and ppm AND light distance in check. Raising the light opened the focal point of this light quite a bit; especially in the center where the PPFD was over 2500 at the center and light less than 8 inches from the canopy. Feeling good. All is in check with some room to grow. She will gain another 2" in height I presume through flower. Day 54: The jury is out of this light. I hits my dli from veg to harvest with it's fixed position design, but wondering if 50watts more would have been the number. I'm going to keep the light in there to keep the data flow congruent to its original design. I hit my DLI right now from the top of the canopy to about 10-12" down the plant. Lighter specs from my last grow, but its hard to tell what is getting what once you leave top of the canopy. Hopefully it will suffice! I moved the light a few inches closer as my DLI was getting light in some of the corners/perimeter. She right 10-11" and is about as good as she is going to get given150watts. I am realizing that 200 watt is probably the optimized wattage here if some canopy penetration is desired, but light these dimensions are not plentiful[. 250 watt and that would be max with managing heat and exhaust sound levels. 250 watt would accommodate a fix state design no problem. I hate to change the light variable but I only have the luxury of one-at-a-time grows, so everything counts on some levels. Been using the PAR meter on and off throughout the day. Penetration needs to be about 25% stronger. Its a perfect light for your average auto grow, but if these results repeat themselves a 250 watt is probably in order. I am making the executive decision to install a 250 watt bar light. I found one with a small footprint at 240watts. Hard find, specs are more than adequate for 4 sf. Will maybe get down a bit deeper but things are looking really crammed with the bottom half. It is PACKED with bud sites and likely not enough light. Questioning the light change, but will definitly thin some lower stuff and "officially" let her be. Since in bumped up the CalMag to about 1.5 ml/gal the reservoir has been running ph equilibrium for 6 days now at 600ppm. I’m guessing this deficiency was driving down ph instead of the usual up/equilibrium in week 7. My first auto to eat at 600ppm for a week with no tip burn. She looks fit, I’ll keep her diet here as the max. I have never cut MicroGro out completely in a grow before. I have been faithful to GH 7 part series since for long time. This grow I took the GH feeding chart and worked backwards to a ppm level I found on the web to be an acceptable range for Autos. These ratios have traditionally been acceptable and without issue. Beautiful plants every time. On the last two runs with this concocted feeding schedule Cal/Magic was very light until week 7, and exactly when I started to see rust spots, etc. in this grow. After a 2ml/gal dose of CaliMagic plus addbacks on watering, that issue disappeared overnight. I mean zero issues with any new or progressing growth. Here's the take away with this. Although CalMag issues are easy to spot and resolve, I did learn is that in both runs they HAD A PERSISTANT DROP IN PH IN MY RESERVOIR in late veg/tranistion. Another wards, if you PH is dropping and your ppm are not doing anything, it very well could be a CalMag deficiency. An indication know before the leaves start getting spotted, etc. I guess if one were perceptive enough, you could resolve this issue as it happens, and never see the effect on the leaves? On this current run, as soon as I dosed the bucket good with Cal/Mag and kept my add/backs a 1.5/ml/gal the PH locked in big. Going on 7 days at 600ppm, 6.0 and the ph is steadily rising. Maybe another bump in ppm. No sign of tip burn yet, why the heck not!:) Not really the expected progress this week but she may just need time. I don’t think she’ll really bulk up until the end of week 9 / week 10. New light to arrive Tuesday but not sure a stronger light will get much further down. It’s almost a roadblock to get beyond the main tops and they are getting well more than they can handle light wise. Bigger light may only mean more heat.
Likes
7
Share
My little experimenting already bears fruits of knowledge, I've topped too close to the node without leaving a bit of stem, and whilst tying down the branch during LST, I had a gnarly stem split. However a cool head, some grafting tape and a day of healing and this rugged little plant picked herself right back off the floor and shot up inches overnight! More and more pistils are shooting out and this plant is stretching so much, as is typical of OG strains, my last autoflower is nearly done, after which I will put a trellis net in and this lady can have the entire place to herself!