
Likes
Comments
Share

@eldruida_lamota
Follow
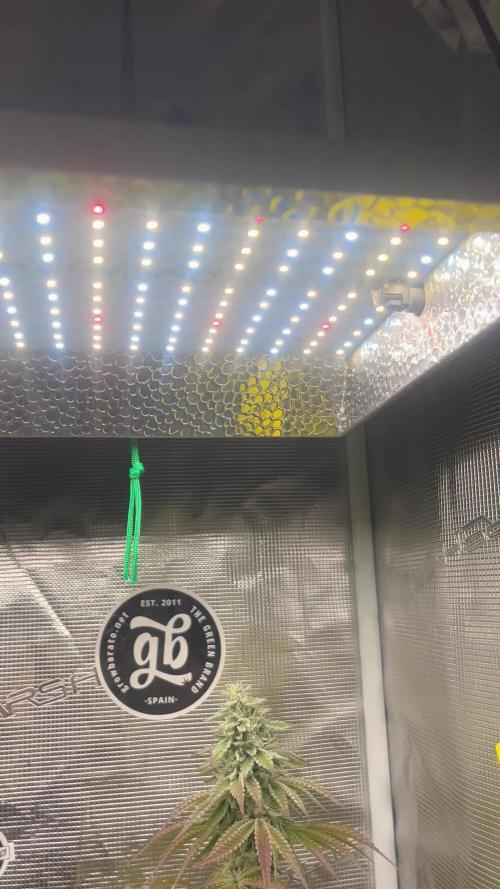
Que pasa familia, vamos con la séptima semana de floración de estas Kiwi x Papaya feminizadas de Mavericks .
Vamos al lío ,se trasplantaron en macetas de 7 litros definitivamente.
El ph se controla en 6.0 , la temperatura la tenemos entre 24/20 grados y la humedad ronda el 50%.
El ciclo de crecimiento puse 12h de luz, el foco está al 100% de potencia.
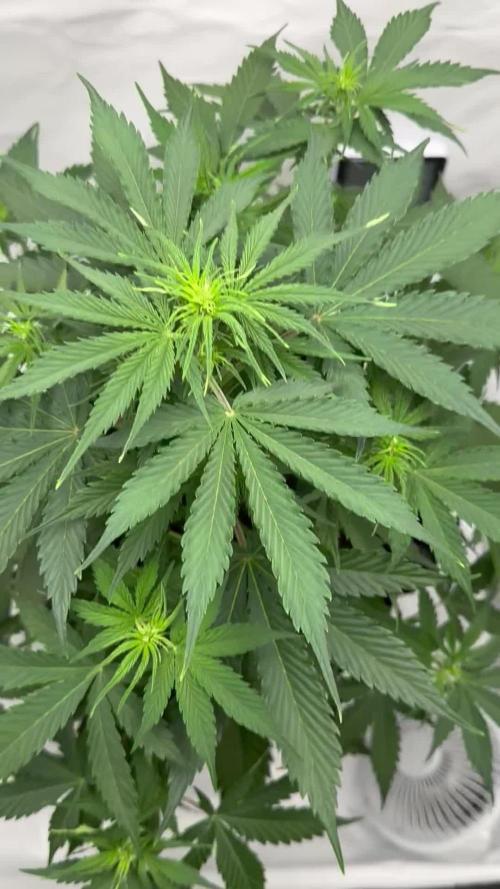
De momento van creciendo a buen ritmo y tienen un buen color.
La flor está cogiendo forma y engordando, ya empezó a tricomar.
Gracias a Agrobeta de nuevo por el kit para esta temporada, unos grandes 🙌.
- os dejo por aquí un CÓDIGO: Eldruida
Descuento para la tienda de MARS HYDRO.
https://www.mars-hydro.com
Hasta aquí todo, Buenos humos 💨💨💨

Likes
3
Share


@Sococannaflow
Follow
Not much sunshine, thank goodness I had a t-5 panel. The temp in old trusty is pretty consistent at 70. They are growing great, spraying when dry and watering when pots are lite.

Likes
27
Share


@GuerillaGorilla
Follow
28th August
Finally the first pistils pop out.
A glimpse of flower, allthough nothing compared to the other strains.
She already got her bloom feed last time.
Handfull of thomaskali. Maybe this helped to kick in flowering.
Not as thirsty as the others


Likes
12
Share


@ELPIRATA
Follow
🙏
Ha comenzado la semana Nº7, Se han acentuado mas los olores en el cuarto de cultivo,
se logran apreciar diversos botones, Espero logren crecer de manera desmedida y robusta.
El día 20/06/2020 se han regado 3 plantas en macetas de 11 litros:
X2 Semillas Auto Lemon Kix= 1L [1MlBLOMBASTIC+1.5mlKnactive+5ml/L ATAGrowth-C+5mL ATAFlower-C+1mLAutoTop] PH 6.2(?) / EC= 1.84Tº=23
X1 Semilla Auto Tutankhamon= 1L [1MlBLOMBASTIC+1.5mlKnactive+5ml/L ATAGrowth-C+5mL ATAFlower-C+1mLAutoTop] PH 6.2(?) / EC= 1.84Tº=23
*El día de hoy se han regado 1 planta en macetas de 7 litros:
X1 Semillas Auto Lemon Kix#3 = 800 ml [1MlBLOMBASTIC+1.5mlKnactive+5ml/L ATAGrowth-C+5mL ATAFlower-C+1mLAutoTop] PH 6.2(?) / EC= 1.84Tº=23
*Se comienza a usar Bloombastic en semana 6, dia 42 (0.5 ml/Lt)
😈
Buenos humos!


Likes
23
Share


@nonick123
Follow
Día 34 (27/05) Riego con 750 ml H2O + Regulator 0,15 ml/l + P-Boost 0,5 ml/l + CaMg-Boost 0,25 ml/l + TopBooster 0,2 ml/l - pH 6.2
Día 35 (28/05) Riego 750 ml sólo H2O pH 6.2
Día 36 (29/05) Riego con 750 ml H2O + Regulator 0,15 ml/l + P-Boost 0,5 ml/l + TopBooster 0,2 ml/l - pH 6.2
Día 37 (30/05) Riego 750 ml sólo H2O pH 6.2
Día 38 (31/05) Riego con 750 ml H2O + Regulator 0,15 ml/l + P-Boost 0,5 ml/l + CaMg-Boost 0,25 ml/I +TopBooster 0,2 ml/l - pH 6.2
Día 39 (01/06) Riego 750 ml sólo H2O pH 6.2
Día 40 (02/06) Riego con 750 ml de Té de Compost de Floración
💦Nutrients by Aptus Holland - www.aptus-holland.com
🌱Substrate PRO-MIX HP BACILLUS + MYCORRHIZAE - www.pthorticulture.com/en/products/pro-mix-hp-biostimulant-plus-mycorrhizae


Likes
12
Share


@Ieiogrow94
Follow
Eccoci qui...
Ormai manca davvero poco ci siamo quasi.... Ora niente più fertilizzanti solo acqua ed attendiamo la maturazione..
ODORE INCREDIBILE!!!!
Seguiranno aggiornamenti, grazie a tutti per il supporto🔥🌲❤️

Likes
96
Share


@DevilsBud
Follow
New week of flowering for
CBD SPLIFF BERRY
Doing nicely @spliffseeds deliver again a great strain 👌🏻 did Les LST to this one compare to Afghani Gold but made sure the lower stuff gone also make sure less popcorn can pop up. I am not sure if ever smoke a 50/50 THC/CBD strain but will see 👀
Happy growings Growmies see you next week
visit www.marshydro.eu
for your best gear and use the PROMO CODE: DEVILSBUD
Some info about the Marshydro FC-4800
Superb Quality LED Chips: The whole light is composed of 1206 pcs Samsung lm301b and Osram 660nm chips. More than two times as many LEDs are used to drive the grow lights at low currents and to avoid overdrive. Quality is guaranteed and efficiency is up to 2.8 μmol/j.
Even PAR Distribution and High PPFD Output: The multi-light bar design and the densely distributed light chips enable the LED grow lights to achieve the optimum PPFD required for plant growth over the entire effective coverage area.
Specifically Designed Spectrum: To ensure even plant growth, blue and red light are enhanced on the basis of a full spectrum combination. Not only does this accelerate plant growth, but it also improves the yield and quality of the plants at the same time.
Dimming Daisy Chain Function: The dimming function saves on electricity costs and enables brightness from 10% to 100% for the different stages of plant growth. A single master light can connect up to 30 lights in a daisy-chain system.
Business LED Grow Light: The light's wavy heat sink dissipates heat quickly and the IP65 waterproof allows the light to operate in humid conditions. 180° collapsible feature for easier installation. All these features provide favorable assistance for commercial cultivation.
And some tent info
●【Lock All Light Insid】MARS HYDRO Grow Tent Interior is made of diamond mylar. Non-toxic to the environment, no harm to plants. High-quality 1680D canvas being double stitched, (ALL OTHERS BRAND grow tent is 601D canvas) which is tear-proof for perfect light locking, No light leaks or rips at all.
●【Durability Grow Tent】Stable Metal corner adapters and poles are the trustful supporters of the tent. No rusting nor paint-falling. Quick easy tool-free installation. Carries strong heavy-duty SBS zippers, double layer lining to create a light-proof seal.
●【Easy Observation of your Plants】Special peeks window made by double layers of cloths. Observe the growing conditions of your plants without opening the tent and avoid disturbing plants. The peek window also serves to dissipate heat and ventilate air.
●【Removable Tray Keep Clean】The package includes a removable waterproof floor tray to hold soil and fallen leaves. The tray can be taken out easily to wash. Removable and water-proof makes cleaning easy.
●【Good Ventilation&Fast Assembly】 Circular double-sleeved vent holes with adjustable nylon strap for air circulation by exhaust fan, ducting, carbon filter, or reflector. Better allows proper light, heat, and airflow. Quick tool-free installation. Reinforced by a sturdy metal frame to ensure security and stability, supports up to 140lb. Perfectly safeguard your plants to thrive even in winter


Processing
Likes
17
Share


@KrudBuddysExotics
Follow
Hey guys idk what’s going on my autos it seems as if the Gelato and Zkittlez has just stop growing completely I mean there’s no change at all the Zkittlez Og is starting to fill in forming nice little buds but my other autos seems like they had stop completely
I know the lifespan on the Gelato is 76-80 days from seed to harvest
The Zkittlez lifespan said the same 76-80 days from seed to harvest
Zkittlez Og lifespan is 80-90 days from seed to harvest
And I know I’m for sure March 9th marked the 60th day on all autos and I know I stress the hell out of them overwatered etc but it looks as if I might only have one plant to successfully make it yet this is my first grow and why I choose to do autos first to give me a little insight on what I’m doing but I’m going to let these girls go for a full 90 days before I decide to trash em and focus purely on my clone grows

Likes
58
Share


@420DeepGrow
Follow
Gracias al equipo de AnesiaSeeds, Marshydro y XpertNutrients sin ellos esto no sería posible
💐 🍁Pink Matcha Slush: es un híbrido con una ligera dominancia índica (60% índica) que ofrece altos niveles de potencia y un aroma increíblemente delicioso. La cepa tiene el subidón perfecto de efectos índica y sativa, y trae consigo una gran potencia que puede dejarte completamente anonadado si no tienes cuidado con la dosis.
El subidón es rápido y potente, con una euforia cerebral vertiginosa. Te sientes concentrado, sociable y lleno de energía.
Es una planta de crecimiento veloz cuando empieza a florecer, llegando a alcanzar una altura de 100-120cm en interior, las plantas pueden alcanzar hasta 2m de altura en exterior, proporcionando una gran cantidad de rendimiento
Los efectos energizantes y el increíblemente alto contenido medio de THC del 31% hacen de Pink Matcha Slush una valiosa variedad terapéutica para su uso contra el estrés crónico, los cambios de humor, la depresión, la fatiga crónica y el TDA/TDAH.
🌻 🚀 Consigue aquí tus semillas:
https://anesiaseeds.com/es/product/pink-matcha-slush/
💡 Mars Hydro TS 3000, como la lámpara de cultivo LED más grande de la serie TS, ofrece suficiente cobertura para un área de 4 × 4 pies con un precio asequible y rendimientos de calidad; a cambio, se puede aplicar tanto al cultivo doméstico como al cultivo comercial.
Potencia - 450w
Cobertura Vegetal – 5×5 pies
Cobertura de flores - 4 × 4 pies
La opción abrumadora para la mayoría de los productores que la aplican en tiendas de campaña.
Consigue aqui tu lámpara:
https://marshydro.eu/products/mars-hydro-ts-3000-led-grow-light/
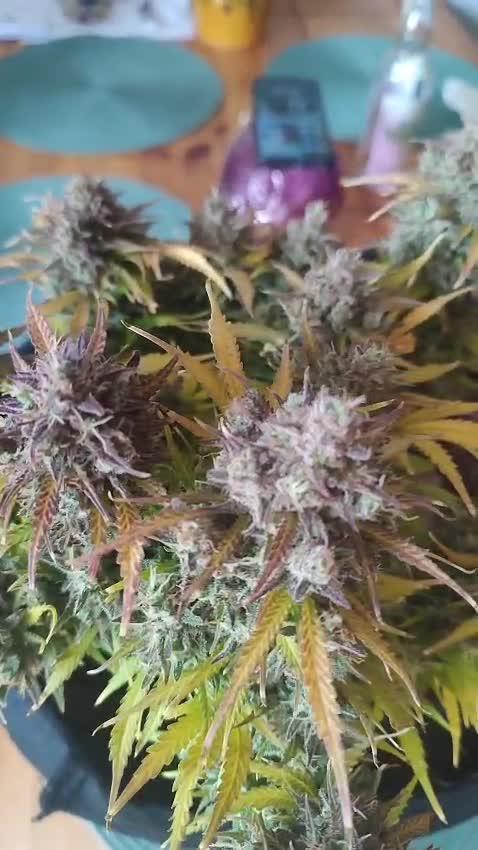
📆 Semana 10:
Última semana de esta maravilla de la naturaleza, ha quedado limpia y con unos cogollos duros y llenos de resina.
Defoliacion para una mejor penetración de la luz en la parte baja de la planta.
Una semana de lavado de raiz a base de agua de manantial y al secadero.

Likes
44
Share


@Jays_Not_Here_Man
Follow
Thanks for checking out my grow! This is the 4th or 5th strain I’ve ran by 34 Street Seed Co. I have yet to be disappointed, great genetics for a fair price. This Pink Lemonade strain has tested in the 30% cannabinoid range with crazy terps, all from other Home Growers! This will be one of my submissions for the 2023- 34 Street Grow Cup, Can’t wait 🇨🇦👊❤️
I started as usual by soaking my seeds for about 6 hours in a glass of distilled water, then planted directly into the substrate about a 1/2 inch into the starter pot. I dialed my light back to about 100 watts from the wall, and raised it to about 40 inches above the pots. I covered the pots with domes, and set my humidifier to run non-stop. 30 hours later , they had all sprouted ❤️

Likes
86
Share


@Roberts
Follow
This is the end to Larry lemon og from seedsman. It Is a great indica strain for a autoflower. 129.5 grams so it joins my QP+ diaries. It has a very pleasant taste, and effect. I did a daily picture from seed to smoke after lst that day if needed. Was my first attempt at doing a daily picture. Basically to show how, and when I go about bending based on plant size not days. Thanks again for everyone that has been liking, and following my grows. Especially those that hit up my YouTube with a subscription. See you on the next one👍

Likes
2
Share
@eldruida_lamota
Follow
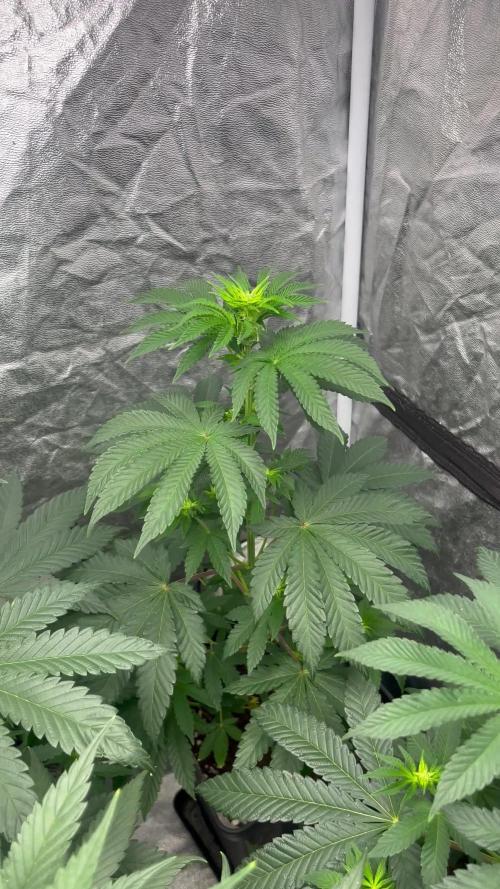
Que pasa familia, vamos con la segunda semana de floración de estas F.U.H. feminizadas de Seedstockers.
Vamos al lío, las plantas se trasplantaron a macetas de 7 litros.
El ph se controla en 6.5, la temperatura la tenemos entre 24/22 grados y la humedad ronda el 50%.
El ciclo de crecimiento puse 12h de luz, el foco está al 50% de potencia.
Me gustaría estar más encima este cultivo pero la salud me está impidiendo un poco estar 100% con el proyecto.
- os dejo por aquí un CÓDIGO: Eldruida
Descuento para la tienda de MARS HYDRO.
https://www.mars-hydro.com
Hasta aquí todo, Buenos humos 💨💨💨

Likes
17
Share


@Dineh
Follow
hello fellas
have ya seen my clone that refuses to grow
it is still alive making only three finger leaves
i should kill it
but i cant lol
gonna see where that brings us
looks like i am gone be in flower for about nine weeks
THREE WEEKS TO GO
i see the cola formation growing
in am thinking if i would feed them this week
they now have got three waterings
plain water
i guess i am gonna do that
600ml every other day
biobizz + water
Likes
13
Share


@Eldorado_ed
Follow
Well after splitting the Girls up due to space it’s looking like the HPS Ladies are almost ready looking we’ll ahead of LED ones also buds are fatter with HPS but would say the LED ones look healthier looking if that makes sense

Likes
2
Share

@LuckyLolek
Follow
Well, that's the end of the story. Finally she's been chopped and dried, buds are in the jar for curing period.
As it was my first plant, there was so many mistakes on my side that cost me a yield ( only 30g dry) and size of the plant, was 22 cm tall only.
So the main mistake was a bad water pH especially on the start of flowering but at least I found the problem on time and didn't kill the plant.
All in all I'm happy with all the lessons I got, happy with quality of the blackberry. Yield is low but I'm glad that I have something to taste at the end.
Likes
50
Share


@Giggle_butt420
Follow
Im super excited to grow this strain. It just looks soo beautiful from the pics ive seen. I cant wait for her to grow up!

Processing
Likes
45
Share


@AsNoriu
Follow
Day 65 . Girls love theirs shitty life ;)))
Looks everything fine, they started to smell really berry , time to put air filter on.
The only toped and most delayed girl is showing super results, you can check her size on week 4. Its crazy what upside down plant delivered. Good i left her and always hoped that she will be special ..
Day 66. And its friday 13 ;))) I see that late FastDiesel is way behind, so i made it even worse ;)) i stripped her hard, just to know how this strain reacts. All other girls are way upfront and for some it would be second round of defoliation in flower, but they never tried it and its just to late to experiment with all of them. After two hours she still hates it.
Fast Diesel really loves CalMag, on day 67 all girls will get CalMag + Molasses mix, for some girls it will be last CalMag i think. They will have a heavy feed aswell. Planing on day 69-70.
Thats all action and plans for this week. All girls got striped a bit on day 66 and changed left with right . Thinking new possition will light up other buds, maybe flower will develop more evenly...
Looks like thats it, hope no budrot, thats my only fear ....
And i forgot to make earliest Tangie photo, but she was always in front at the entrance and she is nothing special, looks like too leafy bud phenotype, the only plus, i hope she will be choped this year.
Day 67. Morning, girls still not thursty, they drink pure ph water slowest from all mixes. Defoliated girl prays like nothing happend, she should make long colas ;) just in february i quess ;)))
Way too long run with autos, i was hoping to flush by now ... Wont make it with two waterings this week. Its a first week for them without nute boost. Will reduce a bit amount, was feeding almost 2 liters per pot, thinking to go back to 1.5-1.7 area and stop giving silica and cal mag mix. So feed will be in 3 steps from now
1. Heavy feed
2. Ph Water
3. Molasses and calmag mix
Day 67. Late Eve. They are finally light, maybe i will make feeding on tuesday, right at the end of week, today calmag and molasses mix. Raised 3 pots, girls should love more light, now have more even canopy.
Everytime i say thats it , but after pot raise i dont see what can i do more with them...
Toped tangie looks having some bleaching on top cola, raised lights half inch ;))
Day 70. Heavy feed day. They look happy and fatten a bit.
End of week
Next run if i ever do autos i will check #FastBuds beans, from all diaries this house make it super fast.


Processing
Likes
21
Share


@LittleBigTrees
Follow
Plucked a few more leaves but other than that just feed them this week including bloom.
Also gave them some rice starch (from boiled rice water collection) on day 42 as a boost for the microbes 👍
Turned the IR off now and turned up to 34000lux