
Likes
Comments
Share


@TeamQuality420
Follow
So for this week the training comes into play . So 1 ogkz was topped, 1 ogkz was broken , * note on the brake it was the best brake I have done , not because I am getting better at it mostly because the outer skin of the plant with the OG kz was much thicker and stronger than I'm used to so it broke quite easily. My guess is the correlation with the autoflower plays a big part in that. And 1 ogkz I just left it be .
Green crack
1 kept as a mother
2 were broke
2 topped

Likes
30
Share


@Dunk_Junk
Follow
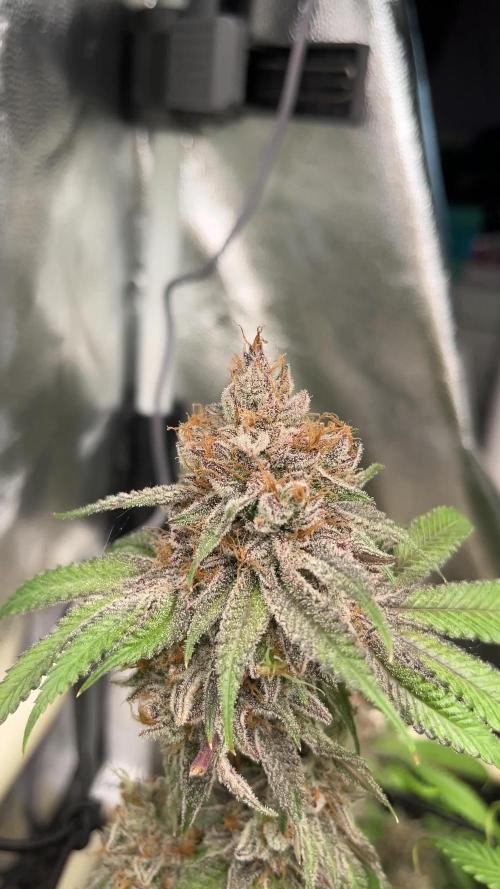
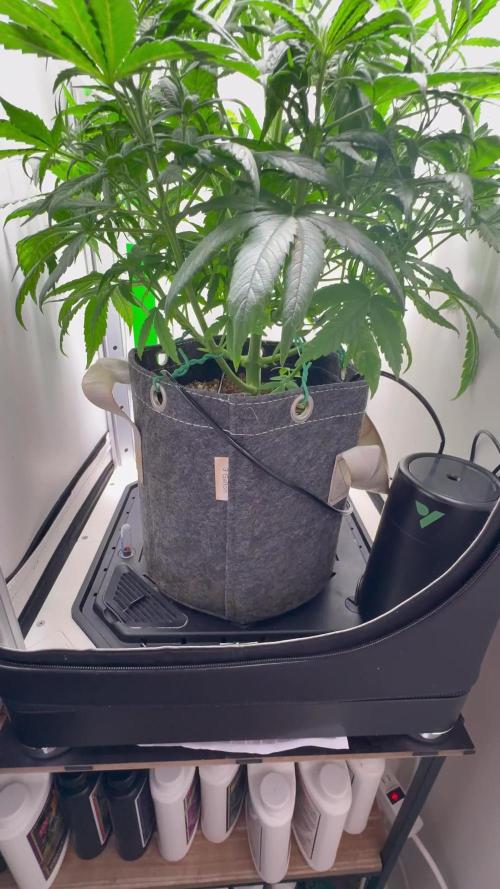
The buds are fattening up now. Still no amber trichomes. Weather is hot here. Tent seeing 30+c at it's peak. I'm wondering if the heat is stressing her.


Likes
18
Share


@GOODoverEVIL
Follow
Greetings in the Name of His Imperial Majesty Emperor Haile Selassie I the First. Power and Virtue of The Trinity. In the Name of Jah The Father, Jah The Son, Jah The Hola Spirit, One Jah. First. Amen ❤️🙏🏼❤️
Diese Woche lasse ich einfach nur die Bilder sprechen ❤️❤️❤️ Außerdem hab ich mich an mein erstes Video gewagt 😃 hoffe es gefällt euch ✌️
LOVE AND BLESSINGS ❤️🙏🏼

Likes
32
Share


@MadeInGermany
Follow
Unfortunately, I had to find out that my account is used for fake pages in social media.
I am only active here on growdiaries.
I am not on facebook instagram twitter etc All accounts except this one are fake.
Flowering day 20
since time change
to 12/12.
Hi everyone 😃.
The lady continues to develop very nicely :-).
The buds get thicker and look tastier 😅.
This week it was poured 2 times with 1.2 l each time.
The tent was cleaned and everything checked for functionality.
Have fun and stay healthy 🙏🏻
You can buy this Strain at :
www.Zamnesia.com
Type:
Runtz
☝️🏼
Genetics:
Zkittlez x Gelato
👍
Vega lamp: 2 x Todogrow Led
Quantum Board 100 W
💡
Bloom Lamp : 2 x Todogrow Led
Cxb 3590 COB 3500 K 205 W
💡💡☝️🏼
Soil : Bio Bizz Coco
☝️🏼
Nutrients : Green House Seeds Company Powder Feeding Bio
☝️🏼🌱
Water: Osmosis water mixed with normal water (24 hours stale that the chlorine evaporates) to 0.2 EC. Add Cal / Mag to 0.4 Ec Ph with Organic Ph - to 5.8


Likes
4
Share


@KCChiefers
Follow
Day 58 Update: Watered both plants with 3/4gal until runoff. Water was dosed with Terpinator at 15ml/gal. I will start the flush on Plant #1 next watering. Added a stake and a plant yoyo to Plant #2 to support the heavier branches.
Day 62 Update: Starting flush on Plant #1. Watered both plants with almost a gallon until runoff. Plant #2's water was dosed with 3/4tsp of Big Bloom, 1/4tsp of Grow Big, and 1/4tsp of Tiger Bloom. Plant #1's water is just plain pH balanced water. I will start watering every 3 days now. I will start the flush on Plant #2 after one more nutrient watering.

Likes
21
Share


@NG420
Follow
Fattys are growing and seem to be thirstier.Used foliar spray to help the leaves and also started tucking. When the plant was topped pistils were seen for first time.

Likes
12
Share

@Jardin33ro
Follow
Ya comenzamos con el lavado! Flawless para terminar con un buen sabor y buena ceniza! Tratamos de bajar la EC lo mas cercano a 0 que pueda. Esta es la ultima semana antes del corte, asi llegamos a las fiestas con flores secas y frescas! Muy contento por como se ha dado todo este ciclo, pero con muchas ganas de corregir ciertas cositas que he ido aprendiendo en este cultivo, muy agradecido con la planta y con este aprendizaje! Felicidad absoluta
En la expocannabis de Uruguay pude analizar 2 muestras, f5 y f2. El f5 tiene mayor thc y mas % de terpenos! Mas presencia de limoneno, luego linalol y un poco de myrceno! Mientras el F2 tiene mas presencia de Myrceno, limoneno y linalol. Menos thc que f5 y menos terps, esto ya es otro nivel! Entender quimicamente como esta tu flor, esto otro juego! Saludos Jardin33ro

Likes
11
Share


@Original_Growers
Follow
Plants keep growing very well, stopped to stretch and already start showing pistils. This in only 14 days of flowering. That shows how fast you can grow using clones instead of starting from seeds, infact clones have same age of mother plants from wich are taken, that have already reached sexual maturity by far and so they are much more ready to flower unlike plants bornt from seed.

Likes
18
Share


@Pokan187
Follow
The trichomes on the Runtz are all milky and I'm getting some amber on the sugar leaves, I think the end is near 😁
The G13 is looking great and smelling wonderful, the buds are getting heavier and same for the GDP


Processing
Likes
10
Share


@CityFarmer
Follow
Hello everyone,
Now that I can tell the difference I split these apart, this is my Pineapple Kush, grown outdoors this time, shes smelling really fruty and I even seen some lilac hairs, lets see how she goes...
See you guys next week🤘🤘🤙🤙✌️✌️✌️
Likes
11
Share


@Nookandplant42o
Follow
Good week this girl is doing well, varied coloration, the buds are compact, the trichomes are creating color, I can go further until the harvest window to avoid loss of yield.


Likes
14
Share


@BudXs
Follow
Ya boii, you know the ABC sound!
Playground
Coming from the playground take it straight back to the streets
You know what it is
Well im Roro coming in third
Nows about that time that i get heard,
None of my rhymes have ever ever been heard
Word to herb play tricks on ya mind, a come on
Everybody here is real superb, and ill be right back with part 2 of rhis funky rhyme , B , ya...
Yo red, i dont wanna flow no more man, yall go aheadz im just gonna sit back on this bad old beat
Cuz this is what i do
At the playground
Likes
18
Share

@BudXs
Follow
Hot damn this is a pretty plant. Enormous fan leaves, tight nodes, and LOTS of em. This plant continues to impress, however, some of her daughters are blowing past her in height, surprisingly.
Room is on point, mother is happy and healthy. 55 days or so till harvest:)

Likes
7
Share


@MrEarlyBird
Follow
Beer almost ruined half a year of work.
Long story short, a space heater got the room wayyy too hot during their off cycle...and I run it on the colder side when the lights off. Dealing with some powdery mildew but containing it with a foliar spray mix of baking soda (sodium bicarbonate) a “splash” of h202 and a tiny drip of soap and applying with the lights off.
Throughout the grow I am consistently using 3/4th the recommended doses each week for their hydro line. I fill 4 gallons but dose as if there’s only 3 gal. Near the end of the grow I am filling 4 gallons, still dosing as if 3 gallons, however the root ball would cause the bucket to overflow so I have to dump about 30% away to other plants so my water level is where it should be. A little more than halfway full seems to work, and if it is slightly too high, the plant will drink it down where it is fine by tomorrow

Likes
11
Share


@GorillaZativus
Follow
7 días .
Ph: 5,9-6,0
Ec: 02 - max 0,6
1 semana y ya completamos el pan de raíz.
Desde el día 3 riego foliar , knactive , mycochum + orca .
Likes
1
Share


@Smithsgrow420
Follow
Seen a lot more growth this week, starting to fill the tent up nicely
Happy growing

Likes
10
Share

@CCSAUTOGROW
Follow
Last week of veg for Tangie Auto. She's a beauty & is already smelling like citrus & tangerine 😋. Getting ready for the stretch!