


Likes
Comments
Share


@SamDo
Follow
Hello growers,
This week marks an important step in the development of the Pineapple Upside Down from Humboldt.
The plant has now been moved into the flowering tent. The main reason for this change is simply to give the plant more space and to benefit from better environmental control. The larger tent allows improved airflow and more stable climate management, which should help the plant maintain a healthier rhythm moving forward.
Even though the light fixture changed, the spectrum remains the same. The plant is still running under a 3500K spectrum, so there should be no real shock from a lighting perspective. Light intensity has been kept around 600 PPFD, which means the plant continues growing under conditions that are very similar to what it was used to previously.
Some environmental adjustments were also made this week. The VPD has been increased slightly to around 0.8–0.9 in order to encourage stronger transpiration and improve nutrient uptake.
Last week the plant showed a small slowdown in growth and overall vigor. The leaves were slightly droopy and the plant looked a bit less energetic than usual. After reviewing the parameters, the most likely explanation was a pH drift upward toward 6.2–6.3.
While this range is not catastrophic, it can reduce the plant’s ability to absorb certain nutrients, especially nitrogen, which could explain the temporary slowdown that was observed.
The pH has now been corrected and brought back down to around 5.8, allowing it to naturally fluctuate between 5.5 and 5.9. Since this adjustment is very recent, the plant will need a few days to fully respond to the correction.
Earlier in the week, the EC had been increased to 2.0 to test the possibility of a nutrient deficiency. Toward the end of the nutrient solution cycle, the mixture was slightly diluted with osmosis water in order to rebalance the EC and avoid pushing the plant too hard.
This week was also used to work heavily on the plant’s structure.
A topping combined with a strong defoliation was performed. The canopy was opened up significantly, removing a large amount of leaf mass to improve airflow, light penetration, and overall structure. It was not a light cleanup — the plant was trimmed quite aggressively in order to reset the canopy properly.
The plant originally had four main apexes, and each of those was topped again. This now creates approximately sixteen main growth points.
With sixteen apexes, the plant structure is now approaching the intended final architecture. From this point forward, the main objective is simply to allow the plant to recover from this fairly heavy pruning session, regain strength, and stabilize before any further training.
Over the coming days and weeks, the focus will be on observing how the plant responds to the pH correction, the environmental adjustments, and the recent structural work.
For now, everything appears to be back under control.
We’ll see how she responds over the next week.
Alright growers, take care and see you next week.

Likes
24
Share


@Kountryboi90
Follow
And here we are! CHOP DAY! This strain has been impressive and smells like a bag of oranges! Oh so lovely! This girl packed on the weight. Several branches are hanging and has caused some side branching to separate from the main stalk(my fault for cutting the scrog net). Will definitely be growing this strain again!

Likes
11
Share


@Cockneycultivar
Follow
This week she has grown so tall. I am so regretful for not scrog’in her or done any low stress training.
Although I do have a nice size tent with the grow light on adjustable rope so it’s not that much of a problem.
Although when I flip her to 12/12 into flower I know she’s gonna stretch even more.
The size of her leafs are impressive.
I read that your not meant to use biobizz grow and fish mix at the same time but I went against it and she’s showing no signs of stress or nutrition problems.
I even have an 11 fingered leaf now!!
She is beginning to smell very nice too, so all good so far. Can’t wait till she packs on some bud now.

Likes
45
Share


@masterofsmeagol
Follow
7/3 Hot as fuck today. Japanese beetles were around. I killed a few. I'm going to have to go over and keep an eye on things. It reached 90° today for the majority of the day. I watered around 1pm as I noticed most of the bags were very light. I'm glad I held off on the BT. I've dealt with jpn beetles before so hopfully that won't be an issue. Things are getting big. It won't let me upload any pictures or the video I did. I may upload it to past week. Went back over at night and and plants looked dropy but it was after 7pm and they were just going to sleep.
7/4 Didn't take photos this morning. Found some jpn beetles. That's the damage I've been seeing. I went back over last night to hunt them but I only got two. There weren't any others. No biggie. I'll put some pics up from today after I get back
7/5 Didn't get a chance to check the plants out today. My intuition tingled around 1pm and I had just gotten home and I ran over to check them. They displayed minor signs of heat stress as seen in the pics (due to the super high humidity and 90° weather) and the bags were light. A few were REALLY light. I could see they needed water. I WATERED 4 1/2 GALLONS TO THE GARDEN. DO TO THE HIGH TENPS AND WINDS IVE HAD TO WATER THE LAST THREE DAYS IN A ROW. IVE SLOWLY STRARTED INCREASING VOLUME. I don't want to water until I get a shit ton of run off because I want to keep the nutes in my soil as long as possible. As you can see things are going great. Minor pests but notjing major. They're growing at a very rapid pace. I'll need to add another layer of supports soon and begin to LST some of these girls. I've got one seedling in a 10 gal and I'm pretty sure it's a feminized red runtz but it's in preflower and looks and SHOULD be a female but I haven't seen the white hair yet. Looks like a female preflower though. I do have one auto though in a 5 gallon tjats doing good too. I have a bunch of pics but the internet is too slow. I'll upload tomorrow. Started pouring around 6.
7/6 Poured sheet rain all night. After it had Bern super fucking hot and I watered my plants with 4 1/2 gallons. Oh well. If I didn't water we wouldn't have gotten the rain. The fabric bags makes watering easier. The wind will dry out the medium. We do have some rain in the forecast. A pallet fell over and knocked my 5 gal bucket with tje auto into a 10 gal seedling but it held the pallet up and didn't damage anything. Out of all the ways it coyldve landed it landed just right to not hurt anything. Everything is super healthy. I do have some random pest damage but it's minimal. I'll decide whether to use a spray or not. Didn't take pictures this morning. Was pressed for time.
7/7 Super hot even at 8a.m. Rained the majority of the day yesterday. Plants are getting HUGE. I'm going to have to build a second round of supports and should probably start some LSTing. They seem to like growing natural how they are (besides the original topping and FIMed. You can tell these are ALL very high % indicas. I'm seeing pistols spitting out everywhere. Event horizon and sherb cake seem to be in the lead. The seedlings have realky taken off. The one I put in the 50 has fan leaves the size of my hands.
7/8 Wow it has been extremely hot. It's going to be in the 90's again today. Checked my plants and it seems the GMOs seem to be using more water. Those bags were a little lighter. Seeing how there is no rain in for a few days I had to water. WATERED 3 1/2 GALLONS. LAST SEEDLING FINALLY SHOWED AS A FEMALE.
7/9 Bags are still heavy. Found ONE jpn beetle this morning. Plants seem to be bigger everytime I look.starying the stretch and spitting out some pistols. I took some pics of the pistles. I'll update
7/10 should've started a new week but I didn't. I'll make next week six days. Plants are starting ro stretch. Minor random pest damage but woth the heat they need lots of water. Noticed a couple dead interior leaves so I should probably go through everything and defoliate. I need to add another layer of supports as well.

Likes
4
Share


@GREENPHOENIX6262
Follow
* 10/22 -Cherry Cherry Cola Auto - 10/22 - 9.5 Inches *
Thus far no concerns and she is growing vigorously, switched out Myco (Using Myco+ from Element) and increased nute and clean water feeds to 1 gallon per day offsetting the clean water and nute water feeds. Lite LST with bend clips applied yesterday (10/21).
* End of Week - Veg week 5 - 10/28 - Thus no issues or deficiencies, slight increase of veg dose - Defoliation will begin next week.

Likes
4
Share

@Mexicanasseeds
Follow
SEMILLAS MEXICANAS | SEGUIMIENTO: DÍA 14 DE FLORACIÓN (SEMANA 2)
Proyecto: Evaluación fenotípica en Planta Madre Multi-injertada (9 cultivares sobre portainjerto Jarilla Sinaloa).
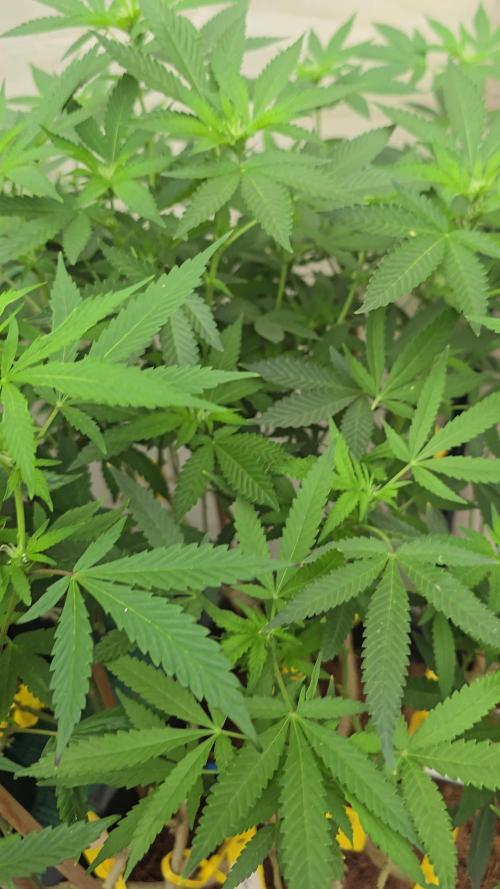
Respuesta Fisiológica y Stretch: Los 9 brazos (Banana OG, Galletas, Gelato, Black Domina, White Kush, GSC, Skywalker OG, Critical Kush y Cheese & Kush) mantienen un stretch activo bajo 12/12. Se observan variaciones en vigor, longitud de entrenudos y estructura según la variedad.
Compatibilidad y Canopia: Uniones de injerto mecánicamente firmes, sin marchitez ni rechazo. La canopia muestra crecimiento vertical heterogéneo, bien estabilizada con tutorado individual y etiquetado para trazabilidad.
Fisiología y Sanidad: Ápices activos de color verde claro y follaje maduro uniforme. Sin signos visuales de patógenos, colapso de tejido o plagas.
Fertirriego: Manteniendo el protocolo en sustrato Coco 50/50 con riego automatizado (8 micropulsos, solución a 24 °C y 20 % de drenaje.
Conclusión: Segunda semana completada con éxito. La planta muestra excelente compatibilidad de injertos y una diferenciación morfológica clara entre variedades .
Likes
5
Share

@LittleBigTrees
Follow
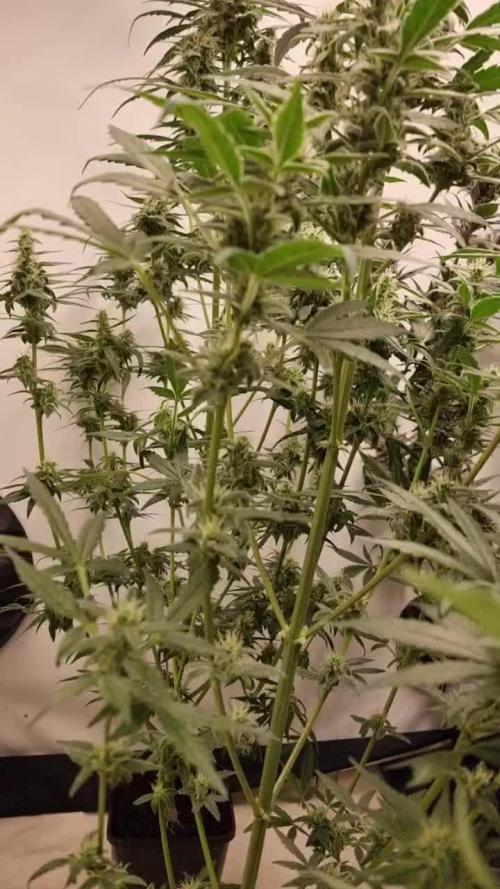
All three plants are happy and showing a nice layer of trichomes. Still in 2litre pots.


Likes
10
Share


@Unnamed
Follow
Removed 20l from the reservoir and filled it up with fresh nutrients.
Added Yara Kristalon Orange, Yara Calcinit and a little bit of Haifa GrowClean to the reservoir.
Adjusted PH/ORP, PH- adds P and ORP adjustment adds K.
Topped it up with tap water every second day, the dehumidifier pulls ~12l/day, most of it should be from the plants I've got in my tent.
I am struggling to keep ORP at ~100, might be a sign of root trouble.
Nothing else to report.
Values are average of the day.
DATE - °C - RH% (Tent Temp/RH)
20241125 23.9 61.9
20241126 23.6 60.9
20241127 23.3 60.3
20241128 22.8 60.7
20241129 23.2 60.4
20241130 22.7 61.3
20241201 22.3 60.3
DATE - PH
20241125 5.99
20241126 5.94
20241127 5.96
20241128 5.95
20241129 6.02
20241130 5.98
20241201 5.93
DATE - ORP (mV)
20241125 103
20241126 95
20241127 92
20241128 67
20241129 127
20241130 88
20241201 72
DATE - EC(us/cm)
20241125 1955
20241126 1852
20241127 1864
20241128 1914
20241129 1988
20241130 2052
20241201 2135
DATE - CF
20241125 19.55
20241126 18.52
20241127 18.64
20241128 19.14
20241129 19.88
20241130 20.52
20241201 21.35
DATE - °C (Reservoir)
20241125 23.1
20241126 22.3
20241127 22.2
20241128 21.9
20241129 22.3
20241130 21.8
20241201 21.2

Processing
Likes
21
Share

@LittleBigTrees
Follow
Fed once this week with a weak feed including top max.
I use kombucha vinegar as pH down. Water from my tap is ph6.8-7.0 and 38-42ppm so I might start using calmag supliment as the ppm at my old house used to come out of the tap at ph7. 2 and 200-220ppm.
I had 2 plants that didn't like the light at 30000 lux and started bleaching so I took them out.
I've defoliated today day 35 as humidity was getting over 80% and also to let light to the lower bud sights.
Pre flower pistils showed on some plants around day 33 (some still have none) so I'll consider this the end of veg start of flower. The kalimist indica pheno is still not showing pre flower pistils but is always hard to force flowering when it's not mature for some reason. It's always 7-14 days behind everything else 🤔
Likes
2
Share


@Saintvicious
Follow
Just keep watering as it drys. Supporting buds along the way that are getting too heavy. Smells like skunk and gas. Little fruit but not much. Trics still getting thick. Look forward to it finishing. Tricomes still cloudy. Little amber on sugar leaves but it's still going strong. Some leave fading finally to fall colors.
Likes
6
Share

@Swanberg
Follow
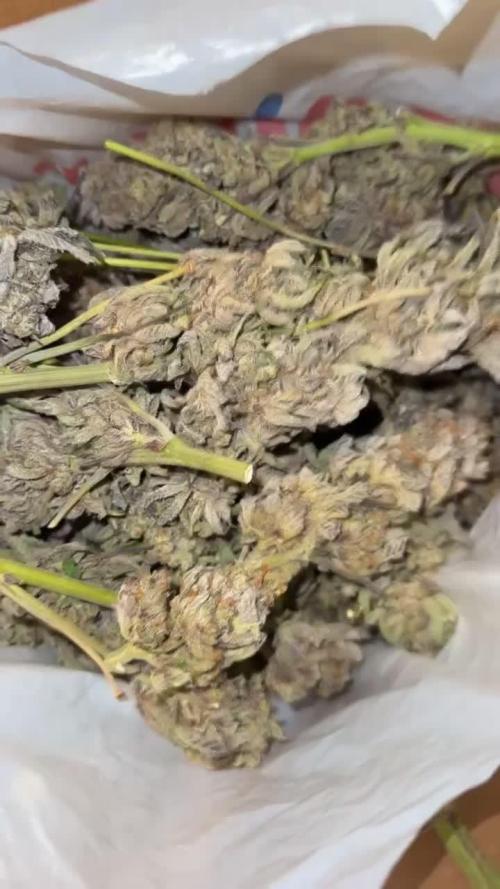
Thanks everyone for support and tuning in love the culture, community, and progress

Processing
Likes
11
Share


@AUTOASSASSIN215
Follow
Just started giving it Veg nutes but not too much and did some lst


Likes
26
Share


@siL01337
Follow
I mean it looks like it works..... I can't wait 4 this lovely mix of indica and sativa.... I want to taste and smell the ready product... But it needs 2 months of cure minimum.....



Likes
111
Share


@Salokin
Follow
Hi Growmies,
So far she is doing what she is supposed to. She popped her head out within two days and since then she has been growing nicely. I have switched on a little fan to make sure she gets sturdy enough. I have also transplanted her into her final net pot and nested her in a bed of Speedgrow green mini cubes and soaked her for 15 min in a 500 ppm ph balanced RO water.
I would love to upload some videos, however this seems to be getting increasingly challenging on this website.
Here is the code that’ll give you 20% in Zamnesia‘s online store, just input ZAMMIGD2023 at checkout.

Likes
7
Share


@Lacremelabs
Follow
The flora has started, and I increased the amount of MKP while reducing calcium nitrate. PPM is slightly above 1000, nearing 1200. The pH remains between 5.8-6. They are in that phase of substantial daily growth, hoping for a bountiful harvest. I'm still defoliating and tying them.


Processing
Likes
72
Share


@DreamIT
Follow
🐩👤Sirius Black👤🐩 by 🌍🌱WeedSeedsExpress🌱🌍
👤 26.1 ...
👤 27.1 We enter the heart of the vegetative phase. the seed has not yet wanted to detach but it is also fine hanging there where it is: p
👤 28.1 ...
👤 29.1 ...
👤 30.1 ...
👤 31.1 ...
👤 1.2 It is a few weeks old but already proves resistant. The lamp works beautifully, I see the results day after day with plants already in bloom. Compared to the previous lamp always make it bloom even faster in terms of time. Can't wait to try the XS series
____________________________________________________
👀Are you looking for a good lamp to start?👀
Viparspectra in my opinion has something more than the others, take a look at their site.
➡️ http://bit.ly/pro-seriesproductspro-series-p1500
⏩Use " GDVIP " for an extra discount💯
____________________________________________________________________________________
📜👀 A look at the details of what I'm growing 👀📜
🐩👤Sirius Black👤🐩 by 🌍🌱WeedSeedsExpress🌱🌍
📋 Details 📋
⚧ Gender
▪️ Feminised
➰ Genes
▪️ 70% Indica / 30% Sativa
🎄 Genetics
▪️ Sirius Black
🚜Harvest
▪️ 450 g / m²
🌷Flowering
▪️ 63 - 70 days
✨THC
▪️ 25.0%
✅CBD
▪️ 0.5%
🏡Room Type
▪️ Indoor
🌄Room Type
▪️ Outdoor
🕋Room Type
▪️ Greenhouse
🎂Release Year
▪️ 2020
____________________________________________________________________________________
👀📷 Follow the best photos on instagram 📷👀
https://www.instagram.com/dreamit420/
🔻Leave a comment with your opinions if you pass by here🔻
🤟🤗💚Thanks and Enjoy growth 💚🤗🤟
Likes
3
Share


@drewnagy0510
Follow
I was very shocked on how fast it grewand how much it produced very great strain a must for you Indica lovers very strong I went to about 80% red hairs perfect smoke a lot of cannabinoids and a lot of leftover sugar leaves great for lovers of bubble hash
