Likes
Comments
Share
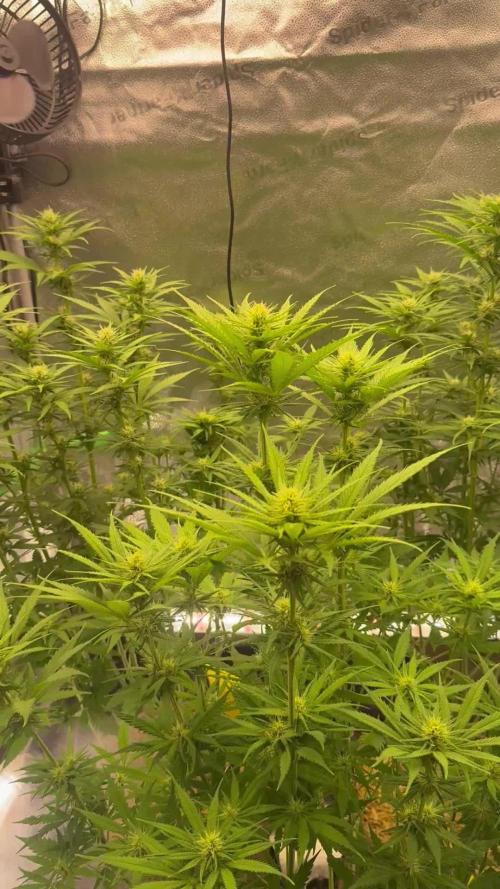
Hallo zusammen 🤙. Habe 25 g Silicium Flash als Topping gegeben. Sie wächst sehr schön und macht keine Umstände
Likes
11
Share
@gluvaja
Follow
Just water and honey for last few days. I washing my babies with water and honey. Finaly fnishing this project very proud. It finished. Trimming time next few days
Likes
38
Share
Utopia Haze is a rare heavily sativa dominant hybrid (90% sativa/10% indica) strain created through back crossing Brazilian Sativa strains. This tasty little bud took home 1st Place for Best Sativa in the 2008 High Times’ Cannabis Cup and for good reason – with its potent 18-22% average THC level and long lasting cerebral effects, Utopia Haze is one powerhouse smoke. The Utopia Haze high comes on soon after you finish your first toke, hitting you with a strong cerebral lift that infuses you with a sense of hazy relaxation. Type: Feminised/Photoperiod Cultivation: Indoor/Outdoor Flowering Time (days): 70-75 Indoor Yield (g): Up to 650 Feminised Outdoor Harvest Month: October Feminised Outdoor Harvest Month Week: 3rd-4th week Aroma: Citrus, Woody, Pungent, Mint Effect: Cerebral Lift, Hazy Relaxation, Sleepy Welcome Everyone to the Final Entry of my Utopia Haze Grow ! There is so much to discuss ! I have been extremely busy as of late trying to get this Harvest together, but i am happy to have it here for you now ! I Seriously under estimated the amount of time, help from others, and my own necessary skills to pull this off.. and i still kind of screwed it up lol ! But its worth noting i have never actually done this before and trying to document it during....was extremely hard. It is next to impossible to work an iPhone with rubber gloves on ! First I want to discuss everything step by step so before you jump straight into the comments on how the end product is so small in "quantity" Rest assured i am happy with its"quality"...and thats all that matters to me because Life is a journey not a destination! and i have learned so much from this grow that I couldn't be any happy even if i messed some things up :) But at the very least I hope you read through this entry in its entirety with an open mind and focus more on the process, rather than just the outcome! I ran out of Ice & i was only able to wash three times..(normally I've heard you should go sometimes 5-6 washes) Preparation is Key & things will be much better next round :) Photos 1-22 These are pretty self explanatory but for those of you just tuning in now.. this is what happens to a very happy plant when you don't have the necessary tools to monitor key components of growing cannabis.. Ph, as well as EC levels play a very key role in the outcome of your grow lol that being said I was just able to save this plant by purchasing both tools but that doesn't mean the plant didn't suffer because of the prior events.. This was a Huge reason behind me choosing to turn this harvest into what i would consider "Solventless Hash Rosin" from "Ice water extracted Bubble hash". Pictures 23 The idea here is the process of using "fresh Frozen Cannabis" this has been discussed many a time online on such sites as instagram and here on grow diaries as well.. I personally have Never tried the process so i decided to try it out and make a judgement for myself.. Video 24 The Cannabis has now been in the freezer for 72 hours making it very well frozen.. as you can tell i struggled getting it all into the 25u Screen Wash Bag. One thing of note i would do differently is i will de-stem my next batch as i also believe this played a part in the amount of plant matter that escaped through the sieves. Photo/Video's 25-28 The idea here is "ice water Seiving" & especially with the bags that I am using here that are only have screen material on the bottom portion of the bag it is very important to have spaces in-between the screens to allow the water to pass directly through the screens into the bottom bucket with the least amount of resistance.. because the hash is so extremely temperature dependant if it gets warm on the side of the bag.. it will stick there and not make it to the bottom to become use able product.. 29 You do not need to use as much Ice as i used here lol... the idea is to keep everything very cold..i certainly achieved that but at the sacrifice of using so much that i ended up grinding product and producing "contaminants" but in the end they are just plant matter that i would be smoking when i rolled up my joint either way so.. I'm not super disappointed.. But it should be noted that what you want to achieve here is a Layering effect where you have the wash bag between two small layers of ice while the "water current" washes the Trichomes away allowing them to be separated by the screens setup below :) Before Starting the machine you should allow some time (i.e.;10-12minutes pre soak to allow the product to become saturated) before the first cycle. By video 32 I have just ran out of ice lol.. Video 33-34 Here I have a tip for you.. to separate the screens that you sieve through.. cut 5 gallon buckets to stretch them across nice and tight.. it'll make scooping your Bubble that much easier ! i learned this from the many "Frenchy" videos I have watched :) Picture 35 Here in lays the problem for most people.. drying your hash without loosing vast amounts of "Terpenes" whilst also stay ever vigilant against mold ! Thanks to all those videos I've watched on youtube.. id like to think this was one of my most successful parts of this process.. Things to Note; Terpenes start to seriously evaporate at temperatures 68F or 20C you need to stay as cold as possible whilst bringing the Relative Humidity in the space down into the 40-30% to stay away from that nasty mold ! I used my cold storage room in the basement.. with a dehumidifier running to keep the space at 45% RH & staying at a constant 15c. All while spreading the hash as thin as possible across parchment paper, on top of the white screens with a fan moving air across both sides of the paper. Pictures 36-38 These are some macros i took in the middle of my drying session I fell in love with the colour. Yes i know the black spots are plant material but they will get caught when i bag the hash & squish the oil out. Thing to Note; at this stage it is important to ensure you 'micro plane" the hash down as fine as you can whilst staying weary of the temperature... any "chunks" will hold pockets of moisture.. that lead to potential problems..ie; mold ... Picture/Video 39-41 Successfully planed bubble hash ready to be bagged and Squished ! Picture 42 Ive decided to follow Pedro.. from Pedros Grow Room and double bag to be on the safe side so i don't have any blow outs. So thats One 25u bag inside one 160u bag ! :) Pictures 43 This is almost 3 grams of the bubble hash from above, already melting in the bag.. this is where i ran into trouble again lol things started getting to warm in the house and i was only able to get one of the three squish's i did on video :( things started getting sticky. Picture 44 This is basically just a photo of the equipment I'm using; 3x5 LowTemp Cage in the frame I built myself, with a 20Ton bottle jack. Something to note here is this is an older Lowtemp model with only a single heating zone which is which i have it closed here heating Both sides of the press :) As well as the importance of having adequate pressure on your plates.. my rig is very overkill for the size of hash bags..lol Video 45 Here is the lovely press video.. its didn't quite work the way i wanted either lol my directional folding wasn't quite tight enough for a big "drip" :) &the Press was set to 65°c Photo's 46-50 are pretty self explanatory :) I had a blow out.. but still managed to pull an 80% return from the hash once squished...& yes it tasted amazing :) Was it worth it in the end... that could be debated.. for some..i understand..its not your thing, but for those of us that are interested in making our own concentrates.. free from Solvents... I wouldn't make it any other way :) If even ONE of you reading this diary finds it helpful to reference for ANYTHING.....even if its "what not to do" ill consider it a success ! Thanks again for tagging along on this garden adventure.. its been one heck of a journey ! Much Love from B.C. Canada, Until Next time, Cariboo
Likes
59
Share
(12/23-12/29, days 56 to 62) Hope everyone enjoys the pictures. I will try to add a video and black back or cover pics by end of week every week. Week 6 Notes & Observations: No new issues to note, no mites found after the first and I have used Spinosad twice now just in case. P2 is getting stressed over ties and no ring, so I decided they will both go on a ring after i broke another branch without realizing it. Found it the next day and then topped the other side to gain two colas there - still 8 set but with varied start time's and points. Still looking to flip around new year’s day. Day 58 (last feed was day 55) Tested and Calibrated my ph pens. Starting weight from each pot was 18 lbs and 8 oz, this time P1 weighed 12lbs 1oz. (12lbs 10oz before last feed) and P2 weighed 11lbs 8oz before feed (11lbs 8oz before last feed). Each plant got 1.5 gallons of purified water with a mix of Veg/Bloom Mix concentrates - 300ppm Veg Mix (recipe on week 2) and 190ppm Bloom Mix (recipe on week 5) with 1.5ml of CaliMagic (General Hydroponics 1-0-0) . The ph on this feed was balanced to 6.75ph (6.25 last time). After feed this time, P1 weighed 21lbs 5oz and P2 also weighed 21lbs 11oz (both weighed 20lbs 9oz after last feed). I got ~8 cups of runoff on P1 and 10 cups on P2 this time (8 cups of runoff on P1 and 8 cups on P2 after last feed). Runoff for P1 ph was 6.42 with 970ppm (6.36 with 1110ppm last feed) and P2 was 6.41 with 980ppm ( 6.35 with 1170ppm last feed). no top soil tests this time as ph is mostly showing no issues - next feed will be 1.5 gallons of de-chlorinated water and 6.5 to 6.75ph again - I dont see any issues from feed or training.
Likes
5
Share
Well, probably this is her last week. There might be a chance of me holding for another week for more than one reason, but mostly because I think she is a little late. A noticed that the first week of flowering took longer to show flowering signs, something I usually see quickly. And the stretch took a little more time than it usually does. So, by Thursday I'll be sure. Still, as you can see, the yield will not be that good, we can't win them all, can we? Nevertheless, it is a healthy plant, with awesome genetic material and I'm already anxious to grow the last seed I have, which will begin July 2025. Also, I uploaded a pictures showing a light green structure. It seems to me like male flowers already opened, but no really. I dont know. The other LSSH had the same thing, developing close to the end, but there where no seeds at all.
Likes
24
Share
@Doubleb84
Follow
Running into some rookie mistakes with PH and nutrients 😫. Getting her healthy again with help from friends though! Love this light so much!!
Likes
2
Share
Week 3 flower she's been drinking alot, so keeping her water reservoir full. I should top dress but am gonna finish her without top dressing, I believe the soil is healthy enough to do the job,🤞
Likes
Comments
Share
@Naujas
Follow
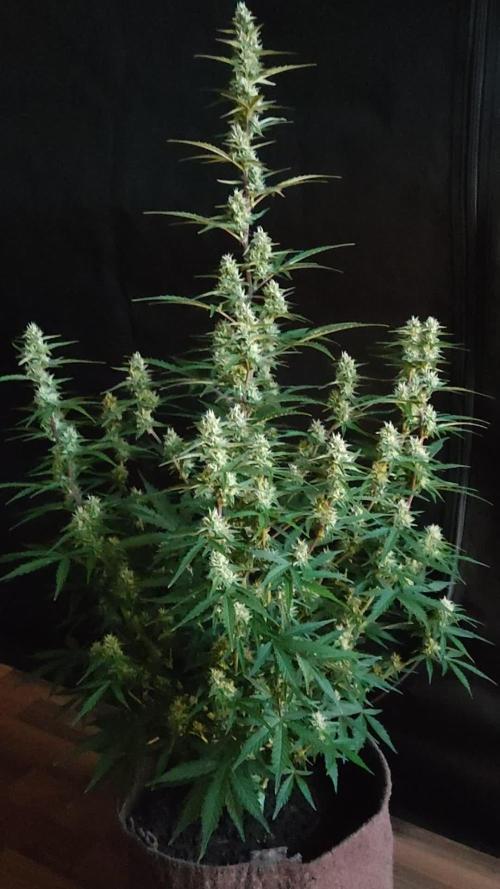
1 savaitė :) viskas atrodo gana gerai, nors kol kas augimas lėtas :) Kitą savaitę persodinsiu į paskutinį vazoną :) sėkmės visiems :):) ...
Likes
111
Share
@DreamIT
Follow
There is little to say yet. I recommend everyone to try this technique at least once. Maximize your harvest and increase your personal experience. If you want more serious proof of how mainlining works, take a look at the diaries of @Canamatoes, my teacher and mentor. More updates later, stay high🤘😁🦄
Likes
2
Share
@xipo86
Follow
Chopped at day 75 just fans leafs out and full plant hang dry... at room temp 24 and HR 50 - 55 wich for summer is not bad :)
Likes
3
Share
The stretch seems to be done, and the buds are fattening up
Likes
9
Share
Miei cari amici, L'estate incalza e finalmente il tempoi permette di trasformare ad hoc. Secondo i gusti il giardino, la terrazza e i due balconi. Un lavoro duro e intenso con i 25/30 gradi che il NW in questa settima sta proponendo e che spero vivamente durino tanto. Travaso storico e professionale. Vediamo ciò che l'armadio dice. Questo travaso probabilmente ritardera di due o tre settimane il raccolto, ma andava fatto e ne varrà sicuramente la pena. 28/06 My dearest friends, comrades and farm partners. Doc. Cannas is extremely happy to introduce you to the 5 wonders of Expert Seeds. Still my most heartfelt congratulations for their genetics, between photos and videos you have seen what a wonder these little girls are growing. Today they have been introduced to LST, an art halfway between Astana yoga and BSDM. Being their first time there was a need for love and passion. So it was. At the next update farmers
Likes
17
Share
Buenas a todos , esta semana la laughing Budda sigue creciendo bien, con los cogollos bien definidos, hice riego solo con melaza y luego solo agua, 3 litros cada 3 días.
Likes
18
Share
Week 4 - It’s Friday again, and that means it's update day! Another week has passed, and as usual, there's plenty to report. A lot has happened, and once again, I’m bringing you along on my journey as a total beginner in the world of growing. Every week is a new learning experience, and I’m excited to share what’s been going on in the tent as my Amnesia Zkittlez and Gorilla Cookies continue to grow. ------------------------------------------------------------------------- Key Growing Parameters -Humidity: 43-55% -VPD: Max 1.4 -Airflow: Always active at level 1, auto-adjusts when needed -Day Temperature: 25-26°C -Night Temperature: 22°C -Light Cycle: 20 hours light / 4 hours dark -Lamp: IONBOARD S24 from AC Infinity (240W) Watering Schedule: -Day 24: 1 liter -Day 26: 1 liter -Nutrients are applied with every watering Light Adjustments: -Light distance now at 50 cm -Intensity increased to level 10 ------------------------------------------------------------------------- Growth Update The most noticeable change this week has been the incredible growth of the plants. I’ve uploaded some new photos for everyone to see, and it’s amazing how much they’ve shot up compared to last week. The differences in growth behavior between the Amnesia Zkittlez and Gorilla Cookies are becoming even more pronounced. The Amnesia Zkittlez has more than doubled in height since last week, shooting up and stretching outward. Meanwhile, the Gorilla Cookies hasn’t grown as much in height, but it has become noticeably rounder and bushier, almost like a pufferfish. It's fascinating to watch these plants develop in such different ways. While the Zkittlez focuses on vertical growth, the Gorilla Cookies is spreading out horizontally, forming a dense, compact structure. All around the plant, small flower sites are emerging, extending from within the plant and beginning to take shape. This difference in growth styles really highlights the unique characteristics of each strain, and I’m excited to see how they continue to evolve. ------------------------------------------------------------------------- Training: LST and Defoliation This week, I’ve also focused heavily on training the plants using Low-Stress Training (LST) and some selective defoliation to optimize light exposure and encourage better growth. I applied LST more aggressively over the past few days, using clips to gently bend the stems of individual branches outward, almost to a 90-degree angle. This technique has helped the plants spread out horizontally, allowing more light to reach the inner and lower branches. I’ve been adjusting the clips nearly every day to refine the structure and ensure that the light penetrates deeper into the canopy. The goal is to encourage outward growth and create more space for the lower branches to thrive. In addition to LST, I began selectively removing leaves. I started with the first set of fan leaves, followed by leaves growing inward toward the plant’s center. These were either shading promising bud sites or simply not contributing to the plant’s energy needs. I’ve also removed the lower bud sites, which likely wouldn’t have developed into anything substantial. This way, the plants can focus their energy on the more promising, higher-up buds that are receiving better light. Throughout the defoliation process, I’ve been careful not to remove too many leaves at once. I’ve only taken off leaves that were either blocking key bud sites or were small and shaded, ensuring that the plant still has enough foliage to continue its healthy growth. ------------------------------------------------------------------------- Nutrients and Watering Routine There haven't been any changes in my nutrient schedule or the way I water the plants this week. I’m still using the same BioBizz nutrients at the recommended dosages with each watering, and the watering process itself remains unchanged. Each plant receives a consistent 1 liter of water every couple of days, and so far, the plants are responding well. However, based on some recommendations I’ve received, I’m planning to introduce CalMag from BioBizz into my watering routine over the course of the next week. This will help ensure that the plants have enough calcium and magnesium, which are essential for strong cell structure and nutrient uptake, especially as we move further into the flowering phase. ------------------------------------------------------------------------- Personal Reflections and Lessons Learned As I progress through this grow, I’m realizing how much more there is to learn, especially when it comes to managing light exposure and training techniques. It’s been rewarding to see how the plants respond to LST and defoliation, but I’m still figuring out the perfect balance. Every small change seems to make a big difference, and I’m constantly amazed by how quickly these plants adapt. Being a beginner, this process has been both challenging and exciting, and I can’t wait to see how the flowering stage develops. This journey has been a humbling experience, reminding me that growing plants isn’t just about following steps, but also about observing and learning from the plants themselves. Every day brings new insights and challenges, and it’s incredibly rewarding to see these changes reflected in the health and growth of the plants. ------------------------------------------------------------------------- Looking Ahead In the next week, I’ll continue to monitor the pre-flowering phase closely. I expect the water and nutrient demands to increase even more as the plants transition into full flowering, so I’m preparing to increase the watering amount to 1.2 liters per plant soon. I’ll also be keeping an eye on the structure of the plants, especially the differences between the Gorilla Cookies and Amnesia Zkittlez. I may begin defoliating some of the lower leaves to give the plants more room to breathe and allow light to penetrate deeper into the canopy. There’s a lot of excitement ahead as the flowering phase approaches, and I’m eager to see how the plants respond to these new stages of growth. Stay tuned for more updates, and feel free to drop any advice or questions in the comments—this journey is all about learning together!
Likes
7
Share
@TJHeadley
Follow
I'm very pleased on the way she's growing. Seems like a healthy lady. I can't wait to see the nugs she produces
Likes
28
Share
Flowering day 3 since time change to 12 / 12 h Hey guys . My cutting heating broke 3-4 weeks ago, which was fixed immediately and everything went wonderfully. Now, 3 days ago, the central heating broke down in the entire room, so that at night I only have temperatures of around 13 degrees :-( . One or the other lady is slowly starting to see a phosphorus blockage, as this can no longer be absorbed at temperatures below 15 degrees, like many other nutrients :-( . A friend looked at the heating yesterday and came to the conclusion that a real company had to do it, which is by no means possible for a stranger to enter my room. I quickly ordered heating mats for all the boxes so that the ladies could at least get warm feet. That's all I have this winter full can do . Let's hope everything will be fine 🙏🏻. As soon as the heating mats are attached in the coming days, I will post them in the pictures. Now for the update. Despite the severe cold, the ladies are still doing well and have made good progres . The ladies only had to be watered once this week, each time with 1 l, because it absorbs the water very slowly because of the cold and I don't want to overwater it. I took every single plant in the pot to take a close look at their roots. These are snow white and look very healthy 🙏🏻. It was also the last time neem oil sprayed so that the last trips are finally gone. Otherwise everything was checked and a lot of planning was done, like I do with the heating mats. Since a friend had the same problem in one winter and the heating mats got 10 degrees plus on the pots, I am very confident that it will at least bring something for the last cold month 😃 🙏🏻. I've started flowering even if some are still a bit small, but otherwise they'll get too wide from training and end up taking up space :-) until then have fun and stay healthy 🙏🏻 👇🏼👇🏼👇🏼👇🏼👇🏼👇🏼👇🏼👇🏼👇🏼👇🏼👇🏼👇🏼 You can buy this Nutrients at : https://greenbuzzliquids.com/en/shop/ With the discount code: Made_in_Germany you get a discount of 15% on all products from an order value of 100 euros. 👇🏼👇🏼👇🏼👇🏼👇🏼👇🏼👇🏼👇🏼👇🏼👇🏼👇🏼👇🏼 Water 💧 💧💧 Osmosis water mixed with normal water (24 hours stale that the chlorine evaporates) to 0.2 EC. Add Cal / Mag to 0.4 Ec Ph with Organic Ph - to 5.8 - 6.4 MadeInGermany