Likes
Comments
Share
@MistaOC
Follow
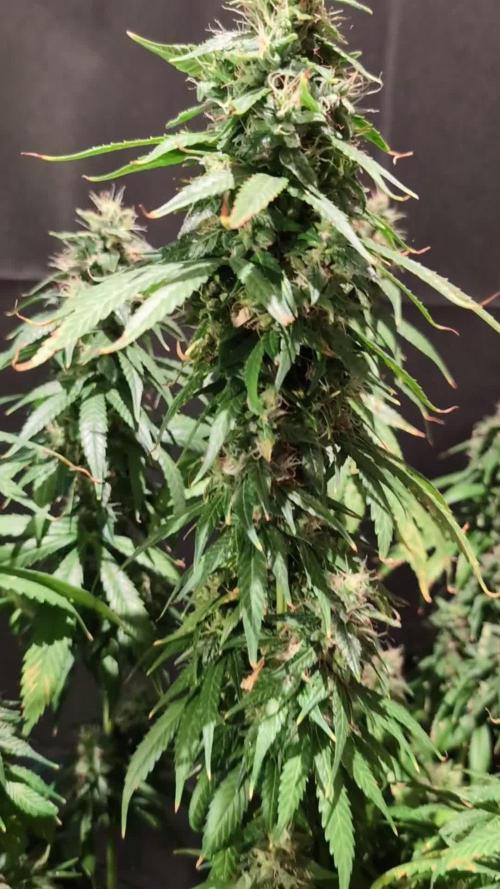
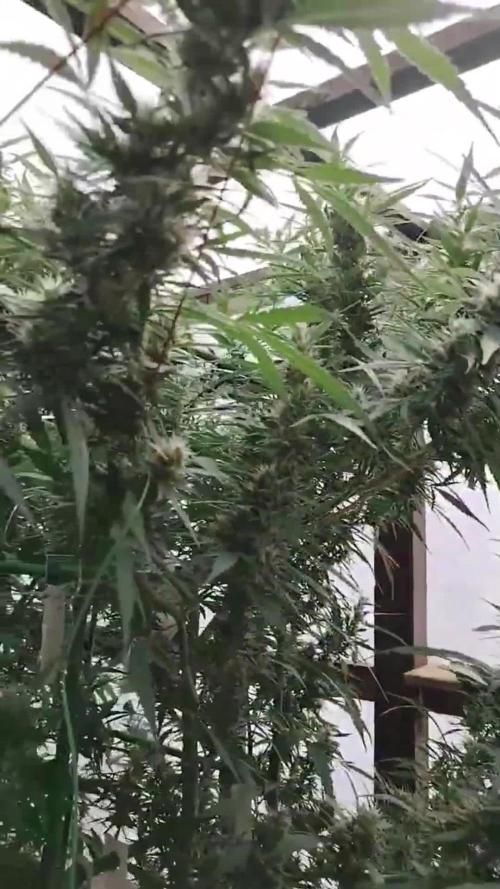
Final Week – Late Flower The final week was essentially a clean finish to the run. The buds swelled further, becoming dense and well structured. Despite the ongoing mildew issue, the situation remained controlled and never spiraled out of hand. Lowering nighttime humidity below 50 % clearly helped slow down further spread. The focus was on maintaining stable conditions and consistently removing affected leaves. Overall, the positives clearly outweigh the negatives: strong plants, solid bud development, and very relaxed handling thanks to Biotabs and the automatic irrigation system. Now it’s simply about finishing strong and harvesting.
Likes
38
Share
All the plants are building buds. Gave them a little beastie bloomz. I cut them off the maxigro today since the leaf tips are burning. Other than that everything is going smooth.
Likes
10
Share
Day 34 this lady is running, I can see flowers getting bigger every day, smell started really really soon this time so I already had to add the Carbon Filter. I’d like to close the cycle in less then 80 days. It would be great First flowering fertilisation Ph 6.2 Ppm 631 Day 37 - 9 of flower 🌸 Started blooming fertilisation, I’m keep Giving all-in one from aptus, i think I lm substitute with super pk and I stop all in one. Ph 6.2 Ppm 731 As I’m growing an solito in a 9.2 lt pots with all mix nutrients I’m slowing down with all in one and just giving base feedings, I ll decide later if I should give super-pk for the next weeks Day 40, tomorrow will be feeding days. Sge’s going really well, resin is already showing up on flowers that are several as and colorfull, smell is already there 🤤 Tomorrow update with feedings parameters. Day 41 feeding day Aptus regulator 0,15ml/1 lt Aptus all in one 1,25ml/1lt Aptus Topbooster 0,3 ml Aptus enzym + 0,5 ml Calmag 0,3 ml /L Ph 6,18 Ppm 756 Let’s see
Likes
73
Share
@Andres
Follow
patience .... she has a mint smell on her stem and smells of forest too ... she is taking shape with her buds ... she looks great outdoors ... she continues with her natural fertilizers .... every 10 to 15 days and these are their results ... I am struggling with some worms in the leaves of my plants but I am dedicated to finding one by one the worms ...
Likes
12
Share
# 💙 Project Blue Tent – Week 12 ## ? Blue Waffle F1 – Pheno A ### 🌸 More Photons, More Flowers, and a Beautifully Balanced Ecosystem Hello everyone, and welcome back to another chapter of Project Blue Tent! 💙🌱 And honestly, my friends... LOOK AT HER! 😂🌸 We're now moving further into flowering, and I'm genuinely happy with what I'm seeing inside this little ecosystem. Four plants. Two different cultivars. One tent. One shared environment. Our beloved Blue Waffle F1 girls are sharing the space with their Pickle Lemon Haze F1 sisters, and every plant is giving us something interesting to observe. But today, we're putting the spotlight on Blue Waffle F1 – Pheno A. Because even though she's sharing the same tent, the same reservoir, and the same environmental conditions as the other girls, she deserves her own report and her own moment to shine. And this week, we made a couple of small but meaningful adjustments. We lowered the temperatures and humidity slightly, increased the power of our overhead LEDs, and kept the entire nutrition recipe exactly where it was. No unnecessary changes. No complicated interventions. Just a little refinement of the environment and a lot of appreciation for what these beautiful cultivars are showing us. Let's get into it! 💙🌿 ### 🌸 WEEK 12 – A SMALL CHANGE THAT MAKES THIS WEEK INTERESTING Not every week needs to bring a major transformation. Sometimes, the most interesting updates are the ones where we make a few adjustments and observe how the plants respond. That's exactly where we are now. The major structural work has already been completed. The canopy has been organized, the second SCROG is in place, and the under-canopy lighting experiment is underway. Now we're concentrating on maintaining a comfortable environment while the flowers continue developing. This week, we made two principal adjustments: - We reduced the temperature and relative humidity slightly. - We increased the power of the overhead LEDs to the highest level we intend to use in this 1 × 1 metre tent. We're not running everything at 100%, and we're not necessarily trying to squeeze every possible watt out of the equipment. Instead, we're giving the girls a little more light than before while keeping an eye on how the whole ecosystem responds. And so far? They're looking beautiful! 😂💙 ### 💡 MORE PHOTONS – BUT WE'RE KEEPING OUR HEADS COOL Let's talk about the lighting, because this is one of the most interesting changes this week. We've increased the LED power to the maximum level we currently intend to use in this particular tent. Not necessarily the maximum the equipment can deliver, but the maximum we've decided to use for this setup. There's a difference! I honestly don't think we need to push the lights harder just for the sake of doing it. The tent is relatively compact, and we already have a beautiful, productive-looking canopy. But we also know that light is one of the important factors influencing plant development and flower production. So we're giving the girls a little more photon availability and observing how they respond. The goal isn't simply to turn up the lights and hope for the best. It's to find a sensible balance between light intensity, temperature, humidity, and the plants' overall condition. More light can be beneficial when the plants can use it effectively, but more isn't automatically better. The response depends on the intensity reaching the canopy, the environment, and how comfortably the plants are handling the conditions. That's why we're not jumping straight to 100%. We're increasing the available light while keeping the ecosystem balanced. And now we watch. Because the plants always get the final word. 🌿💡 ### 🌸 THE WHITE PISTILS ARE CHANGING, AND THE FLOWERS ARE FORMING This is where things are becoming particularly beautiful. The white pistils are developing and changing as the flowers continue to form. The flowering sites are becoming more defined, and the overall structure is starting to show us more clearly where this plant is heading. When I look at Blue Waffle F1 Pheno A, I see a plant that's moving through another stage of her flowering journey. We're no longer looking only at the framework we created during vegetation. We're watching the flowers develop within that framework. The branches, the canopy organization, the training, and the support system are all part of the picture, but the flowers are increasingly taking centre stage. And the close-up photographs make it even more enjoyable to follow. Every week gives us another opportunity to compare what we're seeing now with what we saw before. The pistils. The flower structure. The developing resin. The way the plant is progressing. It's a beautiful process to document. And she's giving us plenty of reasons to keep the camera ready! 📸💙 ### ❄️ THE FROST IS STILL ONE OF MY FAVOURITE THINGS TO OBSERVE I have to mention the frost again, because you know me... 😂❄️ I love getting close to the flowers and seeing all those little details that are easy to miss when you're simply looking at the whole plant. The developing flowers and sugar leaves give us so much to appreciate through the camera. And that's one of the things I love about keeping a detailed diary. You can see the plant from a distance and appreciate the structure. Then you get closer, take a photograph, and discover an entirely different level of detail. We're documenting the plant as she develops, not just taking pretty pictures. Although, let's be honest... the pretty pictures certainly help! 😂💙 ### 🌡️ A LITTLE LESS HEAT AND HUMIDITY Alongside the increase in LED power, we've also reduced the temperature and relative humidity slightly. These adjustments go together as part of the overall environmental management. When we change the lighting, we're also paying attention to the conditions around the canopy. More light can mean a different thermal load, so we want to make sure the room continues operating comfortably. We're not changing every setting at once or rebuilding the entire environment. We're refining the conditions while keeping the rest of the setup consistent. And that's an important distinction. We already have a system that we're happy with. We don't need to reinvent it every week. We simply need to keep observing, make sensible adjustments when appropriate, and avoid changing things without a reason. The ecosystem is working beautifully, and the goal is to keep it that way. 🌿💙 ### 🌱 SAME NUTRITION, SAME RESERVOIR, SAME PHILOSOPHY Now, here's something that hasn't changed this week. The nutrition. We're keeping the same recipe in the reservoir because everything is progressing well, and there's no reason to introduce unnecessary changes just because we've adjusted the lighting and environmental conditions. Our current recipe remains: - PLAGRON Hydro A — 2.2 ml/L - PLAGRON Hydro B — 2.2 ml/L - PLAGRON Power Buds — 1 ml/L - PLAGRON pH Plus — 0.03 ml/L - PLAGRON pH Minus — 0.03 ml/L The pH Plus and pH Minus quantities are the recorded recipe values; the actual amount required for adjustment can vary with the source water and the solution. We're not changing the nutrient recipe this week. The plants are developing, the irrigation system is working beautifully, and we're happy with the overall progress. Keeping the nutrition consistent also means we're not introducing another variable while observing the effect of the lighting and environmental adjustments. That's part of what makes this project interesting. We make a change where we believe it makes sense, maintain the other elements, and watch what happens. Simple, consistent, and documented. 💙 ### 💧 IRRIGATION AND DRAINAGE – THE QUIET HEROES One of the best things about this ecosystem is that the irrigation and drainage systems are doing their jobs without demanding constant attention. The girls are sharing the same reservoir, and the automatic irrigation system continues supporting the plants throughout the day. When these systems are working properly, it's easy to forget how important they are. But consistency matters. We want a setup that supports the plants while allowing us to concentrate on observing their development. And that's exactly what we're aiming for here. The equipment doesn't need to be the star of every update. Sometimes, the best compliment you can give a system is that everything is running as expected. No unnecessary drama. Just another part of the ecosystem working together. 💧🌿 ### 🕸️ THE STRUCTURE IS ESTABLISHED – NOW WE WATCH Remember how much work went into getting these girls to this point? The training. The topping. The SCROG. The defoliation. The management of the stretch. The adjustments to the available space. The additional support. The airflow improvements. There was a time when the main question was how we were going to manage the canopy. Now, the structure is established, and we're watching the plants develop within it. The second SCROG remains an important part of that support system, while the canopy organization helps us observe the flowering sites more clearly. We're not looking to make unnecessary structural changes this week. The plant has a framework, the support is in place, and the focus is on monitoring her progress. Sometimes, the best way to appreciate the work we've done is to stop interfering with it and see what the plant does next. And that's precisely what we're doing with Blue Waffle F1 Pheno A. ### 💡 TWO LUMIFLORA FIXTURES – LIGHT FROM BELOW Our under-canopy lighting experiment also remains part of the bigger picture. We're using two LumiFlora 150W full-spectrum fixtures underneath the canopy, arranged in an X-cross configuration. The main LEDs provide the primary overhead lighting, while the LumiFlora fixtures give us another way to explore supplemental lighting in the lower portions of the plants. It's an interesting addition to this setup, particularly because the plants have developed substantial vertical structure. But, as always, we're approaching this as an experiment. We aren't assuming that adding lights underneath will automatically produce a particular result. We're interested in observing how the lower flowering sites develop and how the complete lighting arrangement performs as the plants progress. The overhead power adjustment and the under-canopy lighting are both parts of the lighting environment, but they serve different roles. Now we continue monitoring the plants and documenting what we see. That's what this project is about: experimenting, observing, and learning as we go. 💡🌸 ### FOUR PLANTS, TWO CULTIVARS, ONE BEAUTIFUL ECOSYSTEM This is one of the things that makes Project Blue Tent so enjoyable for me. We have four plants sharing one tent, representing two different cultivars: Blue Waffle F1 and Pickle Lemon Haze F1. They're growing in the same room, sharing the reservoir, and experiencing the same general environmental conditions. And yet every plant deserves to be documented individually. I know I've mentioned how uniform these plants can look, but I still find it fascinating. Sometimes, looking across the canopy, the plants appear remarkably similar in their overall development. At the same time, we need to leave room for individual differences to show themselves as flowering progresses. That's why I'm keeping separate phenotype reports. A shared environment gives us a useful basis for comparison, but it doesn't mean every plant will necessarily respond identically. Each one has its own development to document. And today, that's Blue Waffle F1 Pheno A's moment. She's looking fantastic, and I'm genuinely happy with the way this ecosystem is progressing. ### 🌿 WHY THIS WEEK MATTERS – AND WHY IT DOESN'T NEED TO BE DRAMATIC I think this is an important point to make. This week matters because we've adjusted two environmental variables: temperature and relative humidity. We've also increased the overhead LED power to the highest level planned for this tent. Those are meaningful changes to observe. But this doesn't mean we need to make the week sound more dramatic than it is. We haven't changed the nutrition. We haven't introduced a completely new training technique. We haven't rebuilt the room. We're refining an already established setup. And sometimes, that's exactly what a good grow update should document. Not every week needs a breakthrough. Not every adjustment needs to produce an immediate, obvious difference. Some changes need time before we can properly evaluate them. So we're recording what we've changed, appreciating what we're seeing, and giving the plants time to respond. That's how we learn. And that's why I enjoy documenting the entire journey rather than only showing the big moments. The quiet weeks matter too. 💙 ### 🌸 CURRENT GROW CONDITIONS - Cultivar: Blue Waffle F1 - Phenotype: Pheno A - Flowering: Week 12 - Height:Approximately 145 cm - Light schedule: 12/12 - Day temperature: Reduced slightly; current value to be confirmed - Night temperature:Reduced slightly; current value to be confirmed - Relative humidity: Reduced slightly; current value to be confirmed - pH: 6.01 - EC: 2.24 mS/cm, last recorded value - Solution temperature: 25°C, last recorded value - Substrate temperature: 24°C, last recorded value - CO₂: Approximately 666 ppm, last recorded value - Pot size: 8 L - Watering volume: Approximately 1.6 L per plant per 24 hours - Main lighting: LED power increased to the maximum planned level for this tent - Under-canopy lighting: 2 × LumiFlora 150W full-spectrum fixtures - Nutrient program: PLAGRON Hydro - Nutrient recipe: Unchanged this week Note: The previous recorded readings are retained where no new measurement was provided. They should not be interpreted as newly measured values for this week.* ### 🔭 WHAT I'M WATCHING NEXT Now I'm particularly interested in seeing how the girls respond to the updated environment. How will Blue Waffle F1 Pheno A progress with the increased overhead light intensity? How will the slightly reduced temperature and humidity affect the overall balance of the room? How will the flowers continue developing? How will the lower flowering sites progress under the supplemental LumiFlora lighting? And will the similarities between our Blue Waffle F1 and Pickle Lemon Haze F1 plants continue as they move further through flowering? We don't need to answer all those questions today. We need to keep the environment consistent, observe the plants, and record what happens. That's the beauty of a project like this. We're not simply trying to reach the finish line. We're learning along the way. ### 💙 FINAL THOUGHTS – KEEP EVERYTHING SHINING Blue Waffle F1 Pheno A is looking beautiful, and I'm genuinely happy with the direction this ecosystem is taking. The flowers are forming. The white pistils are developing and changing. The structure is established. The nutrition remains consistent. The irrigation and drainage are working beautifully. We've slightly reduced the temperature and humidity, increased the overhead LED power, and kept the rest of the system stable. And that's the story of this week. A few deliberate adjustments. No unnecessary changes. And a beautiful plant continuing her flowering journey. I don't believe we need to push every setting to its absolute maximum to prove that we're doing something. We need to find a balance that makes sense for the space, the lighting, and the plants themselves. That's why we're not running the LEDs at 100%. We're giving the girls more light while keeping the whole environment in mind. And now we let the plants show us how they respond. I'm really, really happy with this room. Four plants. Two cultivars. One ecosystem. And so much still to discover. Blue Waffle F1 Pheno A deserves her own spotlight, and this week she's getting exactly that. Keep the environment balanced. Keep observing. Keep learning. And remember that sometimes the best decision is the one that allows you to appreciate what you've already built. 💙🌸🌿 ### 🙏 A HUGE THANK YOU A huge thank you to Zamnesia for making Project Blue Tent possible and giving us the opportunity to explore these beautiful Blue Waffle F1 and Pickle Lemon Haze F1 cultivars. Thank you to PLAGRON for the Hydro nutrient line supporting the girls throughout this journey. A massive thank you to Zamnesia for the Phytonaut LED lighting, curved scissors, and clip fans that have become important parts of this ecosystem. Thank you to Mars Hydro for the automatic irrigation and drainage system that continues helping us maintain consistency throughout the tent. And a special thank you to LumiFlora for the 150W full-spectrum under-canopy fixtures that we're using to explore supplemental lighting beneath the canopy. And of course, thank you to GrowDiaries for giving us the platform to document the journey, the experiments, the lessons, and the beautiful moments along the way. Most importantly, thank you to everyone following Project Blue Tent! 💙 We're continuing to learn, observe, and enjoy the process, one week at a time. Until next week... More flowers. More observations. More learning. And hopefully, even more reasons to stand in front of the tent, look at these beautiful girls, and smile. 😂💙🌸 Growers Love, happy growing, and take care everyone!🌱💙
Likes
2
Share
@Mrdub
Follow
This girl is almost done about another week left on you can see the fade coming in heavy colas not to big but they reek of fermented fruit super sticky super bushy I gonna have to buck a lot of leaves before I hang her gonna cut the nutes out hit her with the carboflush I check checking the trichomes not to many amber yet but I keep checking haven't checked my pH being in late flower and my water has been pretty consistent lately turn the lights down to 75 percent to keep from burning her the under canopy lighting is rocking u can see from the colas so here to another week of growing lfg
Likes
Comments
Share
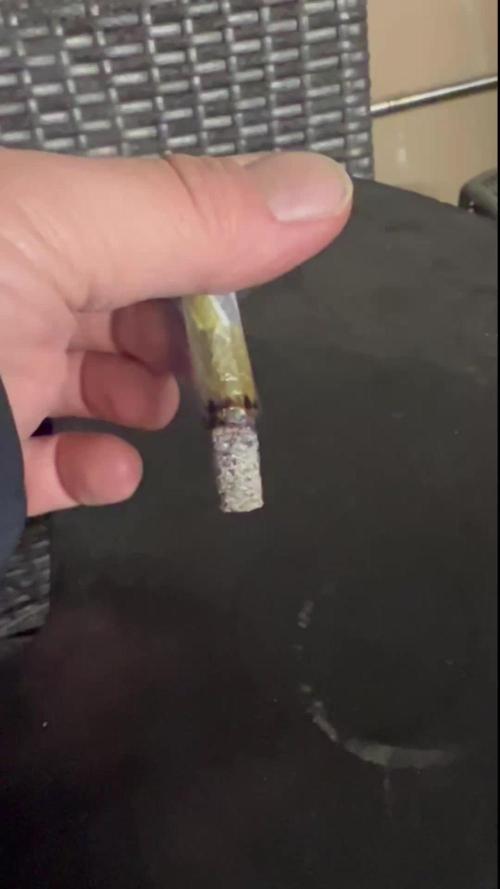
Die Stretchphase ist in vollem Gange! Erste Blütenansätze sind deutlich sichtbar. Alles läuft stabil – kein Mangel, keine Schädlinge. Netz wurde leicht nachjustiert, um das Blätterdach gleichmäßig zu halten.
Processing
Likes
38
Share
After Input from the Community I've Decided on NO Nutrients for a few Days to let Her Recover from Her Suspected Nitrogen Toxicity. If She Recovers like I Hope She'll get One more Feeding of Beastie Bloomz only before a Final Flush as I Suspect only a Few Weeks before She's ready to Harvest.
Likes
103
Share
Overall i am satisfied with this strain and I do plan on buying more seeds from Barney’s farm. Very strong and stable genetics I highly recommend this strain to experienced growers as well as newbies. Very easy to grow and a great smoke.0
Processing
Likes
10
Share
Still perplexed with the tip burn but I don't think its a disaster, 2 more weeks until harvest or 3? no rush.
Likes
38
Share
Utopia Haze is a rare heavily sativa dominant hybrid (90% sativa/10% indica) strain created through back crossing Brazilian Sativa strains. This tasty little bud took home 1st Place for Best Sativa in the 2008 High Times’ Cannabis Cup and for good reason – with its potent 18-22% average THC level and long lasting cerebral effects, Utopia Haze is one powerhouse smoke. The Utopia Haze high comes on soon after you finish your first toke, hitting you with a strong cerebral lift that infuses you with a sense of hazy relaxation. Type: Feminised/Photoperiod Cultivation: Indoor/Outdoor Flowering Time (days): 70-75 Indoor Yield (g): Up to 650 Feminised Outdoor Harvest Month: October Feminised Outdoor Harvest Month Week: 3rd-4th week Aroma: Citrus, Woody, Pungent, Mint Effect: Cerebral Lift, Hazy Relaxation, Sleepy Welcome Everyone to the Final Entry of my Utopia Haze Grow ! There is so much to discuss ! I have been extremely busy as of late trying to get this Harvest together, but i am happy to have it here for you now ! I Seriously under estimated the amount of time, help from others, and my own necessary skills to pull this off.. and i still kind of screwed it up lol ! But its worth noting i have never actually done this before and trying to document it during....was extremely hard. It is next to impossible to work an iPhone with rubber gloves on ! First I want to discuss everything step by step so before you jump straight into the comments on how the end product is so small in "quantity" Rest assured i am happy with its"quality"...and thats all that matters to me because Life is a journey not a destination! and i have learned so much from this grow that I couldn't be any happy even if i messed some things up :) But at the very least I hope you read through this entry in its entirety with an open mind and focus more on the process, rather than just the outcome! I ran out of Ice & i was only able to wash three times..(normally I've heard you should go sometimes 5-6 washes) Preparation is Key & things will be much better next round :) Photos 1-22 These are pretty self explanatory but for those of you just tuning in now.. this is what happens to a very happy plant when you don't have the necessary tools to monitor key components of growing cannabis.. Ph, as well as EC levels play a very key role in the outcome of your grow lol that being said I was just able to save this plant by purchasing both tools but that doesn't mean the plant didn't suffer because of the prior events.. This was a Huge reason behind me choosing to turn this harvest into what i would consider "Solventless Hash Rosin" from "Ice water extracted Bubble hash". Pictures 23 The idea here is the process of using "fresh Frozen Cannabis" this has been discussed many a time online on such sites as instagram and here on grow diaries as well.. I personally have Never tried the process so i decided to try it out and make a judgement for myself.. Video 24 The Cannabis has now been in the freezer for 72 hours making it very well frozen.. as you can tell i struggled getting it all into the 25u Screen Wash Bag. One thing of note i would do differently is i will de-stem my next batch as i also believe this played a part in the amount of plant matter that escaped through the sieves. Photo/Video's 25-28 The idea here is "ice water Seiving" & especially with the bags that I am using here that are only have screen material on the bottom portion of the bag it is very important to have spaces in-between the screens to allow the water to pass directly through the screens into the bottom bucket with the least amount of resistance.. because the hash is so extremely temperature dependant if it gets warm on the side of the bag.. it will stick there and not make it to the bottom to become use able product.. 29 You do not need to use as much Ice as i used here lol... the idea is to keep everything very cold..i certainly achieved that but at the sacrifice of using so much that i ended up grinding product and producing "contaminants" but in the end they are just plant matter that i would be smoking when i rolled up my joint either way so.. I'm not super disappointed.. But it should be noted that what you want to achieve here is a Layering effect where you have the wash bag between two small layers of ice while the "water current" washes the Trichomes away allowing them to be separated by the screens setup below :) Before Starting the machine you should allow some time (i.e.;10-12minutes pre soak to allow the product to become saturated) before the first cycle. By video 32 I have just ran out of ice lol.. Video 33-34 Here I have a tip for you.. to separate the screens that you sieve through.. cut 5 gallon buckets to stretch them across nice and tight.. it'll make scooping your Bubble that much easier ! i learned this from the many "Frenchy" videos I have watched :) Picture 35 Here in lays the problem for most people.. drying your hash without loosing vast amounts of "Terpenes" whilst also stay ever vigilant against mold ! Thanks to all those videos I've watched on youtube.. id like to think this was one of my most successful parts of this process.. Things to Note; Terpenes start to seriously evaporate at temperatures 68F or 20C you need to stay as cold as possible whilst bringing the Relative Humidity in the space down into the 40-30% to stay away from that nasty mold ! I used my cold storage room in the basement.. with a dehumidifier running to keep the space at 45% RH & staying at a constant 15c. All while spreading the hash as thin as possible across parchment paper, on top of the white screens with a fan moving air across both sides of the paper. Pictures 36-38 These are some macros i took in the middle of my drying session I fell in love with the colour. Yes i know the black spots are plant material but they will get caught when i bag the hash & squish the oil out. Thing to Note; at this stage it is important to ensure you 'micro plane" the hash down as fine as you can whilst staying weary of the temperature... any "chunks" will hold pockets of moisture.. that lead to potential problems..ie; mold ... Picture/Video 39-41 Successfully planed bubble hash ready to be bagged and Squished ! Picture 42 Ive decided to follow Pedro.. from Pedros Grow Room and double bag to be on the safe side so i don't have any blow outs. So thats One 25u bag inside one 160u bag ! :) Pictures 43 This is almost 3 grams of the bubble hash from above, already melting in the bag.. this is where i ran into trouble again lol things started getting to warm in the house and i was only able to get one of the three squish's i did on video :( things started getting sticky. Picture 44 This is basically just a photo of the equipment I'm using; 3x5 LowTemp Cage in the frame I built myself, with a 20Ton bottle jack. Something to note here is this is an older Lowtemp model with only a single heating zone which is which i have it closed here heating Both sides of the press :) As well as the importance of having adequate pressure on your plates.. my rig is very overkill for the size of hash bags..lol Video 45 Here is the lovely press video.. its didn't quite work the way i wanted either lol my directional folding wasn't quite tight enough for a big "drip" :) &the Press was set to 65°c Photo's 46-50 are pretty self explanatory :) I had a blow out.. but still managed to pull an 80% return from the hash once squished...& yes it tasted amazing :) Was it worth it in the end... that could be debated.. for some..i understand..its not your thing, but for those of us that are interested in making our own concentrates.. free from Solvents... I wouldn't make it any other way :) If even ONE of you reading this diary finds it helpful to reference for ANYTHING.....even if its "what not to do" ill consider it a success ! Thanks again for tagging along on this garden adventure.. its been one heck of a journey ! Much Love from B.C. Canada, Until Next time, Cariboo
Likes
3
Share
Día 22. Se empieza a notar el más el estiramiento. Recién empiezan a aparecer algunos pistilos blancos. Por lo visto si es bastante sativa, y va a demorar más que las 10 semanas que se pronostican. De todos modos eso me hace cambiar un poco la rutina de nutrientes y voy a ver si opto por hacer algún agregado. Anteriormente no pude ter knar el diarko debido a una mudanza, pero combinando esta receta con big bud obtuve muy buenos resultados. De todos modos para el engorde me regalaron un nutriente apto para hidroponia que se fabrica en México y tengo entendido que da buenos resultados. Así que vamos a probar la combinación y ver resultados. Ya usaré el overdrive más adelante.
Likes
4
Share
Poderia ter saído melhor mais foi muito boa a experiência !! Valeu✌️🏼👽600
Likes
7
Share
These were all pretty Uniform in height and weight even with #3 being replanted 2 weeks in, lots of Haze smell diesel and pungent on the front end and some sweet at the tail, I should of let these go a few more weeks I think it would be better. I have read and have heard that the flowering time the breeders recommend is based on a 1000w set up. and light plays an important roll in yield as far as flowering goes Its all about time. and maybe next time I will grow these to a more perfect pant. but this round as a grower I give myself a 6 out of 10 got some buds to some and turned the trim and larf to hash, not a huge return and the Trichomes were mainly in the 25 micron range with a minimal amount in the 76 micron bag. so My thinking is that these were all small and under developed trichomes, this leans into my theory that they could have gone another 3 or for weeks, Failure has been my greatest teacher and I really enjoy this hobby. Next grow will be an Organic Dry Amendment Auto Flower with new lights no more Blurple import lights. I got my 1st vaccine shot. hope you all are staying safe and lifted. BDH#1 13 oz wet 42gm buds 30gm larffy trim BDH#2 13 oz wet 26gm buds 42gm larffy trim BDH#3 13oz wet 20gm buds 42gm larffy trim TOTAL 39oz wet TOTAL 94 gm buds 97gm larffy buds
Likes
88
Share
My second growroom is built and the girls have moved in. Medical Mass is a new medical cannabis strain with a high CBD content and a low THC level that provides good medical properties without a strong psychoactive effect. This is a mostly indica plant that contains 40% sativa and 60% indica. Critical Mass and CBD rich strain were crossed to create this amazing valuable variety. The plant suits both for indoors and outdoors, for beginner and experienced growers. The strain grows up to 60 - 100 cm tall and produces good yields for such height of about 500 - 550 gr/m2. The plant demonstrates great results even in small spaces. The flowering time takes only 7-8 weeks and the harvest comes in late September. The smoke brings very strong, intense flavors with sweet notes of honey and skunk and an intense pleasant relaxation. Medical Mass is the great choice for each medical user due its small height, ease of growing, fast flowering and of course great medical potency. ---------------------------------------------------------------------------------------------------------------------------- 2017-10-20. Week 6 day 3. Late update. The girls are in there final 12 liters autopots and have moved into my newfixed second growroom. The girls is growing fine and have been Fimmed. Girl 1 is 41 cm Nr2 is 34 and Nr3 is 32 cm tall. Added videos and pics. Grow room Nr2 is 1.75 meters x 1,05 meters and its 1.92 meters high. Im using 1x 140 watt Apollo led 4 and 1x 370 watt Apollo led 10.
Likes
15
Share
The seed was free and i tried with no expectations. the plant maintained a deep green with great bud structure for lollipopping it made it easy to know what was able to be pruned or not quite easily. seemed to be very resistant to bugs. buds were dense but not as crystally as i might have expected, potentially i chopped a little too early.. *shrug* i will update when it has dried sufficiently
Likes
18
Share
this week was great, the V1 arrived through a lot of logistical nightmares. its the final test before mass production- i will post another dairy for it but please have a look at the pics above. ive created a stylish subtle, modern way to grow 4 plants. this will be great for all levels and will save big on energy and nutrition. you just have to prune, it can even draw water into itself. anbd its 4 plants!!! stick here and youll see it in action. ive decided to change the order in tents. now we have super strong Purple berry Kush with the returned and super strong sweet seeds Sweet cherry pie. so one tent is the strong, and the other tent is now perma auto flower, which serves for additional veg for girls who fall behind their grow peers. hope that makes sense. i think my net is pretty useless other than a visual to plan nodes. i guess the real support will come from placing more plastic rods around the colas and fastening them. hope Christmas was kind to everyone. this oncoming week will be the last week of veg i think for tent two and we flip to flower. thanks for looking.
Likes
24
Share
@nonick123
Follow
Día 37 (08/07) Ajustes de LST en todas las plantas! 🚀 Día 38 (09/07) Ajustes de LST en todas las plantas. Las ramas inferiores están creciendo como un cohete! 🚀😍 Riego con 250 ml H2O pH 6,5 Día 39 (10/07) Las plantas se muestran sedientas! Creo que el cepellón está lleno de raíces y piden el trasplante! El crecimiento no se ha visto afectado de momento Riego con 500 ml H20 pH 6,5 Día 40 (11/07) Paso a regar con 500 ml / día, ya que hace mucho calor (30 ºC) y efectivamente las plantas ya han copado la maceta de raíces OnionOG y KS1: Las ramas de nodo inferior se han quedado enanas tras el entrenamiento, de modo que las elimino y aplico canela en polvo en los cortes Riego con 500 ml H20 pH 6,5 Día 41 (12/07) Riego con 500 ml H20 pH 6,5 Clones! Mi experimento vuelve a demostrar que NO necesitas complejos productos de clonación ni sistemas para obtener clones! Hace 15 días puse 2 clones con el tallo sumergido en miel durante 5 minutos en una maceta de 400 ml con PRO-MIX HP BACILLUS + MYCORRHIZAE He mantenido la humedad alta con una cúpula de humedad casera hecha con una botella de agua PET de 5 litros cortada por la mitad y pulverizando a diario. Han estado los 15 días en mi terraza con luz indirecta, y temperaturas que rondan los 30 - 32ºC durante las horas centrales del día Hoy los he trasplantado a una maceta de 1 litro porque ya habían formado raíces y empezaban a formar nuevas hojas! 🐥🐥🚀🐥🐥 Día 42 (13/07) Riego con 500 ml H20 pH 6,5 Día 43 (14/07) Trasplante a maceta definitiva de 21 litros de ROOTPLUS Pot de GSKOREA GLOBAL! Estas macetas son una maravilla! Proceso de trasplante: Se prepara con 17,85 Litros (85%) de sustrato PRO-MIX HP BACILLUS+MYCORRHIZAE + 1,05 Litros de Humus de Lombriz (5%) + 2,01 Litros de Insect Frass (10%) + 210 gramos de Earth Vibes Super Soil (10 g/L substrato) Se llena la maceta de sustrato con las manos (limpias) y rompiendo los trozos más gruesos, para que el sustrato esté aireado y esponjoso, sin presionar Se coloca una maceta vacía de 6,5L para que quede la forma perfecta de la maceta donde están actualmente Se espolvorea la parte proporcional de la probeta de microorganismos sobre el agujero de trasplante Se saca la planta de su maceta actual (bonitas raíces 😍) y se coloca en la maceta final Se riega muy lentamente hasta percolación profunda con H2O EC 0,5 pH 6,5 Una vez asentada, complemento con un riego de 500 ml con 25 ml/L de Humus de Lombriz Liquido Se coloca mulch (acolchado) de paja para evitar traspiración excesiva y cuidar a los microorganismos del suelo A ver como reacciona al trasplante! Aplicación foliar Kelp hidrolizado de Lurpe Solutions a 0.25 ml/l Realizo ajustes de LST aprovechando el trasplante a la nueva maceta. De momento tienen una canopia muy bien formada! 💦Nutrients by Lurpe Solutions - www.lurpenaturalsolutions.com 🌱Substrate PRO-MIX HP BACILLUS + MYCORRHIZAE - www.pthorticulture.com/en/products/pro-mix-hp-biostimulant-plus-mycorrhizae
Likes
13
Share