


Likes
2
Share

@MrWeeedWorld
Follow
Woche 5 – Die Form nimmt Gestalt an 🍑🌿
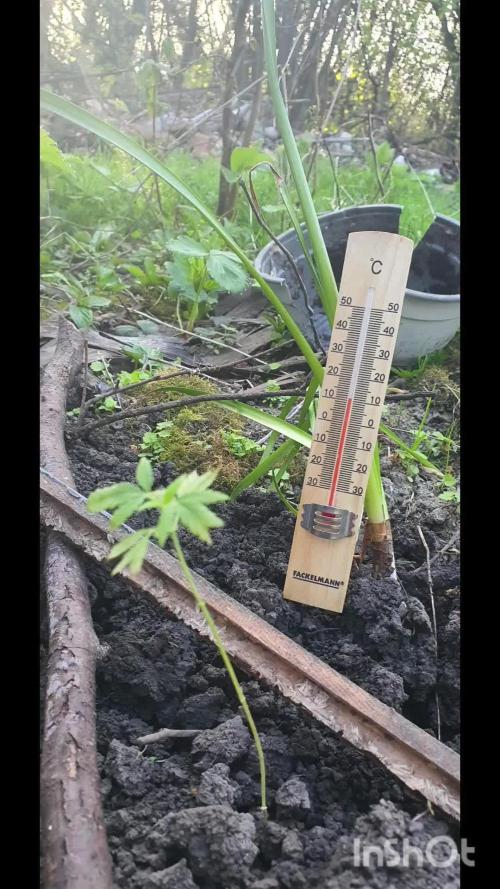
Nach einer aufregenden Woche und meinem Besuch auf der Mary Jane in Berlin geht es nun wieder zurück in den Garten. Die Apricot Automatic entwickelt sich weiterhin hervorragend und zeigt genau die Eigenschaften, die ich mir von einer starken Outdoor-Autoflower wünsche.
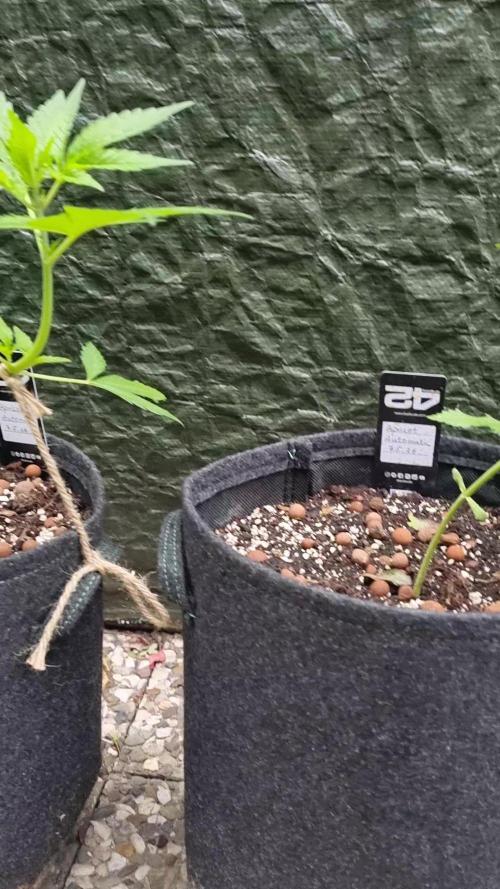
Das Low Stress Training zahlt sich mittlerweile deutlich aus. Die Seitentriebe wachsen kräftig nach oben und verwandeln die ursprünglich schlanke Pflanze langsam in eine breite, gleichmäßige Struktur. Das Kronendach wird von Tag zu Tag voller und die zukünftigen Budsites verteilen sich optimal über die gesamte Pflanze.
Besonders erfreulich ist die schnelle Erholung nach dem Training. Es gibt keinerlei Anzeichen von Stress und die Damen wachsen munter weiter. Die Blattfarbe ist gesund, das neue Wachstum wirkt kräftig und die Internodienabstände bleiben angenehm kompakt.
Mit jedem Tag wird deutlicher, welches Potenzial in diesen Apricot Autos steckt. Jetzt beginnt die spannende Phase, in der sich entscheidet, wie groß die Pflanzen vor dem Einsetzen der Vorblüte noch werden. Wenn sie dieses Tempo beibehalten, dürfen wir uns auf einige sehr interessante Outdoor-Ladys freuen.
Vielen Dank fürs Vorbeischauen und bis zum nächsten Update! 💚🍑
--------------------------------------------------------------------------------------------------------------------------------------------------------------------
Week 5 – The Structure is Coming Together 🍑🌿
After an exciting week and my visit to the Mary Jane Expo in Berlin, it's time to get back to the garden. The Apricot Automatic continues to impress and is showing exactly the characteristics I hope for in a strong outdoor autoflower.
The Low Stress Training is now paying off. Side branches are growing vigorously and transforming the plants from a simple main stem into a wide and balanced structure. The canopy is becoming fuller every day, allowing future bud sites to receive excellent light exposure.
What makes me especially happy is how quickly the plants recovered from the training. There are absolutely no signs of stress, and the ladies keep pushing forward with healthy growth. Leaf color remains vibrant, new growth is strong, and internodal spacing stays nicely compact.
With every passing day, the potential of these Apricot Autos becomes more obvious. Now we are entering the exciting stage where the plants will determine how much more growth they can achieve before fully transitioning into flowering. If they continue at this pace, they are going to become some very impressive outdoor ladies.
Thank you for following along and happy growing! 💚🍑🌱

Likes
12
Share


@Mikefromjax
Follow
Having some issues with get ppm levels down just switch them to 5 gallon buckets and ppm been reading 1800
To 2300 with no nutrients and Just use ocean forest with clay Pellets in the bottom

Likes
16
Share


Likes
81
Share


@UnorthadoxDude
Follow
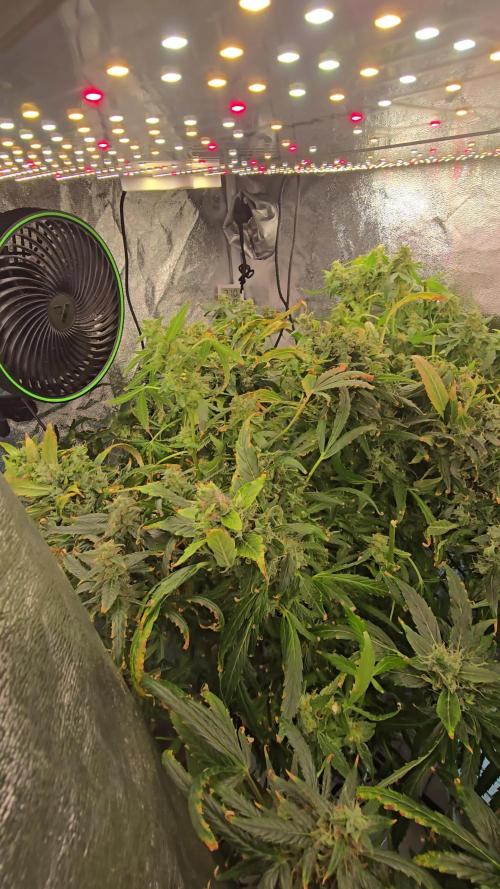
Hey! Welcome to week 8! Karen is mid way through her flowering stretch. Please check back to last week as I update daily so the week is now complete. I count about 20 colas now.
Day 51: Have reconfigured the tent, see video. Karen is now 36cm and still stretching. Karen has more light now. Smell is still there hits you when you open the tent. Fertigated 2l.
Day 52: Height: 39cm. Karen's scent is heavenly. I have reconfigured again and installed some upgrades. Better reflector. Much bigger carbon filter. Increased airflow. Better config. More efficient pot layout. Karen is lovely.
I am grateful to her and for her, so I wrote her a little poem, I hope she liked it.
"Karen! Oh Karen! The phoenix of flowers,
Three lowly weeks she struggled in vain,
Shadowed and starved for five hundred hours,
He slowly wept to witness her pain.
Karen! Oh Karen! I P-H'd your showers,
and in the fourth week you started to gain,
Hallowed and hard you survived as you cowered,
I thought you meek, I was wrong once again.
Karen! Oh Karen! Forgave me my howlers.
She set a pace, a pace she maintained,
Now shes a girl at the peak of her powers,
And so I'm a geek, with buds on the brain."
Day 53: Approx 48h into a simulated dry spell.
Alright I think it is time for Karen to get her first MAJOR defoliation. I will update shortly with photos and info. I will also be doing some gentle LST to separate the colas a bit.
Day 53.5: Defoliation and LST. Finally got chance to photograph that bunda. Enjoy!
Day 53.75: Bit of a fail. Messed up the timer and the lights ended up being off for about 3 or 4 hours. Because I was cooling the room (open window) to keep temperature in the tent down, without any light the temperatures absolutely plummeted as it is sub-zero outside. By the time I realised and turned the lights on, the temp in the main tent had dropped to 14 degrees celsius. Whoops! How is that for mistreating your girl? Defoliated about 80% of her leaves, 4 nodes, significant LST, then stuck her in the cold and dark for 1/6 of a day. Not to mention she is now almost 3 days into a "dry spell". There do not seem to be ill effects, and Karen has already begun to respond to the LST; all the colas that had been changed in angle are now upright again.
The dry spell I keep mentioning, there is a method behind my madness, I have spotted one or two small flies and I think they may be fungus gnats. I am starting to suspect that the 2nd seedling in the Purple OG Punch Auto grow was actually beheaded by fungus gnat larvae. So I am drying out the mediums as much as I dare. I am closely monitoring the plants, so far the only one I have had to break the drought for is Enigma; all the girls in big pots haven't even noticed it's dry yet. How far am I going to push it? Well I will judge it on a plant by plant basis, but quite honestly I am hoping to see physical signs of thirst before I breakdrought. Of all the plants the two I think will respond most strongly to this will be Karen and Bertha, because of where they are. Karen here is actually probably 4 weeks into flowering rather than two, so about now is a good time to give her a little hydration stress. I do not think I will push it past 5 days, as RH is 34%. By now all the plants will be compensating for the lack of moisture and the high temperatures and low humidity. They will be taking more and more moisture out of the coco, and as the coco dries further and further down, those plants that have space will start desperately growing roots to find moisture. Mark my words, 24 hours after I end this drought, every plant in the tent will throw out crazy growth.
Day 54: Ended drought and fertigated 6l, no run off, I will re-fertigate tomorrow. Karen is still stretching her height post LST is now 37cm. The two tallest colas seem to have stopped but the other colas are still stretching.
Day 55: Alright so it has been 5 hours since lights on, and Karen is looking in good shape, all her drooping leaves have perked back up and she has added quite a bit of foliar growth. The colas are all still rising, except perhaps the two tallest. This girl is absolutely loaded with pistils, I'm starting to see trichomes on the sugar leaves, but trich production hasn't started in earnest yet. She has a least 20 colas, and 6 of them are thicker/taller than the primary cola at her tip. Every one of her nodes has reinforced itself with a bulbous growth and these cola branches are swelling rapidly. I am increasingly of the opinion that, all being well, this girl is going to surprise us all with her yield. My first grow, which was just mucking about really, I got 60-70g of the two main plants, and they were just bare sticks with 2 colas. Although her height is less than theirs was, 2/3 of their height was bare stick... whereas every mm of her is befoliaged and living. So in terms of the height of the actual cola I think they were about comparable in usable space on a per cola basis. The main difference being that Karen has 20+ colas whereas they had 2 primary and 2 lower. I know that it is probably unrealistic to expect more than 70g from a single auto grown indoors. Nevertheless my gut tells me this baby could achieve at least 100g, perhaps as much as 150g. The next few weeks will determine that, but given where we were in week 3 I will be grateful for any yield of quality bud. I have dropped the lights down to 18/6 from 'tonight' onwards.
I really have no idea how long we have left for Karen. According the the "brochure" she flowers for 7-8 weeks, with a total crop time of 9 weeks. The problem is I don't know what a total crop time is? Does that mean from seed to finish? If so Karen is clearly not going to be anywhere near that timescale.I am going to go ahead an assume that, for my plant anyway, the first 4 weeks were veg weeks. I think it is fair to count week 5 and 6 as flowering because pistils were popping out very early in week 5 if not before. So that makes this week four of flowering. I am going to assume 8 weeks rather than 7, so I think we have another 4 full weeks give or take a week. On that basis I am expect harvest week to be around week 12 or so. I am not fixed on this though, I am determined not to harvest this girl early.
Day 55: Photos taken 00:00 9/3/23 Strong 24h of veg growth as predicted.
Day 56: Existing leaves continue to swell. Stretch appears to be slowing. I've taken so many media this week that I cannot scroll down far enough to select a recent thumbnail. Probably Karen's biggest week in terms of changes. She is looking like she is going to impress. Height 39cm.


Likes
16
Share


@Chubbs
Follow
420Fastbuds
FBT2310/Week 6
What up growmies. Weekly update on these beautiful ladies. This week we've had some temperature swings and wow did they not like getting down into the high 50's. They both bounced back but won't be letting it get that cold again if I can help. Flower sites are all over with pistols. No signs of any major issues so will keep the same routine. All in all Happy Growing


Likes
28
Share


@SultanOFweed
Follow
Due premature sono state tagliate a 48f giorni
Appiccicosissima puzza di limone

Likes
15
Share


@Messypies
Follow
13/07/2020 - growth looking good. Highered lights to try to get plant to stretch
14/07/2020 - plants green and seems to be responding well to nutrients.
15/07/2020 - all looking good


Processing
Likes
5
Share


@Chile_groweed
Follow
Cabe decir que lleva 30 días desde el cambio 12/12 .
21 días de floración
Se ha comenzado a formar la flor densa

Likes
17
Share


@ChitownCannaChica
Follow
Chopped her. Full harvest report once dried! Smells are a beautiful lemon candy! Cannot wait! Resin is there, terps are there, and easy to grow! Loved the sun! Only issue was caterpillars! ✌️🏻💚🌿💨

Likes
3
Share


@Krautis_IndoorFarm
Follow
Tag 77 | Blütetag 37: Die Frost-Explosion! ❄️🚀
7 Tage nach dem letzten Update hat sich das Blatt im 90x90 Zelt gewaltig gewendet im wahrsten Sinne des Wortes!
Das Video von heute zeigt. Der Stretch ist endgültig vorbei, jetzt regiert der Zucker.
Das Update vom Feld (Montag zu Montag):
• Zapplez 2.0 (The Centerpiece): Sie hat in der letzten Woche massiv an „Frost“ zugelegt. Die dunkle Färbung bildet jetzt den perfekten Hintergrund für die weiße Trichomschicht. Ein absoluter Blickfang in der Mitte des Zelts! 🍇❄️
• Z-Vally Power: Die Buds schwellen ordentlich an. Man sieht deutlich, dass die Lichtausbeute nach dem Entlauben vor einer Woche die unteren Etagen jetzt voll befeuert.
• OreoZ Milkshake: Hier ist der Name Programm. Die Harzbesetzung ist für BT 37 phänomenal. Die 30L Stofftöpfe leisten ganze Arbeit und versorgen die Damen optimal für den Endspurt. 🥛🍪
Präzision zahlt sich aus.
Seit einer Woche gießen wir wieder präzise mit pH 6,0. In dieser Phase (BW 6) ist das entscheidend, damit die Nährstoffaufnahme für die Terpenbildung nicht stagniert. Das Living Roots Pro in Kombination mit der Feinjustierung lässt die Pflanzen vitaler denn je aussehen keine Mängel, nur pure Energie.
Der „Forest-Floor“ Effekt
Die Luftzirkulation ist trotz der dicken Kolben perfekt. Die Entscheidung, letzten Dienstag radikal zu entlauben, war genau richtig, um die RLF im Griff zu behalten, während die Blüten jetzt ihre maximale Dichte erreichen.
Die Crew & Partner:
🌿 Genetik: @conscious__genetics & @positronicsseedsgermany
🤝 Support: @panova25.de & @living_roots_pro
📍 @cannacommunity.deutschland


Likes
5
Share


@GERGrowDesigns
Follow
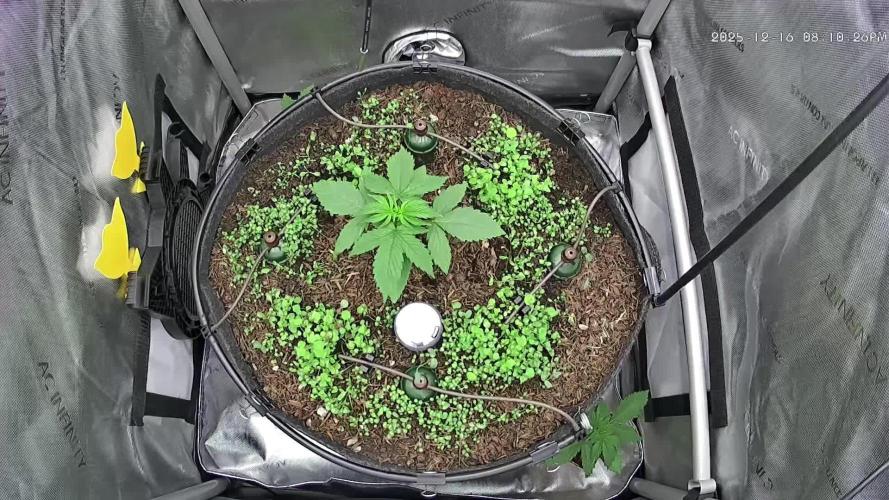
Welcome to Flower Week 3-4 of Divine Seeds Auto White Widow
I'm excited to share my grow journey with you all as part of the Divine Seeds Autoflowering Competition 2025. It's going to be an incredible ride, full of learning, growing, and connecting with fellow growers from all around the world!
For this competition, I’ve chosen the Feminized Automatic strain: Auto White Widow
Here’s what I’m working with:
• 🌱 Tent: 120x60x80
• 🧑🌾 Breeder Company: Divine Seeds
• 💧 Humidity Range: 50
• ⏳ Flowering Time: 58 Days
• Strain Info: 20%THC
• 🌡️ Temperature: 26
• 🍵 Pot Size: 0.5l
• Nutrient Brand: Narcos
• ⚡ Lights : 200W x 2
A huge thank you to Divine Seeds for allowing me to be a part of this amazing competition and Sponsoring the Strains. Big thanks for supporting the grower community worldwide! Your genetics and passion speak for themselves!
I would truly appreciate every bit of feedback, help, questions, or discussions – and of course, your likes and interactions mean the world to me as I try to stand out in this exciting competition!
Let’s grow together – and don’t forget to stop by again to see the latest updates!
Happy growing!
Stay lifted and stay curious!
Peace & Buds!

Likes
6
Share


@Trichoma
Follow
@ 1.2-1.4 kPa
Raspberry parfait smells strong, this instantly noticeable when opening the tent.
The BlueZushi smells good as well but only noticeable when rubbing on the sugar leaves.
Likes
2
Share


@ElBrujoTHC_Official
Follow
Terminamos nuestra quinta semana pasando a floración nuestras fotodependientes 🍀💫 empieza la magia.

Likes
21
Share


@northsweed
Follow
the biggest plant on the right is booming, the one in the middle as well and fingers crossed for that one on the left not to die 😃
–––––
for some reason the one on the left does not want to start maturing, maybe stressed her way too much 😞
–––––
today i checked trichomes for the first time and vast majority is still clear eventhough pistils are turning orange 😊


Likes
5
Share

@Alvareas
Follow
Der Grow:
Die Pflanze hat nachdem Umtopfen, erst einmal die Blätter, etwas hängen lassen.
Dieser Zustand, in dem es auch kein sichtbares Wachstum gab, hat 3 Tage gedauert.
Danach hatte sich die Pflanze vom Umtopfen erholt.
Die Blätter haben sich langsam aufgerichtet und eine matte Dunkelgrüne Farbe bekommen.
Am 4 Tag nachdem Umtopfen, wurden die untersten Triebe samt Blatt entfernt.
Am vorletzten Tag der Woche, wurde nach den vierten Nodien, getoppt und die untersten Triebe, samt Blätter, erneut entfernt.
So das am Ende 6 Hauptriebe übriggeblieben sind.
Diese werde ich vermutlich, noch einmal toppen, zu einem späteren Zeitpunkt und dann mit 12 Trieben in ein Scrog Netz gehen.
Das toppen hat die Pflanze gut verkraftet.
Einen Wachstums Stopp konnte ich nicht feststellen.
Das Cover Crop wuchert mittlerweile auch ganz ordentlich und muss regelmäßig zurückgeschnitten werden.
Die Luftfeuchtigkeit wurde zum Start der Woche weiter gesenkt und die LED auf 20% Leistung erhöht.
Die LED hängt 40cm entfernt von der Pflanze, sodass 350 PPFD bei der Pflanze, ankommen.
Ich lasse die Pflanze jetzt langsam zur LED wachsen, sodass sich die PPFD, langsam erhöhen.
Die Parameter in Woche 3:
Controller Einstellung Tag: Advanced AI Luftfeuchtigkeit 60% - 70%
Controller Einstellung Nacht: Advanced AI Luftfeuchtigkeit 55% - 65%
Durchschnittliche Tagestemperatur: 26,7 Grad
Durchschnittliche Nachttemperatur: 23,3 Grad
Durchschnittliche Luftfeuchtigkeit Tag: 65,2%
Durchschnittliche Luftfeuchtigkeit Tag: 60,4%
Durchschnittlicher VPD Tag: 1,0
Durchschnittlicher VPD Nacht: 1,0
LED Leistung: 20% = 95 Watt
Beleuchtungsdauer: 18 Stunden
Umluft: Stufe 1 oszillierend

Likes
4
Share


@Growyourownathome2x2
Follow
Thursday 16th march day 59 Harvested a couple days earlier then planned as my humidity was getting a bit high and worried about risking mold I decided to chop, have to get a good dehumidifier soon, everything looking lovely, nice and dense with very strong fruity potent smell definitely the best looking plants I have grown to date not the biggest buds but they look quality, chopped plants whole gonna do my best to keep the temp and rh% in the dry room as close 60/60 as I can to get a nice slow dry, 🍁😎 I only took the wet weight from 1 plant back left plant was 270g with large fan leaves removed

Likes
39
Share


@stephandjo
Follow
No special problem for this fourth week of flowering.
The stretching period of the Moby Dick was a little longer than that of the Shark or OG Kush.
That's why I preferred to wait for PK 13/14.
I began to defoliate a little, the buds begin to fill little by little.
The two apices are already well bloomed and begin to cover with trichomes.
The smell remains discreet.
