


Likes
Comments
Share

@NoProbation4Weed
Follow
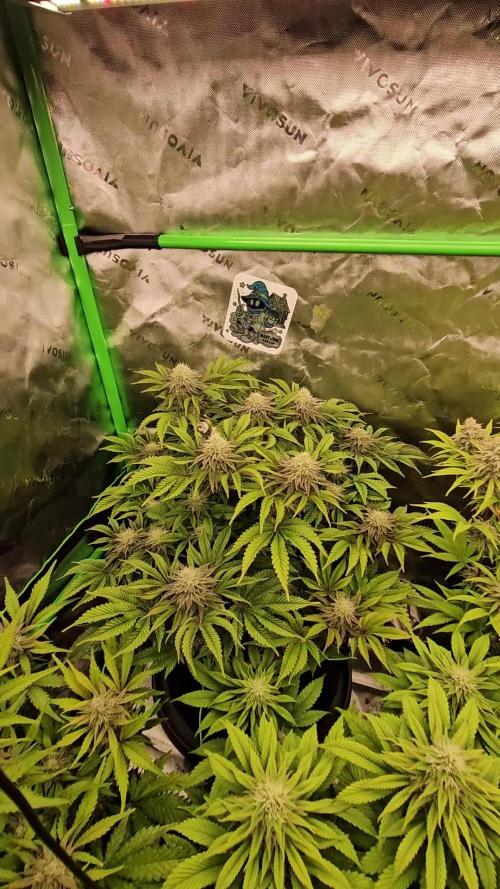
It is day 42 since switching the light cycle to 12/12.
Huge Plants! different phenos and growth paterns. one looks super frosty and the other more like oldshool weed from back in the days. both leaning towards lemon side.
The light is hitting the plants at around 800 PPFD

Processing
Likes
12
Share


@rhodes68
Follow
8/31 Week 7 and the damned tent is full .... such problems err?
25 sq ft of green, did not expect this really was hoping the extra space would allow more plants but this is full on 5
Plants doing well just trying to make em all fit
Nuets remain as is
Defoliation to try and get they to fit in the tent a bit easier, removed fan leaves.
9/1
Upped PK to 2ml/g the cotton balls have begun
9/2 In full stretch now hit 25"
9/4
Major defoliation cleaned bottoms middle tops get the buds in light and help them fit in the tent better.
Still hitting about 1 inch-ish a day nut seem to be slowing
No further training planned for Pea


Likes
16
Share


@ChewiesGrow420
Follow
Today on day 17 from date of birth Iam preparing a worm casting tea. In a cheese cloth bag ,Made up of 2 cups of worm castings 2 tablespoons of unsulfured molasses,2 tablespoons of mineralized phosphate (bat shit) ,2 tablespoons of soluble seaweed extract . 2 tablespoons of alfalfa meal 2 tablespoons of all purpose 4-4-4 all Gia green products other than. I also sprinkled in some great white premium mycorrhizae inton2 gallons of water. Tea will brew for 24 hours before applying.

Processing
Likes
5
Share


@Mr_nugs_lover_David
Follow
This lady is showing beautiful roots and a fast growth pace, let's see how she keeps developing every day guys, finally this beautiful lady was Transplanted on February 2nd after 17 days planted from seed because I thought it was the right time considering her size and also because the pot was completely conquered by those super healthy and strong roots, let's see how this lady keeps performing so far! 💛❤️💚👨🌾💯

Likes
2
Share

@PapaTerps
Follow
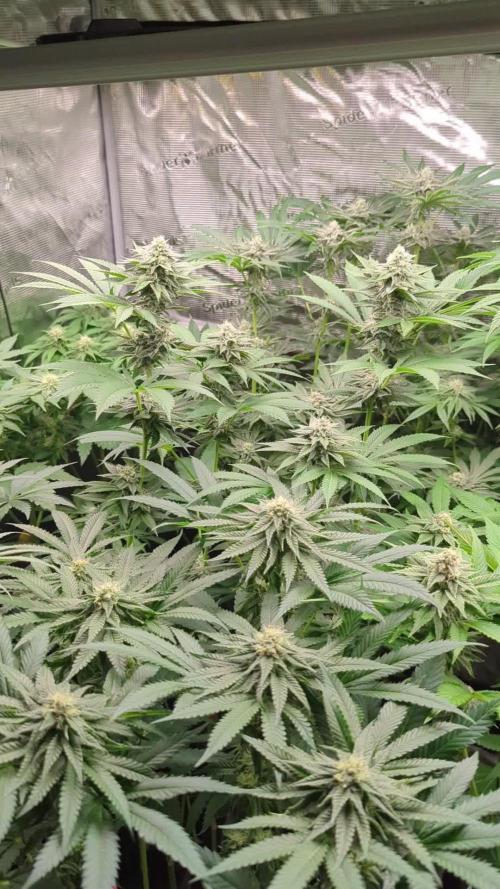
Shake Back - Compound Genetics
Week 4 Bloom
🌸 She has developed her flower into closely nit stacks of budsites and has started to bulk up! Her smell is coming through now, a fresh apple sharpness followed by a spicy herbal scent - very interesting. All the girls have been moved into the Spider Farmer 8x4, because the 5x5 and 4x2 were too difficult to manage 👍🏻
✂️ I cut away some sugar leaves from the main colas, to improve light penetration and airflow, but no other work was required today👌🏻
💧 Watered every three days with 3L of RO water - nutrients were mixed individually, in order and then finally pH'd to 6.3. I've increased her nutrients again to keep up with her flower production.
💡 PPFD: ~700
♒ VPD: 1.61kPa
🌱 Days from seed: 91
🌸 Days in Bloom: 30

Likes
7
Share

@Ribemarti
Follow
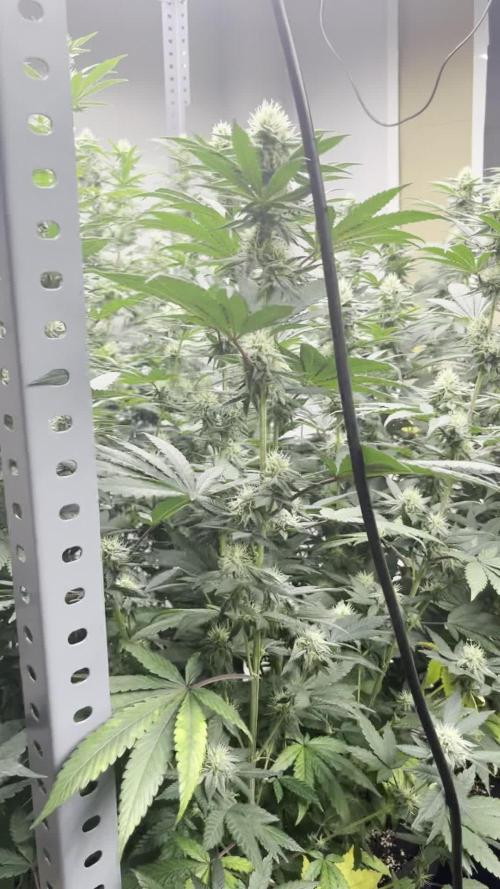
COMO DICHO FINALIZO CON BARNEYS AUNQUE AQUI ESTA ALGO MEJOR ESTA BANDEJA
LOS RIEGOS SON IGUALES QJE LA OTRA BANDEJA VEREMOS SI ESTAS NOS DAN UNA ALEGRIA
PERO SE VAN A RETRASAR MIUCHO MAS DE LO QUE ELLOS TIENEN EN SU WEB

Likes
4
Share


@UnicornSparklehorn
Follow
She finally triggered flowering this week. I was away for a few days, but fortunately I had the timelapse camera running and it caught the beginning of flowering.

Likes
2
Share


@CannaIGrow
Follow
I did not top this girl, yet. Her top lowers started catching up to the top so I didn’t want to stop her yet lol. But all in all she’s looking healthy.
Likes
15
Share


@SmokingTiki
Follow
This week was bright and warm. The fan leaves started to turn purple, I added a bit of Bio-Grow to help it last until the harvest. The trichomes are cloudy overall. Next week will be the harvest 😎
Likes
Comments
Share


@Ogchemst
Follow
Day 1 of flo, description in OG Kush Diary, I'm really curious about this bush. I think I will taste great from what people told me it'd been really good for making some wax also, I like how I managed that canacopy I know I can do better but it's my first time trying this actually... I'm kinda beating myself up because I wanted a bit longer branching but next time I think I will try doing this with all 4 of my plants just because I like how it looks
Day 3: sorry to see that beautiful bushy structure having to come off, I enjoyed looking at it but time to give those bigger buds some space and give the plant some energy to the top so I'm removing all unnecessary small little branching to increase the airflow etc.. I enjoy working on my plants.
Day 4: flo so I managed to get rid of most of the bush and alot more of the plant has opened up, I removed mostly smaller branches and let the bigger ones stay just to see how I can further improve this In future and what to look for.
I could watch all the videos I want but without a 1st hand experience it's always just a theory , there's always room for improvement every grow in my opinion.
8 Feburary Update: I flushed all 3 with some water and fed 10ml of each a and b + additives they responded very well soon on day 7 I'm planning to start giving them more bloom nutrients after flushing the medium just a little once more so I can really push it and make sure my ppm is high enough without too much salt buildup, for that I will be using cal mag water followed up by final dose of grow a + B with some big bud I'm trying to avoid that saltbuildup at all costs here as this is my first grow in 7 Years here in Germany 🇩🇪😁, btw the water quality here is so much better than in Ireland...
I gotta be careful with pests alot living on the bottom floor, thing is a nightmare...

Processing
Likes
39
Share


Likes
1
Share


@Green_Peace
Follow
Transplanted to 5 gallon pots half way through the week and heavily watered/fed for the next 2 days, then topped for the first time yesterday.
The 3rd clone didn't make the cut and is now on my windowsill.
Next couple of weeks will be about keeping the plants trained and the same height.
2 timelapses this week. Enjoy!

Likes
18
Share


@bono420
Follow
DAY 53
Had to take out of the room the Amnesia XXL hermaphrodite; cant take the risk of turning the rest into males too.
DAY 54
FUUUCKKK!! The wind dropped a piece of heavy wood onto the plants!!!
1 of the Moby Dick was totally broken. Some branches of the neighbour plants were affected too.
So that's 2 plants lost at the moment (the hermaphrodite and the broken one).
Day 56
Two days after the tragedy. Had to reorganize the room to prevent similar accidents in the future 🖤😢 Saved the most I could but definately this stressing event will influence the plant’s development.
Also, considering taking out the claw leaved plant, which has signs of hermaphroditism (FML again 😫).
Hope these 7 make it till the end.
PS: Also, there’s 1 Moby Dick which has no signs of flowering at day 56, cant figure out what’s happening with it. I’m starting to think that it’s an Regular Feminized seed instead of an autoflowering.

Likes
6
Share


@Broffel
Follow
The start of the week and no problems. I'm thinking to do 1 more transplanting when she have 6nodes and after she recover from that im going for mainline for cola's.
Day 26 and transplanting the Girls in to there final 35l pot.
Day 27 the girls looking very healthy and already have 6nodes, so I topped the girls by the 3node and removed all grow below the 3node( step 1 mainline)
Likes
23
Share


@MistaOC
Follow
*******************************************
**************
27.02 Day 32
**************
the fertilizer takes full effect. greenhouse feeding with 4g/liter makes the difference.
I'm excited to see what the interaction with plagron greensansation will be like.
*******************************************
**************
01.03. Day 34
**************
Lookings good so far. All 5 plants together receives 3L Water
// RO Water // TEMP 20C // PH 6,4 // CalMag 1,5 // 0,1ml Regulator //
*******************************************

Likes
32
Share


@Ciocanna
Follow
I've adjusted the PPM to 420💜.
I've excluded all the stimulants and left only Hesi Bloom.
I also add Hesi Zyme to each watering, but only half the recommended amount, which is 1 ml/l.

Likes
36
Share


@MrJoint
Follow
🌻 It already starts to smell very well.
✌️🎃Thank you for checking my cultivation.
Likes
2
Share


@SSKNFbyHAZE
Follow
Hi Growmies~!
What This Post is About
Today, I'll be recording how to cultivate soil microbes at home.
These microbes offer numerous benefits, and they are simple to make.
How I Came Up with This Technique
Since 2014, I’ve tried synthetic growing methods like DWC. While they gave quick results, I often ran into issues with consistency.
Nutrients would expire during breaks, meaning I had to keep buying new bottles.
I strongly felt I needed a change.
A couple of years ago, after taking a break, I started to research and switched to organic growing.
At first, it felt overwhelming with all the steps and prep work, but I saw real potential.
After experimenting with different methods, I came across Korean Natural Farming (KNF) and JADAM, introduced by Mr. Cho.
His simple, ultra low-cost techniques inspired me. They focus on letting nature do the work.
While growing,
I noticed that synthetic nutrient bottles were expensive, especially when trying to complete a full nutrient set.
Organic growing may require more attention and can be costly when investing in organic materials.
Preparing the soil in advance and top dressing with dry nutrients every other week - just these two methods were consuming space, time, and money.
Indoor farming is unnatural, while organic farming is a natural approach.
I had to bring these ideas together, but organic farming often seems geared toward large plots like farms.
Incorporating organic techniques into my indoor garden requires a lot of effort and careful calculations.
So this is one of my techniques for keeping my plants happy:
supporting their daily needs helps them snap out of deficiencies quickly, allowing them to grow consistently.
It took me a while to adapt this technique for indoor use.
I hope this helps, guys!
Supplies Needed
- Potatoes: Provide nutrients and food for the microbes.
- Sea Salt: Stimulates microbial activity and controls harmful organisms.
- Dechlorinated Water: Allows the microbes to grow and multiply.
- Compost, leaf mold, or worm castings: Contains natural microorganisms that are key for this process.
How to Make (1 gallon)
1 cooked potato (about 2 golf ball-sized)
1 pinch of sea salt
2 tablespoons compost or worm castings
1 gallon dechlorinated water
1. Mix Ingredients: In a clean container, fill it with the dechlorinated water, dissolve the sea salt, and add the compost along with the mashed potato.
2. Ferment: Optionally cover the container and let it sit at room temperature for 24-48 hours.
3. Strain (Optional): After fermentation, you can strain the solution if you prefer a clearer liquid.
Note: Watch the timelapse video to see how the microbes activate!
**WARNING**
Wear gloves if possible and/or avoid contact with open wounds
How to Use
IMPORTANT: Always dilute the solution before applying it to plants.
- Use when bubbles form a "pizza shape" on the surface.
- Dilute 5-10 ml per liter of water for bi-weekly feeding. (Test a small batch first to find the best rate for your setup.)
- Once the bubbles disappear, the microbes are likely inactive. You can either mix the rest with water as fertilizer or discard it.
Pros
Promotes Plant Growth
- Usually fixes deficiencies in as little as 6 to 72 hours.
- Improves nutrient absorption, and helps plants thrive.
Boosts Plant Immunity
- Works as IPM: Can be used as foliar sprays (no staining on leaves).
- Lowers the risk of powdery mildew and other diseases.
- Helps the soil ecosystem with beneficial organisms like predatory mites and springtails.
- Naturally reduces pest pressure (Less risk of fungus gnats and other pests).
Improves Soil Health & Supports Composting
- Quickly breaks down organic matter and nutrients.
- Makes growing organically in small containers, like 1-gallon pots, easy.
- Over time, soil becomes softer and richer, even in small pots.
Cost-Effective, Sustainable & Eco-Friendly
- No need for complex equipment like pH pens, air pumps, or other tools.
- Reduces the need for CalMag, N-P-K, or micronutrient supplements (just add a little bit of sea salt to every watering).
- No sugar sources needed in the soil.
- Works for all types of plants—houseplants, exotics, ornamentals, and crops.
Cons
- Limited shelf life; the solution will develop an unpleasant odor after a certain period.
1 Corinthians 10:26