


Likes
Comments
Share
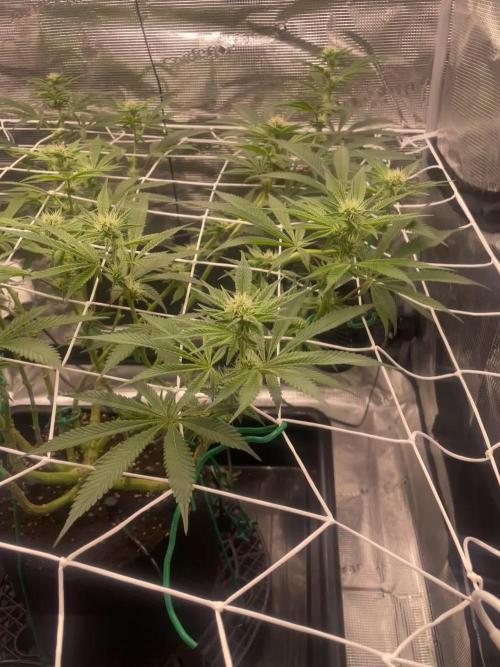

@BIG-JAY-AL
Follow
DAY 1
Water 5x300 3x200
Visual:
Last week, it just kept increasing hunger Daily.
Did not want to bump to hard so it took around 3-4 days to hit true EC uptake.
It is coming together nicely.
Comment:
Just keep having the Feeling of it could have been much further by now. It is, what it is.
I believe this stems from bad timing in relation to training and defoliation.
TIME TO BULK AND GET THEM GAINS ICE! 💚🌱

Likes
16
Share


@Aircoholic
Follow
That's it, she's done. The buds didn't really fatten up towards the end, but the trichomes show enough amber heads to call it a grow. There's a lot of possible reasons for that, so I guess for the next grow I'll have to experiment a little to find out, what caused it.

Likes
15
Share


@MorangoTango
Follow
O calor diminuiu um pouco, mas nessa última semana as plantas perderam bastante cheiro devido a temperatura.


Likes
2
Share


@Takeaims
Follow
I cant beilve how big hybrids and xxl auto grow these are the best results I've ever had i won't be going back to autos again sweet seeds have a really good range of f1 hybrids and autos I haven't had a problem with any of there seeds so easy to grow and loads of fun can't wait to start more


Likes
67
Share


@Only4passion
Follow
Crazy smells i already smoke 💨 this strains so I know what to expect from those buds and they are getting bigger👌😋

Likes
13
Share


@SzkolaZiola
Follow
After a month they are doing quite good. Should be bigger by this time but well... there were problems on the way.
It's good now ;)
Middle one - Grandpa's Cookies is smallest and least branchy - but it was germinated almost 2 weeks after the rest so it's normal.
Strawberry Cough is still weird and sicklish - but I hope it'll bounce back in the new soil.
All of them were topped last week and the tallest - Strawberry Cough got some LST clips installed to make her more "ghrounded" ;)


Likes
Comments
Share


@ShiokaraiGenetics
Follow
Day one of flower for the London Pound Cake and Purple Shah. I moved the Blueberry Muffin into another veg tent for a week or two. They’re early finishers so when I move them back everything should harvest around a similar timeline. Fed them all with an Organic Alf Alfa seed sprout fermentation. The triacantanol in the Alf Alfa makes these things go crazy if you don’t overdo it. Add some coconut water and aloe and youve got yourself organic plant steroids. The growth rate will cause you to have an increased need for ca mg and nutrients which in organics may not be readily available. Top dress or feed ahead of the curve.

Likes
14
Share


@Stork
Follow
Day 15
PH 6.0
EC 0.8
PPM 400
DLI 20h 10.8
PPFD 151
Water 23
Day 16
Fill up the pot with water and nuts
PH 5.9
EC 1.5
PPM 730
DLI 20h
PPFD 151
Water 22
Day 17
Add Ph down
PH 6.7/5.8
EC 1.6
PPM 800/770
DLI 20h 20.2
PPFD 280
Water 22
Day 18 Thu
Add Ph down
PH 6.1/5.8
EC 1.6
PPM 810/820
DLI 20h 20.2
PPFD 280
Water 23c
Day 19 Fri
PH 6.0
EC 1.7
PPM 820
DLI 20h 20.2
PPFD 280
Water 21c
Day 20 Sat
Hmm I think light is to strong but I'm not sure 🤔
PH 5.9
EC 1.7
PPM 830
DLI 20h 20.2
PPFD 280
Water 21c
Day 21 Sun
PH 5.9
EC 1.7
PPM 840
DLI 20h 20.2
PPFD 280
Water 21c

Likes
35
Share


@Sparkychris1980
Follow
Ok shes really moving along now.
The trichomes are milky white, and maybe 15 % amber to 10% . Shes also still growing.
Question, if I let her grow , will potency go down or something else? If my harvest window is open , dont I have basically two weeks to harvest? My question is if I go over or past harvest window will my tree get less potent ?

Likes
34
Share


@gottagrowsometime
Follow
Welcome to my Ganja Farmer contest grow. Drop a like if you want me to drop by your grows. Either way thanks for dropping by
She's doing really well. Would like for her to have bigger buds. Should of started flowering her under my P1000.
She has a lovely structure and some nice colors showing up on the buds which seem to be getting nice and dense
20/6/22 she's doing really well. Growing nice and strong. This time I think I'm going to have to do bud washing as the hair is just beyond a joke now. I'm going to do a deep tent clean this week. Just waiting on some stuff and I'm going to get my tents in order.
Plant is at to getting struck down with what I'm nearly sure is iron defs. Found 1 to 2 leafs starting out yellow with green vains.
Let the soil dry out after a few watering and gave them a boost of Iron (fe). (Have put up a video and focused partly on showing a light iron def. This leaf showed up like this 4 days ago. Took me a day to dry out the soil so it was a little harder to notice) but if I hadn't of fixed you'd of seen what looked like a N def (a yellow leaf with green vains) hope this video helps to help u. Feel free to DM me if you need me to go into any fixes
24/6 Have installed my new AC intake unit, it's more of an AC unit the way I have it set up. I have it outside the tent. And have a negative pressure environment. So, if I can drop my outside temp then in turn the inside temp will drop. There's no point in having it set up inside with the lights off as the RH will go sky high with no exhaust set up as that would defeat the purpose of having AC in an unsealed tent setup. Be good though when I want to grow with co2 this beast will have no issues keeping the temp in check. It's doing my whole top floor. Yeah, it's struggling. Have it set at 20% but it won't drop to 20% until you reach the temp you have it set at. It was 31.5 brought it down to 27.5 in 15mins and that's a top floor in a 3 bed big bedroom house. Id say it would work quicker with the door closed but my RH will only go high and I'd have to run my Dehumidifier and that well, raise the temp. Going to see what happens by dropping the temp to 24c when the air around the pre attached probe goes down to 24 it will go to the % you have it set at. But until then, (you reach the temp) it runs at full steam. It has brought the temperature down 2.8-3c in 15mins.
Update. My AC unit intake is nothing but a big ass temp controlled intake, not control temperature. It does help draw up cold air from an extended 10m ducting so I can get 18c air if I want. Just gotta run big ass ducting threw my house. Just until I can punch a hole up into my attic. It runs 16c up there. But I'll need a filter 1st and then I can drop temps rapidly. Looked into an AC unit. They are affordable. A 7000 Btu unit would do my grow room. Runs at 800watts an hour but you have to hook it up to a window. My air outside at night is that temp so I'd be better just running poxy ducting from my attic using this powerful 110watt intake.
It'll be great for air flow with co2 growing. I'll hook it up from the bottom to the top and run the ducting either side and let the unit sit on top of the tent. It's so powerful won't need any fans. Just co2 and high ppfd which I have now.
Thanks for reading this week.
gottagrowsometime
Likes
3
Share

@PhinolaGreen
Follow
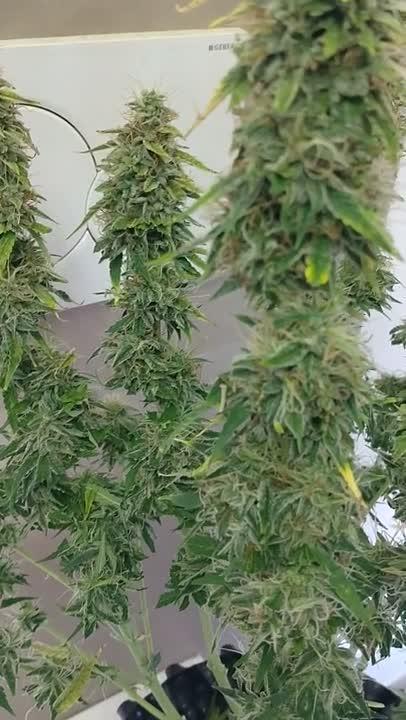
Die Reise ist zuende. Es war spannend sie wachsen zu sehen. Leider hatte ich irgendwann Probleme mit dem Dünger bei ihr und sie litt sehr darunter. Aber sie hat sich tapfer durchgebissen und hat mir am Ende deutlich mehr gebracht, als ich gehofft hatte.
Green Gelato Auto von RQS gehört wie Cookies Gelato und Fat Banana Auto zu meinem ersten Tagebuch. Leider wird das Tagebuch nicht angezeigt, daher habe ich jede Pflanze jetzt nomma einzelnt hochgeladen, damit ihr auch sehen könnt, wie mein Start auf Growdiaries war.
Das Tagebuch hatte damals vor 2 Jahren ganze 4 Likes abgestaubt... 🙄🤷🏻♂️😁

Likes
43
Share


@TheBulldozerSicily
Follow
Venerdì 22/03/2024
Inizio controllo ec 3999+ ph 4.9
Cambiamo acqua
Aggiungiamo 75 litri acqua osmotica
Ottenendo ec 530 ph 7.8
Aggiungiani Dosaggio per 80 lt
64 grow 128 micro 192 bloom
Ottenendo ec 1550 ph 6.5
80 cal mag 80 sensizym 80 rhino skin 80 bud candy 80g mega bud
Ottenendo ec 2466 ph 6
Likes
2
Share


@homegrow_pro
Follow
Not much happened this week. The plant needs to establish a proper root system to gain some strength. I used a sprayer to water her. Did not use use in the water. The Kanamu Pacha soil has all the seedling could need for now.


Likes
3
Share

@BunnyBud
Follow
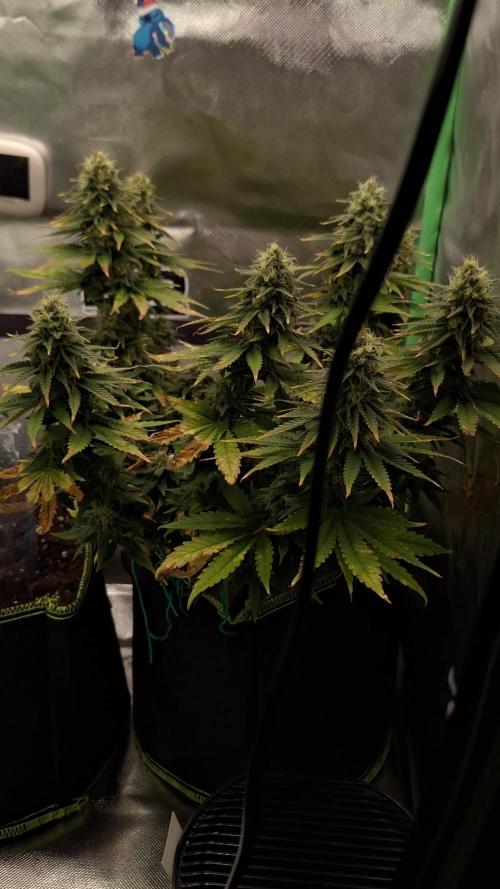
Despite being a dwarf, despite all the shortcomings and damage it has suffered, I cannot complain about the buds it has produced. I am satisfied with my little bonsai. ❤️
Likes
8
Share


@Kirsten
Follow
☆♡ Purple Punch: I'm just watering with flower nutes, when dry.
I installed a small monkey fan to keep the air moving at the back of the tent, where they are.
Waiting on the harvest, but may still be a little while yet. I DID NOT TOP DRESS THESE! ☆♡
16.2.25:
I decided to check out the lower canopies of all plants to see if I need to get rid of any foliage.
I did get rid of a few small branches and leaves.
However, whilst I was doing this, I saw more garden pegs from my LST remaining.
There were about 6 or more in Pink Mist alone. Additionally, on Watermelon, there were some left in, too.
I'm so annoyed to see that because the plants are really stretching, and I could've potentially disrupted this by leaving the pegs in for all this time without realising it.
🤞 that I haven't compromised things too much. We'll see.
I watered today with 2ltrs of dechlorinated water PH'd to 6.3 containing the following nutrients;
♡ .8g Green Leaf Nutrients PK booster
♡ .5g Ecothrive Biosys
I ordered quite a few things for the garden. I got Greenleaf Nutrients Sea K(elp) and Mega Crop Parts A+B. To go with their PK Booster I got last month. I'm excited to try it all together. Next run, maybe just using these. We'll see how it goes.
18.2.25:
The plants are going crazy for water! Everything is getting used right up so fast!
Today, I decided to add some more Black Strap Molasses to add some carbs and other micronutrients. I'll add the jar with the label in the photos section above.
I watered a very small amount to each plant.
What I put in:
♡ Black strap molasses 150g
♡ 2g Sea K(elp) Greenleaf nutrients.
I dissolved everything in 4ltrs of dechlorinated water PH'd to 6.4.
19.2.25:
I received the majority of the garden purchases that I made. I'm still waiting for the Ecothrive Life Cycle. I wanted to top dress, but it's been delayed unfortunately.
I am using my Greenleaf nutrients products which I bought on Amazon. I got the Mega Crop 2 part system Part A and Part B. I have the Sea K(elp), and the bud explosion PK booster.
I really wanted to get some of their sweet candy asking read many positive reviews. Unfortunately, for me, this is unavailable to buy currently. So that's a little disappointing.
I needed to do a good watering so when my nutes were delivered today, I got excited 🤗
I watered 2ltrs of dechlorinated water per plant, PH'd to 6.4, containing the following nutrients:
♡ 1g Mega Crop Part A
♡ 1g Mega Crop Part B
♡ .5g Sea K(elp).
The plants drank this up within a few hours.
I'm going to try and hold off on watering in hopes that my Ecothrive Life Cycle will arrive so I can top dress and water it in then.
20.2.25:
My Ecothrive Life Cycle arrived yesterday, and the plants are ready for their top dress and a good watering in.
I have some Biobizz Light Mix, Canna Coco,and perlite. I'm going to use this as a base to mix my amendments in.
I'm going to fill my 5 gallon bucket with about 4.5 gallons of my top dress mix. I will distribute this across 6, 4-5 gallon pots. Then I will water in well with Greenleaf nutrients Mega Crop Parts A+B and Sea K(elp).
I've made a crude attempt to video mixing my top dress. Don't listen to the audio. lol, my YouTube didn't stop playing whilst I recorded this 😂
So anyway, I added the following amendments to the above base mix of 4.5 gallons;
♡ 3 TBSP Ecothrive Life Cycle
♡ 3 TBSP Vitalink Bat Guano
♡ 3 TBSP Ecothrive Charge
♡ 1 TBSP RHS Mycorrhizal Fungi granules
♡ 6 TBSP Ground Cinnamon.
Likes
9
Share


@BeanCrop420
Follow
This girl is coming along really nicely I'm really pleased with how she had turned out for my first ever grow. I have noticed this week she is starting to get a lot more of purple colour to her stem and branches she looks amazing. Her buds are are looking really frosty and are nicely dense I can't wait to try them!
This week I have started the full flush by doing a full reservoir change to just water at ph 6.2 - 6.5 and will continue to add just water untill harvest.
Happy growing 🌱

Likes
52
Share


@WhiteEdge
Follow
26.03.2024
Continue into week 4
Update firmware on TrolMaster Tent-X (3.6)
Replace all filters, remove and clean drain buckets and tubing.
Mix new batch with 56ml AN connoisseur AB + 4.5g Big Bud Powder + 7.5ml Silica - total 30l @ 1.34EC. NPK Ratio is 1-2-3 , Cal/Mg ratio is 4-1.5
Target EC for this week is 1.2 start and end week with 1.3. Checking plants will determine timing of strength
Donne one pass off long misting (3min) with diluted solution @ 0.84@C
Finally have time for managing canopy, pull down taller branches and position all tops to fit under screen without touching. Try to spread them evenly across the net, top per square of net
Defoliating all girls, remove all fan leaves and prune lots of smaller branches from middle. Lot of foliage is removed!
After stripping humidity drop significantly (41%) , need to install humidifier again to keep RH @ 50-52%
Set dehumidifier thermostat to work @ 50% RH. Reduced light intensity for this day, let girls recover from stress
PAR map 850max/650min PPFD, VPD -1.2-1.3, DRH 50-54%, NRH 45-49%, NT-20-21c, DT-24/25.5c, Leaf temperature 22-23c, Light distance 45-55cm, CO2 700+ppm
HLG Scorpion Diablo @ 65-75% - 45-55cm distance
60s ON time 20min OFF time @ Day Time
60s Off time 30min OFF time @ Night Time
NT-Nutrient Tank - PH -5.90-, EC -1.32, Temp-20-21
27-28.03.2024
All girl looking great after defoliation,)
Clean benches and floor in box
Replace all filters
Set dehumidifier thermostat to work @ 47% during night times, 50% @ day. Humidifier is also connected and set @ 49% Day and 45% @ night, if needed
Inkbird humidity controller stop executing's automation for day/night settings. Start manually to change day/night values for now
Next several days, until weekend, temperatures outside will be high , 29c max. Hope it will not raise temperature in box to much.
Light is set on TrolMaster TCS-1 controller to dimmed at 28c
AC Infinity fans are set to AUTO mode with height temp set at 26c and high RH set at 54%
Top up tank with 25ml AN connoisseur AB + 4.5g Big Bud Powder + 7.5ml Silica - total 75l @ 1.34EC
PAR map 980max/650min PPFD, VPD -1.2-1.3, DRH 50-52%, NRH 45-48%, NT-21-22c, DT-24/25.5c, Leaf temperature 22-23c, Light distance 45-55cm, CO2 700+ppm
HLG Scorpion Diablo @ 80% - 45-55cm distance
60s ON time 20min OFF time @ Day Time
60s Off time 30min OFF time @ Night Time
NT-Nutrient Tank - PH -5.90-, EC -1.32, Temp-21-22
29-30.03.2024
Refilled the tanks with 20l of fresh mixture. 25ml AN connoisseur A+B + 3g Big Bud Powder + 7.5ml Silica - total 20l @ 1.21EC
Refilling is done in two passes, one time before light up, and second time early in morning, two houres before night time.
This give additional nutrient cooling without running water chillier. Refill soulution is @ 18c
Checking EC and PH 2-3 times a day. The electroconductivity values are around 1.24EC.
I maintain the strength until it drops or rises. For now, I’ve caught the perfect strength, the liquid is almost static with very small oscillations in electroconductivity and PH.
Replaced all filters in the system, replaced on washing… Every other day is enough, during daily cleaning there is no dirt on the filters.
The girls are handling the environment well, leaves are raised as they should be, they seem like very happy plants.
Formation and enlargement of flowers can be noticed with the naked eye.
The wave of warm weather continues all this week. Expected temperatures for the next seven days range from 25-29c. Need to pay attention to that
Raise light 10cm, top of canopy now is around 50-55cm
PAR map 980max/650min PPFD, VPD -1.2-1.3, DRH 50-52%, NRH 45-48%, NT-21-22c, DT-24/25.5c, Leaf temperature 22-23c, Light distance 45-55cm, CO2 700+ppm
HLG Scorpion Diablo @ 80% - 50-55cm distance
60s ON time 20min OFF time @ Day Time
60s Off time 30min OFF time @ Night Time
NT-Nutrient Tank - PH -5.95-, EC -1.24, Temp-21-22
31.03.2024
Girls totally recovered from defoliation. Almost all gig leaves grow again on all girls.
Tropicana Cookies is joy to grow , its pleasure to watch this girls haw fast and beautiful it is!
Tropical condition continue. Temperatures going from 26-29c, night temperatures still colder and stay around 16c
Outside temperatures affected water temp in nutrient tank, will se if i need for a water chiller or i will cool with adding cooler nutrient solution.
Lower wattage on light , set Diablo @ 75%
Replaced all filters in the system, replaced on washing…
Refilled the tanks with 15l of fresh mixture. 25ml AN connoisseur A+B + 3g Big Bud Powder + 7.5ml Silica - total 15l @ 1.21EC
PAR map 1180max/680min PPFD, VPD -1.2-1.3, DRH 48-52%, NRH 42-48%, NT-22c, DT-25/25.5c, Leaf temperature 22-23c, Light distance 50-55cm, CO2 700+ppm
HLG Scorpion Diablo @ 80% - 50-55cm distance
60s ON time 20min OFF time @ Day Time
60s Off time 30min OFF time @ Night Time
NT-Nutrient Tank - PH -5.95-, EC -1.21, Temp-22-24
01 04.2024
Outdoor Climate: It’s hotter outside. I’ve set the Diablo at 73% to maintain temperatures in the box within the 25-26°C range.
Humidity: After defoliation, the humidity is low, which is great! The dehumidifier hardly worked this week.
Misting Routine: I start the day with a 3-minute misting session; this will be the routine for now.
Nutrient Solution Temperature: I’m keeping the nutrient solution temperature between 20-23°C. I refill the tank twice a day to cool down the solution.
Light Parameters:
PAR Map: Maximum PPFD is 1080, minimum PPFD is 650.
VPD: Ranges from -1.2 to -1.3.
Daytime Temperature (DT): 25-26°C.
Nighttime Temperature (NT): 22°C.
Leaf Temperature: 22-23°C.
Light Distance: 50-55 cm from the plants.
CO2 Levels: 700+ ppm.
HLG Scorpion Diablo: Set at 73%, positioned at a 50-55 cm distance.
Lighting Schedule:
Daytime: ON for 60 seconds, followed by 20 minutes OFF.
Nighttime: OFF for 60 seconds, followed by 30 minutes OFF.
Nutrient Tank (NT):
pH: Maintained between 5.9 and 6.1.
EC: 1.18.
Temperature: 20-23°C.
Week 4 off Flowering in Summary
120 litter off RO water,
210ml+210ml AN connoisseur A+B, 18g Big Bud Powder, 45ml Growth Technology Liquid Silica
70kW electricity in total for light, Pumps and AC Infinity Fans. 63kW for Light + 2kW Dehumidification + AC Infinity ventilation
Week start @ 1.31EC, nutrient strength., keep strength @ 1.24 till the end of the week
Girls look superb all time, Wedding Cheesecake have two pheno, really like buds on one girl
Tropicana Cookies fill bud sites this week a lot, Purple Lemonade is going to be tallest from all three stains. Nice bud formation also.
PH was stabile and move from 5.90 min to 6.2 max.
Light distance for this week - 50-55cm from tallest top , PPFD levels around 1100 in center, trough whole week. Lowest reading 680 @ corner
Temperature are from 23c at start off day to 26c max at some points. AC Infinity T6 extracting fan program in AUTO to kick in @ 26c
Night temps around 21-23c, dehumidifier work less this week. Outside humidity is low this week
Water temperatures in middle off week start to rise, refilling solution is cooled to bring temp back from 23-24 to 20c
Defoliate girls on first day off this week, pruning off smaller branches, lots off foliage is removed
After defoliation humidity drop immediately in box. Need to bring back humidifier for couple of days. RH was low trough whole week
Day RH is moved from 45% to 50% max, at night times drop to 40-45%
Next week outside temperatures continue above average for this time of the year.
Continue in next week, starting probably with one more light defoliation, bigger fan leaves only


Likes
4
Share


@MrRaid
Follow
It was an ugly short plant but big bud turned out well need to let it cure not hard to grow made a couple mistakes but still did well was hoping to get 70g but ended up with 56g