
Likes
Comments
Share

@Aircoholic
Follow
Okay, that was it, her growth period is over. My summary is a bit of a mixed bag.
Sonnenerde: I liked how the plant grew in this living soil and am curious on the result after drying and curing. But so far, I'm happy with the experiment
Blumat: I give up - I fell like this is not the watering system for me, despite me really liking the idea and the concept of it. To be fair, I need to check the drippers, if the membrane and moving parts are spotless, to rule out reasons beyond my wrongdoing, but I'm not too hopeful. I just don't think I'll use it again. the water hoses/pipes(?) make the whole plant too immobile, not even turning the pot is possible. I'm sure it's great for certain situations, but just not for me.
Bio Tabs PK Booster+Orgatrex: This time I used a little more Orgatrex, not sure if I changed anything else, but it really made a huge difference, even bigger than in previous grows. The aroma intensified dramatically, the buds were covered in trichomes and bulked up really nicely - and all that was noticeable after a few days.


Likes
9
Share


@SeseGrows
Follow
Do Si Dos 33 // Home Indoor 90x90 // Barneys Farm
⠀⠀⠀⠀⠀⠀⠀⠀⠀
Week 4
⠀⠀⠀⠀⠀⠀⠀⠀⠀
- Grotek Nutrients.
- Lumatek LEC 315w+💎.
LEC 315w --> 80%
Modo LST --> Activado ;)
Likes
24
Share


@Ginger_gnome
Follow
Well this thing is looking really really great. Far better then my last grow in this 2x2x4 tent. This light is covering this tent a lot better then the PH-1000 model. I am going to give that light one more shot but in my 2x3x5 next.
I added the exhale bag about 6 days ago. I don't think it'll do much because it takes awhile to build up to its release. But by the next grow it should be at max. I've used one ones before and didn't feel like it did much so I'm a bit skeptical on if it'll do anything the next go around.
This plant to my understanding is a 9 to 11 week strain so I'm hoping for at most 10 weeks so 4 more weeks. Going to do the next 2 weeks with Overdrive and then flush for 2 weeks straight.
Well that's all for now so happy growing

Likes
7
Share


@MichaelNoob
Follow
They are strong. The no4 girl is huge, had to top her, no lst and going to flip her at young age with the rest of her sisters


Processing
Likes
21
Share


@Fullmeltalchemist
Follow
5.23 F60
5.27 F65 - Everything has been going well this week. The plants went through a feed cycle that should carry them through flower no problemo. Started with the AACT Tea, then a bokashi drench with Fish Shit from Fishheadfarms and plain water from here on out. They are drinking quite a bit. 1.5-2 gallons a plant every 3ish days. The terps in my tents smell out of this world. The ScrOG and 3x3 are like a candy store. Passion Berry has mango/guava citrus terps while Deadstar v2 has strawberry watermelon terps. The 4x5 is much more varied, but in general the sweet pink dominates with it's grape candy terps and the dread bread cuts through with it stanky gassy lemon while the prayer pupil smells like moth balls and a bit of GMO. Very lucky to get to experience this much variety.
5.29 F67


Processing
Likes
8
Share


@eldruida_lamota
Follow
Bueno pues lo dicho familia, es una cepa dulzona y acaramelada, con un porcentaje medio de 16% thc , me parece bastante potente está indica en verdad es un cebollazo épico, si te pasas sentirás hormigueo en las extremidades asegurado.
Sencillisima de cultivar, muy rápida de verdad tamaño entre 45/60cms no es muy grande pero las flores son muy compactas.
Espero que os guste este último trabajo, os dejo muchas fotos y algunos vídeos finales , un saludo y buenos humos.


Likes
38
Share


@Wicked_Stix
Follow
Gorilla Cookies is growing well. Making some nice progress. I had to give them some organic calmag because that is all I could get locally but it seems to be working. pH has held steady and the leaf color is looking great on all the plants. Haven't had to do any maintainence this week other than defoliate a few bottom leaves and spread some branches out a little. Plants are growing bigger than I thought they would so I will have to figure something out to get them spread further apart soon. Just going to keep the juice pumping and the lights beaming. Hoping to get them under the QB lights soon. She is 28 days old in a 16 oz cup. No roots have grown out of the cup at any time. No roots have been trimmed or touched. Happy growing everyone!
Likes
21
Share


@Growin_it
Follow
Removed the yellowing senescence leaves.
100% cloudy trichomes.
Will leave for another few days, then sleep the plant for a couple of days prior to harvesting.

Processing
Likes
12
Share


@therivernile
Follow
Temps were hard to control this week due to a heat wave and the fact I'm in a basement with no AC. I put the fans in the tent on too high a setting pointed right at the plants and they ended up with some wind stress which can be seen in the pics affecting the new growth. Bought a 6 inch inline fan to beef up the exhaust for the tent and this seems to have helped a lot.
I moved the tent to its final location to allow access to ventilation so I can pipe the smell outside when the flowering starts.
I started low stress training on both plants this week. I decided not to top either plant but I will for the next grow to see how it affects yields.
I also fixed the other viovsun tent that had a broken zipper track and only one slider. Hopefully I can use it in the future for flowering photoperiod plants.

Likes
12
Share


@Budking420
Follow
Went crazy with LST as I'm anticipating that stretch as they decide to start flowering through the week! I'm so excited the 2 with the older soil happily took nutrients almost to the point I could have went even full strength. The grobiotics is a special formula I got a sample of from a close friend. It consists of canna leaf, organic molasses and lacto bacillus!!!! It was great for improving the life of my soil I look forward to buying it when it becomes available it's not really available yet as far as I know. It improved my microbial life 100% my soil is definetly living and these plants are super happy. I hope you guys are enjoying these diaries as much as I am. Check back next week to see just how fast they grow & remember its 4:20 somewhere!!!!!!!!


Likes
30
Share


@Dunk_Junk
Follow
This week she was transplanted into her forever home. A 38 litre airpot. The timelapse is the whole week except a few hours when I was repotting.

Likes
18
Share

@Dunk_Junk
Follow
Doubled her height this week.... from 3cm to 6cm 😂 but she pushed out a fair few leaves into the process.
Going well so far.
Likes
3
Share


@Mr_Anonym
Follow
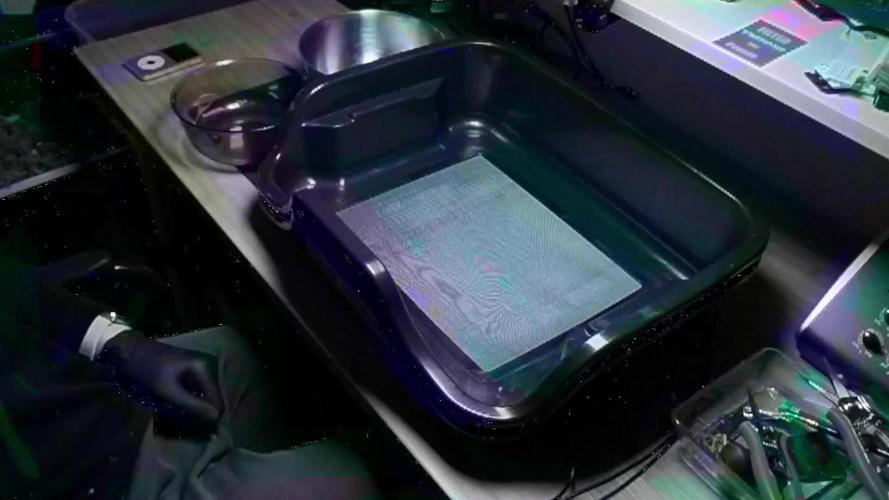
War ca 115g trocken. Riecht und schmeckt kush mäßig. Für automatics würde ich sagen ganz gut abgeliefert


Likes
64
Share


@Cheeba_Inu
Follow
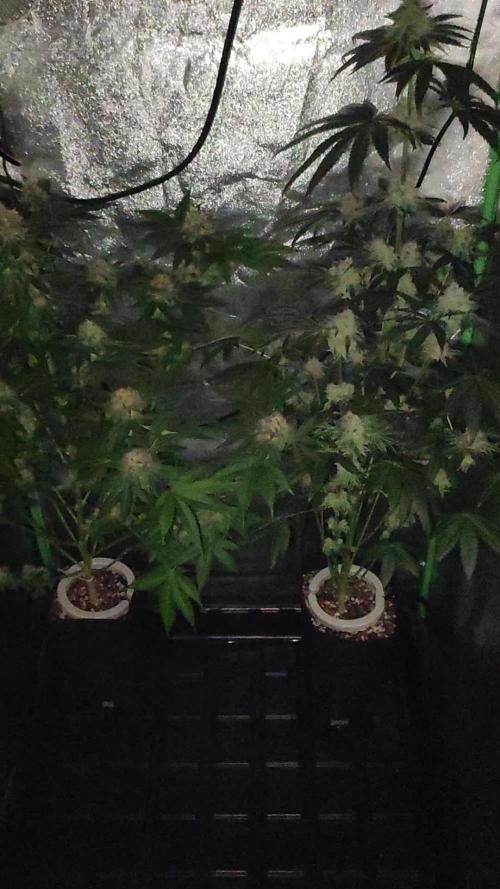
June 19, day 91, the grow has gotten close to harvest time, so I am begining to reduce the nutrient EC for this upcoming week. I will then give the plant 24-48 hours of darkness, along with very low EC water before harvest.
I continue to take leaves off as needed for canopy exposure, but I think the buds have pretty much reached the size they are going to get. While the density of the canopy has limited lower development, there are about 50-100 top bud sites which will each be a minimum of a couple grams dried (and some much more), so I am pretty excited to see the final wet a d dry harvest weights. The buds themselves are hard and resinous, glittering nicely when not under the strong LEDs. The smell is sweet, fruity, and floral, mild but pleasant.
I have noticed more clear trichomes than I would be used to for the stage in the grow (although plenty of cloudy and amber as well). I have a suspect this might be due to genetics, and contributes to the euphoric high this strain in known for.
June 21, day 93, worked to expose more underdeveloped bud during this final ripening period. It's coming along!
June 23, day 95, the Euforia is ripening. A lower bud became light bleached when they were suddenly exposed to light, and I am interested to see what happens to it after harvest. Overall the buds are a lovely light purple/pink and are hard with trichomes.