
Likes
Comments
Share

@DuSSS
Follow
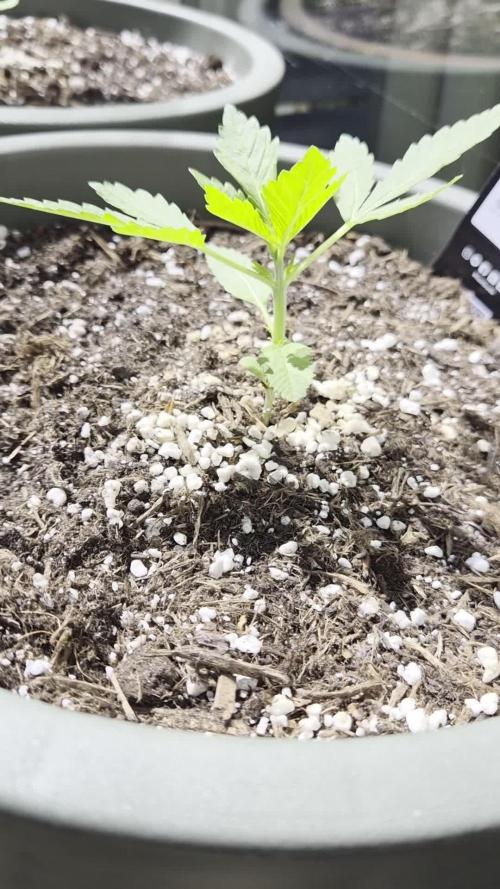
This week i started to let them sleep outside inside a small greenhouse. The sun has been shining most of the days and the ladies have been praying alot. With two cloudy days, i cant complain. Although they seem smaller then they would be indoors, i like what i see. From now on im gonna feed Biobizz fishmix and bio heaven.

Likes
8
Share


@pzwags420
Follow
The start of week 9 is going well. On day 5 and 6 of week 9 the temperatures outdoors we're in the 90s my extractor fan ran continuously and my grow room temps are hitting 83 to 85 warmer than I would like. It is day 7 of week 9 and the plants did well on vacation the 10 gal reservoir lasted with an extra 2-3 gal left when I returned. I did however notice a Nitrogen deficiency on the foliage(yellowing on lower parts of plant). I believe this is due to to the long time in between feedings. I applied my weekly Nutes. I will watch for improvement in the Nitrogen deficiency.


Likes
24
Share


@Firepharmer
Follow
This new LED’s from futur vert is the best of the best !! Worth every penny


Likes
249
Share


@Metatronix
Follow
A big hello to all the cannabis growing gardeners...and all the other visitors that came across my grow journal.
This week i need to change the reservoir again, the plants drink solution just as I add fresh water the EC stays at 2.7 and i need to add PK and Calmag so that's why.
The weather outside is very cold this whole week around -18 degree Celsius at night...this made my reservoir water go under 15 degree Celsius.
Since i ran the Spider Farmer UV lights i noticed some purples on my cannabis plants i think it's their doing....i run it now for two weeks the UVs
----------------------------------------------------------------------------------
The SE 7000 is hanged at 40 cm. over the canopy and runs at 520W.
This whole grow's main sponsor is Spider Farmer. You can easily obtain all the great grow equipment we use at: spider-farmer.com
A big thank you to Jessie and the whole Spider Farmer crew for supporting me with the newest technological advancements in horticulture. Thanks to them what i do here is possible.
Thank you Zamnesia for giving me the opportunity to try out your stock.
zamnesia.com/uk/7686-zamnesia-seeds-do-si-dos.html
20% discount code: ZAMMIGD2023
Plagron did send us their Contest package for the Power Buds competition .
Thank you for your visit, please leave a like and hope to see you beck here in about a week.

Likes
21
Share


@Big0zGrower420
Follow
The plants are doing great so far and seem to be enjoying everything. The smaller CBD plant has caught up and the colorado cookies continues to be the largest so far.


Likes
40
Share


@Ganjagrandaddy
Follow
Day 27 from seed: Wow these ladies like life it seems. Some very good growth this week and the switch to Mega Crop has started well so far. The Paler girl is starting to darken a little more now so let's see how we go. As mentioned in the video , I have been able to top them this week so the training can slowly begin . The only thing I need to sort now it the watering regime for the Los. They are doing good with the MC being used too. I am dialing them all in this week to see how green and healthy we can get them. I am looking forward to their smoke as these have been a strain I grew as a photo period a while back. Love these fast buds girls.


Likes
28
Share


@Roberts
Follow
The smaller Potter of Gorilla Glue is doing good. Looks like I will be changing to flowering In about a week. She is growing under the Spider Farmer G3000 light. Thank you Spider Farmer, and Amsterdam Marijuana Seeds. 🤜🏻🤛🏻🌱🌱🌱
Www.amsterdammarijuanaseeds.com
Thank you grow diaries community for the 👇likes👇, follows, comments, and subscriptions on my YouTube channel👇. ❄️🌱🍻
Happy Growing 🌱🌱🌱
https://youtube.com/channel/UCAhN7yRzWLpcaRHhMIQ7X4g
Spider Farmer G300w: https://amzn.to/3S2zvsd
Spider Farmer 10X20 Heat Mat Kit - https://amz.fun/lsa0J
Spider Farmer Amazon Store: https://www.amazon.com/spiderfarmer
Spider Farmer Official Site: https://spider-farmer.com
Discount code: saveurcash

Likes
65
Share


@Dedon
Follow
Hi everyone !
Everything is OK.
Tank with big plant take 70% of the tent 😅 trunk are very strong now.
They are drinking so much ! i've added 10L in both tank because water level goes under mionimum level ^^


Likes
5
Share

@Webacca
Follow
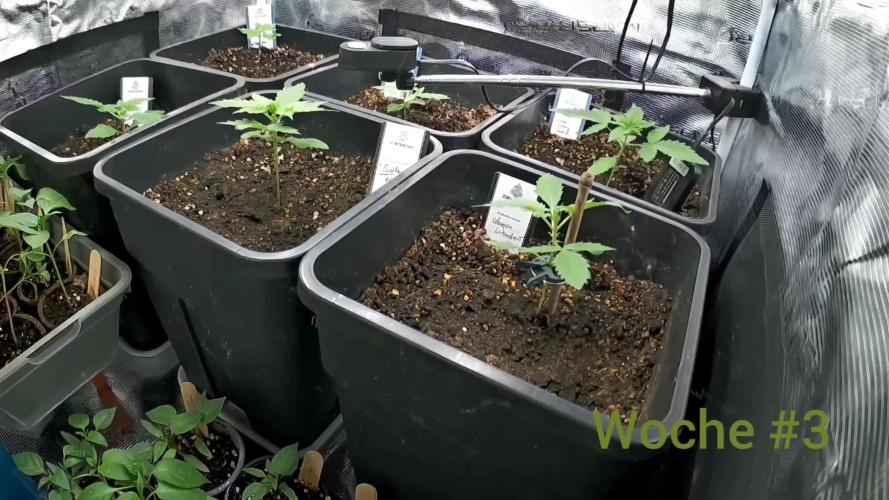
Start in Woche 4.
Hat sich einiges an Wuchs getan. Machen langsam den Eindruck wie richtige Pflanzen. Und die Solar Fang hat ein mega symmetrisches Erscheinungsbild. Absolut senkrecht. Love it 😍
Bisher scheint alles ok zu sein. Muss sich auch nicht ändern.
Beleuchtung auf 30 DLI bei max 700 PPFD geändert.
Schaunmermal, ob sie das aushalten, begrüßen oder neg. reagieren.
Update 1: Solar Fang hat zu kurze Internodienlänge, aber Sherbet und LW haben eine LST Spange bekommen.
Mal schauen.
Zeitraffer der vorhergehenden Woche am. Ende der Bilderreihe.


Likes
48
Share


@PapaNugs
Follow
A great second week here as the girls stabilize. They got watered two times this week. All good growth. 📈
This girl made a great conback. She had fallen down due to overwatering and that stunted her growth. Now she came back up and should be back on track.
Dimmed to 40%
Here are the lights details:
Medic Grow Mini Sun-2 150W LED
Model: MN150-022
Spectrum mode: V1
Efficacy: 2.8 umol/J
Thanks for stopping by!
You can find the light on Grow Diaries:
https://growdiaries.com/grow-lights/medic-grow/mini-sun-2-150-watts
You can find the light on Medic Grow's website:
https://medicgrow.com/
Likes
26
Share


@PedroAndHisPlants
Follow
My first grow has been a great learning experience, and I couldn’t be happier with the results. From the reliable BioBizz soil and nutrients to the impressive performance of the Spider Farmer SF 1000, everything worked well together. Each component contributed to a successful harvest, and I’m excited to continue experimenting and improving my setup with new gear and techniques.
💚☀️🤙🏼
Likes
42
Share


@Zurban_Poison
Follow
Hi people!
Yes! I transplanted it into a 35 liter pot! and switched to flowering mode 12-12 ..
The plant is just huge! this photo was taken immediately after transplanting and LSTb, so the plant is a little sad .. but you can still estimate how well it is developed and healthy .. next week it will appear before you in its full glory!

Likes
1
Share


@Luke_Lee
Follow
—————————————————————
WEEK 5 / DAY 29-36
Mars Hydro FC-E3000
Floragard Professional GrowMix
11L Plant bag made of fleece
Light: 55cm / 55%;
Schedule: 24/0;
PPFD: 650 umol/m2/s
20° C - 70 RH
500ml per Plant
PH 6,5-7
2ml BioGrow; 0ml TopMax ; 0ml BioBloom
2ml CalMag
#1 Blueberry Automatic
#2 Blueberry Automatic
Fan, extractor and pump ON 24/0.
—————————————————————
-17.02.2025
The fourth week of vegetation begins.
The plants are looking very good so far and I'm happy with the grow so far. There have been no significant complications so far.
The lowest few leaves have been removed and light LST applied using plastic benders.
-19.02.2025
The plants get their typical “white hairs”, pre-flowering has started.
-23.02.2025
The plants are doing well, I haven't been able to look after them for the last few days. But they have survived.
The fourth week of vegetation is coming to an end and as you can see the plants are starting to flower.
Processing
Likes
26
Share


@GrowGuy97
Follow
Day 49 - Still giving the ladies just PH water with no nutrients trying to see if I can fix whatever is wrong with them😅 All in all the White Widow & Orange Sherbet plants I took individual pictures of are growing great & should have a pretty nice yield! Thank you for following & make sure to check back for daily updates! Happy growing friends!🌱✌️🏼

Likes
8
Share


@420DeepGrow
Follow
📆 Semana 7:
La Epsilon F1 Auto avanza con fuerza en la floración. Los cogollos se desarrollan compactos y uniformes, cubriéndose de una capa cada vez más visible de tricomas. El aroma se vuelve más punzante, con toques especiados y cítricos que anticipan una cosecha de calidad. El ritmo de nutrición se mantiene estable, reforzando el aporte de PK y azúcares sin provocar excesos.
¡Seguimos creciendo fuerte! 💪
Likes
3
Share


@xipo86
Follow
day 42 of Flower... gettin bigger and smellier by the day. pistils starting to go amber.. i say 2 weeks for gorilla girl f1 and Mental Rainbow to be ready.
