


Likes
Comments
Share

@Tower84
Follow
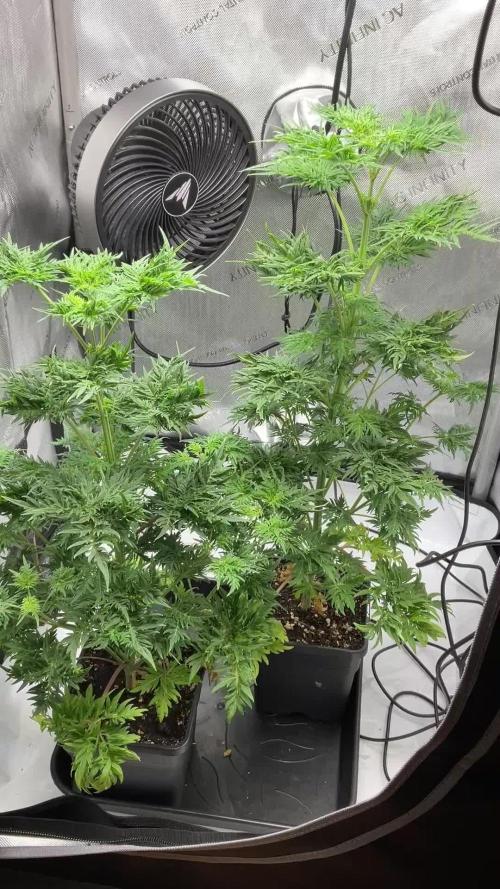
🇩🇪 Woche 7 – Mentha de Croco (Terpyz) 🌱🔥
Die beiden Mentha de Croco entwickeln sich weiterhin absolut top und zeigen in Woche 7 kräftiges, gesundes Wachstum 💪🌿
Mit aktuell ca. 56 cm und 50 cm Höhe haben beide Pflanzen nochmal ordentlich zugelegt und wirken sehr robust und vital.
Die Blattfarbe ist weiterhin schön sattgrün 💚✨, die Struktur kompakt und stabil. Beide Pflanzen machen insgesamt einen sehr gesunden Eindruck und kommen mit dem bisherigen Wechsel zwischen Indoor und Outdoor hervorragend klar ☀️🌬️
Am Dienstag ist es endlich soweit: Der finale Umzug nach draußen steht an ?🌳
Da die Nachttemperaturen jetzt stabil über 10 °C bleiben, können die Ladies endlich dauerhaft Outdoor stehen und ihr volles Potenzial entfalten 🚀🔥
Bis hierhin läuft alles genau nach Plan und ich bin mit beiden Pflanzen wirklich sehr zufrieden 🙌🌱
⸻
🇬🇧 Week 7 – Mentha de Croco (Terpyz) 🌱🔥
The two Mentha de Croco plants continue to perform extremely well and show strong, healthy growth in week 7 💪🌿
At around 56 cm and 50 cm tall, both plants have gained a lot of size and look very robust and vigorous.
The foliage remains a beautiful deep green 💚✨ with a compact and sturdy structure. Overall, both plants look very healthy and are handling the indoor/outdoor transition perfectly ☀️🌬️
Tuesday will finally be the big day: permanent move outdoors ?🌳
With nighttime temperatures now staying above 10 °C, the ladies are finally ready to stay outside full-time and unleash their full potential 🚀🔥
Everything is going according to plan so far, and I’m really happy with how both plants are developing

Likes
5
Share


@Deli_Weed
Follow
En general me encanto cultivar esta genética, siempre fue la primer genética que quise cultivar desde que empecé en esto y no me decepciono en lo absoluto, de una sola semilla obtuve 106 gramos de flores de gran calidad 😃 increíble para ser mi primer cosecha con semillas de bancos, ya quiero ver que resulta en la próxima cosecha ya con más experiencia y mejor equipo 🤩


Likes
6
Share


@Mundito
Follow
Didn't post much I'm week 6 as not too much difference..
Was feeding by recommended dose as per nutrient bottle..
Switched to measuring by ppm mid week and has really made a difference.
Now starting week 7 and looking lovely with fattening buds and ripening trichomes..
Gonna maybe push her for week to 10 days n the flush..
The yield is looking quite promising..

Likes
6
Share


@StonedandSteady
Follow
AutoFlower/Outdoor Vine Flowers plants & plans Update!
They're Budding out like Crazy and looking Beautiful at their 6th Week of Flower! Outdoors Update! 2nd Feed of #HumboldtCountysOwn
#AutoWhiteRussian and #AutoMontreal *Fems* breed by Team #DivineSeeds #DivineSeedsSquad #DivineSeedsBreedingCompany Looking Magnificent and Amazingly Great in thier 6th week of Flowers! Thier Growing under the #Growatt600w and in my #TopoLite 24×24×48 Grow Tent! I'm also using #TNBNaturals #TheEnhancer Co2 Despersal Canister and using thier Ph⬆️⬇️ for my Decolinated Tap Water!
#AutoWhiteRussian breed by Outstandingly Awesome Team #DivineSeeds #DivineSeedsSquad #DivineSeedsBreedingCompany
Yo!!! This Lil Beauty popped open in under between 16-18 hours of Germination using this Wet Papertowel Method, this New Heat Mat, Baked potato ToGo Container and Regular Tap Water Helped Tremendously! Heck Yeah Growmies and Growmets!!! Let's Grow!!!
DivineSeeds:
#AutoWhiteRussian
Origin:Afghanistan
Type:Indica/ Sativa/ Ruderalis
Flowering:65 days
THC:24 %
Harvest:400-600 g/m2
Height:100-150 cm
#AutoMontreal breed by Top of The Line Team #DivineSeeds #DivineSeedsSquad #DivineSeedsBreedingCompany
Yo!!! This Lil Beautiful Bean Popped under between 20 hours of Germination using this Wet Papertowel Method, this New Heat Mat, Baked potato ToGo Container and Regular Tap Water Helped Tremendously! Heck Yeah Growmies and Growmets!!! Let's Grow!!!
DivineSeeds:
#AutoMontreal
Origin:Canada
Type:50% Indica/ 40% Sativa/ 10% Ruderalis
Flowering:65 Days
THC:23%
Harvest:550-750 g/m2
Height:120-160 cm
https://divineseeds.net/
https://instagram.com/divine.seeds?igshid=osxe2v7en33v
HumboldtCounty'sOwn:
Email: [email protected]
Phone: (707) 725-4119
Toll free: (866) 872-9434
Humboldt Bottling
Po Box 429 · Fortuna, CA 95540
HumboldtCounty'sOwn Website Link: https://humboldtcountysown.com/
HumboldtCounty'sOwn Instagram Link: https://instagram.com/humboldtcountysown?igshid=1qj809qkkwych
I love and Appreciate Everyone!!! Thanks Again Teams! Cheers Famz!!! Much Props and Much Topz!💯

Likes
10
Share


@Fatzoe15145
Follow
Just finish last week of flower she still has white hair growing most leaves have changed color she passes gas like twice a day which is like heaven she is getting water twice a week no nutrients figure I need a week or two till she’s done

Likes
4
Share


@GrapevineGrower2
Follow
NOTE 1: Afgooey Auto pheno #3 turns out it's a MALE. Resembled nothing like her two sisters ran at the same time. In fact, I had to move her to the 12/12 tent to initiate flowering. Little did I know or expect She would be a He. Lola by the Kinks is rattling round my brain about now ;)
FEEL FREE TO HIT THE LIKE BUTTON IF YOU LIKE WHAT YOU SEE ;)
2x4 French Macaron - at the time of this posting, FM is heading into week 8 flower. Second extensive flushing w/fresh rain water due to acidic conditions (ph >5). Been struggling with ph the entire flowering. I speculate ph issues due to over feeding. Ph is roughly 5.8 to 6.0 after flushing. At this point, flushing with plain RO water until harvest.
NOTE 2: I've introduced two 5 gallon bubble buckets into the 2x4 grow tent. Both buckets have medium air stones running from a 125 gph air pump. Given French Macaron isn't scheduled for harvest until mid-January, I might not have cutting ready. First grow may have to be from seed. Update later.
3x3 Afgooey Autos and clones from previous grow - Afgooey #1 and #2 are firing on all cylinders. #2 running a bit acidic (>5), so flushed back to neutral with roughly 7-8 gallons of fresh rain water ph at 7.0 to 7.2. Same with clones (i.e., ph very low). Flushed with fresh rain water too. A couple days later plants look so much better. Wait till plants nearly dry before next watering. Trimmed and cleaned up three of the clones growing weird. Felt a bit like trimming a bonzai tree. Let's see how they respond.


Likes
5
Share


@Bertabud
Follow
The mother has green growth coming in. Older leaves showing magnesium deficiency. Lots of bud sites. The clone is very healthy and happy😊 Any input is always welcome!


Likes
2
Share

@Papadubz
Follow
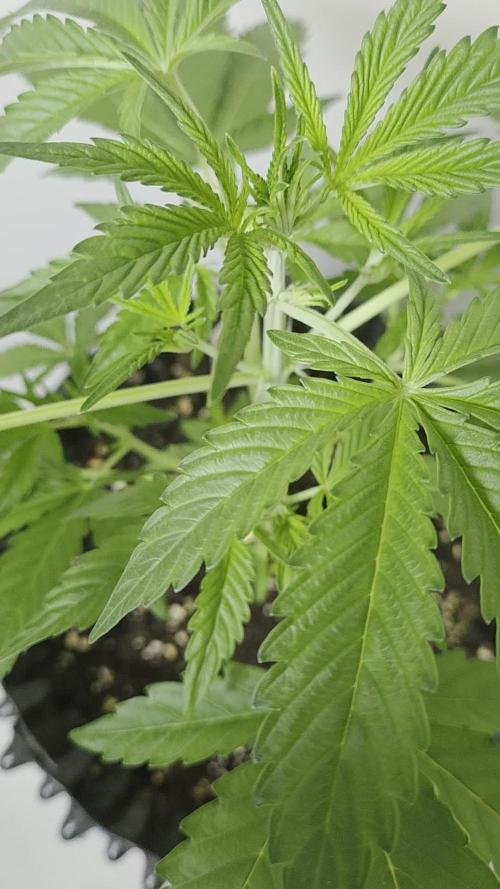
They really have grown over the last 7 days going to start feeding next week. I'm so Looking forward to seeing how these development,

Likes
5
Share


@TherealNICOGREEN
Follow
Er blevet plantet over i 17 liter potter i stedet en 12 liters! Hun er allerede begyndt at vise tegn på rigtig gå i blomst 🌸. Det er først gang jeg prøver pulver gødning OG JEG ER SÅ POSITIV OVERBEVIST OM DET ER DET JEG VIM FORSÆTTE FREM AF ( undtagen det der ikke fåes i pulver ( endnu) 😇glæd jer til flere dagbøger og nye spændende planter og NYE SKUNK STRAINS OG NY GØDNING ÆGTE GRO JORD MED TILHØRENDE PULVER GØDNING! Det bliver fantastisk spændende😇🤩🤩🤩🧐🤩🤩😜😝😎🤪😇💚🖤💛💚🖤💛💚

Likes
48
Share


@Igrowneil
Follow
Thanks to all the sponsors of this run
@Vipraspectra (LEDs) #xs4000 #p2000 #p2000 = 880watt full spectrum
@Zamnesia (seedbank )
@Emeraldtriangleseeds
@RoyalQueenSeeds
Hey growers @IGROWNEIL (now on Instagram)
this last week has seen amazing growth the plants have been super happy with the bigger feeds and the lighting moved to 18/6 saving on electricity is a must , 12£ gbp per day to 8£ gbp
, saving 4£ a day is about 300£ per run saved which will now pay for new pots and more nutrients from @terra_aquactia and mabey there light mix soil
The watered method of flood and allow to dry out works really good from seedling 🌱
Really happy with these results and really happy with my @viparspectraled lights #xs4000 and #p2000s also I'm using bio roots on this run which I do think is adding to the overall growth formation along with the lights themselves.
Plants appear to have alot thicker stems from very young , plants all seem vigorous in growth and appearance seem all quite healthy plants .
The new soil / coco @canna_terra professional plus is great stuff and also another factor I've changed to a lighter soil mix which is definitely helping out as it doesn't seem as compressed as the other soil without coco coir .
@Terra_aquatica nutes being used along with @vitalink dairys have ratios being used but @terra_aquatica bio roots is doing me well and my plants seem to love the bigger feeds
I will be moving over on my next run to @terra_aquatica nutrients line only I literally love the brand and how the owner relates to his own business and plant research 🙌
Extraction and intake @blackorchid @ramfilters
All 12 liter fabric pots (amazon basic) and Thhefabricpot companys
Soil - @canna_terra professional plus ➕
Had an amount of fungus knats that still presist having to make sure my soil is dry and ruffing up the top layer to stop any eggs being layed down the knats are a problem and this has put doubts in my usage of this soil again as I used about 240liters which is 5 bags at 18£ GBP each 90£ on soil to then cause me more money and additional problems in a big run isn't something I can let slide as this could seriously harm financially by reducing the amount at harvest.
Okay plants
@zamnesia
Gorilla glue
Doing amazing, thicker stems , bigger leaves , did notice some calmag or N defenices leaving me to increase calmag and nitrogen, but doing really well with the LST also and start to increase the size of the Bottom branches as we can create many tops instead of the one main on weeks 3 and 4 days 21 to 35 will see the main phase of stretching
Girl scout cookie's loving the growth and the girl with the leaves purple 💜 underneath are pretty cool 😎
Runtz 🚫 automatic
Study looking plant doing super under some LST hopfully see some more of the bottom branches catching upto the main colas before I hit them with netting
@royalqueenseedsrqs
#dosido
Expected more from these girls but there starting to come back a bit faster now hopefully this keeps up
@emeraldtriangleseeds
#lemonhazeauto
Doing well under LST being a sitiva I'm gonna watch closely for major sprouting.
#headlightskushauto
Doing well also under LST any defenices you see on plants will be me getting used to this new soil which I'm finding tempermental and a problem with knats
#blueberryauto
Coming back to life this little girl has surprisingly gained some traction keeping a close eye on her as I can't wait to finally try Blueberry weed , proper stuff 🙌
Thanks all for liking and commenting 🙂
Please follow me on Instagram @igrowneil

Likes
25
Share


@GERGrowDesigns
Follow
🥦 Vegetative Week 4 Structural Consolidation Phase
Eternity Grow Cup 2026 Sticky Broccoli Feminized
Stage: Vegetative Phase Week 4
Day:~Day 28
🌡️Environmental Control:
-Temperature: ~26°C consistent
-Humidity: balanced for vegetative growth
-Light Schedule:18/6
-Airflow: optimized for stem strength and canopy health
No major adjustments were required, indicating a established grow environment.
🌿 Plant Development
Observations:
-Strong vertical expansion
-Noticeable thickening of main stems
-Excellent development of lower and inner branches
-Deep, vibrant green coloration
-No visible deficiencies or stress symptoms
Overall health can be described as robust and highly stable of all 4 Plants .
🍵 Nutrient Strategy till Flower , Hy-Pro Program:
-Hy-Pro Terra (Growth/Bloom combination)
-Hy-Pro Terra Rootstimulator
-Hy-Pro Spraymix applied once daily as foliar support
The plant’s deep green coloration and upright leaf posture suggest strong nutrient uptake and efficient root function.
🥦Strain Observation Sticky Broccoli:
-Strong vegetative energy
-Excellent stress tolerance
-Dense node stacking
-Promising canopy architecture
Lower branch development is becoming increasingly strong, indicating high potential for productive flowering sites.
📸 Weekly Summary
Vegetative Week 4 was a controlled and strategic growth phase.
With no additional stress introduced, the plant was able to fully express its natural vigor and structural potential.
The foundation is now firmly established one final vegetative week stands between this stage and the flowering transition.
See you in Veg Week 5 Final Prep Before Flower 🌿✨
Likes
39
Share


@GermGrowFox
Follow
Schnipp schnapp. Weitere Updates nach der Trocknung und zur Vorbereitung für das Fermentieren.
29. März
Ein Teil der Orions wurde bereits zum fermentieren gelegt. In kürze gibts ein Update zum finalen Endprodukt.
Likes
Comments
Share

@Livetimegrower93
Follow
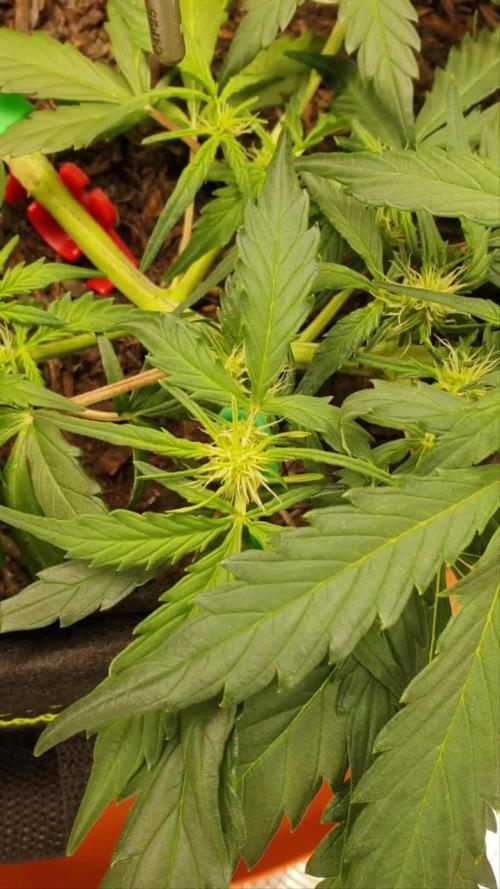
This is where she started to boom in growth and bud sites. I did mess up alot by bending the main stem over. And in doing so I stunned her alot but what we do have is gold
Likes
4
Share


@SuperGluedGrow
Follow
This week was also uneventful, growth has been slow and I'd say its half my fault with PH issues and over feeding which I'm correcting moving forward; and two unstable genetics. I dont have much info on growth patterns for this strain but its supposed to look a beautiful dark purple so I'm gonna breed a male and female hopefully. I'm also looking forward to the fourth phenos straits, I kind of hope its different just to have fourth completely unique phenos.


Likes
16
Share


@Chubbs
Follow
420FASTBUDS
FBT2107 WEEK 6
These two beautiful ladies are growing great. Staying on the shorter side but very bushy and healthy from the looks of it. It's been super cold so they have hung in there when temps have dropped lower than I would've liked. Fixed the issue by adding an oil heater in the tent so far so good. Only have snow in the forcast for the next week or so then it should warm back up a little. Kept the same feeding they've responded well to it. All in all Happy Growing
Processing
Likes
5
Share


@Highdro
Follow
At the start of the week I fimmed a few high blooms to slow growth.
Humidity kept climbing untill I added a carbon filter 4inch on a inline fan as an exhaust, added a 2nd fan to circulate more.
Checked pH around 4 times a day due to.such a small tank.
At the end of this week I defoliated and also took around 40 cuttings which I will post separate to this dairy, they will be in a DWC setup.
