


Likes
Comments
Share

@DogDoctorOfficial
Follow
LSD Zamnesia Tripping 🙂 | Fresh Frozen, Ice Water & Temple Balls — Week 16 From Seed
First of all…
Yes 😄
We are once again dividing the harvest reports into multiple chapters, and once again we apologize for that. But honestly, there was simply no way to fit:
* harvest,
* drying,
* trimming,
* curing,
* smoke review,
* macro photography,
* fresh frozen work,
* washing,
* extraction,
* and hash making…
…into a single GrowDiaries update without rushing through important parts of the process.
And this part?
This part deserved its own spotlight completely.
Because this week was not about flower anymore.
This week was about resin.
Living resin.
Fresh frozen material.
Ice water extraction.
Patience.
Cold temperatures.
Sticky hands.
And slowly transforming trichomes into beautiful hash.
For everyone joining only now, quick recap:
These LSD girls were grown under 12/12 from seed from the very beginning. Minimal training, mostly natural structure, gentle leaf manipulation, and environmental balance instead of aggressive intervention.
Part of the harvest was dried traditionally and already covered in the previous report.
But another part…
…never got dried at all.
Straight during harvest, selected flowers were removed fresh from the plants and immediately vacuum sealed before going directly into the freezer.
No drying.
No curing.
No waiting.
Fresh frozen.
And that changes everything.
The goal here is preservation.
When flowers are frozen immediately after harvest, a large portion of the volatile compounds:
* terpenes,
* flavonoids,
* aromatic compounds,
* and delicate resin characteristics…
…can remain much closer to their living state compared to traditionally dried material.
This is why fresh frozen extraction became so respected in modern hash making.
It captures a version of the plant that only exists for a very short moment in time.
Alive.
Wet.
Fresh.
Fully expressed.
And honestly?
Opening those frozen bags weeks later felt like reopening harvest day itself 😄
The flowers still looked incredibly resinous even after sitting frozen for weeks waiting for wash day.
Now let’s talk process.
For the wash itself, we used the Bubbleator machine courtesy of Zamnesia , and honestly huge thanks to them for providing it. They knew I wanted to start exploring ice water extraction properly, and they were kind enough to support the journey.
The setup itself is actually beautifully simple.
First:
ice.
Lots of ice 😄
The machine was filled partially with ice first before adding the fresh frozen material inside the working bag.
The flowers themselves were placed inside a closed 220-micron washing bag. This is important because the bag keeps the plant material contained while still allowing the trichome heads to separate during agitation.
After placing the material inside:
* more ice on top,
* cold water added,
* everything submerged,
* and then…
…we waited.
Around 30 minutes or so.
And this step is actually extremely important.
A lot of people think washing starts when the machine turns on.
But honestly?
The wash starts before that.
This resting phase allows the frozen material to:
* slowly rehydrate,
* absorb water again,
* become fully saturated,
* and most importantly…
* become extremely cold throughout the entire plant material.
Why does this matter?
Because trichomes become brittle at very cold temperatures.
The colder everything gets:
* the easier the resin heads separate,
* the cleaner the release becomes,
* and the less physical force is required.
That is also why ice exists under and above the material:
* lower temperatures evenly,
* protect the resin,
* and maintain the cold environment throughout the wash.
Once the water temperature approached near freezing…
…the machine came alive 😄
And honestly?
Watching the water slowly transform during the wash is always magical.
At first:
just ice,
water,
and flowers.
Then slowly:
foam,
cloudiness,
resin separation,
and finally that beautiful milky golden water hash makers love seeing appear.
Meanwhile on the side, we prepared the filter bags.
We did not use every single micron separation individually because honestly sometimes over-separating becomes unnecessary depending on goals and material quality.
Instead, we focused on collecting the grades we actually wanted to work with and enjoy.
And then came one of the most satisfying parts of the entire process:
Collection 😄
Slowly lifting the bags.
Watching the resin gather.
Carefully scraping.
Separating grades.
Observing texture and color differences.
Beautiful creamy resin everywhere.
Some lighter.
Some slightly darker.
Some sandy.
Some greasy.
Every layer carrying slightly different characteristics.
After collection, the resin was carefully freeze-dried.
And this part also requires patience.
First freeze drying.
Then breaking it apart.
Then more drying.
Then more waiting 😄
Depending on environment and conditions, full drying can take several days because trapped moisture inside hash is dangerous long term. Rushing this step can ruin months of work later.
In this case, the process stretched closer to about a week before everything felt properly stable and ready to work.
And honestly…
This is where the magic really started.
Once dry enough, we allowed the hash to rest briefly before beginning the hand-working process.
No extreme heat.
No giant pressure.
No fancy machinery.
Just:
room temperature,
body warmth,
gentle pressure,
folding,
rolling,
stretching,
and patience.
The room itself stayed around 15°C, which turned out to be perfect for working the resin slowly without overheating it.
And this step matters far more than many people realize.
When hand-working hash properly:
* oils redistribute,
* compounds begin merging,
* terpenes spread through the material,
* oxidation starts slowly,
* texture evolves,
* and curing begins transforming the resin itself over time.
You are not simply “rolling hash.”
You are starting a living curing process.
And slowly…
The texture changed completely.
From sandy loose resin…
to creamy material…
to sticky dough…
to smooth beautiful temple balls.
Honestly, seeing that transformation happen in your hands never gets old 😄
Final result?
Three temple balls total:
* two smaller ones from smaller micron collections,
* and one large main temple ball that became the true star of the session.
Final weight:
46.5 grams.( big one )
And honestly?
I was extremely happy with that result.
Especially considering the quality, texture, color, and how beautifully this LSD washed overall.
Once formed, the temple balls were wrapped carefully in parchment paper before being vacuum sealed for long-term curing.
And now?
They rest.
Months.
Maybe longer.
Waiting.
Because the goal here is not “fresh hash.”
The goal is evolution.
Traditional temple ball style curing allows:
* oils to redistribute,
* compounds to merge,
* texture to transform,
* aroma to deepen,
* and the entire resin profile to mature over time.
Almost like aging wine.
Or curing cheese.
Or fermenting traditional products slowly and intentionally.
This is medicine with patience built into the process.
And honestly…
That part alone deserves respect.
We also included:
* detailed process photos,
* collection stages,
* macro photography,
* texture closeups,
* curing progression,
* and multiple stacked macro images showing the resin in insane detail.
Some of these stacks reached:
* 62 frames,
* 87 frames,
* 114 frames,
* and even 152-frame focus stacks.
Because honestly, hash under macro magnification becomes another universe completely.
The textures stop looking real.
Tiny resin mountains.
Oil rivers.
Micro-crystals.
Glossy surfaces.
Soft creamy structures.
It almost starts looking geological instead of botanical 😄
Mr. Baggy of course supervised the entire operation like the professional resin inspector he clearly believes he is.
And next week…
The final chapter arrives.
Smoke review.
Curing review.
Flower review.
Hash review.
Terpene evolution.
Effects.
Textures.
Lessons learned.
Mistakes made.
And final thoughts after this entire LSD journey from seed to cured medicine.
And finally…
Thank you.
To Zamnesia for the genetics and the Bubbleator.
To Plagron.
To F.O.G.
To all the LEDs, gear, and equipment involved.
To GrowDiaries.
To the community.
To the OG followers.
To the new curious visitors.
To the silent supporters.
To the skeptics.
To the lovers and even the haters 😄
To everyone spending time sharing this strange beautiful plant journey with us.
Wishing everyone:
cold water,
sticky fingers,
healthy plants,
beautiful resin,
and enough patience to let good hash become great hash 🌱


Likes
59
Share


@Neo09
Follow
🌌🛸 hey hou,
just putting in all pics from begging till now, cos im really low with the time,.. behind this project is biggest story of my life, not only grow story, its much more behind.. i wish nobody to get such a grow in way as i do,. actually is nothing possitive there and this project i started, cos i lost everthing what in life importnt is. with this project, once, i wanted to give back just a litle bit of that what i got,.. and it still not eneough,. some things you cant buy, you cant pay,.. and you can get back... peace and stay hard, thing about what you decide, think about twice..
Likes
24
Share


@MediciGrade
Follow
End of Week 4 of Flower (day 28):
Some flowers look like they're starting to swell. Resin production has begun in earnest.
I put a tower fan with 180 deg. oscillation into the tent in order to increase overall airflow.
Noticed a slight tip burn showing up on some of the leaves and realized I had stopped getting adequate runoff after each fertigation event. I increased the volume (+16%) of nutrient solution they were getting during each of the 5 daily feedings and there have been no further spread of the tip burn.
Seems like the plants are all on cruise control. Here's hoping I can avoid any stupid mistakes the rest of the way. Until next week!

Processing
Likes
66
Share


@JieGrow
Follow
Girls are still growing smoothly 👍🏼 had zero issues this grow except crazy growth although I don't think that's a bad thing👌🏼 had to give another trim and gave them a tuck under just one more time! Hoping that these next couple of weeks run smoothly 🤘🏼
Nothing else to report surprisingly been a super easy grow!
Happy growing ✌️🏼️🍁

Processing
Likes
50
Share


@MyCloset
Follow
So things got ugly when i used 0 ppm r/o water, so i know its lacking nutrients.
I messed up with the nutrients i may completely stressed out the plant.
Also on the second half of the week i started using nutrients again and tried 1:1 ratio ec of 1.0 but still my ph was dropping like from 6,1 to 5,2 in a day since my ph keeps dropping i know the nutrient solution isnt good but my order on flora nova ( 1 bottle solution) was kinda delayed so ill be using that next week..
on the positive side, i noticed some development again and hope these other nutrients will work out better.
Till next week, Cheers😃

Likes
25
Share


@Kakui
Follow
Veg22, riego con 3.0 EC y pH 5.9, drenaje promedio de 5.8 pH y 2.6 EC(muy bien), primer riego con Sensizym para limpiar un poco las raíces, y este será el último riego de vegetación con Voodoo Juice, Tarantula y Piranha.
Se hizo una pequeña defoliación de las hojas abanico más bajas y se volvió a ajustar el LST, ya van tomando la forma final.
Veg23, creciendo bien.
Veg24, se mide la temperatura de las hojas 22°C y se compara con la temperatura del indoor 23°C, con una humedad de 50% RH, la calculadora arroja un valor de VPD=1.24 kpa, lo que está dentro del rango óptimo.
Veg25, hoy toca una pequeña defoliación y probaré también hacer un último apical en 2 o 3 plantas a modo de prueba.
Al final, tomé un gran riesgo, y hice varios apicales extra y una defoliación más grande de lo que tenía en mente, tengo fe que resultará bien 😎👌
Veg27, riego con 0.8 EC y pH 6.0, drenaje de 6.0 pH y EC 2.0, se están alimentando y creciendo bien, quedan casi 2 semanas para pasar el fotoperiodo a 12/12, espero que crezcan suficiente para esa fecha.
Veg28, un par de hojas de 2 plantas presentan mordidas tipo oruga, revise y no encontré nada, aplique spray insecticida, espero no siga pasando. A parte de eso siguen creciendo bien, quedan un poco más de 10 días para el paso a 12/12.


Likes
8
Share


@Elixire
Follow
Flipping the light to 12/12 start to see some stretching.
They looking good but the canopy is not actually well leveled.
Lets wait for them to completely stretch


Likes
8
Share


@Creme_De_La_Creme
Follow
Last week before turning on the utopot system !!
She is loving the high EC, everything looking perfect around here !!

Likes
7
Share

@frigo_camelo
Follow
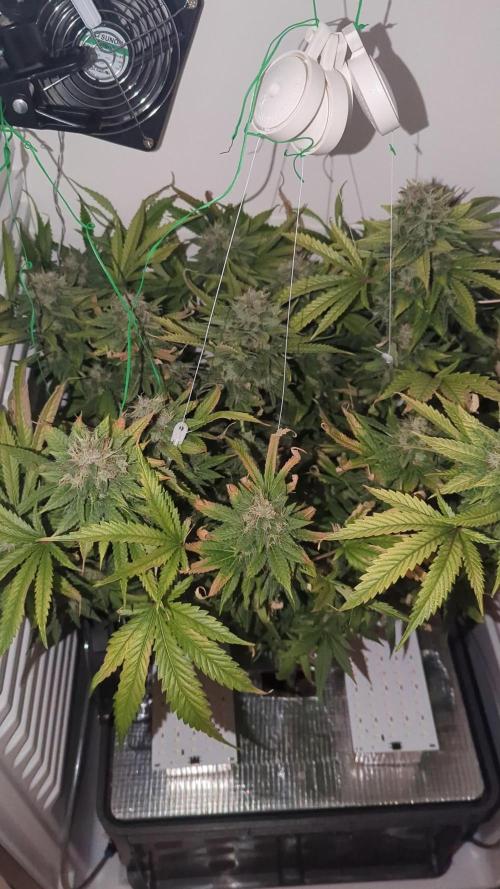
Harvest after 61 days of flower 🏼 | what a beast! Way bigger than my first run | hope the genetic will deliver some nice taste
Now drying at 15°C 55% for approximately 10 days 🏼

Likes
14
Share
@DogDoctorOfficial
Follow
🌱 Ghost Train Haze — Week 7 From Seed
🔁 Quick Recap — How We Got Here
• 12/12 from seed
• Mineral base in AutoPots (steady availability, no dry-back stress)
• Occasional top-feed with organic inputs
• Selective defoliation in the room — but these girls were left untouched
• Multi-layer LED canopy + under-canopy lighting
• Week 7 from seed → stretch phase still active
And now?
She’s around 70 cm, some phenos pushing 80 cm, praying nonstop, stretching like she has somewhere important to be.
That’s Haze.
⸻
🌡️ Environment Snapshot
• Day temp: ~28 °C
• RH: ~65%
• EC: ~2.9 (higher than the rest — intentionally)
• pH: ~6.5
• Height range: 40–80 cm
• LED full-spectrum, layered canopy
On paper?
Some growers panic at 28 °C in flower.
In practice?
Understanding numbers.
⸻
🍃 LED Physics — Why 28 °C Is Not 28 °C
Under LED:
• No infrared dumping
• Leaf surface runs 2–4 °C cooler than room
• Lower radiant load
• Different transpiration dynamics than HPS
So if:
• Ambient = 28 °C
• Leaf temp ≈ 24–26 °C
• RH = 65%
👉 Leaf-level VPD lands beautifully in early–mid flower comfort zone.
And the plants confirm it:
• Deep healthy green
• No tacoing
• No clawing
• No light bleaching
• Strong internode spacing
• Constant upward praying
That praying?
Not stress-praying.
It’s metabolic confidence.
⸻
⚡ Why EC Is Higher on These Girls (~2.9)
This is important.
Ghost Train Haze is:
• Vigorous
• Long-flowering
• High metabolic rate
• High transpiration under LED
She’s drinking more.
She’s moving nutrients faster.
She’s building vertical structure aggressively.
If we fed her like the others?
She’d outpace availability.
So EC is slightly higher here to match:
• Growth speed
• Stretch demand
• Structural building phase
We’re not pushing blindly.
We’re matching consumption.
And the uniform leaf color across the canopy confirms uptake is balanced.
⸻
Let’s Talk Genetics — Why She’s “Late”
Ghost Train Haze carries heavy Haze lineage.
That means:
• Longer stretch
• Longer flowering time
• Slower early flower stacking
• Higher final terpene complexity
• More cerebral profile
Compared to hybrids or more indica-leaning cultivars, Haze types:
• Take longer to show flower mass
• Spend more time building structure
• Finish later
But what do they give back?
• Airy-but-resinous spears
• Intense terpene complexity
• Electric, clear-headed medicine
• Beautiful, elegant bud architecture
They compensate.
Always.
⸻
📏 The Stretch Question — Will She Outgrow the LEDs?
At 70 cm in Week 2 flower?
Yes. She’s not done stretching.
Haze typically stretches:
• 2–3 weeks into flower
• Sometimes up to Week 4 depending on phenotype
Expect:
• Another 10–25 cm possible
• Internodes to slightly elongate
• Apical dominance to stay strong
Bringing LEDs up soon?
Smart move.
Better to anticipate than react.
⸻
🍃 Defoliation Choice — Why We Didn’t Touch Her
We left her natural.
Why?
Because:
• Haze structure is naturally airy
• She manages light penetration well
• Over-defoliation can slow stretch momentum
• She’s showing perfect airflow already
Sometimes restraint is the better technique.
⸻
🔮 What To Expect Next Week
You will likely see:
• Continued vertical stretch (but slowing by end of week)
• First real bud site stacking
• Slight shift from lime green to deeper flower tone
• Increased thirst
What you should NOT expect:
• Massive bud density yet
• Hard swelling
• Early frost explosion
It’s too early.
Haze builds in stages.
⸻
Stability Over Reaction
We are not chasing numbers.
We are reading the plant.
Temperature? Fine.
Humidity? Fine.
EC? Matching demand.
Structure? Strong.
Leaves? Praying but relaxed.
This is controlled vigor.
⸻
Final Thoughts
Week 7 from seed.
Week 2 flower.
~70 cm.
Still climbing.
And honestly?
This is exactly what you want from a Haze.
Patience now equals magic later.
⸻
🙏 Gratitude
To the OGs.
To the new followers.
To the lovers and even the skeptics.
To the GrowDiaries platform.
To the GD community.
To the sponsors.
To everyone watching silently.
Thank you.
We’re learning together.
We’re growing together.
We’re documenting honestly.
And in the end?
We grow medicine.
With respect. 🌿❤️
📡 Please stay tuned they can try and take us down but we never quit https://www.youtube.com/@DOGDOGTHEDOCTOR NEW
🙏 Thank you for your patience and continued support.
FOR DISCOUNT CODES AND MORE JUST FOLLOW THE LINK https://website.beacons.ai/dogdoctorofficial
📲 Don’t forget to Subscribe and follow me on Instagram and YouTube @DogDoctorOfficial for exclusive content, real-time updates, and behind-the-scenes magic. We’ve got so much more coming, including transplanting and all the amazing techniques that go along with it. You won’t want to miss it.
GrowDiaries Journal: https://growdiaries.com/grower/dogdoctorofficial
Instagram: https://www.instagram.com/dogdoctorofficial/
YouTube: https://www.youtube.com/@dogdoctorofficial Deleted by Youtube
Vimeo : https://vimeo.com/dogdoctorofficial Under construction stay tuned ⸻
Explore the Gear that Powers My Grow
If you’re curious about the tech I’m using, check out these links:
🔆 Lighting & Environmental Control
• Future of Grow — Advanced LED lighting technology
https://www.futureofgrow.com/
DISCOUNT CODE: DOG20
• Lumiflora — Under-canopy LED lighting
https://lumiflorade.com/
• TrollMaster — Environmental controllers and automation gear (past collaboration)
⸻
Genetics
• Zamnesia Seeds — Genetics used in this project
https://www.zamnesia.com/
⸻
🌱 Soil, Substrates, Boosters & Root Support
• Plagron — Substrates, bio mixes, and supportive products
https://plagron.com/en/
⸻
🎒 Storage, Curing & Preservation
• Grove Bags — Curing and storage solutions
https://grovebags.com/
⸻
📸 Photography Equipment & Tools
(Not sponsors, but part of my creative toolkit)
• Sony A6700
• Sony full-frame macro lens + few more
• Stacking photography workflow - learning
• iPhone (for behind-the-scenes shots)
We’ve got much more coming as we move through the grow cycles. Trust me, you won’t want to miss the next steps, let’s push the boundaries of indoor horticulture together!
As always, this is shared for educational purposes, aiming to spread understanding and appreciation for this plant. Let’s celebrate it responsibly and continue to learn and grow together.
With true love comes happiness. Always believe in yourself, and always do things expecting nothing and with an open heart. Be a giver, and the universe will give back in ways you could never imagine.
💚 Growers love to all 💚
📸 P.S. – The Eye Behind the Lens
All photos in this diary (for now — except for the ones showing the camera, which I took with an iPhone) are taken with a Sony A6700 paired with a Sony full-frame macro lens and a few more.
Photography is part of the story — it’s how we share the fine textures, the glow, and the quiet details that words can’t always capture.
I’ve also started experimenting with photo stacking — a technique where multiple images, each taken at a slightly different focus point, are layered together to create one perfectly sharp image from front to back.
It’s not digital enhancement or AI; it’s pure photography — a way to reveal the plant’s beauty in microscopic depth, from trichome to petal.
You’ll even see a few shots of "ghost me" capturing the shots — camera, lens, setup — because every grow deserves not just to be cultivated, but documented like art.
FOR DISCOUNT CODES AND MORE JUST FOLLOW THE LINK https://website.beacons.ai/dogdoctorofficial
NEW DISCORD - Official Server Invite Link : https://discord.gg/ksjAkA5T74
Likes
6
Share


@GoldenWeedGrower
Follow
Legend
Timestamp: 📅
EC - pH: ⚗️
Temp - Hum: 🌡️
Water: 🌊
Food: 🍗
pH Correction: 💧
Actions: 💼
Thoughts: 🧠
Events: 🚀
Media: 🎬
D: DAY, G: GERMINATION, V: VEGETATIVE, B: BLOOMING, R: RIPENING, D: DRYING, C: CURING
______________
📅 D22/V18 - 07/05/24
⚗️ EC: 0.7 pH: 5.3
🌡️ T: 22 °C H: 50%
🌊
🍗
💧
💼
🧠
🚀
🎬 1 TL video
______________
📅 D23/V19 - 08/05/24
⚗️ EC: 0.7 pH: 5.3
🌡️ T: 22 °C H: 50%
🌊
🍗
💧
💼 Topping and LST
🧠
🚀
🎬 1 TL video of grow and one of the topping
______________
📅 D24/V20 - 09/05/24
⚗️ EC: 0.9 pH: 5.4
🌡️ T: 19 °C H: 50%
🌊
🍗
💧
💼
🧠
🚀
🎬 1 TL video
______________
📅 D25/V21 - 10/05/24
⚗️ EC: 0.9 pH: 5.4
🌡️ T: 19 °C H: 50%
🌊 12 L
🍗 Calmag, Grow A-B, B52, Hydroguard, Rhino Skin, Bud Candy
💧
💼
🧠
🚀
🎬 1 TL video
______________
📅 D26/V22 - 11/05/24
⚗️ EC: 0.9 pH: 5.4
🌡️ T: 19 °C H: 50%
🌊
🍗
💧
💼
🧠
🚀 Out of Home
🎬 1 TL video
______________
📅 D27/V23 - 12/05/24
⚗️ EC: 1.0 pH: 5.3
🌡️ T: 20°C H: 50%
🌊
🍗
💧
💼
🧠
🚀 Out of Home
🎬 1 TL video
______________
📅 D28/V24 - 13/05/24
⚗️ EC: 1.0 pH: 5.2
🌡️ T: 20°C H: 50%
🌊
🍗
💧
💼
🧠
🚀 Out of Home
🎬


Likes
9
Share


@OrionSparkles
Follow
▶️
-Muy frondosas;ocuparon practicamente todo el espacio del armario.
-Yá puestas a fotoperiodo 12/12,las dí la segunda aplicación Delta9,esta vez via riego;la tercera y ultima será dentro de 10 dias.
🐭🐭

Likes
12
Share


@Ziggs
Follow
I missed last week's diary but I did get these lady's transplanted last week and got the grow room all set up. I'm supper excited to start the training.

Likes
1
Share


@KannaGrowing
Follow
Esta semana, nuestras plantas empiezan a mostrar las primeras flores.
Ya tenemos la sala con las cuatro luminarias funcionando al 75% de su potencia y las he separado un poco más, ya que veo que con led, el espacio internodal es muy reducido.
Añadimos a la mezcla de fertilizantes CALMAG de BioBizz, que aportará un extra de calcio y magnesio.
Regamos cada tres días aproximadamente, una vez con fertilizantes y otra vez con agua.
Comenzamos a reducir la humedad relativa en la sala y desconectamos la calefacción en fase nocturna, para que empiecen a pasar un poco de frío.
Likes
3
Share


@SolitudeCorners
Follow
Have to cut them early cause they're too crowded with colas, and there are risks for mold. Whole plant weight average at 750g /only flower 400-450g
The total flower from 23 plants is 9.95kgs


Likes
17
Share


@FatalFarmer
Follow
Last week of veg, starting 12/12 tomorrow as I'm starting to worry about space.. hopefully stretching isn't too much of an issue.. we shall see. I'm still not happy with my defoliation, I've been mostly removing large/damaged leaves and sucker branches off the bottom of the plants.
I've been experimenting with the fan and scrog placement, placing one large fan oscillating below the canopy and two clip on fans above the tops and mostly using the scrog as a support for branches during flower as I somewhat failed to actually scrog..
Once again, any advice much appreciated and happy holidaze!
