


Likes
Comments
Share

@GERGrowDesigns
Follow
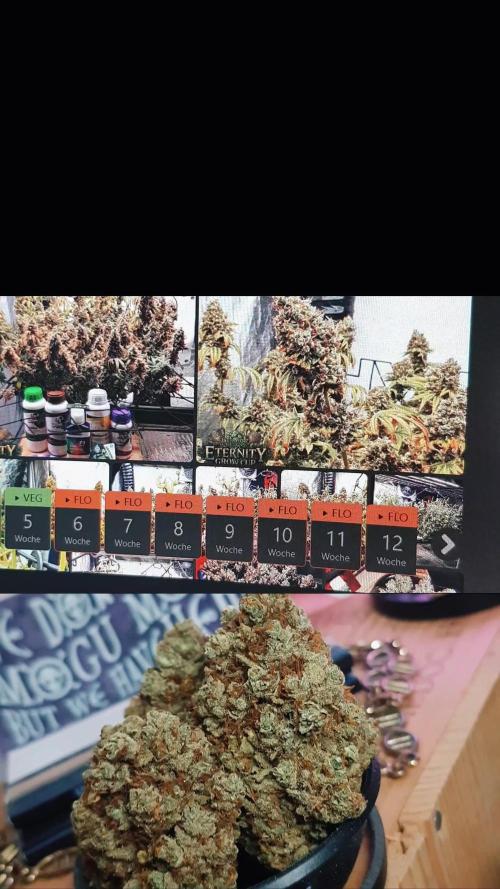
🥦 Final Cure & Smoke Report Sticky Broccoli Feminized
After 12 days of controlled drying and an additional 2 weeks of curing, Sticky Broccoli has fully revealed its final character.
The flowers were dried under stable environmental conditions and cured in Terploc Grove Bags at 19°C, allowing the terpene profile and overall flower quality to develop exceptionally well.
👀 Appearance & Bag Appeal
One of the most striking features of Sticky Broccoli is its visual appeal.
The flowers display:
-Dense and well structured buds
-Heavy trichome coverage
-Beautiful green grey and slightly bluish coloration
-Vibrant deep red pistils tightly wrapped around the flowers
The contrast between the frosted buds and the intense red pistils creates outstanding bag appeal and gives the flowers a premium appearance.
The SCROG training throughout the grow cycle clearly paid off. Aside from a small amount of popcorn buds (approximately 33g), the harvest consisted almost entirely of large, uniform flowers with excellent structure and consistency (Total 318g).
👃 Aroma & Flavor
The aroma closely reflects what was observed during late flowering.
Sweet candy like notes dominate the profile, accompanied by creamy dessert characteristics and fruity undertones reminiscent of Gelato and Zkittlez type cultivars.
After curing, additional depth emerged, introducing a slightly sharper and more complex edge to the bouquet.
The flavor translates remarkably well from aroma to smoke, delivering:
-Sweet fruity notes on the inhale
-Creamy dessert-like undertones
-A noticeable gassy and slightly plant-forward finish on the exhale
The combination creates a rich and enjoyable smoking experience with multiple layers of flavor.
✨ Overall Impression
Sticky Broccoli proved to be an exceptionally rewarding cultivar from seed to cure.
The strain combined:
- Excellent genetic stability
- Strong training response
- Heavy resin production
- Attractive coloration
- Dense flower structure
- Complex terpene expression
From cultivation to the final cured product, the entire process remained consistent, predictable, and highly satisfying.
The final result is a harvest with impressive visual appeal, strong aroma, enjoyable flavor, and flower quality that fully reflects the effort invested throughout the grow cycle.
A cultivar that successfully delivered on every stage of the journey.

Likes
9
Share


@Mr_nugs_lover_David
Follow
This ladies got pretty big for real, hands down the biggest autos I've ever had grown in 7l pots, excellent performance, and the flowers start to stink really strong, there is one pheno which is more developed than the other 2 phenos but the 3 have developed really good and they are producing a lot of sticky and stinky trichomes! Let's see how this will end up! Can't wait 🤤

Likes
42
Share


@GanjaReaper
Follow
Hey guys,
I did some LST with some copper dreads. I like Rubber tie tubes more but my brances are to small for that.
A day later i gave them some water with enzymen ph 5.8-6
and yesterday i gave them nutrients and sprayed them with CANNA CURE.
I decided to build a roof for my plants haha, i can't help myself giving them the best conditions i can give them for a outside grow.
Bought some 20L pots and some garden dreads.
Sadly it is still to cold in the night so i can't repot them and keep them outside 24/7.
I'm not really sure if i like the way i LST them because it takes a lot of time to recover and grow but like i said i like to do different things everytime.
Normaly you should LST them when you got more brances or just bend the main cola. The way i did it cost many leafs while not having much, so you take away lots of energy.
By accident a brance from the plant in the middle(look at pictures) got cut off but i really didn't mind because i was planning to keep four plants instead of five :)
ps, made the pictures at 10pm so the leaves are down a bit, i might make some new ones when they are happy in the sun therefore they are lifted more.
They still get a few hours of sun every day when i put them outside and therefore they still grow slowly, it will take some time.
I hope you enjoyed.
Update:
Made a new picture at daylight under the roof.
Putted the plant I don't want to keep in the bigger pot and will keep her outside to see if she can manage through the night temperatures.
If i don't see anything i don't like, keep growing in the comming week, i might put all my plants outside permanent.


Likes
22
Share


@Spliffi
Follow
Week 13👍🤙👍🌱
And it's Chop time. I made some bubble hash from the wet trim. First time and did not expect anything yet is was a success. Got a few drops. Will do one more bubble hash cycle with the dry trip. Overall the contest was nice. Still waiting on all the details.
Jon Dabs
Check them out here:
https://jondabs.com
@jondabs Instagram
The Sponsors
Check them out here:
Dutch Passion
https://dutch-passion.com/en/
Hydroponic.co.za
https://hydroponic.co.za/hydroponic/harvesting-and-growing-accessories/
Bud Juice
https://www.gohydro.co.za
The Best Grow
https://thebestgrow.co.za
Dynomyco
https://www.dynomyco.com
Nuclear Roots
https://www.nuclearroots.co.za
Photronic
https://shop.photronic.net
Special Thanks to Hydroponic.co.za. I buy all my products from them. Best service.
Daily updates coming...

Likes
10
Share

@Zdenda
Follow
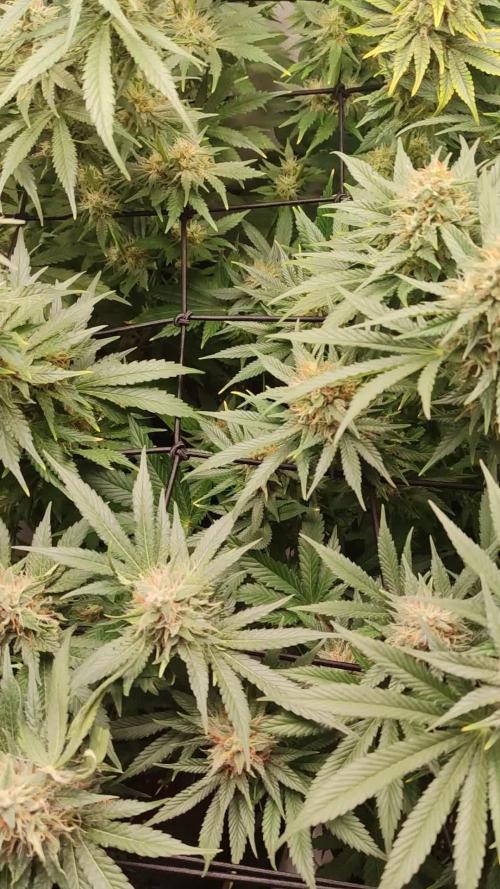
Pomalu to jde do finále.. vidím to na dva týdny.
Jednu bych už sice mohl příští týden, ale nechám jí dojít s ostatními.. měla hodně ec a musel jsem jí po druhé prolit aby to v půdě kleslo.. přitom všechny dostávají stejně, ale jen u jedné to bylo znát..
Jinak se mi to líbí.. pěkně to prorůstá do tvrdých palic
Teď už jen na začátku týdne začnu dávat Winter Frost na pět dní a potom jen voda..
Likes
5
Share


@BettaN
Follow
The LST really opened up the girls and helped them to increase volume.
During the week PE finally got some more training, it feels like she opened up nicely.
It is not very comfortable to grow 2 plants in a 60*60cm tent.
Likes
12
Share


@DutchRookie87
Follow
Ok now it looks to go good no signs of Amy strange things so far 👌🏾👌🏾

Likes
19
Share


@proud_to_grow_loud
Follow
I switched my nutrients to Nectar For the Gods because I didn't have the funds in the beginning to do so. I got their spartan regiment with the extras. Photo-plus and SLF-100 which I use separately and not during feeding. Im watering everyday and feeding every other day. Water days I use SLF-100 and the next water day I use tea with Photo plus. my tea I use bloom by cultured biologics organic easy bloom and compost worm castings from my personal vermicomposting bed. alternating water days with the slf and photo plus was a massive growth in buds. They dense' nd up and just started putting on trichomes. brilliant brand- Nectar! OCGFAM for life now. Feeding is a pain but damn its worth it.
Pricy but worth the investment!


Likes
2
Share

@Ninjabuds
Follow
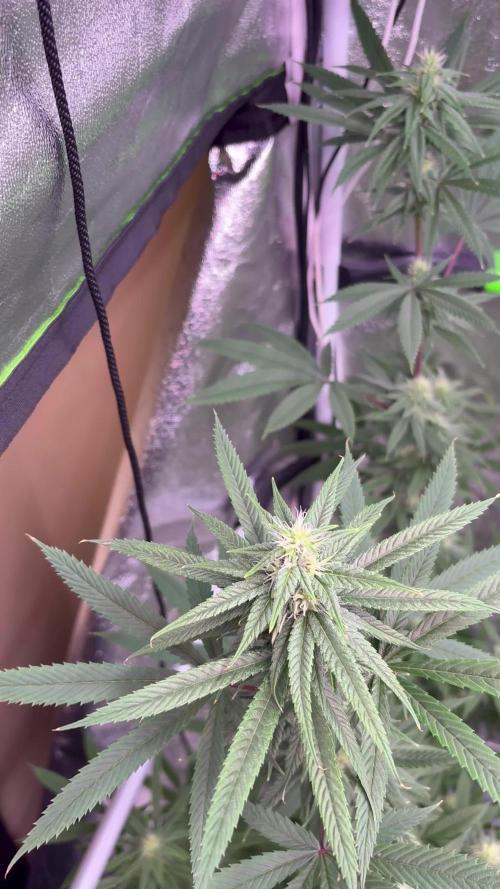
This plant is a beast I finally got the nutrients down and got rid of the light color growth it was having the plant would have been great to have a clone it is definitely something worth growing again


Likes
4
Share


@DeepSouthDank
Follow
Day 30 of bloom!
Buds are stacking, and the smell is strong already. Carbon filter has been installed. Another 30 days or so to go. No issues in sight.
VPD: 1.4
EC 2.6
PH: 5.9-6.1

Processing
Likes
32
Share


@Vega0284
Follow
Hey Guys!
Super excited this week! I've really been wanting to try growing outdoors, so I built a cheap hoop house! Got most of this stuff for the frame from Lowes under 300$. All the soil products I got from GrowGreenMI. Some really cool people out there.
One thing I'm super worried about is drainage. Right now those holes are about 4 feet deep and they've got about 4 inches of water in them already. What's been cautioned is that, eventually, about 2 months in these plants roots will grow and reach the bottom and cause root rot to form. One of the biggest things I was trying to be wary of was causing root rot. This was also the biggest precautionary measure I took when mixing the soil. Adding the extra perlite, coco, and clay pebbles. Best advice right now is to build the soil up on the holes another 16 to 18 inches and possible stick a PVC pipe down to the lowest drainage point of the hole to allow some of that natural occurring water to evaporate.
Any advice anyone has on it is welcomed!
Making a compost tea for the soil outdoors, will probably put 2 cups in each RDWC bucket as well and let that do it's magic for a day or so before nutrient change. Raised the bed about 14 inches as well!
All the seeds sank! Off to a good start! Lol


Likes
5
Share


@CalGonJim
Follow
12/18 4am CANNAKAN!!!! Giving my FAST Flowers a try. A late spring early summer grow. CannaKan is my new best friend, I had a 100 per cent success rate last time!!! Ok I got it all done at 5:30 am, I set the Temp to 88 MPH or the Time Machine wont work, EVERYBODY KNOWS THAT! Marty will meet me in the parking lot at the mall, I have a great feeling about this. 11am Room temperature is 73. Heating Pad set to 88. Water temp 77.7 PERFECT!!
2:30pm blue dream is already starting to open. I think Tropicana cookies looks like she’s opening a little bit. They should all be open by tomorrow. It’s only been about nine hours.👍👍. 11:30pm They all opened. I drained the water put in new distilled water, made sure water level was right. Looks great!!!!
12/19 4am The temp looks good, all are opening nicely. I have to get the pots ready now, put on new stickers, they help identify the plants from different angles, especially in photos. Im doing a low power fast turn around grow in easy to move 1 gallon pots. They will all be topped above the 3rd node, then the bottom or 2nd to the bottom branches will be cut off to achieve a 4 cola grow. Very simple, easy to manage.
11am. 2:30pm, 5:30pm..so tired, finish in the morning.
12/20 12 am 1:30am Just finished TC & GS I had a little trouble seating GS, TC no problems, takes a while to learn. BD is still sprouting, not a long enough tail to bury yet.
9am I think im getting another CannaKan. 10am 👍👍👍
12/21 Put BD in the pot, not sure if she will go or not, I'm firing up the CannaKan and doing another, since its a photo I will keep it in Veg until my next grow cycle. I may do a full 3 gallon grow with this one and take clones, this is fun!!!! gardening, who knew? The new filter paper I got is a little thicker than what came with it takes longer to sink, more dramatic, I got medium in that blue box from amazon.
7am Tropicana Cookies is the Winner of fastest to sprout, she looks great! GS has the shell and skin, it could still fall naturally so I'll wait. BD is unchanged.
Micro-surgery on TC got the skin off and she popped right open!!
12:30pm SUCCESS!!! 4 hours later, she's PERFECT, worked GREAT!!! I NEVER thought I would be able to do seed surgery. That was my 3rd time doing that, success every single time! 4pm looks good.
12/22 9am. all look great, GS is taking off VERY strong overnight, TC has taken root her main stalk is already thick!! BD #2 is almost ready. I kept BD#1 underwater too long...then I accidentally ripped her head off this morning......so really not my fault......shhhhh.....
1 pm BD looks perfect 🤩 almost ready. 330pm Did the transplant...I really need to work on that....so nervous when I do it. Im not paid for this but CannaKan is one of the best products Ive ever used. I need lots of practice planting the radicles ...""In botany, the radicle is the first part of a seedling (a growing plant embryo) to emerge from the seed during the process of germination. The radicle is the embryonic root of the plant, and grows downward in the soil (the shoot emerges from the plumule)""..... I had to look radicle up... It makes a complete difference, I dont lose seeds now It just a million times easier using CannaKan.


Likes
2
Share


@Vet4weed
Follow
Pretty exciting week. Been doing last-minute prep to switch from Veg to flower, by moving lights around and adjusting them between blue and red to encourage growth in that last little stragglers.
More significant though, we had a power outage in the middle of the day, mid week, that caused me to scramble to find light. This gave an added bonus because I the weather is getting better and I was able to expose my plants to some natural sunlight and air.
You can see in the timelapse the combination of blue, red, and white light as I shift things around. NOTE: This week was also the start of the COVID-19 Self Quarantine, so the time at home gave me a lot more flexibility to tend to my babies.
Plants have reached as high as 20 inches or more, but topped off the tallest ones because they were overpowering the smaller guys and also starting to droop. Plus I broke one trying to weave through the net.
Next Week: Switch to Flower Stage!

Likes
77
Share


@Puffdamagikchillum
Follow
Day 91) 12/24 Merry Christmas 🎄 Eve growers. Another week gone by and I made satisfactory changes to nutrients this past week. I am just a tad bit worried 😬 about nute lockout cause it seems like slow bud growth is my only issue. Buds are getting fat but I don't like seeing the empty spots on the stalk. Could be environmental issues as well, temps been weird here at home. Other than that trichomes are shiny but I don't see any cloudy ones yet and pistils are still mostly white so come along on another week and see if she comes ready for starting the flush.
Happy Growing and
Happy Harvesting
Likes
7
Share


@OnlyMono
Follow
These girls seem to love abuse.. on a side note, one plant is throwing dense little nugs on fan leaves (video). Loving the smell in the tent😁

Likes
11
Share

@cangrowz
Follow
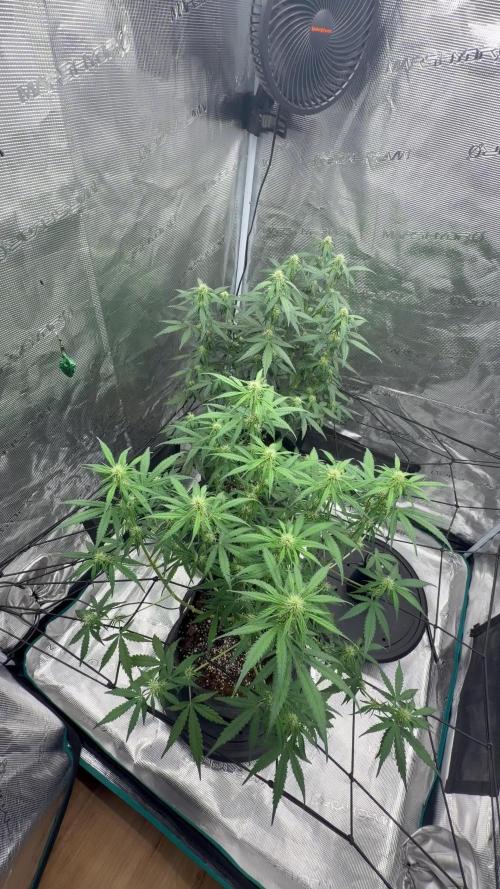
Ende Woche 4 / Anfang Woche 5 – Grow Diary Mimosa x 🍊👊🏻 Barney’s Farm
Die beiden haben nochmal ordentlich Stretch hingelegt 💪 Seit die Runtz raus ist (Ernte lief sauber durch), wirkt das Zelt jetzt etwas leer – aber gibt den Mimosas schön Platz, sich voll zu entfalten.
Die ersten Blütenstempel kommen jetzt richtig stabil durch, genau so will man das sehen 🔥 Wenn das so weitergeht, werden das am Ende richtig schöne Ladies.
Klima bleibt weiterhin im sweet spot – weder zu feucht noch zu trocken, Temperatur passt auch konstant. Genau so hält man sie happy in der Phase.
Bis jetzt wieder mal sehr zufrieden mit dem Run und der Genetik von Barney’s 👌
Happy Growing Growmies 🌱?💚

Likes
12
Share


@Smokehonja
Follow
21 days of flowering put this baby in a 2x2 tent with my northern lights.
Processing
Likes
19
Share


@AsNoriu
Follow
Day 15. Girls are flying !!! Think on day 18 i will do heavy defoliation, maybe Middle girl will have to be treated differently, she is a bit behind by flower development.
Still see one or two bugs, but today i should get ladybugs from friends shed, they always nest there, but you never know ....
Worst case - this wednesday i will get 200 LadyBug larvas, they should do a deal !!!
Plus, new adventure on horizon ....
FastBuds send me theirs surprise package !!! I know i said never again autos indoors, but this house is just too good not to give a try ! Huge thanks !!! I really will try my best to show beauty of theirs strains !!!
So Future is planed, now just finish those wonderfull Kushes !!!
As you see, my anti-fim'ing worked well on Tallest Kush, other girls managed to save main cola as main, Tallest have it as well, but it shrinked to smallest size and stayed lower than main canopy.
Main stretch is going to the end and after training i will lift Smallest Kush to Middle's level.
Day 15. Update, got like 50 ladybugs. 10 went to this tent, others will go to big one. Still waiting for larvae postage.
Day 16. Heavy training done now : defoliation, lolitoping, watering straight after....
Tallest Kush - 14 tops, amazing, cleared her really high, but it will be 3-4 ounces plant easy, i see structure already, after my version of fim'ing she made 3 tops, where center one shrink to side branch size. Very good structure - thats my target for future grows.
Middle Kush - a bit delayed in flower, but very bushy. After failed attempt of anti-fim'ing all side branches had triple shoots, needed to repeat action most probably ...
Anyway - she will be dofoliated in 4-5 days i think.
Smallest Kush - Midget warrior ;))) She will have hardest nugs from all 3, let's see what size colas she will make, branches shortest, but fatest of all 3.
Day 17. Girls are on absolute max power, looks happy as f@ck and that makes my heart sing !!! ;)))
Day 20. Gave Silica acid with watering. Looks like this tent is free from thrips, girls always prays and drink quick, so its all good in the neighbourhood ;)))
Happy Growing !!!


Likes
19
Share

@bkickstand
Follow
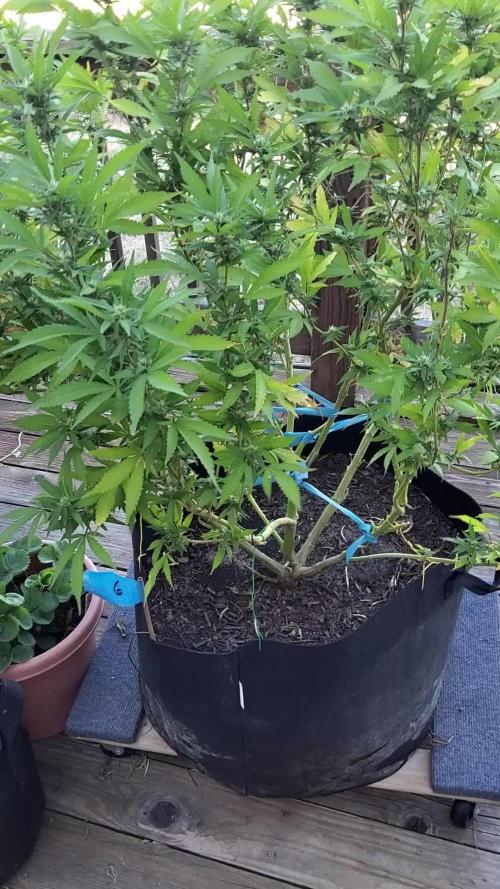
Week 25 is rolling along on the deck, and the Durban Poison photoperiod crew is putting on an absolute masterclass in outdoor structure and flower development. Sitting comfortably in their large fabric bags on furniture dollies, these sativa powerhouses have built an incredible network of robust colas that are packing on serious weight and density as the late-season bloom cycle intensifies.
Managing this stage successfully comes down to dialing in the right balance of organic amendments, micronutrients, and water chemistry to keep the root zone happy without causing nutrient burn or pH lockouts.
Nutrient Management & Feeding Routine
* Seabird Guano (0-11-0): Playing a starring role in the heavy bloom phase, the high-phosphorus seabird guano provides the essential P needed to drive massive flower set and resin production. Following top-dressing routines like the recent application on August 2nd, this amendment fuels the explosive bud development visible across the upper canopy.
* Kelp Meal: Espoma Organic Kelp Meal works in tandem with the soil to supply essential natural trace elements, potassium, and growth hormones that boost plant stress resilience against shifting late-season outdoor temperatures and wind.
* Cal-Mag: Essential for preventing secondary nutrient deficiencies, calcium and magnesium keep the cell walls strong and support the heavy metabolic demands of these sprawling sativa colas.
* pH Down & Water Balance: Balancing out the hard tap water requires careful monitoring. While source water sits around a 7.5, keeping a close eye on the General Hydroponics pH Down ensures the root zone stays optimized for maximum nutrient uptake without inducing sudden pH crashes.
The canopy is looking exceptionally vibrant, vigorous, and primed for a heavy, aromatic finish as harvest window approaches.
The aroma on the deck is now really intensifying. I'm going to enjoy watching the colas form over the next month, month and a 1/2.