


Likes
Comments
Share

@MrWeeedWorld
Follow
Keimungsbericht – Lemon Cherry Sundae Automatic
Heute beginnt mein neues RDWC-Abenteuer mit der brandneuen Lemon Cherry Sundae Automatic von FastBuds.
Für die Keimung habe ich diesmal eine völlig neue Methode ausprobiert – mit einem Ergebnis, das mich absolut überzeugt hat.
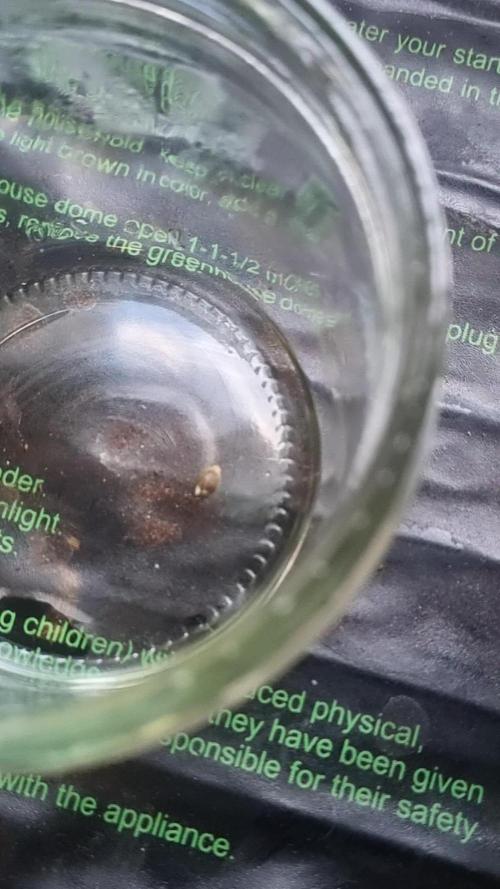
Zum Einsatz kam ein neues, sauberes Marmeladenglas mit Deckel. Das Glas wurde mit etwa 1 cm Osmosewasser befüllt. Anschließend habe ich mit einer Pipette zwei Tropfen 11,9 % Wasserstoffperoxid hinzugefügt und das Glas verschlossen.
Danach wurde das Glas auf einer Heizmatte bei konstanten 28 °C platziert.
Das Ergebnis war beeindruckend: Bereits nach nur 8 Stunden entwickelte die Lemon Cherry Sundae eine kräftige Keimwurzel von etwa 1 cm Länge.
Eine schnellere Keimung habe ich bisher nur selten erlebt. Die Kombination aus sauberem Osmosewasser, stabiler Temperatur und zusätzlicher Sauerstoffversorgung scheint ideale Bedingungen geschaffen zu haben.
Nach diesem perfekten Start zieht die Lemon Cherry Sundae nun in ihr neues RDWC-System ein, wo sie mit dem Plagron Hydro Düngeschema versorgt wird.
Ich freue mich darauf, die Entwicklung dieser neuen Genetik von Anfang an zu dokumentieren und bin gespannt, welches Potenzial sie unter optimalen Hydro-Bedingungen entfalten wird.
Vielen Dank fürs Vorbeischauen!
Jeden Sonntag gibt es neue Updates zu diesem Grow.
--------------------------------------------------------------------------------------------------------------------------------------------------------------------
Germination Report – Lemon Cherry Sundae Automatic
Today marks the beginning of my new RDWC adventure with the brand-new Lemon Cherry Sundae Automatic from FastBuds.
For this grow I decided to test a completely new germination method and the results were outstanding.
A brand-new clean glass jar with a lid was filled with approximately 1 cm of reverse osmosis water. Using a pipette, I added two drops of 11.9% hydrogen peroxide before sealing the jar.
The jar was then placed on a heating mat maintaining a constant temperature of 28°C (82°F).
The results were impressive. After only 8 hours, the Lemon Cherry Sundae had already developed a strong taproot measuring approximately 1 cm in length.
This was one of the fastest germination results I have experienced so far. The combination of clean RO water, stable warmth and additional oxygen appears to have created ideal conditions.
Following this excellent start, the Lemon Cherry Sundae is now moving into its new RDWC system where it will be grown using the Plagron Hydro nutrient line.
I am excited to document the complete journey of this new genetic and discover its full potential under optimized hydroponic conditions.
Thank you for following along!
New updates will be posted every Sunday.

Likes
29
Share


@JeyGanesha
Follow
Quinta settimana di fioritura 💪 forza bella mia,vai avanti così e fammi delle belle e grandi pannocchie 🙏🕉️💚💛❤️

Likes
10
Share


@Lagriculteur420
Follow
First week, nothing to say, i've put seeds in coco pellet, about 5 days to show up, Biscotti IS more string than MAC

Likes
4
Share
@Trinidad
Follow
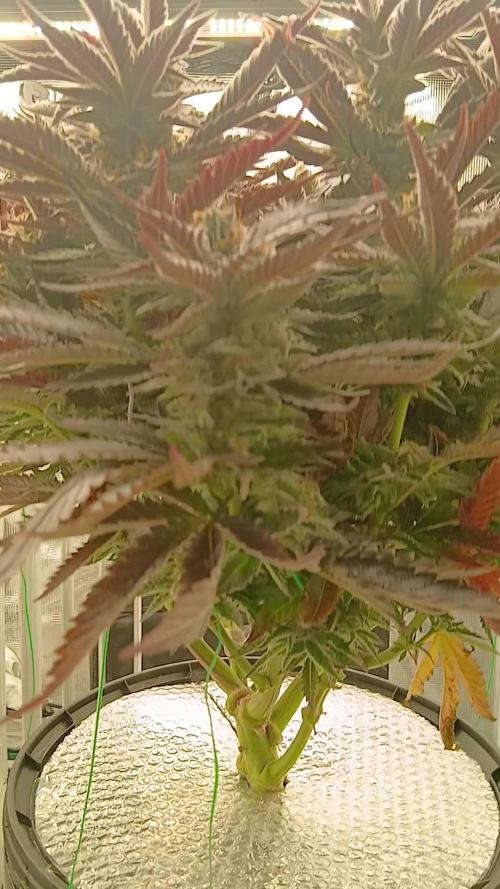
Day 135 (4.5 months)
Day 72 since 12/12 ( for badazz og cheese)
Reservoir change out today. 2 gals of water. 16 grams of full tilt.


Likes
45
Share


@masterofsmeagol
Follow
8/7 Plants were still heavy this morning. Temperatures have been much milder. 70's is much better than 90's. I had to water twice a day for a while. I defoliated ahind found some heat stress ob the gmo canary on the end with some twisted leaves. Some leaves are turning purple on an event horizon and gmo. Night Temps are much cooler plus its probably a pheno thing. I defoliated everything dead yesterday. Found lacewind eggs. Saw an adult green lace wing this morning in the garden along with a couple more lady bugs. There were also some lady bug larvae so I hope the go right to town. It's getting cooler so if I'm going to poorly I need to do it. Sherb pie plant seems to he the pillars favorite. I've killed a few of them. Still need to fix supports and do a little more defoliation. I have a video too but it's too slow to upload now.
STOPPED AFTER GETTING MY TIRES PUT ON AND DAD SAID THE LITTLE PLANT IN THE 5 GAL BUCKET IS DROOPING. I WENT BACK AND OF COURSE IT WAS. I WATERED THAT AND THE ONE IN THE TEN AND THE 50 AS IT LOOKED DROOPY. 10 GOT A HALF GALLON AS IT WAS DRYING UP AND ITS GOING TO BE HOT TOMORROW TOO. NOT 90S PROBABLY 80S AT MOST BUT STILL. I GAVE PRETTY MICH EVERYTHING A HALF GALLON EXCEPT THE EVENT HORIZONS TGAT ARE FURTHEST IN FLOWER. WITH THIS SUPER HOT WEATHER AND LACK OF RAIN I DONT WANT TO OVERWATER. DAY AFTER TOMORROW IT SAYS WE ARE SUPPOSED TO GET AN INCH. IM DOING MY BEST. IM TRYING TO UPLOAD THE VIDEO I DID TONIGHT. ILL UPLOAD ThE OTHER ONE TOMORROW.
8/8 Went over this morning and it was 55°. I gave the event horizon in the back half a gallon of water. I gave the other event horizon a LITTLE water but it still is holding weight. It doesn't get the wind blowing through it since it's in the middle. Still need to do supports and decide about whether to spray BT. population is down. A couple plants look hungry so I'm going to have to look at nutes. I defoliated the toasted toffy some this morning. I have more to do on a few others.
TALKED TO MY BUDDY AND SHOWED HIM A VIDEO. HE WAS KINDA ALREADY IRRITATED AND SAID OMP WAS IN THE AREA. UE SAID MY PLANTS LOOKED DROOPY AND THAT I NEED TO GIVE THEM THE 10% AND AT LEAST WATER TWO GALLONS A TIME. HE ALSO SAID NOT TO BET ON THE RAIN. I DONT AGREE WITH THE LAST PART AS IVE STUCK A BICKET OUT DURING THESE RAIN STORMS AND EVEN PHED IT. I WATERED EVERYTHING A GALLON. PLUS THE HALF LAST NIGHT. I THINK MY BUDDY MAY BE RIGHT AND THAT I NEED TO INCREASE THE VOLUME OF WATER AT A TIME SO I DID. I NEED TO INCREASE NUTES TOO. ILL CHECK LAST TIME I FED AND FIGURE THAT OUT. KILLED A FEW JPN BEETLES, A LEAF HOPPER AND A COUPLE PILLARS WITH HAIR ALL WEBBED UP. IM WONDERING IF THE TOASTED TOFFY HAS SEPTORIA. IM LEANING TOWARDS PESTS THOUGH. IVE SEEN TONS OF PESTS IN THE GARDEN. I REALLY SHOULD SPRAY IF IM GOING TO. I NEED TO DO THE SUPPORTS AND REARRANGE A FEW THINGS FOR FLOWER. THE SEED IN THE 5 GAL BUCKET (I THINK ITS A BLUEBERRY IS VIBRANT DARK GREEN BUT THE TIPS OF THE JEWLY FORMED FLOWERS ARE TURNING BROWN ON SOME. ILL GET A PICTURE TOMORROW. A FEW OTHERS EXPERIENCED SOME BURNS AND HEAT STRESS. I HOPE ITS NOT ROOTBOUND OR A ROOT ISSUE. IF IT IS ILL HAVE TO CUT THE BOTTOM OFF THE BUCKET AND STICK IT IN A HOLE. IT WILL HAVE TO BE OUTSIDE MY CAGE WHICH WILL SUCK. WE'LL SEE HOW IT GOES.
8/9 Got like an inch of rain. Plants are looking great. Some look a little hungry. MY buddy was right about the water. I made a SHIT TON of bubble hash today so I'm barely able to type this. NY plant is the 5 gal has some burns that look like it could be root issues. I've finished in buckets before with no issue. I think it's just from being too hot. You can see at the end of the video what I'm talking about. Oh well. I'm tired and done for now. I made a large ice hash pizza now I'm waiting for it to dry so i can make a temple ball. Things are kicking off. We're in flower that's for sure.
8/10 Everything looked good bit I wad in a hurry and didn't get out of the car. I'll check things out when I get back.
HOLY FUCK. WE GOT SO MUCH HARD RAIN THAT I FOUND MY FAVORITE GMO PLANT PUSHED OVER AND LYING ON THE CAGE THATS USED AS THE FIRST SUPPORT. I DIDNT GET OVER THERE UNTIL LIKE 11AM. I IMMEDIATELY FIXED THE PLANT THAT WAS LYING DOWN AND PUT A TRELLIS NET OVER IT AS DEEP AS I COULD AND ZIP TIED IT TO THE PALLETS. I ALSO ADDED A PLASTIC GARDEN STAKE AND USED TWINE TO SECURE THE MAIN STALK HIGHER UP. I DID THE SAME THING WITH THE GMO NEXT TO IT. THE OTHER IN THE FRONT LOOKED BETTER THEN EVER. SAME WITH THE TWO EVENT HORIZON. IM GETTING LITTLE BUDS NOW. I SHOULD GO FEED TONIGHT. THE TOASTED TOFFY EITHER HAS SOME PESTS OR ITS GOT SEPTORIA. COULD JIST BE A DEFICIENCY. I WORRY A LOT. IT WAS SUPER HOT AND HUMID. I DID WHAT I COULD AND THEN I RAN SOME STRINGS ACCROSS THE CAGE TO TEMPORARILY HELP WITH HIGH WINDS OR RAIN (EVEN THOUGH THE STORMS OVER.) I STABBED MY THUMB TOWARDS THE END OF MY WRIST WITH A COLD STEEL RECON 1. WOULDNT STOP FUCKING BLEEDING. I SHOULD'VE KNOWN MY LIMITS AND WAS MORE CAREFUL. I TOOK A COUPLE PICTURE AND DID A MINUTE VIDEO. NO REST FOR THE WICKED. IM FUCKING DEAD TIRED. I RAN SOME MATERIAL FROM LAST YEAR THROUGH BUBBLE BAGS. GOT A TON OF HIGH QUALITY BUBBLE. IM ABOUT TO TRY IT. AFTER IT DRIES A LITTLE MORE ILL MAKE A TEMPLE BALL. I JUST CHECKED THE WEATHER AND THE RAIN TOTALS FOR TODAY AND YESTERDAY AND ITS A COUPLE POINTS UNDER 3 INCHES. I HAD WATERED A GALLON THE NIGHT BEFORE THAT. I HAVE NO IDEA WHY MY PLANTS AREN'T DROWNED BUT THEY ARENT.
8/11 Its going to be hot again today. Plants looked amazing. I took a video. I FED TODAY. EVERYTHING GOT A QT EXCEPT THE 10 GOT HALF A QT. THE 50 GOT SLIGHTLY MORE. A fucking chipmunk ran in my garden when the door was open. He was going fast and I couldn't find him. I looked under the pallets the entire length. Hopfully he just ran out of a hole or up the fence. I'm going to get an air horn and blow it inside the cage. I need to get some zip ties and do a little rearranging before I setup the other supports for flower. Suprisingly the plantvin the 50 went from the furthest from flower to having little budlets on it. Can't be an auto or I think it would've flowered already.
8/12 Ending of the lions gate portal. Everything looked good this morning. The one in the 5gal was removed until I figure out its issue or trash it. The yield would be less than a branch anyway. Probably chronic underwatering. The 10 was bone dry despite the 3in of rain. Some bags seemed light. Looked at last years diary and went with my intuition. WATERED TODAY. Gave everything a gallon. I moved the event horizon to where the 5gal bucket wad and STARTED reorganizing to use the most of my space. I gotta pick up some zip ties and finish the supports but I'm happy. Plants look happy. Not as tall as last year but they are SUPER bushy. I'm going to have to open some up and spread the branches. I'll keep this updated.
WENT OVER AROUND THREE. I CHECKED OUT THE LITTLE PLANT AND NOTICED MULTIPLE BUDSUTES DIEING. I ALSO SAW WHAT "COULD'VE" BEEN A MALE PREFLOWER. MY INTUITION TOLD ME TO GET RID OF IT. ITS LESS THAN A BRANCH OFF THE CROP IT COULD HARM. LUCKILY I HAD BAGGED IT UP BEFORE IT BEIBG REMOVED AND IT WAS FAIRLY WELL SEPERATED. AFTER CUTTING AND DISPOSING OF IT I BROUGHT THE BUCKET TO EMPTY. IT WAS EXTREMELY ROOTBOUND. THE ROOTS WERE WHITE EXCEPT THE ONES ON THE OUTSIDE WHICH WERE A NEON GREEN. THE INSIDE OF THE BUCKET HAD WHAT LOOKED LIJE GREEN ALGAE ON IT. I IMAGINE THAYS PROBABLY WHERE MY PROBLEMS CAME FROM. I'VE USED THIS BUCKET SECERAL TIMES AND IVE SEEN TJIS TYPE OF ALGAE BUT USUALLY ONCE I SANITIZE ITS GOOD TO GO. IM NOT SURE IF IT WAS BEING ROOTBOUND OR THE ALGAE THAT DID IT IN BUT I HAVE MUCH BETTER SPACING NOW. THIS WAS THE RIGHT DECISION. I COULDNT BEAR THE RHOUGHT OF MY GIRLS GETTING POLLINATED. I DID A VIDEO TOO BUT ILL HAVE TO UPLOAD TOMORROW. ALSO CAUGHT THE TINIEST EVER MOUTH LARVAE. I SEE TINY GOLD FINCHES AND OTHER BIRDS DARTING IN MY CAGE AND AWAY WHEN I APPROACH. I THINK THEY ARE GIVING ME A HAND.
8/13 Thought thos was a new week so I took a ton of pictures and did a video. Who knows what will upload. Plants look hetter with the increased room spacing. I have the materials to finish final supports. I've just got to do it. Same with the BT spray. I'm thinking I should've upped the water to a gallon and a half or two but I'll do that next time I guess. Only problem I can see is some septoria looking spits on the toasted toffy and one gmo looks like itscrunning through nutrients quicker than others. Dad said he thinks this is my best year. He said they're more full and healthier looking. I looked at my diary last year and I had plants over the top of the cage. The weren't as bushy but I'm not complaining. These are far more indica dominant than last year so that's probably part of it. Leaves on the event horizons are starting to turn purple. I'll update what I do. I defoliated what needed it and combed through the plants hunting pillars.
I GUESS I FORGOT TO UPDATE THIS OR IT DIDNT SAVE. I BOUGHT A WATERING CAN THAT HOLDS A GALLON AND A HALF AND EMPRIED VERY QUICKLY IN SMALL STREAMS SO IT DOESNT HURT THE ROOTS. GREAT INVESTMENT. COULDNT GET OVER UNTIL 2 AND I GAVE EVERYTHING A GALLON AND A HALF. EXCEPT FOR THE ONE IN THE 10 TJAT GOT A GALLON AND THE TWO PLANTS IN THE MIDDLE THAT GOT A GALLON. ONE EVENT HORIZON AND THE TOASTED TOFFY.

Processing
Likes
4
Share


@Green_Thumb
Follow
My o my, what can I say... These ladies are gorgeous! Along with adding in the 2000W along side my 600W, I cut out the grow solution in my nutes contrary to the instructions and my ladies are booming! We'll see how the rest of the week continues! I started a majority bloom with some added glucose for my feed to help with bud weight but they are really packing on. Hopefully next week will be my last week of feeding as trichrome production increases and I can start my 2 week flush!


Likes
21
Share


@420DeepGrow
Follow
Gracias al equipo de Kannabia Marshydro XpertNutrients y Trolmaster sin ellos esto no sería posible.
💐🍁 Amnesi K - Lemon:
La Amnesi-K Lemon es una semilla formada a partir de un trío de reyes, la Amnesia, la Lemon Skunk y la Jack Herer. Este matrimonio de tres dio lugar a una gran sativa que, con tonos dulces, terrosos y muy cítricos
🌻🚀 Consigue aqui tus semillas:
https://www.kannabia.com/es/semillas-marihuana-feminizadas/amnesi-k-lemon
💡TS-3000 + TS-1000: se usaran dos de las lámparas de la serie TS de Marshydro, para cubrir todas las necesidades de las plantas durante el ciclo de cultivo, uso las dos lámparas en floracion para llegar a toda la carpa de 1.50 x 1.50 x 1.80.
https://marshydro.eu/products/mars-hydro-ts-3000-led-grow-light/
🏠 : Marshydro 1.50 x 1.50 x 1.80, carpa 100% estanca con ventanas laterales para llegar a todos los lugares durante el grow
https://marshydro.eu/products/diy-150x150x200cm-grow-tent-kit
🌬️💨 Marshydro 6inch + filtro carbon para evitar olores indeseables.
https://marshydro.eu/products/ifresh-smart-6inch-filter-kits/
💻 Trolmaster Tent-X TCS-1 como controlador de luz, optimiza tu cultivo con la última tecnología del mercado, desde donde puedes controlar todos los parametros.
https://www.trolmaster.com/Products/Details/TCS-1
🍣🍦🌴 Xpert Nutrients es una empresa especializada en la producción y comercialización de fertilizantes líquidos y tierras, que garantizan excelentes cosechas y un crecimiento activo para sus plantas durante todas las fases de cultivo.
Consigue aqui tus Nutrientes:
https://xpertnutrients.com/es/productos/
📆 Semana 6:
Esta semana ha explotado 💣, los cogollos comienzan a tomar densidad y llenarse de resina, me hubiera gustado aplicar algo mas de nutrientes en la fase vegetativa, la próxima vez será.

Likes
70
Share


@KilgoreTrout
Follow
Things still going great. I had a bit of light burn(upturned leaf edges) so I backed off an inch or two. Other than that no major changes.

Likes
8
Share


@Lushbloomz
Follow
She's done! She took longer to ripen than her tent mates but she was an easy grow and her buds are dense, dank and stank! Flushed her for the last couple weeks then threw her in the dark for a couple days. I don't know if it made a difference, but I didn't want to waste the power. 14.3 wet ounces once she was chopped down.
Stay tuned for the smoke report!
Processing
Likes
10
Share


@LedboxCulture
Follow
BEST genetics
I want to see the different clours of the flowers right now🎌📸
Expectatives Is all. I have the BEST phenos here🎌🌱💣

Likes
18
Share


@Coughy
Follow
Day 56
New Rez change, partial drain and RO fill up. 125 Liters.
200PPM, ph 5.9
First day flush. Will flush again in 3 days to get to 80ppm.
Day 59
Drained res, added florakleen and RO...
PPM sub 100.
Day 61
Drained the reservoir, added 100L new RO water, no florakleen. Pure RO at 20 PPM. Should be the last drink they get.
I was going to harvest tomorrow on day 62, but trichrome inspection is only showing about 5% amber. I wanted to try and get a little more ambers this run.
(Note for next run, keep nutrients till day 63, then start flush).
Seems to be slower to ripen with this phenotype, hopefully not too much longer. Will chop Monday likely, possibly Tuesday... who knows!?
Also, dropped lights on to like 10.5 hours and lowered the light wattage to the minimum.
Likes
29
Share


@lefthandedJ
Follow
SO..........................the girls are doing okay. I can only expect so much, given they're in 5 gals (except for LB), and half of them didn't get a good start. It's a nice experiment, for comparison sake. I don't think there's any bad plants here (of course, I don't think there are any bad plants ANYWHERE, EVER), just some early bloomers and some that still need some time. I've been feeding them with Tiger Bloom and a seaweed/kelp additive, and they've had two doses now of guano for top-dressing. Now I'm running out of room, should've planned better and left more room at the top of the bags. Never again with the 5 gals, they're great for indoor but way too restrictive for outdoor even way up here in Maine. I just finished LST again and they're looking pretty funky, but it's getting the desired result. GLad I kept some of them straight and didn't top, I want to see the difference in the end between nature's architecture and my twisted mess.
SO far, so good, but I'm a little worried about the Ph. Again, my solution is good (around 6- 6.3), but my medium still comes in at 7 even. Great buffering shit, but I really need to acidify the soil a bit more. I've got some PhDown, but I'm worried that if I drop the solution too low I'll burn the plants. On the other hand, it doesn't seem to have much of an effect so far at 6....
7/31 Update:
Gave the ladies another round of bat guano, 2 lbs. spread hroughout a dozen plants. Kinda worried that I used too much, but the first applications weren't enough so we'll see. Yesterday gave 'em a feeding of Tiger Bloom, today I watered the guano in with well water that I adjusted (using PhDown) to a reasonable 6.5. A good dry day, bright too, they should soak it up good today!

Likes
25
Share


@MyWeedAccount
Follow
(technically, writing this on 9/19..sshhhhh): not too many updates again - still thickening up and getting foxtaily so i've decreased the light intensity.
I cut a small tester nug as you can see (ended up being about 1.5g dry) and dryed it for several days. I was too impatient so i defintetlely broke in a little early, but hey, that's what a tester bud is for, right? I vaped part of it and took one bong rip, and it's amazing y'all...the terps!!! THE TERPSSS!! I really hope I can preserve them when I cure this time. It's seriously like a watermelon candy now, and the effect was very clear-headed and relaxing - great for day vibes.
Also, can't remember if I said this or not, but I started just giving plain tap water since they're both clearly near the end. Will be chopping soon!
----
Thanks for following 🤙 Always appreciative of tips or suggestions

Processing
Likes
7
Share


@gablmo
Follow
I finally turned 600 watts on, would love to get comments from you folks, so clueless here. If you see something wrong, please let me know.


Likes
2
Share

@Ninjabuds
Follow
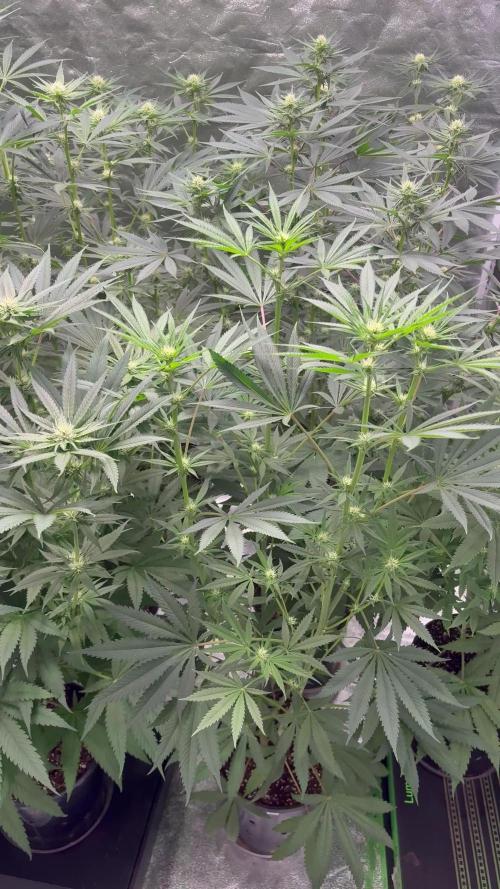
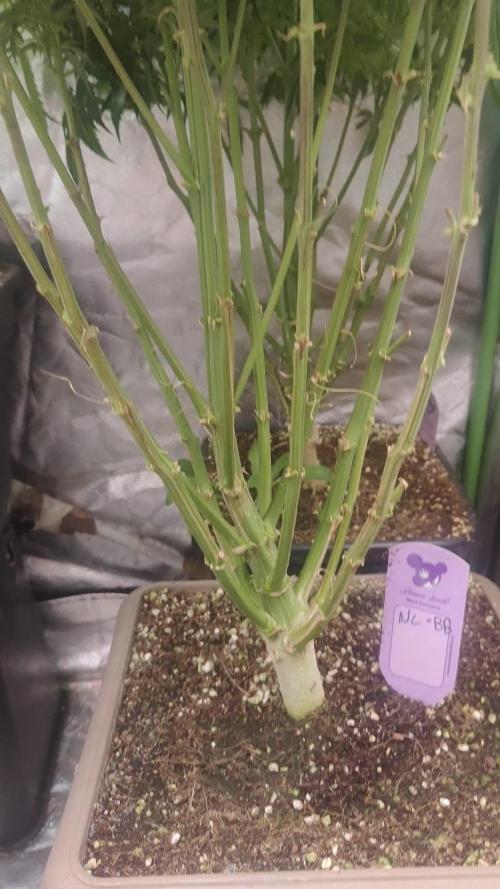
Week three of flower is off to an amazing start! At day 22, the ladies are looking incredibly healthy. They're praying like crazy, reaching for the light, and stacking nodes like it's their job. The buds are starting to plump up, and the trichome production is getting intense. I'm so excited to see how they develop over the next few weeks!


Likes
3
Share


@Gery21
Follow
I had bad luck, or beter I didn’t keep the rain out of the structure.
So unfortunately the lady’s did get wet! We had a lot of rain after a great summer.
I think if I didn’t had rotten flowering 800 gram per plant was normal yield!
It is a great plant verry easy to grow and a big yield!
I like the seeds of high-Seeds!
Its a great supplier!
This year a couple of diverent lady’s!
Whit a new growhouse.

Likes
3
Share

@420Junglist
Follow
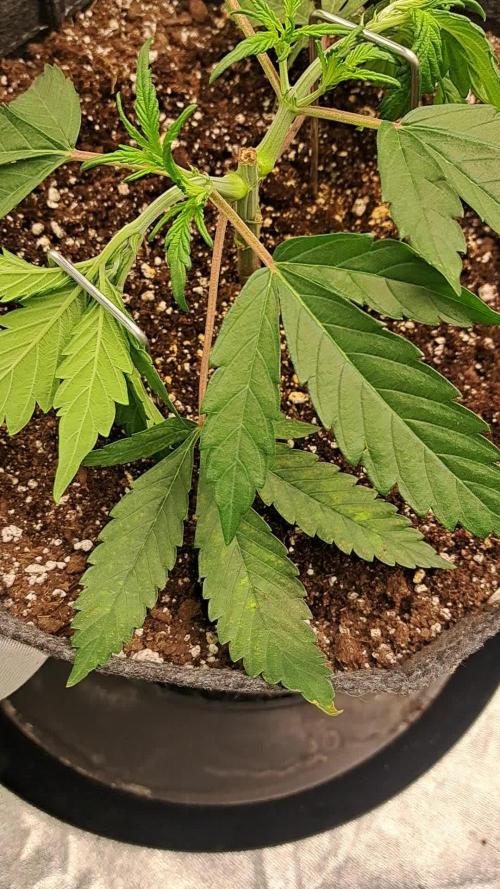
So a few days back I chopped the plants to start the mainlines. Each plant was chopped at fhe 3rd node. 3 were a decent size before while one was a little smaller. As tonight 3.5 days since the mainline all plants seem to have taken it like champs ans grown quite a bit. Using plant staples to strain sideways.. probably gonna again at the 3rd node and maybe top the side branches we'll see.
Likes
13
Share


@YOUNGSTERBR
Follow
apenas 1 das que estavam na tela de SCROG conseguiu sustentar até essa semana mesmo com problema de PH do solo, as outras 3 tive que colher na semana passada, a descoloração das folhas já começando a indicar que o fim está próximo, pouquíssimos tricomas ambar, cheiro maravilhoso!