Likes
Comments
Share
@zenderman
Follow
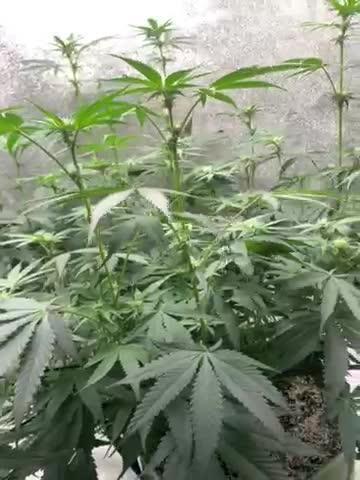
16/6/26. day 15 of flowering.watered with all set of nutrients. watering once in two days(4,5l on 20 l pot) with filtered and remineralised water PH6.0(twice only water,1-with nutrients)

Likes
6
Share
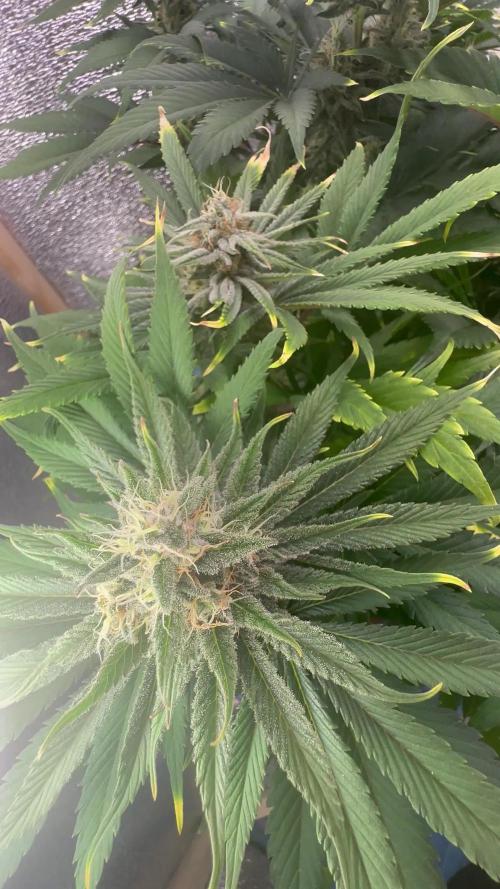
Plant fading and changing colour nicely. Day 77 Trichomes are still milky or clear. Waiting for the first signs of amber Trichomes, at which point I plan to harvest. Day 77 might be the plants last watering depending on the Trichomes in the next few days.
Likes
7
Share
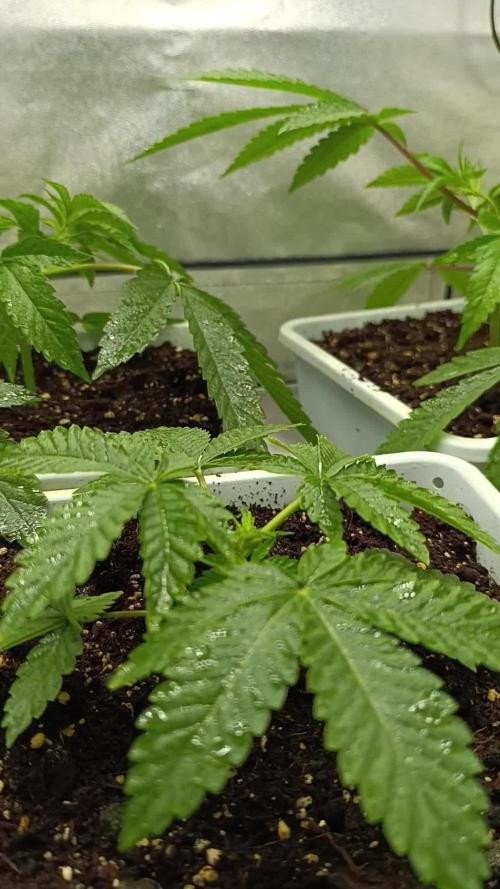
Had a good week. Transplanted these babies into a much bigger pot and they started stretching out right away.
Likes
3
Share
Day 21 and the flowering tent went kaboom big buds zkittles especially the front one has tones of even tops .still no smell at least I haven't smelled anything but the carbon is running full blast heavy humidity here in Canada this week lots of rain
Likes
18
Share
The buds are starting to be big and smelly, they are fattening and we can see her grow day after day. We are super happy with this breed and we can't wait to see more from her. Some bigger leaves are full of pollen and that makes us hope for the best. Hoping everything keeps going well 😀
Likes
4
Share
@Ensign420
Follow
|»» LOG DISCLAIMER: Not intended as a grow guide. Grow log entries are usually posted 3 weeks later and are for my learning reference. ««| Introduction - Week 16 Summary - Ensign's log, stardate 17547.8, Wow what a great week in the garden! By the end of the week, the main tent has pretty much doubled in size! Upgraded the scrog frame and now have a second layer of netting about 14in above the original netting which is already filling in and looking incredible! The tent’s floor slightly flooded, but fixed it. Also trying Stash Blend for the first time! As for the veg tent. To preserve the genetics, started the mother plant cycling process and took more clone cuttings (which were rooting in Coco Coins by the end of the week). To make more room, also bonsaied all mother plants. The stretch is starting to slowing down and next week begins the first week of bloom! Ca-Caw! Let’s go! Onwards Ensign! [START OF WEEK 16] ========================================================== ---------- [ 4x4 MAIN TENT ] ---------- Heady OG BX1 #1 [Round4 ~Wk9] - WEEK 16 - Pre-Bloom [Stretch Wk2] TKO [Round2 ~Wk14] - WEEK 16 - Pre-Bloom [Stretch Wk2] ----------- [ 3x3 VEG TENT ] ------------ Garlic Budder OG#1 - WEEK 09 - Full Veg Garlic Budder OG#2 - WEEK 09 - Full Veg Gorilla Goat #1 - WEEK 09 - Full Veg Gorilla Goat #2 - WEEK 09 - Full Veg 08/04/25 → 08/10/25 This Week's Estimated Goals ---------------------------------------------------------------------------------------------- DLI: ~13 mol/m²/d PPFD: ~300 μmol/m²/s VPD: ~1.0 kPa This Week's Meter Readings & Averages ---------------------------------------------------------------------------------------------- Light On/Off: 19:00 - 07:00 | Wattage: ~326.5W [LV04] Distance From Canopy: ~31”, 27” DLI: ~15.60 mol/m²/d PPFD: ~361 μmol/m²/s VPD: ~0.69 kPa Soil %: [40.7, 47.0, 38.1, 56.6, 41.9, 42.7, 42.9, 43.9] ========================================================== Day 01 - Monday - 08/04/25 - Total Days: 113 ----------------------------------- Daily Averages ~[+01:00] - Temps: 83.6°F [28.7°C] - Humidity: 83.6% - VPD: 0.66 kPa - Soil %: [49, 37, 45, 60, 44, 43, 43, 45] ----------------------------------- - [+00:14]: Night check on the 4x4 tent. --- Holy Cannoli! Wow! These girls are in full stretch! --- Both cultivars have grown beyond the netting and have stretched beyond the (green) Vivosun’s CFM bars! Heady is a bit low on the left, but the canopy is pretty even and perky! --- Ca-Caw! Let’s go cuddies! --- Heady OG (BX1 #1) is starting off shorter than TKO, but am pretty confident that she’ll catch up. --- TKO is looking incredibly healthy! She’s the larger plant, but also in the smaller 20-gallon pot. Well she is 5 weeks older than Heady OG so makes sense. Regardless of the growth difference, absolutely stoked for this grow cycle!! - [+12:19]: Checked the Ecowitt soil moisture sensor data: ------------------ [ 4x4 MAIN TENT ] --------------- ------ 46% - [CH01 FT » G30 - Heady OG BX1 #1] ------ 37% - [CH02 FB » G30 - Heady OG BX1 #1] ------ 48% - [CH03 BT » G20 - TKO] ------ 62% - [CH04 BB » G20 - TKO] ------------------ [ 3x3 VEG TENT ] ---------------- ------ 41% - [CH05 BL » GR7 - Garlic Budder OG#1] ------ 44% - [CH06 BR » GR7 - Garlic Budder OG#2] ------ 40% - [CH07 FL » GR7 - Gorilla Goat #1] ------ 50% - [CH08 FR » GR7 - Gorilla Goat #2] --------- Veg: 38% - 45% | Flower: 45% - 55% --------- General: 30% [Dry] «| 45 - 60% [Moist] |» 70% [Wet] - [+00:14]: Checked the 3x3 veg tent. --- Ooo yea! The veg garden is looking incredible! --- All mamma plants are looking bushed out and beautiful! - [+00:37]: Super-cropped and bend the canopy down a bit. --- Lowered the canopy down a few inches. Really need to defoliate soon. The top growth is bushing out and getting really thick! --- Clones are also looking incredible and both are rotting along beautifully! Heady is going to make it and she is looking great! - [+00:38]: The cuttings are looking good for the most part. One is looking pretty droopy (damnit Ensign). --- Misted the cups with RO water. --- Think the RH may not be consistent enough and the cups might be drying out too quickly. - [+00:41]: Checked the humidifiers. --- Tanks are still full and no leaks found. --- Another day done! --- Okay! Since growth is raging upwards, decided to upgrade the scrog frame and plan to add a second layer tomorrow. --- Ahh yea! This grow is turning out to be an epic one! Day 02 - Tuesday - 08/05/25 - Total Days: 114 ----------------------------------- Daily Averages ~[+01:00] - Temps: 83.3°F [28.5°C] - Humidity: 83.3% - VPD: 0.67 kPa - Soil %: [49, 38, 47, 62, 41, 43, 43, 45] ----------------------------------- - [16:25]: Evening check on the 3x3 veg tent. --- Ooo yea! The clones are looking incredible! --- The cuttings still seem to be struggling. --- Hmm. - [16:27]: Misted the cups with RO water. --- Made a slight modification and wrapped the top of both cups with plastic wrap. --- Cut a slit from the middle to the edge. Misted the cup through the slit with RO water (2-3 sprays each). --- Then gently slipped the cups over each cutting. --- Also slightly misted each Coco Coin with RO water. --- Great! This should hopefully make a better seal and will keep the RH higher. I think. --- Anyways! --- The mother garden is vegging along beautifully! --- Growth is getting really bushy and need to do a heavy defoliation soon. - [16:56]: Checked the Ecowitt soil moisture sensor data: ------------------ [ 4x4 MAIN TENT ] --------------- ------ 48% - [CH01 FT » G30 - Heady OG BX1 #1] ------ 36% - [CH02 FB » G30 - Heady OG BX1 #1] ------ 47% - [CH03 BT » G20 - TKO] ------ 61% - [CH04 BB » G20 - TKO] ------------------ [ 3x3 VEG TENT ] ---------------- ------ 41% - [CH05 BL » GR7 - Garlic Budder OG#1] ------ 43% - [CH06 BR » GR7 - Garlic Budder OG#2] ------ 41% - [CH07 FL » GR7 - Gorilla Goat #1] ------ 49% - [CH08 FR » GR7 - Gorilla Goat #2] --------- Veg: 38% - 45% | Flower: 45% - 55% --------- General: 30% [Dry] «| 45 - 60% [Moist] |» 70% [Wet] - [19:03]: Night check on the 4x4 tent. --- Ooo yea! Wow these girls are stretching! --- Growth has clearly grown since the last checkup and getting taller! --- Ca-Caw! Let’s go ladies! - [19:14]: Wait. Uh-Oh! --- The tent seemed to have flooded slightly.. DAMNIT ENSIGN! ------ [» A FEW HOURS LATER.. «] --- Okay! Think I figured out why the tent flooded and how to fix it. --- The main reason was the new soil sensor which was probably not in proper contact with the soil. --- Fixed this by re-seating the unit. Also adjusted the drip ring a bit. --- Also poured about a cup of water straight onto new sensor. This should make the surrounding soil wetter and will hopefully fix the dry pocket. I think. --- For added redundancy, added additional trigger conditions to both Ecowitt WittFlows (TKO and Heady OG). - [23:45]: Adjusted the watering triggers for the auto-watering system for TKO. --- Changed the ON trigger from: --------- When CH3 soil moisture is under 45% ------------ Updated to: --------------- When CH3 soil moisture is UNDER 45% --------------- AND When CH4 soil moisture is UNDER 50% --- Changed the OFF trigger from: --------- When CH3 soil moisture is OVER 50% ------------ Updated to: --------------- When CH3 soil moisture is OVER 50% --------------- OR When CH3 soil moisture is OVER 50% --- Applied similar watering triggers for Heady OG. --- Changed the ON trigger from: --------- When CH1 soil moisture is under 45% ------------ Updated to: --------------- When CH1 soil moisture is UNDER 45% --------------- AND When CH2 soil moisture is UNDER 50% --- Changed the OFF trigger from: --------- When CH1 soil moisture is OVER 50% ------------ Updated to: --------------- When CH1 soil moisture is OVER 50% --------------- OR When CH2 soil moisture is OVER 50% --- Will check back daily to make sure the flooding has completely stopped. --- Well that pushed everything back a bit. --- Okay! Anyways, - [23:57]: Time to both build and install the second frame and netting. Let’s go! --- Got four 1in PVC corner fittings (local Lowes) along with four 1in PVC pipes (10ft long each). Also got more self-tapping screws. --- For the netting, using mason string. Usually use the braided nylon, but the twisted variant is a lot cheaper. --- To build the frame, I cut the 1in PVC pipes down to two different lengths: ------ [» x2 @ 42.5in «] – Front / Back ------ [» x2 @ 44in «] – Left / Right --- This makes the frame slightly thinner from left to right. --- Saving the extra piping for future projects. - [+04:04]: Okay! The new frame is built and looking sturdy! --- Did not use any glue and simply dry fitted each component. --- For easier fitting, smoothed the ends of each pipe with sand paper. --- Also marked each pipe to indicate the front, back, left, and right sides. --- For the fittings, used corner fittings and have open slot facing downwards. This way I can add the legs. --- After the frame was built, marked and drilled screws about 3in apart (self-tapping). Made sure to mirror the screw spacing on the opposite side. --- Time to weave the netting! - [+04:06]: Using some mason string, --- Started at one corner and strung all the horizontal lines. --- Double-wrapped each screw. --- After the horizontal lines were strung, continued and wrapped the vertical lines. - [+04:44]: Now that the frame is built and the netting fully weaved, time to install the frame! --- First the support poles. Cut and sanded more 1in PVC piping. ------ [» x4 @ 14in «] – Vertical Support - [17:56]: Installed the back support poles before the front ones. --- Temporarily removed the front CFM bar and had to raise the fan up a bit (was not easy, but got it done). --- Once the support poles were installed, gently set the new frame on top. - [+06:07]: Done and wow she’s a beauty! --- Well that took a bit longer than anticipated (also the flooding did not help), but glad the frame fit perfectly and the netting looks great! - [+06:12]: Checked the humidifiers. --- Tanks are still full and no leaks found. --- Ooo yea! What a day! Day 03 - Wednesday - 08/06/25 - Total Days: 115 ----------------------------------- Daily Averages ~[+01:00] - Temps: 83.9°F [28.8°C] - Humidity: 83.1% - VPD: 0.69 kPa - Soil %: [42, 54, 43, 60, 42, 43, 43, 45] ----------------------------------- - [+00:17]: Night check on the 4x4 tent. --- Ca-Caw!! Let’s go cuddies! Growth is looking beautiful and green! --- The second layer of scrog netting was not the easiest to install, but wow the garden is looking incredible! --- Both Heady OG and TKO are still stretching upwards with new nodes branching out everywhere! --- The canopy hasn’t reached the top net yet but hoping a few will make it. --- Regardless, absolutely hyped for this flower cycle! - [+00:23]: Checked the 3x3 veg tent. --- Looking beautiful in the veg garden! --- Wow the mothers have bushed out and have reached the grow light! - [+00:32]: Super-cropped and lowered the canopy --- The canopy is getting really thick! Plan to do a pretty heavy defoliation tomorrow. --- Clones look great and stoked that both Heady OG and TKO seem to be rooting along in the cups. Need to check the weights. Let’s go! - [+00:37]: Here are the starting initial watering ranges: ------ Heady OG BX1 » 261.4g → 301.2g ------ TKO » 240.9g → 301.4g --------- General Solo Range: [Dry] «| [Initial Cup Weight] + ~55-100g |» [Wet] --- All cups were last watered 5 days ago. - [+00:37]: Took the starting weight of both clones before watering, ------ Heady OG BX1 weighed 250.4g ------ TKO weighed 240.9g --- Oops! Probably should have watered earlier, sorry ladies! --- Stoked that Heady OG is clearly going to make it! Also good to know the soil dryback can be at least 10g from the initial pre-saturated weight. --- Anyways! --- While on a scale, --- Gently misted the straw mulch of both cups with RO water. --- Focused on the straw and sprayed as evenly as possible. --- Misted 10-20 sprays. Waited a moment, then misted again. --- Made sure to reference the watering weights. --- Repeated this process for both cups. --- There was no runoff. - [+01:08]: Took the saturated weight of both clones after watering, ------ Heady OG BX1 » 335.5g ------ TKO » 345.1g --- Marked the final wet weight on the back of each cup. Also marked the watering date on the front. --- Placed both phenos back into the tent. --- Cuttings are looking better! --- Glad that the slight modification to the cups helped to keep the moisture in (covered both with plastic wrap). --- Gently removed both cups and re-misted each with RO water (~2 mists). --- Carefully placed the cups back onto the cuttings. - [+01:21]: Checked the Ecowitt soil moisture sensor data: ------------------ [ 4x4 MAIN TENT ] --------------- ------ 34% - [CH01 FT » G30 - Heady OG BX1 #1] ------ 52% - [CH02 FB » G30 - Heady OG BX1 #1] ------ 39% - [CH03 BT » G20 - TKO] ------ 58% - [CH04 BB » G20 - TKO] ------------------ [ 3x3 VEG TENT ] ---------------- ------ 44% - [CH05 BL » GR7 - Garlic Budder OG#1] ------ 47% - [CH06 BR » GR7 - Garlic Budder OG#2] ------ 41% - [CH07 FL » GR7 - Gorilla Goat #1] ------ 46% - [CH08 FR » GR7 - Gorilla Goat #2] --------- Veg: 38% - 45% | Flower: 45% - 55% --------- General: 30% [Dry] «| 45 - 60% [Moist] |» 70% [Wet] - [+01:23]: Checked the humidifiers. --- Tanks are still full and no leaks found. Day 04 - Thursday - 08/07/25 - Total Days: 116 ----------------------------------- Daily Averages ~[+01:00] - Temps: 84.9°F [29.4°C] - Humidity: 82.0% - VPD: 0.75 kPa - Soil %: [32, 51, 37, 57, 42, 43, 43, 45] ----------------------------------- - [09:42]: Quickly checked on the propagation dome (in the 3x3 veg tent). --- Nice! Clones are both looking great! --- Heady OG is clearly recovering and looking better! --- Wow! TKO is looking incredibly healthy! Top growth has perky leaves with a few nodal growth sites starting to stretch. As far as cloning, she has been healthiest with no issues the entire way! --- Both Heady OG cuttings are looking beautiful and should be rooting. Plan to check for roots in a few days. --- Plan to do a pretty heave defoliation today. --- Also going to start the mother plant cloning process. - [17:12]: Evening check on the 3x3 veg tent. --- Mother garden is looking beautiful and the canopy is bushy with growth! --- Both Heady OG and TKO clones also look green and healthy! --- My main focus for today is the veg garden and the preservation of the genetics . --- Lots of work to do and time to also start the mother cycling process! --- This time, going to do a pretty heavy defoliation! --- Going to pretty much bonsai each mother while taking a few clones to preserve the genetics. --- Let’s go Ensign! - [17:58]: Filled a measuring cup with 1.5 cups of RO water. ------ Added 1/8tsp of Horticultural Aloe --- Mixed the solution and poured it straight into a clear solo cup. --- Repeated this process until 4 cups were filled. - [18:05]: Also marked each cup with the corresponding mother plant name. --- Time to defoliate and take the clone cuttings! - [18:07]: Using a pair of trimmers (AC Infinity), --- Bonsaied each mother plant. Removed over 75% of overall growth leaving several branches and nodes. - [19:44]: Done and wow what a difference! --- Pretty much removed all growth leaving a few nodal growth sites to heal. --- This is my first time going this heavy and am hoping that they recover. --- If this bonsai defoliation heals up with healthy growth, this can also be an alternative to a full plant cycling. --- Anyways! - [19:46]: To preserve the genetics, made sure to cut clone cuttings from each mother plant. --- To ensure successful rooting, took several cuttings. --- Made sure to clean each cutting by trimming most of the branches off leaving the top one or two nodes. --- Did not cut any leaf fingers and made sure to cut the tip of the stalk (about 45°) before placing into the cup of aloe solution. - [19:55]: Placed the fresh cuttings into the 3x3 veg tent. --- Have each cup resting on top of the corresponding mother plant. --- Okay! Let the two-day soak begin! - [20:00]: Mulched the trimmings in a paper bag. --- Since the bottom of the paper bags tend to decompose, have the bag in a used BuildASoil soil bag which should not decompose (these are meant for soil). --- Also added a bit of Kashi Blend and worm castings to the bottom of the bag. --- Back to the Heady OG cuttings! --- Gently removed the cups and misted the inside of each with RO water (~2 mists each). - [20:02]: Carefully placed the new cups onto the cuttings. --- Great! Plan to check for roots soon. - [20:08]: Checked the Ecowitt soil moisture sensor data: ------------------ [ 4x4 MAIN TENT ] --------------- ------ 31% - [CH01 FT » G30 - Heady OG BX1 #1] ------ 51% - [CH02 FB » G30 - Heady OG BX1 #1] ------ 35% - [CH03 BT » G20 - TKO] ------ 56% - [CH04 BB » G20 - TKO] ------------------ [ 3x3 VEG TENT ] ---------------- ------ 41% - [CH05 BL » GR7 - Garlic Budder OG#1] ------ 40% - [CH06 BR » GR7 - Garlic Budder OG#2] ------ 42% - [CH07 FL » GR7 - Gorilla Goat #1] ------ 44% - [CH08 FR » GR7 - Gorilla Goat #2] --------- Veg: 38% - 45% | Flower: 45% - 55% --------- General: 30% [Dry] «| 45 - 60% [Moist] |» 70% [Wet] - [20:12]: Checked the 4x4 tent. --- Ca-Caw! Ah yea! The garden is looking incredible and wow growth is raging! --- The tallest growth is just barely under the netting! --- Not much to do in the main tent now but to wait until the stretch slows down. --- Time to relax and let the grass grow! Let’s go! - [21:34]: Have an extra stainless steel rack and thought of a better way to hold the solo cups in the veg tent. --- The cups are balancing on the edge of the pots am concerned that they may tip over. --- Carefully too each cup out of the tent. - [21:36]: Placed the rack upside-down in the middle of the tent. --- Have the rack positioned on top of all 4 pots just above the center floor fan. - [21:39]: Gently placed each cutting cup onto the rack. --- The floor fan can easily still blow through the grid of the rack. Great! --- This should be way more stable while still allowing decent airflow. - [21:40]: Checked the humidifiers. --- Tanks are still full and no leaks found. Day 05 - Friday - 08/08/25 - Total Days: 117 ----------------------------------- Daily Averages ~[+01:00] - Temps: 84.5°F [29.2°C] - Humidity: 82.5% - VPD: 0.72 kPa - Soil %: [32, 50, 30, 53, 40, 42, 41, 42] ----------------------------------- - [23:02]: Night check on the 4x4 tent. --- Ahh yea! The garden is thriving! --- Both Heady OG and TKO are still stretching upwards and the canopy is getting dense! --- Wow! TKO has reached the top netting! Heady OG is just under the top netting. --- Ca-Caw! Let’s go ladies! - [23:11]: Checked the 3x3 veg tent. --- The veg garden is looking great! --- The bonsaied mother plants are still recovering from the heavy defoliation. But growth is looking a lot better than I would expect from such a large biomass reduction. Nice! --- Cuttings are looking great as well! - [23:13]: Time to swap the aloe water out! --- Replaced each solo cup with a clean one filled with fresh RO water (1.5cups). --- Plan to start using the propagation dome soon! --- Going to let these soak for another day before transplanting into Coco Coins for rooting. - [+02:05]: Quickly checked on the auto-watering system. --- System is still charged and no leaks or kinks found in the tubing. - [+02:08]: Checked the humidifiers. --- Tanks are still full and no leaks found. Day 06 - Saturday - 08/09/25 - Total Days: 118 ----------------------------------- Daily Averages ~[+01:00] - Temps: 83.4°F [28.6°C] - Humidity: 83.3% - VPD: 0.67 kPa - Soil %: [32, 50, 35, 52, 41, 40, 41, 41] ----------------------------------- - [07:55]: Quickly checked on the 3x3 veg tent. --- Looking great in the veg garden! --- Mothers are all recovering nicely from the bonsai defoliation. Great! --- Cuttings also look healthy and ready for transplanting! --- Both Heady OG and TKO clones are looking perky and getting bigger! --- Heady OG cuttings also looking green and rooting! I think. Will check for roots in a few days. - [20:58]: Night check on the 4x4 tent. --- Ca-Caw! This is why we grow! Wow! --- Also hyped that the canopy is getting dense with nodal growth! --- TKO has more tops stretching through the top scrog netting! Heady OG has not reached the net yet. --- Stoked the 14in space in between the netting is filling quite nicely and just going to let everything grow! - [21:01]: Checked the Ecowitt soil moisture sensor data: ------------------ [ 4x4 MAIN TENT ] --------------- ------ 29% - [CH01 FT » G30 - Heady OG BX1 #1] ------ 50% - [CH02 FB » G30 - Heady OG BX1 #1] ------ 34% - [CH03 BT » G20 - TKO] ------ 53% - [CH04 BB » G20 - TKO] ------------------ [ 3x3 VEG TENT ] ---------------- ------ 40% - [CH05 BL » GR7 - Garlic Budder OG#1] ------ 40% - [CH06 BR » GR7 - Garlic Budder OG#2] ------ 40% - [CH07 FL » GR7 - Gorilla Goat #1] ------ 40% - [CH08 FR » GR7 - Gorilla Goat #2] --------- Veg: 38% - 45% | Flower: 45% - 55% --------- General: 30% [Dry] «| 45 - 60% [Moist] |» 70% [Wet] - [21:05]: Checked the 3x3 veg tent. --- Growth is still recovering quite nicely! This may be my solution to maintain mother plants longer between cycles. --- Mother clone cuttings are also looking healthy and ready to be rooted! --- Was originally planning on rooting all of the cuttings, but since the mother plants are recovering better than anticipated, just going to plant one of each pheno. --- Let’s go! - [21:23]: Filled a measuring cup with 1.5 cups of RO water. ------ Added a pinch of Quillaja Saponaria Extract [60] ------ Added 1/64tsp of Horticultural Aloe ------ Added 1/32tsp of Mycrobe Complete --- Mixed the solution thoroughly. - [21:26]: Dropped 4 Coco Coins into the measuring cup. --- The coins immediately started to expand. ------ [» ~10 MINUTES LATER «] --- Placed each fully saturated Coco Coin into half-cut solo cups. - [21:41]: Using a squeeze bottle filled with Clonex, --- Gently filled each pre-made hole with Clonex rooting gel. - [21:43]: Time to plant the cuttings! --- Using a pair of clean trimmers, made a final 45° cut. --- Also stripped and scrapped some of the stem’s outer membrane. --- To help with planting, gave each Coco Coin a squeeze to loosen the coco. --- Made sure to insert each stem straight and snug with the tip about a 1/4 inch from the bottom of the Coco Coin. --- Also secured the stem by pinching and pressing in the top of the Coco Coin. --- Once each cutting was planted, - [22:11]: Placed each pheno into the propagation dome’s tray. --- Made sure to keep each clone properly tagged. --- Added 1/4 cup of RO water to the bottom of the tray. --- Placed the side extensions onto the tray. - [22:15]: Misted the top of the propagation dome before covering the cuttings. --- Vents are fully closed. --- Also lowered the intensity from 5 to 1. --- At the current light intensity (LV1), the PPFD is around 110 μmol/m²/s which gives a DLI of 7.13 mol/m²/d under an 18/6 light cycle --- Will check back daily to cycle the air under the dome. - [22:17]: Placed the extra mother cuttings back on the rack. Will try to keep these cuttings alive until the planted ones root. --- Will need to change the water every day or two. --- Also need to water the Heady OG and TKO clones. --- Ca-Caw! Let’s go! - [11:33]: Here are the starting initial watering ranges: ------ Heady OG BX1 » 261.4g → 301.2g ------ TKO » 240.9g → 301.4g --------- General Solo Range: [Dry] «| [Initial Cup Weight] + ~55-100g |» [Wet] --- All cups were last watered 3 days ago. --- Took the starting weight of both clones before watering, ------ Heady OG BX1 weighed 257.0g ------ TKO weighed 259.7g --- While on a scale, --- Gently misted the straw mulch of both cups with RO water. --- Focused on the straw and sprayed as evenly as possible. --- Misted 10-20 sprays. Waited a moment, then misted again. --- Made sure to reference the watering weights. --- Repeated this process for both cups. --- There was no runoff. --- Also defoliated and removed the lowest growth on both clones. - [23:03]: Took the saturated weight of both clones after watering, ------ Heady OG BX1 » 345.3g ------ TKO » 355.4g --- Marked the final wet weight on the back of each cup. Also marked the watering date on the front. --- Placed both phenos back into the tent. Have them now resting on the rack (on drip trays). - [23:14]: Checked the humidifiers. --- Tanks are still full and no leaks found. Day 07 - Sunday - 08/10/25 - Total Days: 119 ----------------------------------- Daily Averages ~[+01:00] - Temps: 83.9°F [28.8°C] - Humidity: 83.6% - VPD: 0.66 kPa - Soil %: [49, 49, 30, 52, 43, 45, 46, 44] ----------------------------------- - [08:02]: Quickly checked on the 3x3 veg tent. --- Ooo yea! Looking great in the veg garden! --- All mothers are still green and recovering. New growth is starting to develop and growth is looking healthy! --- Quickly checked on the propagation dome. --- All clone cuttings are looking green and healthy! - [19:04]: Night check on the 4x4 tent. --- Ca-Caw! Ah yea! Heady OG has reached the top scrog net! --- TKO has several tops above the netting and she is raging with healthy! --- Canopy is also showing more signs of pistil crowning and vertical growth seems to be slowing down. I think. - [19:07]: Checked the Ecowitt soil moisture sensor data: ------------------ [ 4x4 MAIN TENT ] --------------- ------ 48% - [CH01 FT » G30 - Heady OG BX1 #1] ------ 49% - [CH02 FB » G30 - Heady OG BX1 #1] ------ 36% - [CH03 BT » G20 - TKO] ------ 55% - [CH04 BB » G20 - TKO] ------------------ [ 3x3 VEG TENT ] ---------------- ------ 41% - [CH05 BL » GR7 - Garlic Budder OG#1] ------ 43% - [CH06 BR » GR7 - Garlic Budder OG#2] ------ 43% - [CH07 FL » GR7 - Gorilla Goat #1] ------ 43% - [CH08 FR » GR7 - Gorilla Goat #2] --------- Veg: 38% - 45% | Flower: 45% - 55% --------- General: 30% [Dry] «| 45 - 60% [Moist] |» 70% [Wet] - [19:10]: Checked the 3x3 veg tent. --- The veg garden is recovering beautifully! --- Since the stretch seems to be slowing down in the main tent, going to give these ladies a little extra. - [19:17]: Going to feed some Stash Blend for the first time. --- This blend of beneficial microbes and mycorrhizal fungi also includes a bit of silica which should help during the bloom phase. --- Also shout out to Mr. Grow It, Rob (from CLTV), and Pigeons420! Stay lifted! - [19:19]: Filled a pitcher with 16 cups (1gal) of RO water. ------ Added 1/8tsp of Quillaja Saponaria Extract [60] ------ Added 1tsp of Stash Blend --- Mixed the solution before pouring 6 cups straight into a pump sprayer. --- Gave the sprayer a good shake before spraying the entire solution onto Heady OG’s straw mulch. - [19:52]: Repeated this process again for TKO. --- Depending on how growth develops, may start feeding these ladies weekly. --- From personal experience, the veg phase can easily be grown with straight RO water. --- Flower is probably the most important time to feed because there are more roots and the plants are trying to produce more biomass. I think. --- Anyways! - [20:10]: In the veg tent, repeated the watering process for all mothers (1 cup + 1 cup RO each). --- Focused mainly on the straw (2 cups each). - [20:13]: Checked the humidifiers. --- Tanks are still full and no leaks found. --- Wow what a grow week! --- The difference in growth from Monday until now has been incredible! [END OF WEEK 16]
Processing
Likes
15
Share
All is rosey with this lady. No complaints. Defoliated and ready for flower. Not stretched as much as I would have expected but given its my first grow I'm unsure. A ton of tops with hairs showing everywhere. Can't wait to see this lady develop!
Likes
29
Share
SO..........................the girls are doing okay. I can only expect so much, given they're in 5 gals (except for LB), and half of them didn't get a good start. It's a nice experiment, for comparison sake. I don't think there's any bad plants here (of course, I don't think there are any bad plants ANYWHERE, EVER), just some early bloomers and some that still need some time. I've been feeding them with Tiger Bloom and a seaweed/kelp additive, and they've had two doses now of guano for top-dressing. Now I'm running out of room, should've planned better and left more room at the top of the bags. Never again with the 5 gals, they're great for indoor but way too restrictive for outdoor even way up here in Maine. I just finished LST again and they're looking pretty funky, but it's getting the desired result. GLad I kept some of them straight and didn't top, I want to see the difference in the end between nature's architecture and my twisted mess. SO far, so good, but I'm a little worried about the Ph. Again, my solution is good (around 6- 6.3), but my medium still comes in at 7 even. Great buffering shit, but I really need to acidify the soil a bit more. I've got some PhDown, but I'm worried that if I drop the solution too low I'll burn the plants. On the other hand, it doesn't seem to have much of an effect so far at 6.... 7/31 Update: Gave the ladies another round of bat guano, 2 lbs. spread hroughout a dozen plants. Kinda worried that I used too much, but the first applications weren't enough so we'll see. Yesterday gave 'em a feeding of Tiger Bloom, today I watered the guano in with well water that I adjusted (using PhDown) to a reasonable 6.5. A good dry day, bright too, they should soak it up good today!
Likes
5
Share
Eccoci qui... Tutto va per il meglio, questa settimana si inizia a vedere la resina e ora si inizieranno a formare le cime, per questo aggiungo Sugar Shot di @xpertnutrients vedremo l'evoluzione settimana prossima. Meravigliosa oltre ad un forte odore mostra il colore viola che tanto cercavo. Ora vediamo come si gonfia e poi dritti al raccolto.... NON VEDO L'ORA. Grazie a tutti per il supporto🔥🌲❤️
Likes
26
Share
Dane, We all should help one another. Human beings are like that. We should live by each other’s happiness - not by each other’s misery. We don’t want to hate and despise one another, share the Joint. And mother earth is rich and can provide for everyone. We can Grow enough Happiness, In this paradise, there is room for everyone. We only exist to bring joy into the world and The way of life can be free and beautiful, but we have lost the way. Grow High and Give the world A smile. At the end we own nothing more then all our memories, lets make them amazing for everyone, nothing to loose only everything to win. A last kiss goodby, a second one, softer and long as a sign, that you are woth it. That Everyone worth who loved and give. Enought Hippie Talk, now have a nice day and an even better grow, thx for watching by. ((From Seed 🌱 ((From Clone 🌿 week report: (36 got her own tent now so big she becomes
Likes
59
Share
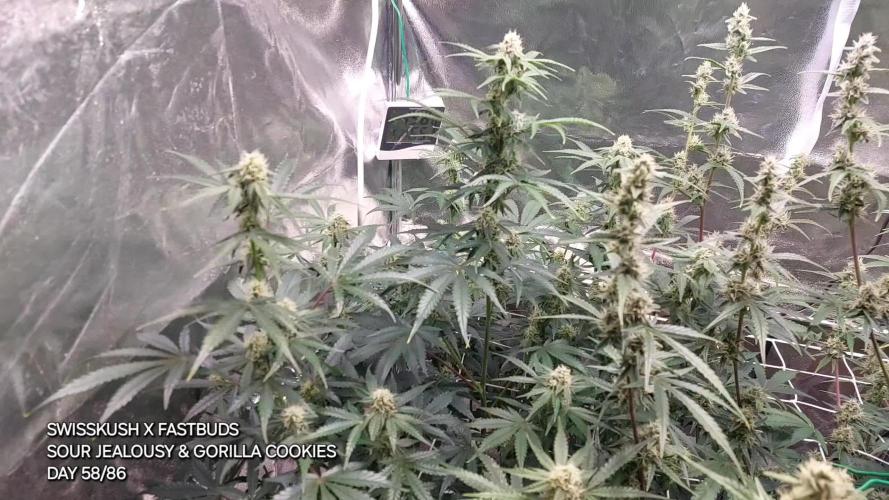
Day 63: This week has seen the bud stacks building up nicely. They look a far way off a finish still in general but that's ok by me for their overall yield potential. All 3 have been doing good and I dont doubt without any training, would have been impossible to fit in the room without a drop in plant count. They are putting out a beautiful aroma now and it seems I have another very fruity smelling beauty strain to harvest. #1 Has kept her growth consistent throughout and been the best producer until now She has a lot of bud sotes to get busy stacking on so hopefully a few weeks will see her balloon. #2 Has become the behemoth of the grow now with her pushing her way through foliage like a British Missionary. She needs some space now and will be very happy to get it following the 1st harvest of blackberry. #3 Has done well to keep her development active among the thicket she was in. Trimming out the undersides of these ladies has given great airflow so I dont have to worry too much about mould and too much Rh. She will also get more space soon. Feeds are going well and they Love the MC/shogun combo it seems. Let's hope we have a great harvest to show how amazing these Fast Buds strains are.
Likes
10
Share
@Andres
Follow
Nothing important to say... she s growing up strong ang healthy outdoor
Likes
307
Share
@Ju_Bps
Follow
Hello growmies 👩‍🌾👨‍🌾🌲🌲, 👋 Stretch continues, girls look doing good 🦔 coming Start to smeel out the tent, I've up the extractor. Weather continues to be very cold, should be up next week 💪 Keep Working on the canope, removing leaves and under buds site. 💧 Give water each 2/3 day And vaporise plant with water + Plagron Roots (1ml/l) 2 l Water + Roots + Bloom + Zym + Sugar Royal (1 + 3 + 1 + 1 ml/l) PH @6 💡Mars Hydro - FC 3000 50% 42 cm. Mars Hydro Fan kit Setting 6 Have a good week and see you next week 👋 Thanks community for follow, likes, comments, always a pleasure 👩‍🌾👨‍🌾❤️🌲 Mars Hydro - Smart FC3000 300W Samsung LM301B LED Grow Light💡💡 https://www.mars-hydro.com/fc-3000-samsung-lm301b-led-grow-light Mars Hydro - 6 Inch Inline Fan And Carbon Filter Combo With Thermostat Controller 💨💨 https://www.mars-hydro.com/6-inch-inline-duct-fan-and-carbon-filter-combo-with-thermostat-controller Anesia Seeds - High Mars 36% THC🌲🌲 https://anesiaseeds.com/product/high-mars/
Likes
161
Share
One more week up we go and this Manma keeps getting better and better, she was huge last week she is massive now and by the looks we still have at least 2 mb 3 weeks ahead so i cant imagine how will she turn but one thing i know for sure, she wont be a small one ate all <3 <3 <3 lets see how the week goes for now no defoliation what soever, she is running wild and free, kind a hihihi i always give her directions and she is great with that <3 <3 <3 Man as the week closes up she s notorious putting grams on them fruits , still think she as at leas 2 to 3 weeks, OMG just amazing and i am dying here to see were this Mama beast is going <3 <3 <3 they got one thing write she is XXL that's is clear crystal to me hihihi man the week keeps moving fast and she keep getting better and better, added a day vs night video <3<3<3 and with the week pretty much close added a strain inf photo with her on week 8, and man them trichomes are getting all over, she will be big fat and sticky hihihihi felling super blessed, thank you SSSC for this one , seriously i can see she is a queen <3 <3 <3 As always thank you all for stopping by for the love and for it all, hope you all surrounded with love , health and blessing of all kinds <3 <3 <3 Genetics : PURPLE OG PUNCH AUTO (Purple Punch x Auto OG Kush) @ Super Sativa Seed Club All info and full product details can be find in can find @ https://aptus-holland.com/ https://supersativaseedclub.com/cannabis-seeds https://autopot.co.uk/ https://lumatek-lighting.com/ #aptus #aptusplanttech #aptusgang #aptusfamily #aptustrueplantscience #inbalancewithnature #trueplantscience #growerslove #dogdoctoofficial With true love comes happiness <3 <3 <3 Always believe in your self and always do things expecting nothing in return and with an open heart , be a giver and the universe will give back to you in ways you could not even imagine so <3 <3 <3 More info and updates @ https://growdiaries.com/grower/dogdoctor/official https://instagram.com/dogdoctorofficial https://youtube.com/channel/UCR7ta4DKLFMg2xxTMr2cpIg <3 <3 <3 Growers love to you all <3 <3 <3 <3<3<3 have a bunch of other journey going on, fell free to stop by and say hi, don be shy <3<3<3 Strain info : About Auto Purple OG Punch cannabis seeds To create Auto Purple OG Punch we crossed our feminized Purple Punch with an autoflower OG Kush. The original Purple Punch is a cross between Larry OG and Grandaddy Purple, illustrious and stable indica dominant THC-rich heavyweights! The total grow cycle from autoflower seed to harvest is a short 9 weeks. You will be rewarded with a large yield of sticky resinous buds, up to 600g/m2 indoors. If you’re looking to grow a high quality indica auto made with cannabis cup winning genetics you will love Auto Purple OG Punch. THC content is always up-to/around 20%. Auto Purple OG Punch effects are intense, euphoric and relaxed. She also contains around 1% CDB which contributes to the very smooth, chilled smoke. Expect a mouthwatering blend of sweet tasting candy, dark fruit and hints of spice. A real connoisseur cocktail with powerful effects! She normally reaches around 1m tall. But in optimized conditions with LED grow lights you can see occasional monster plants up to 2m tall with XXL yields. Auto Purple OG Punch is easy, potent and heavy yielding indoors. She also delivers well outdoors - such as the balcony or garden. Auto Purple OG Punch is a perfect, powerful strain for a quiet relaxed day. The calming indica body effect is very satisfying and de-stressing
Likes
4
Share
Comenzamos con la fertilización de nuestras plantas, correspondiendo con la semana 2 de la tabla. Recordad que la semana de germinación no cuenta como vegetativo. Mezclamos 4ml x litro de Grow-Soldier by JUJU Royal BioBizz y 1ml x litro de Green-Mystic by JUJU Royal BioBizz. Total 10 litros, 5 de agua osmotizada y 5 de agua del grifo, mezclados con los 40ml y 10ml, de los fertilizantes. Ajustamos el PH con reguladores BIO, en el caso que sea necesario y regamos todas las macetas. De esta forma aportaremos los nutrientes necesarios para que nuestras plantas puedan comer en el sustrato de de coco.
Likes
15
Share
@Kurow
Follow
This week is dedicated to finalizing the pot and nutrients for the rest of the lifecycle, looks like it took to the nutrients very well not much new upwards growth but new leaf sites appeared!
Likes
2
Share
@fabialien
Follow
Semana 4: Fotos del Día martes 30 de Julio 2024. Las plantas van bien unas se estan recuperando y las demas están creciendo muy vigorosamente, lamentablemente se nos murio la sherbet y una Gorilla Auto no creció nada. Seguiremos Reportando la próxima semana.
Likes
32
Share
@Hawkbo
Follow
These are doing pretty damn good for the most part. I figured out with the green buzz the only thing in bloom that raises ppm is the base bloom and the more PK which is good to know. Also been using lower ppm for the autos and they seem healthier than usual. These pics and the video were taken on Day 36.