Processing
Likes
Comments
Share
@
Follow
Likes
2
Share
@cafer
Follow
Today is the day my big bud seeds come out of the soil, they have all started to take root in 25 liters of soil without any problems
Likes
51
Share
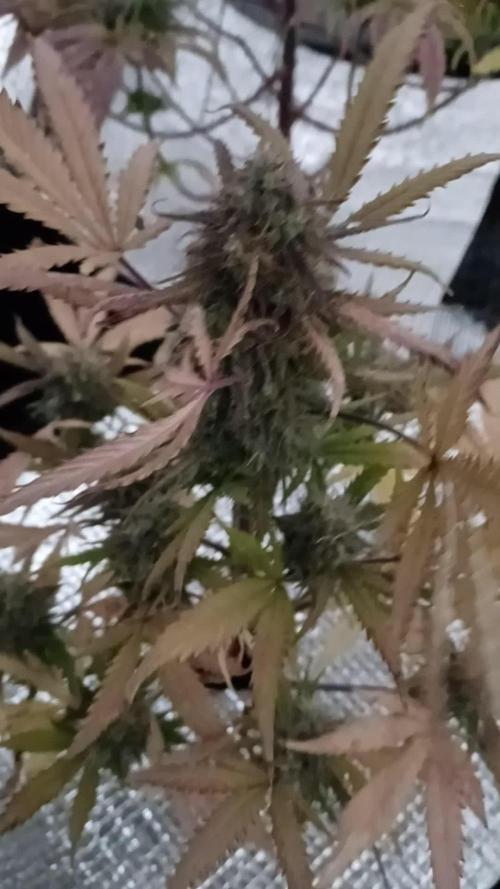
We're officially entering in the real flowering stage. Plant is stretching but not too much, ANUBIS is a compact strain so it will not grow very tall. It is very recomanded to do a good defoliation work, expecially if you're using a SCROG net. Defoliation is useful because with the removal of bigger fan leaves your pre-buds take more light and they will grow better and this method helps to reduce humidity (so, less risk of mold/rot) . Remove the bottom leaves/stems etc.. help plant/s to concentrate energy to the buds located at the top of plants. Now they're eating a little bit of veg solution but now we're feeding with flowering ferts hoping to get big and dense buds as fast as possible <3 <3 <3 <3 <3 <3 <3 <3 <3 <3 <3 <3 <3 <3 <3 <3 <3 <3 <3 <3 <3 <3 <3 <3 <3 <3 <3 <3 <3 <3
Processing
Likes
61
Share
Wow from start to finish was a great strain to grow the buds were covered in the most frost ...from the get go these beans were fast to germinate and grow with no issues when it came to high humidity or light intensity . The team at fast buds does an amazing job with there genetics .The plants were well taken care of and as a result she gave me super dense nuggets that are musky and sticky so dam sticky ..I would recommend this strain to any one who is interested in getting there first auto grow going or even a pro grower the company won't disappoint ...
Likes
18
Share
@GlyoFE
Follow
Friday 1st December 2023 So today marks the start of week 2! Both plants are growing every day, everything seems to be going well so far! The TS600 *should* be arriving this weekend so that will be a nice upgrade. I've started with nutes today, introduced CalMag, Biobizz Grow and Canna Rhizotonic whilst following all feeding advice I can find online. Got my PH Pen calibrated properly today, after mixing my first batch of feed the PH was 8.7! I'm glad I took the time to review those readings as I'm sure this would've been very bad for the plants. Brought the PH down to 6.5 on the nose and gave both plants a good watering, won't give them anymore for a few days and see how they respond over the next few hours. Fingers crossed! Any advice on watering, feeding and nutrients would be greatly appreciated 🙂 Saturday 2nd December The post man must've hated me today! Lots of stuff delivered for the tent and I've installed it all, up and running! Gone for a 4 inch inlibe fan with carbon filter exhausting out the top of the tent, completely invisible from the outside, almost silent and feels like good airflow. My Mars Hydro TS600 also arrived, so hooray for no more purple photos! The light intensity is a huge increase over the amazon special in the tent prior to this, but it's done well so far so I'll stash it away as an emergency backup unit. The TS600 seems to be a perfect fit in the 80x80 tent, it's exceptionally light and wickedly bright. Here's to hoping the plants benefit from a few conscious upgrades 😊 No watering today as media still damp, plants looking healthy and pushing out more leaves every time I check them. Hopefully we are doing well so far! Sunday 3rd December Plants are continuing to grow well, I do think the new light has made a good difference to them! Have made a point of swapping the pots left to right and rotating the plants to make sure they get even light coverage. Using the extractor and carbon filter now as the plants have started to give off an aroma. Going well and nothing seems to be struggling, I'll keep doing what I'm doing and follow my feed schedules. See you tomorrow! Monday 4th December Plants looking great again. After doing research decided to go up to my 11L pots in plenty of time to prevent as much stress as possible. Surrounded the old fabric pots with coir, surgically removed the old 7L pot with a razor blade and lifted it out ever so carefully. Went super smoothly, the roots are nowhere near the outer edges of the 7L pots anyway so they just slid out with minimal disturbance to the plants or the substrate around them. I hope this was successful as I took extra care and followed some good guidance. Lightly watered to encourage the roots to their new home, fingers crossed they hardly noticed what happened and have minimal stress as a result, but I'm expecting growth to slow as a result and I'll take it nice and steady from here. Tuesday 5th December Checked the plants at 7am before work and they looked very sorry for themselves. Droopy and exhausted looking, I spent the whole day at work convinced I'd come home to two dead plants from transplant shock. Instead I've come home to two ladies that have stretched their legs and grown even more! Super relieved, let's see how they go this next few days with more space to root in to 😁 Wednesday 7th December Plants are doing great! Spreading out and growing really well, the soil was bone dry when I checked them at 7pm so I mixed a fresh batch of nutrients up and gave them a steady watering. Lots of new leaf development, I'm really happy so far 🙂 Thursday 8th December Came home from work to lots more growth, as a first time grower it's absolutely amazing just how fast these things grow! They don't seem to be struggling at all and I'm being really careful watering them. I have also introduced a cheap 2L humidifier for the tent, running it on low to see how it affects the overall humidity as it keeps dipping low. It's winter here so really dry with central heating. I guess we keep going as we have been and see what week 3 brings us!
Likes
7
Share
First week of flowering... some fully developed and others not so much! 😅 Heavy defoliation, some bending clips on the newer branches and ended up taking out net for now... focusing more on leveling the main colas. 😉 Lack of training and stunt grow aside they´re looking healthy.... lets see how they finish later! 😎
Likes
7
Share
Ende ersten Woche Flower und Start der Zweiten, ich hatte wieder ein Problem mit Trauermücken und habe diese jetzt mit Neemöl bekämpft und die erste mit Sand bedeckt. Dadurch trocknet diese nicht so schnell aus und die Mücken können ihre Eier nicht in die Erde setzen, ich hoffe mal, das hilft. Die Pflanzen haben einen mächtigen Schub gemacht und sind min. 10 cm gewachsen, man erkennt schon kleine anzeigen von Härchen. Tag 4 von Woche 8: Heute habe ich das Netz gespannt und stark erlaubt sowie triebe raus genommen die nicht mindestens durchs Netz gingen oder kein Licht bekamen. Ich bin gespannt wie gut die anderen jetzt davon Profitieren werden .
Likes
2
Share
HAZIRLIK Dolabı yapmak bir aydan fazla ileri sürdü; aydınlatma, havalandırması, iç kaplaması, montajı, elektrik kabloları, fişleri, soketleri, prizleri vb. Tüm bunların ardından, sonunda bitirmem ve kotiledonların görünenlerin görünmediğini gördüm. Burada yaşadığım mücadeleyi okuduğunuzda, heyecanımı ve mutluluğumu paylaştığınızı düşünüyorum… =) //LED'LER// Torch LED'leri kullanıyorum ve bu LED'ler fiziksel olarak oldukça büyük olduğu için, dolapta ciddi miktarda dikey alan kaplıyorlar. Toplam 70 cm'lik aralıklardan 50 cm'ye düşüyorlardı ve toprak birleştirmeyle yaklaşık 40 cm'ye düştü, bu da başlangıç ​​büyümesi için neredeyse hiç yer bırakmadı. Bunu çözmek için Torch LED'lerini plastik yuvalarından çıkardım ve bunları ayrı ayrı boyutlandırılmış ahşap plakaya düz bir şekilde monte ettim. Bunu yaparak yaklaşık 15 cm'lik alandan tasarruf sağladınız. Ancak dolap yapısı ve Torch LED'lerinin kendisi nedeniyle ciddi ısınma sorunlarının belirtileri. //KABİN// LED'leri açtığımda, 26,5°C'lik iç havayı alıp 37–38°C'de dışarıya atıyorlardı. Her lamba bana yaklaşık +4°C'lik bir ısı artışı sağlıyordu. Durum böyle dönemde fan kapsamını artırdım; bu sıcaklıkta yardımcı oldu, ancak daha sonra içerideki nem 35–30'a, hatta %25'e düştü. Ne yeteneğimi düşünürken, 12V çift taraflı bir Peltier modül kullanmayı planladım: soğuklukta bakır borular sararak bunu fan destekli bir sıcaklığa dönüştürdüm. Aslında işe yarayabilirdi, ancak sıcak ortamdan ısıyı uzaklaştırmak için ihtiyacım olan sistem çok hantal hale geldi. O yerde, "Büyüme hayali bitti" dedim ve vazgeçtim. Birkaç gün sonra "Neden olmasın?" diye düşündüm ve dolabı balkona taşımaya karar verdim. Sonuçta, gizliydi - kimse içinde ne olduğunu bilmeyecekti - ve balkon uydu yoluyla mükemmeldi. Dolap balkonunda olacağından, iç kısım ısıdan, yağmurdan, bölgelerden ve diğer zararlılardan tamamen yalıtılması gerekiyordu. Tüm delikleri ve ortamları sıcak silikonla kapatırım. Daha sonra ısıl işlem köpüğü yerleştirdim ve her şeyi bölme filmle kapladım. Tüm bunları yaparken termostat, ısıtıcı, nemlendirme ve vantilatör için hiçbir şey görünmemesi için tüm kablo bağlantılarını da gizledim. LED aydınlatma için tek tek veya hepsi birlikte kontrol edilebilen ayrı lamba yuvaları ekledim. Ayrıca dolap kapağı açıldığında tüm ana LED'lerin otomatik olarak söndüğü ve yalnızca küçük bir 5W LED'in açık kaldığı bir sistemim oluştu. Vantilatörü dolabın sağ üst arka köşesine monte ederek egzozu diğer noktalara yönlendirdim. Vantilatörün gücünde, negatif basınç o kadar güçlüydü ki hava yalnızca girişten katılıyordu - başka hiçbir yerde 0,001 m³ bile hava kaçağı yoktu. (Bunu hava verileri için değil, zararlıları uzak tutmak için yaptım.) //SICAKLIK VE NEM// Dolabı balkona taşındıktan sonra bu sefer ciddi bir soğukluk sorunuyla karşılaştım. Geceleri sıcaklık 8-9°C'ye düşüyor, gündüzleri ise 24-27°C'ye kadar çıkıyor. Elektrikli fanlı ısıtıcılar kullanmak istemedim çünkü havayı çok kurutuyorlar ve tehlikeliler. Peltier fikrinden ilham alarak tekrar düşünürken çözümümü bir PTC ısıtıcı kullanarak buldum. Hava bağlantıları olan iki alüminyum bloktan oluşan bir PTC ısıtma elemanı yerleştirdim ve gelen tüm havayı bu kanallardan mülkler. Sistemi 24,5°C'de açılıp 24,6°C'de kapanacak şekilde ayarladım. Bu şekilde sıcaklık sadece 1,5° tolerans içinde -24,5 ile 26,5°C arasında dalgalandı ve LED sayıları azaldıkça daha stabil hale geldi. PTC'yi termostata bağlayarak ısıtma sistemini tamamladım. Gündüz sıcaklık sorunlarının çözülmesi için, elektrikler 11:45'te kapanıp 17:45'te tekrar açılacak şekilde programladım; böylece 6 saatlik bir kesinti süresini elde ettim. Bu süre boyunca kabin yaklaşık 24°C'lik dış havayı çekiyor, maksimum 27°C'ye ulaşıyor ve ardından tekrar soğumaya başlıyor; tam da bu noktada PTC devreye giriyor. Böylece daha önceki büyük yangının sorunu tamamen çözülmüş olmuştu. Ayrıca nemlendirmeyi termostata bağlayıp %70'e ayarlayarak nem sorunu da çözülürm. Tüm bu süreci 1,5 ayımı aldı ama değdi. 1-2-3. güne kadar tek led 3. günde 10. güne kadar 3 ledide açtım ama bitkide büyüme problemi olduğunu gördüğüm için ışıkları söndürüp tek ışık 40cmden devam ettim.
Likes
7
Share
@Lowpak
Follow
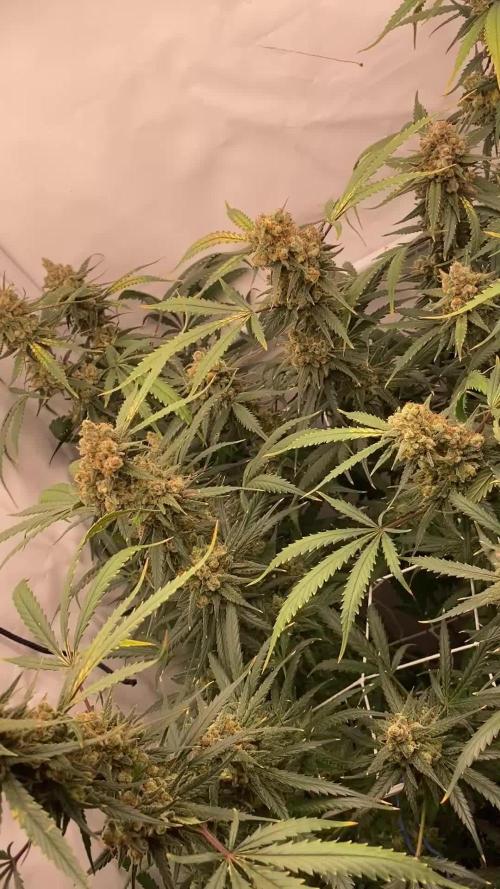
Hello, this is my first grow diary (series of 3). You can check out My other currently running grows! Lowpak's Malasana Cookies: https://growdiaries.com/diaries/171937-grow-journal-by-lowpak Lowpak's Kimbo Kush: https://growdiaries.com/diaries/171990-grow-journal-by-lowpak Flowering week 9: Last week. Flush. Daily check for mold. I think it is quite possible that they will go down earlier than 63 days, because of huge dense buds. Flo56 - Watered with clean water, pH 6.3 Temp.: 29 °C. Light: 100% SETUP: 10x The Original Bruce Banner #3 - Dark Horse Genetics Nutrients: Gold Label Medium: NARCOS Organic Pro Mix Pots: 15L Fabric Lights: Migro Aray 4 250W Migro Aray 8 500W Tent: Mammoth Pro 240L 120x240x200cm Ventilation: PK125WHSP-ECTC PK K4602-150 2x Oscilating Clip Fan - 25cm EC Meter/PH Meter/Hygrometer/Thermometer
Likes
12
Share
Arrancó la floración. Las plantas se fueron bastante arriba, así que estas dos semanas voy a estar aplicando lst para manejar la altura y no estresar a las plantas en floración. Es una variedad de floración rápida y 90% indica, por lo que no espero un estirón muy fuerte. Por el momento elegí usar EMRO desde el principio, dado que la reacción de las plantas fue mejor que al bioestimulante en las aplicaciones foliares. El presupuesto no me dio para delta9 esta vez. Pero la próxima espero que si. De todos modos le tengo mucha fé a la combinación de los dos productos usados. Estaré actualizando. Es el 5to día de flora y las plantas vienen mostrando un estiramiento medido. Por suerte tengo lugar para manejar la altura. Pero aún así voy a tener que agrandar el depósito ya que cada 2 días debo agregar agua. 18 litros no son suficientes para este tamaño de plantas. Pero voy contento con los resultados. El bioestimulante que usé no es muy bueno. He visto mejores reacciones con delta 9. Día 7. Tuve que usar LST obligado para intentar poner las plantas a la misma altura. Al final la pequeña de atrás no prosperó demasiado, así que va a quedar ahí y sea lo que sea. Por el momento las yemas no se muestran tanto, pero eso es la falta de un bioestimulante de calidad. De todos modos por el momento los resultados son buenos y las plantas están fuertes y sanas. Ya estan a 20cm de las luces y voy a tratar de mantenerlas ahí o como muy cerca a 15cm. Mañana cambio el depósito y repetiremos las fórmulas con un poco menos de EMRO.
Likes
12
Share
Likes
Comments
Share
This week I transplanted them from the AC Infinity Seed Starter to their 5 gal grow bag or their final pot! I like to make my own super soil out of Root Organics Formula 707, Coco Coir, Perlite, Vermiculite, and amendments. Then I placed a hole in the middle of the 5 gal grow bag, for the plant being transplanted, and placed the young seedling into the hole. Then I lightly covered around the base of the young seedling. Then I watered with 250mL of pH balanced H20! From there that's it just checking on it daily and watering as needed daily with plain pH balanced H20. Then I amended the soil with 4-4-4, 4-6-3, Blood Meal, Bone Meal, Alfalfa Meal, Kelp, and Earthworm Castings. Then I gave nutrients every other day. First General Hydroponics MaxiGrow then plain pH balanced H20 the next day. Then amended the soil as noted above. Then plain pH balanced H20 the next day. Then I would feed The Stash Blend and then plain pH balanced H20. Then the General Hydroponics MaxiGrow and then plain pH balanced H20. Then Real Growers Soil Recharge and finally plain pH balanced H20 to finish the week off. I always pH at 6.0 for nutrient solutions and 6.8 for my plain pH balanced H20. My temps for solutions were 72° and ppm was 800-850 with EC 1600-1700. I always use my oxygenated H20 that is monitored by a professional meter and so are it's levels! I have oxygenated H2O with a pump ready to go at all times! This way I can just scoop up the water and go on demand without having to worry! All and all they're growing well and gaining a ton daily!!
Likes
126
Share
The little Dawg is coming on great , res change and some more nutes and it's started to open up. The difference in only 48 hours has really surprised me :) Day 3: seems like the little Dawg loves the res haha. .. doubled in width and grew 2cm in 48 hours , drank roughly 4 litres of water , poms were 350 then then dropped to 315 so it's definitely loving them nutes :) Day 4 : decided to do top my dawg and defoliate last night/this morning, came back in tonight and it's drank 2L of fluid and exploded with roots and perked right up.... I know it's it's classed as sin to top autos but i love to experiment and I've assumed if it it can grow this much in less than 21 days then then it should have enough time to heal and stretch some more before flower - well well that's my theory haha. .. All a learning curve for me :) Day 5: perked up since topping it yesterday and I'm positive i can see new leafs trying to poke through the top already so , I've applied some cablr ties to begin training it. Day 6: the little dawg seems to have took took the topping and training in its stride haha.... can see 2 new sets of leaves poking through the top, the plant stands roughly 12cm as it's topped and being trained , spans 20cm
Likes
15
Share
2/1/2024- Pre-Germination Activities Day 1 I have 21 weeks until final photo is do.. I took 3 seeds out of cold storage and will let them get to room temp for the next 48 hours before I go with Glass of water for germination. I have 3 beans because I will start from the very beginning helping ensure I present the best Pheno. This is going to be a fun one.. I am a few days away from being able to clear my tent out for this run.. I have a breeding run in right now and the Seeds are a few days away from being mature enough for me to take down the girls. Once I get them down I will need to get my tent cleaned up and turned over right away. This is going to be close, I will have to time them to the water and into the tray at the right time.. because I will need to get lighting on them right away.. I have my 2X2 and my light ready incase I need to hold them in the cloning machine if the others are not done in the next few days.. Glad I have options that can stretch me out for a week or 2 to give me a little more time. 2/2/2024- Pre-Germination Activities Day 2 I checked on my breeding run to see how close the seeds are and if the tent is ready for me to clear and clean but alas I am still going to need a few days. I setup the emergency 2X2 and that should give me 2-3 weeks. The plan is to still wait one more day to allow the beans to warm up to room temp and then drop them in Water sometime tomorrow. Form my Emergency 2X2 I have the following: 4" inline fan and carbon filter Fan VS-2000 light 2/3/2024- Germination Activities Day 0 - Dropped the Beans in.. Today is 0 day.. Go.. Go .. Go.. 2/4/2024- Germination Activities Day 0-1 - Checked in on them this morning and no tap roots yet.. covered them back up and back in to the closet they went. I setup the Root Riots and the Seed tray for them. I Ensured my water that I was soaking the root riots in was PHed to 5.8 and I used RO water. Afternoon Update: Checked on my Breeders and they are done. I started to harvest them, I took down the one I had reversed with STS and I took down the Black African Magic- All but one bud, I wanted to get some pics of that one today. I was only able to get 2lbs into the Cannatrol because I had to be very careful to keep the bud from the plant that was treated with the STS separated from the other seeded bud that was pollenated from the plant I reversed. Cannatrol could have held an additional 2oz of wet but not today. Ideally I need 1 more Cannatrol so I can take an entire Tent, but will figure that out. I put an additional 1.5lbs into the freezer to wait it's turn into the Cannatrol, I would have left it on the plant and taken it in 4 days when the dry cycle gets done but wasn't sure how much 2.2 lbs was equivalent to chopped and wet trimmed. 2/5/2024- Germination Activities Day 0-2 - Checked in on them this morning and 2 of them have very small tap roots out.. one still doesn't going to give them some more time. I will check in on them this evening and see if they are more open if so I will transfer the ones that are ready to their medium and seed tray. 2/6/2024- Planting Day TRUE Germination Day 0- Checked in on them this morning and all 3 of them have tap roots out. I broke the bottom of the tap root for #1 which was the biggest.. pretty sad.. I hope she survives.. I tried to be careful it just snapped off when I was trying to get it in the root riot right. Other than that all three are now in their in-between home in the 2X2 while if finish clearing and cleaning out their forever homes. 2/7/2024- Germination Day 1- Checked in on them and no surprise no sprouts yet. Sprayed the dome to moist it and light spray to the tops of the Root Riots. 2/8/2024- Germination Day 2- #3 is popped and it looks like #2 will be popped by this evening.. I got my second Cannatrol today so now I can take down the rest of the tent and get it into the dry/cure. 2/9/2024- Germination Day 3- #2 is popped as well.. so I have #2 and #3 up and still waiting to see on #1 but that might be a loss since I accidently broke off some of the Tap root when transplanting. 2/10/2024- Germination Day 4- #1 has Popped... We have ignition on all 3.. YAY!! I finished clean up and install of RDWC system, this time was unique the back left buckets 3 inch pipe wasn't seated correctly so I had to clean up about 12 gallons of water all of the floor. I also had two leaks coming from one of the Waterfall return junctions, this is why I do a full pressure test before I put anything in. I will continue to monitor it through tomorrow to ensure that I am good to go and then I will finish setting up the baskets and prepping the water to be ready for the ladies planting day!!! 2/11/2024- Germination Day 5- #1 Of course is going to be my trouble plant.. No matter what If she lives through planting in the system and making it, I think I might not cull her at all regardless, she has been such a problem, makes me wonder if she will be super worth it towards the end.. We will see as we go through this grow, but #1 has a piece of the shell on the leaves, Other than that I set up a new thing I have been doing since last grow converting my Baskets into Sure plants so I can see exactly where the water is when I plant them and ensure I have the water up high enough that they are able to access it and grow but not too high were they are drowning. 2/12/2024- Germination Day 6- Everything seems to be going good.. will just keep them moist and let the roots grow for a few more days before I transplant to forever home. 2/13/2024 - Germination Day 7- Just keeping them Moist. 2/14/2024 - Germination Day 8 - Planting day.. they are now in the system.. :-)I had to fill the water to the bottom of the basket where I could see water on the bottom rocks and just coming up where I had created my whole/ sure plant. 2/15/2024 - Germination Day 9- Top fed just a little to keep them moist and encourage root growth towards the water. I ensured the PH is right at 5.98-6.02 range. 2/16/2024 - Germination Day 10- Top fed just a little to keep them moist and encourage root growth towards the water.
Likes
2
Share
@Ninjabuds
Follow
Lemon cherry gelato is a good little plant., I like the structure. It has been in the large pots for a significant less amount of time that the others and it is already about the same size so it’s fast growing plant. It’s from Barney’s and everything from them has been amazing so I have high hopes
Processing
Likes
25
Share
Ordered a scale the other day so should have some more numbers tomorrow! Not going to sample anything until I get the scale, then I'll update with some more details.
Likes
14
Share
@Kakui
Follow
15 Noviembre: -Hoy se instaló el sistema de riego "Drip to Waste" que me permitirá hacer riego de precisión, con protocolo "Crop Steering". -Se instalaron sensores de humedad de suelo, para saber cuándo y cuánto regar, el sistema manda datos de humedad de suelo, temperatura y humedad ambiente, etc vía internet a mi celular. -Mañana se comienza con el primer riego de precisión. 17 Noviembre: Segundo día de riego automático, 3.0EC y 5.9pH, las plantas crecen a buen ritmo, las raíces ya están saliendo por los orificios de drenaje a 2 días de transplantadas. 20 Noviembre: Se realizó una pequeña defoliacion de las hojas tipo abanico muy grandes.
Likes
4
Share
Vamos familia, actualizamos la primera semana de floración de estas Thunder Banana de Seedstockers, salieron las 3 de 3, 100% ratio éxito. Aplicamos varios productos de Agrobeta, que son increíbles para aportar una buena alimentación a las plantas. Temperatura y humedad dentro de los rangos correctos dentro de la etapa de crecimiento. La tierra utilizada es al mix top crop, por cambiar. De 3 ejemplares seleccioné los 2 mejores para completar el indoor, cambié el fotoperiodo a 12/12 y también apliqué una poda de bajos, se ven bien sanas las plantas, tienen un buen color progresan a muy buen ritmo por el momento, marcaron las preflores. Agrobeta: https://www.agrobeta.com/agrobetatiendaonline/36-abonos-canamo Hasta aquí todo, Buenos humos 💨💨💨