


Likes
8
Share

@Growbody
Follow
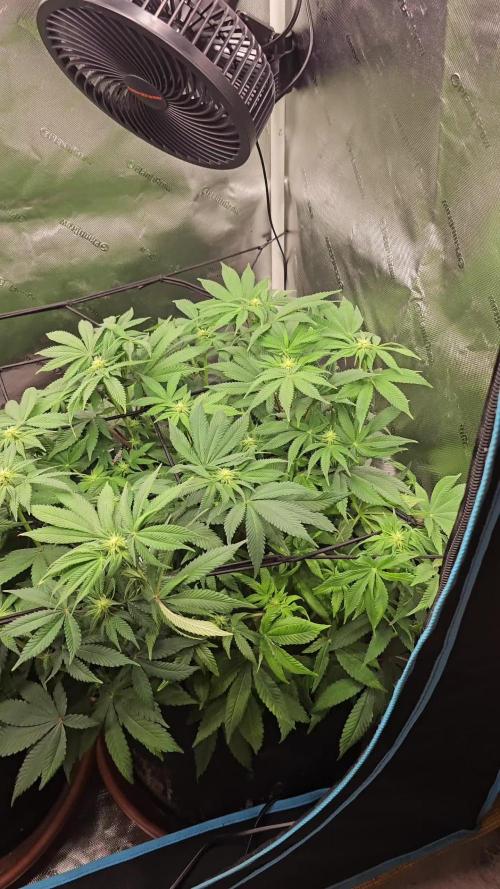
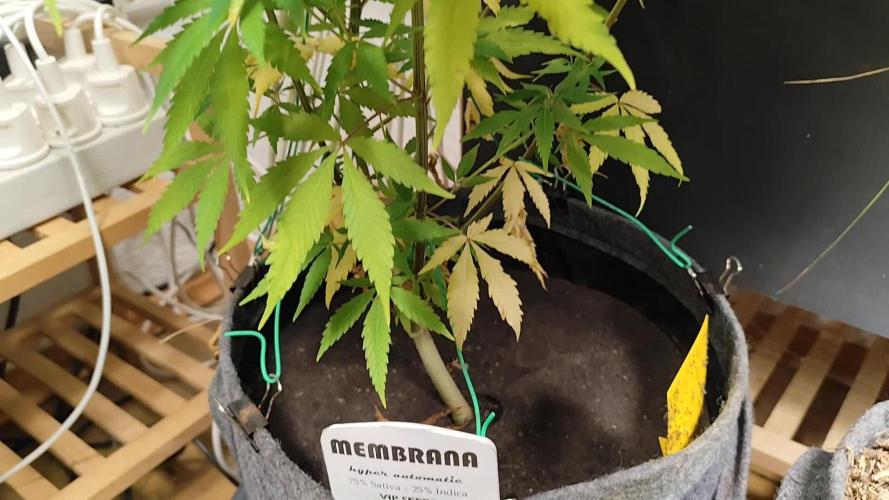
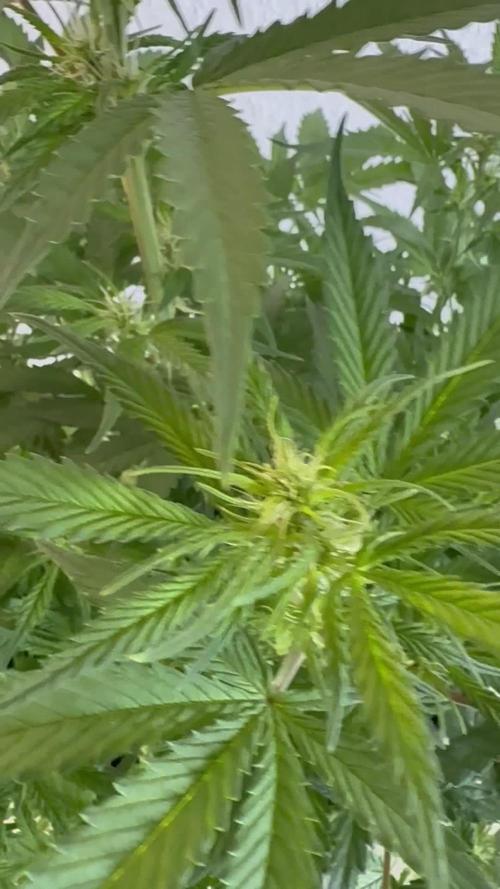
Herzlich Willkommen zu meinem Growbericht der Membrana Hyper Autofem von VIP Seeds.
Die URL für den Strain findet Ihr hier:
https://www.vip-seeds.com/membrana
Für den Grow verwende ich den großen 15 Liter WideVersion Stofftopf von ROOTIES. Bei meinem ersten Grow mit den ROOTIES kam nur die 9 Liter Version zum Einsatz, da haben die sich gut bewährt.
Auch die Smart Start Plugs von Zamnesia werden wieder verwendet, dieses Mal ohne den Samen vorher einzuweichen.
Und die Erde und der Dünger von BioBizz findet wieder Verwendung.
Tag 97: Die Membrane Hyper Autofem von VIP-Seeds bleibt filigran und streckt sich weiter.
Schön, dass du dir mein Tagebuch angesehen hast. Schöne Weihnachten 🎄✋😎

Likes
5
Share


@CreamyNuggets
Follow
So far all plants have been harvested. (3x Bubba Pupil, 1x purple wreck, 1x AK-47, 1x Godberry). The first bubba pupil and AK-47 were harvested a week and a half ago and now have been jarred for 1 week +/- a few days. All pictures are of the bubba pupil and AK. I will come back and update once the other plants have been trimmed.
The first Bubba Pupil, which was the tallest of the 3 and most stretched out, yielded exactly 4.5 Oz dry weight. The smell is starting to get stronger after a week. It smells grapey but has a weird funk to it. It must be the “pupil” funk everyone talks about. This plant looked like it wasn’t going to yield much, but I was pleasantly surprised. The lowers were dense and compact which contributed to a good amount of decent sized buds. Overall, I’m pretty pleased with the yield and quality from this plant.
The AK-47 seemed like it was going to be a heavier yielder, but it ended up only yielding 2.5 Oz dry. The main colas were far during flower and dense when dried, but this plant had little to no lower quality buds. Everything below the main canopy seemed like it was airy and not worth jarring up. This plant smells a little bit fruity, but I can’t really put my finger on it. Super dank smelling, not skunky, but it smells like it is going to be gaseous once it cures up a bit longer.
The Godberry yielded a total of 3.25 Oz. She was the best smelling by far out of all of the girls in the tent. Super fruity and sticky as hell. The resin content on her was definitely the highest of them all.
I will be back to update once the last 3 plants are trimmed and jarred for a final weight and overview.

Likes
10
Share


@undermink
Follow
She looks awesome at the beginning of week 8. Queen Papaya II fills up my hole 60x60 tent and she is growing lovely buds... Let's see how this works out 😍I just cut some leaves and gave her some nurition (2ml one a week from each of the three).

Likes
13
Share


@TrialAndErrorGrows
Follow
Week 9
Didn’t do anything this week except water the lady’s. My telescopes batteries died so I can’t take pics of the tricomes. Rest assured they are nice as hell. They are a massive mix of colour. You see purple, cloudy yellow and amber. Super excited to puff on these nugs!!

Likes
35
Share


@nonick123
Follow
Día 37 (08/07) Ajustes de LST en todas las plantas! 🚀
Día 38 (09/07) Ajustes de LST en todas las plantas. Las ramas inferiores están creciendo como un cohete! 🚀😍
Riego con 250 ml H2O pH 6,5
Día 39 (10/07) Las plantas se muestran sedientas! Creo que el cepellón está lleno de raíces y piden el trasplante!
El crecimiento no se ha visto afectado de momento
Riego con 500 ml H20 pH 6,5
Día 40 (11/07) Paso a regar con 500 ml / día, ya que hace mucho calor (30 ºC) y efectivamente las plantas ya han copado la maceta de raíces
OnionOG y KS1: Las ramas de nodo inferior se han quedado enanas tras el entrenamiento, de modo que las elimino y aplico canela en polvo en los cortes
Riego con 500 ml H20 pH 6,5
Día 41 (12/07) Riego con 500 ml H20 pH 6,5
Clones! Mi experimento vuelve a demostrar que NO necesitas complejos productos de clonación ni sistemas para obtener clones!
Hace 15 días puse 2 clones con el tallo sumergido en miel durante 5 minutos en una maceta de 400 ml con PRO-MIX HP BACILLUS + MYCORRHIZAE
He mantenido la humedad alta con una cúpula de humedad casera hecha con una botella de agua PET de 5 litros cortada por la mitad y pulverizando a diario.
Han estado los 15 días en mi terraza con luz indirecta, y temperaturas que rondan los 30 - 32ºC durante las horas centrales del día
Hoy los he trasplantado a una maceta de 1 litro porque ya habían formado raíces y empezaban a formar nuevas hojas!
🐥🐥🚀🐥🐥
Día 42 (13/07) Riego con 500 ml H20 pH 6,5
Día 43 (14/07) Trasplante a maceta definitiva de 21 litros de ROOTPLUS Pot de GSKOREA GLOBAL!
Estas macetas son una maravilla!
Proceso de trasplante:
Se prepara con 17,85 Litros (85%) de sustrato PRO-MIX HP BACILLUS+MYCORRHIZAE + 1,05 Litros de Humus de Lombriz (5%) + 2,01 Litros de Insect Frass (10%) + 210 gramos de Earth Vibes Super Soil (10 g/L substrato)
Se llena la maceta de sustrato con las manos (limpias) y rompiendo los trozos más gruesos, para que el sustrato esté aireado y esponjoso, sin presionar
Se coloca una maceta vacía de 6,5L para que quede la forma perfecta de la maceta donde están actualmente
Se espolvorea la parte proporcional de la probeta de microorganismos sobre el agujero de trasplante
Se saca la planta de su maceta actual (bonitas raíces 😍) y se coloca en la maceta final
Se riega muy lentamente hasta percolación profunda con H2O EC 0,5 pH 6,5
Una vez asentada, complemento con un riego de 500 ml con 25 ml/L de Humus de Lombriz Liquido
Se coloca mulch (acolchado) de paja para evitar traspiración excesiva y cuidar a los microorganismos del suelo
A ver como reacciona al trasplante!
Aplicación foliar Kelp hidrolizado de Lurpe Solutions a 0.25 ml/l
Realizo ajustes de LST aprovechando el trasplante a la nueva maceta. De momento tienen una canopia muy bien formada!
💦Nutrients by Lurpe Solutions - www.lurpenaturalsolutions.com
🌱Substrate PRO-MIX HP BACILLUS + MYCORRHIZAE - www.pthorticulture.com/en/products/pro-mix-hp-biostimulant-plus-mycorrhizae

Likes
21
Share


@NorthernMonkeyzInc
Follow
Im so happy with how these girls are turning out..these are both photoperiods and are in grape containers from the supermarket. They are taking the training very well and im very pleased with the development and growth

Likes
70
Share


@Mrs_Larimar
Follow
2021, June 19th
Lil Girl is showing up.... so very courious how shes going to perform
New" Babyroom" is ready
new Light everything new, so i have to calibrate some Things to get used to
So back to " START"... and looking how they Grow.
I think a few Adjustments will come
Iam quite hapy to have a solid Growspace now.
Many Thanks to my giftet Carpenter.....
It was alot of Work to build this Space.. from an Vaulted Cellar from 1897... To a Growroom 2021
Iam very Thankful , and happy.
Thanks to all People who supported me
I dont want to throw around with Names now, because Iam sure Iam forgetting someone.....
Peaceout
Shopping Link for the LIghts:
Amazon US:
XS1000 10% off: it10mlarimar http://yx-8.cn/0y-6
XS1500 5% off: it15mlarimar http://yx-8.cn/0yA
XS2000 5% off: it20mlarimar http://yx-8.cn/0y2Y
XS4000 5% off: it40mlarimar http://yx-8.cn/0y5k
Amazon Canada
XS1000 10% off: it10mlarimar https://amzn.to/38udUVe
XS1500 5% off: it15mlarimar https://amzn.to/3esVUyr
XS2000 5% off: it20mlarimar https://amzn.to/3l5zAfg
XS4000 5% off: it40mlarimar https://amzn.to/3l7k5Uj

Likes
4
Share


@JeyGanesha
Follow
Prima settimana di fioritura e tutto procede bene ☺️ è impressionante come funziona bene advance nutrients....fanno il lavoro che devono.......
Processing
Likes
15
Share


@greenflipcali89
Follow
Finished week 2 of flower. I have been inspecting every single leaf for PM and have found a few spots, but quickly spot treated with solution. I have learned that PM is a SYSTEMIC disease and the spots on leaves are a symptom of an already infected plant. So the best thing I can do is keep the symptoms in check by spot spraying and its working! Only a few burned leaves as a result, but nothing like my first grow where it was widespread!
Defoliated to thin out a bit and allow for better airflow. Light LST to a few of the taller stems to maintain an even canopy. Overall, I am happy with the way my 2nd indoor grow is progressing.

Likes
12
Share

@DE_BW
Follow
Week 1 of flowering and she’s turning into an extremely bushy plant with a massive number of bud sites. Switched to bloom nutrients and started guiding her into the generative phase. Did a light lollipopping and defoliation to improve airflow and light penetration across the canopy.


Likes
14
Share


@TOMI08
Follow
80.nap
Növeltem a tápanyagot...
Hesi tnt 20-ml 10 víz
Hesi supervit 2 csepp 10víz
Plagorn alga grow 18ml 10 víz
Csak esővízet kapnak a ph nem mérem
Jól reagáltak a lányok szeretik...


Processing
Likes
19
Share


@Oldmanbud__50
Follow
So no change just got fatter buds. The 2 on the ryt are being flushed for 7.10days. 2 on the left are different strains. Had a few newbie problems at the start but soon realised its a weed n if u listen to her she will let u know what she needs.. Been a nice journey and carnt wait to dry n try. Happy growing peeps
Likes
15
Share


@Fibro_Witch
Follow
Things are going great. These girls are getting nice and frosty. They are so easy. And the smell! Oh she's heavenly! She's almost sickeningly sweet. I'm very excited to try this strain. Last year I was more on the Indica dominant bandwagon, since I use Kratom during the day for pain management. But my obsession with CBD Blue Shark has me excited for more balanced hybrids. I've been having an issue with the quality of Kratom I've been getting from vendors so I may have to start in on wake&bakes, which FastBuds says this strain is perfect for!
Likes
8
Share


@Max1973
Follow
Day 28 - lookin good.... checkin everything daily, adjusting as nessec. ....
might start lookin at a top/trim/bend/flower plan.....
Day 32 - post some ... watch the vid.. pretty sure u know whats about to happen here... lol
i'm a pretty good grower... :)
check out the base on both those super silver haze... that last video... shows u the perfect base and stalks and stems .....
those stalks are each going to be for a beautiful long bud... lol
didn't really start with a clean glow solution.... so just kinda been winging it.....
in the next week or 2 i'll think about flush both out completely, start with fresh new flower solutions,
and switch to 12hr lights.......
getting some awesome growth out of the 60 W on each plant..... thats 6 x 10w household led light globes..... 👍😎

Likes
29
Share


@MrHightimes
Follow
Just about done now. I think i'm gonna take down 2 and leave 2 going another week!
Dank greasy and sparkly!
Should be a great smoke, but i'm worried about these fatty colas. i hope they got enough airflow!


Likes
2
Share


@Green_Peace
Follow
Progressed as expected in the last 7 days. Will be using the Vitalink nutrient range on this grow as their prices are so much lower compared to other nutrient ranges available in the UK and there's a global cost of living crisis thanks to corporate greed, so it will be interesting to see the results when using what they recommend.
BTW - This grow should have an asterisk next to "Wedding Gelato"
I'm almost 100% sure I haven't mixed the seed up with any other, but can't rule it out entirely. I am stoned all of the time so it's a possibility. I guess we'll find out when she flowers.

Likes
3
Share


@High_Grade_Dadli
Follow
Lil younging coming good cant complain.... last two are 2 of 6 mothers for the lil youngin which I took when they were about that size with a bit more aggressive training.....big girl flourishing looking like they due a cut....happy growing
