


@A-C-H
Follow
Eine sehr schöne, harzreiche Pflanze, aber es handelt sich um zwei völlig unterschiedliche Pflanzen. Ich werde einen Bericht schreiben, sobald ich sie probiert habe.


@Riddle
Follow
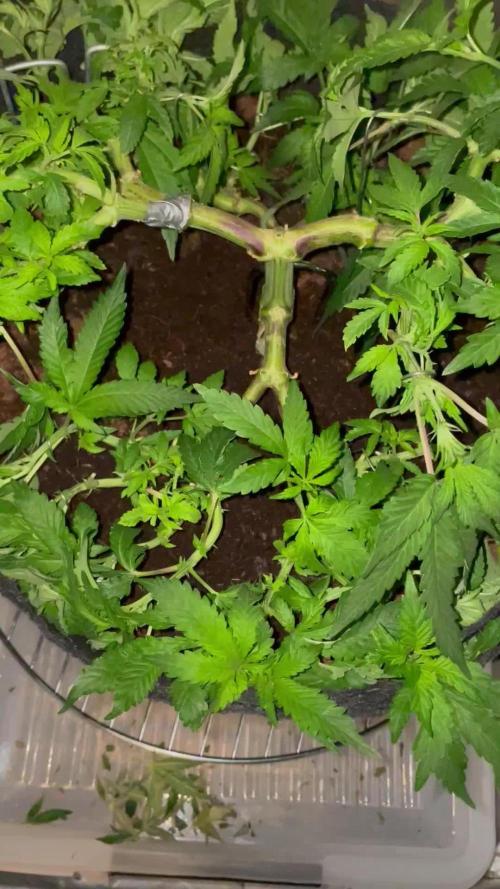
After 14 days of germination and seedling phase I finally put 3 of the plants in my Homebox with the SANLight Evo 4-80.
DLI 16 - measured with Photone iOS App.




@Northern_Ent
Follow
June 6: looking good. Very impressed with these Quebec Cannabis Seeds genetics. This and Bubble OG are great strong plants.
June 7: check out coyowolves howling on video.
June 8: more defoliation.


@Wicked_Stix
Follow
Been another smooth week. A few of the plants are starting to show signs that they are moving towards to finish line. Seeing some swelling, pistils starting to brown, and some beautiful purples coming out in some of the buds. Been debating on giving them a dose of dry koolbloom, but I will probably just keep them running on the maxibloom until flush since they look pretty happy. Thos candy cane is popping up a lot of deep purple tones but I'm not really liking the lack of swelling in the calyxes at this point. She has a nice sweet candy aroma, but I am thinking she will be the loser of this grow when judging bag appeal alone. Hoping she puffs up over the next week or so.






@PhinolaGreen
Follow
11. Woche
Ich habe den Exhale Co2 Bag mittlerweile entsorgt. Ich habe es mit dem in der Wohnung nicht ausgehalten und dann ist der rausgeflogen. Ich werde in Zukunft wieder die kleinen Beutel besorgen.
Joa sonst Space Cookies Auto Delicious Seeds sehr gut aus, sie trägt ordentlich Besatz und die Buds sehen auch richtig ordentlich aus. Denke noch 2-3 Wochen, dann ist sie Ready. Das Licht läuft mittlerweile auf 100% also insgesamt 320 Watt auf 0.54qm Fläche 😊💚☄️🍪


@GrownwithLED
Follow
After germinating the seeds are transplanted into small pots with soil (see tutorial in VIDEO above). The soil is prepared with water mixed with a little bit of BIO NOVA Roots (0,5 ml/l), which aids the development of the seedling. Transplanting is very easy now, because they have grown a STRAIGHT tap-root while hanging during the SERIOUS' WAY of germination. This straight root allows for easy potting of the seeds. Simply make a little hole in the center of the soil with your pinky finger and carefully place the germinated seed with the white root pointing DOWNWARDS into the hole. Best is to lay it onto one side-wall of the hole with the seed shell right at the surface. Then I push the other side inwards and enclose the whole root with soil. At the end only the top of the seed-shell peeks out of the soil. IT IS VERY IMPORTANT to plant the seeds NOT TO DEEP into the soil. The seedling only needs extra strength to work itself upwards thru the soil and you run the risk of the soil drying out and the seed dying off. When you PLANT THE SEED VERY SHALLOW into the soil (=with the top of the seed-shell still peeking out) your seedling can grow out right away and you have a small plant already 24 hours after putting the seed into the soil.
The small seedling sometimes still has the seed-shell on its 'head', it normally falls off by itself, but sometimes you have to carefully help and take it off with your finger nails. Be careful to NOT clip of the seedling accidentally when you do this!
The seed-shall has an inner lining, which feeds the small seedling when it germinates. This inner lining sometimes gets tangled around the stem of the small seedling after the shell has fallen off. This little skin MUST be taken off the stem right away! Once it dries up, it gets hard and can strangulate the seedling around the stem. In order to avoid this, the skin must be taken off as soon as possible! I show it in the pics above and also made a video about taking off the inner lining of the seed.


@AUTOBUDDHA
Follow
Fantastic week. Lots has changed. Plants are stacking something fierce!
I cut out the nitrogen completely this week, qnd that's how it will stay for the duration of the rest of the grow. I have found with autos, i have had the best luck when I push them hard with nitrogen up until this stage in growth. I then cut out the nitrogen completely and up the bloom nutes quite dramatically.
For the rest of the grow I will feed every watering. Water at a 6.4 ph.
Gro- 0ml per gal
Micro- 10ml per gal
Bloom- 15ml per gal
Bug bud- 5ml per gal
Very much looking forward to watching this batch swell!!
Wow... thats all I can say.. deep dark purple. Super strong smell of diesel fuel and citrus! Stacking hard!


@Cogollo_eu
Follow
**Encontrarás la traducción a español al final de la descripción**
From/Desde: 10/05/19 || To/Hasta: 16/05/19
From day/Desde día: 78 || To day/Hasta día: 84
You can find the Money Maker Diary here:
** Podéis encontrar el diario de las Money Maker aquí:**
https://growdiaries.com/diaries/25667-gorillamakingmoney-gorilla-vs-money-m
-----IMAGES & VIDEOS-----
5 - HomeMade Organic & Cheap CO2 generator (more info in week summary)
9, 10, 11 & 12: The bud on the right is a Gorilla one, the buds in the left or/and in the middle are Money Maker ones.
15 - Same Gorilla plant buds, one affected by CO2 in the roots and the other not.
-----WEEK SUMMARY-----
The smell is more sweet and intense every day, friends that came home turned them eyes into crystals when they see this little babys. The size isn't awesome, but the high ammount of buds full of crystals plus the strong sweet aroma makes them awesome. Buds are growing and fattenning very very well.
This week i added a boost of HomeMade CO2, i never measured the results of this invention so i can't give CO2 measurements. This method is widely used in home aquariums and there is where it comes from. For those interested i'm going to write here more detailed instructions. The 4 liters i've made will last for about 2 weeks.
---NEEDINGS---
- 250 ml Bottle
- 6~10 l Bottle
- 400 g Sugar / l water
- 1 Envelope of organic baker's yeast / l water (CHEMICAL WILL NOT WORK)
- 3 mid plastic tubes 40~50 cm
- 1 short plastic tube 5~6 cm
- 4 tube adapters
- Hot glue to seal adapters
The process of creating CO2 is simple, mix water, organic yeast and sugar in a bottle, and the sugar will free CO2 in the process of fermenting to alcohol due to the yeast.
1. Make a hole in the center of the big bottle cap, insert an adapter and secure it with hot glue
2. Make 3 holes in the small bottle cap and glue the other 3 adapters
3. Link both caps with one of the mid tubes and insert the other tubes on free adapters
4. Insert a short tube in the bottom of the small cap in the adapter that came from the big cap
5. Watch the Video!!
-----WATERING CALENDAR-----
Plants are beginning to drain the pots a bit faster so from now on i will raise the water ammount on each watering day 0.25 l.
11/05/19 - 1,5 l with All week nutrients -(Nirvana & Blombastic) also Big Bud half dosed @ PH6.4 & 2 E.C.
14/05/19 - 1,5 l with Bud Candy, Big Bud, Nirvana, B52, Bud Factor-X, Sensizym & Blombastic @ PH6.4 & 1.5 E.C.
*****ESPAÑOL*****
-----IMÁGENES Y VÍDEOS-----
5: Generador de CO2 casero, barato y orgánico (más info en el sumario semanal)
9, 10, 11 & 12: El cogollo que sale a la derecha es de una Gorila, el de la izquierda y/o el de en medio son de una Money Maker
15: Dos cogollos de la misma planta, uno afectado por CO2 en las raíces y el otro no
-----SUMARIO SEMANAL-----
El olor es más dulce e intenso día a día, los amigos que vienen a casa a verlas se quedan ojipláticos al verlas. El tamaño no es una maravilla, pero la gran cantidad de cogollos llenos de cristales añadido al aroma que entra por las fosas nasales las hacen increíbles. Los cogollos crecen y engordan de maravilla.
Esta semana he añadido un boost de CO2 casero, nunca he hecho mediciones de los resultados por lo que no puedo darlas. Este método es ampliamente usado en peceras caseras y de ahí saqué la idea. Para aquellos interesados dejo aquí instrucciones más detalladas. Con los 4 litros de agua que he preparado yo da para unas 2 semanas.
---NECESITAMOS---
- Botella de 250 ml
- Botella de 5 a 10 litros
- 400 g de azúcar por litro de agua
- 1 sobre de levadura de postre orgánica (LA QUÍMICA NO FUNCIONARÁ)
- 3 tubos de plástico de tamaño medio 40~50 cm
- 1 tubo de plástico de tamaño pequeño 5~6 cm
- 4 adaptadores para los tubos
- Cola caliente para pegar y sellar los adaptadores
El proceso de generar CO2 es simple, mezcla agua, levadura orgánica y azúcar en una botella, y el azúcar liberará CO2 en el proceso de fermentación a alcohol.
1. Haz un agujero en la tapa de la botella grande, inserta un adaptador y séllalo con cola caliente
2. Haz 3 agujeros en el tapón pequeño y haz lo mismo con los otros 3 adaptadores
3. Conecta los 2 tapones con uno de los tubos y conecta los otros 2 tubos a los adaptadores restantes
4. Conecta el tubo pequeño en la parte libre del adaptador del tapón pequeño que viene del tapón grande
5. Mira el vídeo
-----CALENDARIO DE RIEGO-----
Las platas comienzan a secar los tiestos un poco más rápido, asi que de ahora en adelante incrementaré 250 ml de agua adicionales en cada riego.
11/05/19 - 1,5 l con todos los nutrientes semanales -(Nirvana & Blombastic) BigBud mitad de dosis @ PH6,4 & 2 E.C.
14/05/19 - 1,5 l con Bud Candy, Big Bud, Nirvana, B52, Bud Factor-X, Sensizym y Blombastic @ PH6,4 & 1,5 E.C.


@Master_weeda
Follow
Bonjour a tous les padawans et les maîtres jedis
Pour cette semaine 4 je surveille comme à mon habitude hygrométrie et arrosage. Je peaufine mon LST en stressant ma plante le moins possible. Je combine mon LST avec un pincage d'Apex cela me permettra d'avoir une canopé plus homogène donc une meilleure pénétration lumineuse et par conséquent un meilleur rendement.
Petit rappel sur le pincage d'Apex:
Le pinçage des plantes de cannabis
Proche de la taille d’apex sur le principe, cette technique possède cependant plusieurs avantages, le principal étant de conserver le gros bud central de la plante, d’une production et qualité maximale.
Pinçage des plantes de cannabis
Le pinçage d’apex (tête de la plante) consiste simplement à pincer délicatement la tige du dernier étage de la plante, entre le pouce et l’index, jusqu’à sentir la fibre s’écraser sous les doigts avec un petit bruit critch caractéristique. Si l’espace disponible sur la tige du dernier étage ne permet pas d’y placer confortablement ses doigts, il faudra plutôt pincer l’étage du dessous.
Le pinçage ralentira fortement la croissance verticale de la plante, tout en stimulant le développement des branches secondaires, donnant ainsi à la plante une forme de buisson.
La plante mettra quelques jours à réparer ce pinçage, formant un nœud à cet endroit, et poursuivra ensuite sa croissance de façon normale. Le pinçage peut alors être répété si nécessaire, sur l’étage suivant nouvellement formé, ainsi que sur les éventuelles branches secondaires qui pourraient dépasser l’apex.
Le pinçage est donc une excellente technique pour avoir une belle canopée uniforme de type marée verte. En pinçant régulièrement l’apex des plus grandes plantes de votre espace, durant la croissance et en début de floraison (stretch), vous obtiendrez ainsi facilement des plantes de hauteur homogène en pleine floraison, ce qui facilitera la culture et augmentera la production finale, surtout si vous cultivez simultanément de multiples variétés de marijuana.
Avec un peu d’habitude le pinçage pourra être réalisé aussi rapidement qu’efficacement. En cas de pinçage trop violent qui se traduirait par un apex arraché, cela produira simplement les mêmes résultats qu’une taille classique de l’apex, ce qui ne sera donc pas dramatique.
Que la force soit avec vous💪


@Not_a_tutorial1990
Follow
She's doing great, recover well on each training. Struggling with tent rotation lol, so She's still in the veg tent, one week left in flower tent for current crop but I want change my lights on/off time so waiting on flower tent to be free..
Training has kept her relatively small though.
She topped herself 2 times after I topped her once. Only wanted 6tops currently have 8.. no complaints just worried about maintaining image through flower..
Happy growing everyone


@Hoodoo
Follow
2020-07-12 New week, same nutrients. I've been carefully monitoring nutrient intake and topping up plant 1 quite often, almost a gallon a day now. The 2nd plant is growing slower and eating a bit less but it's also a week behind developmentally. Plant 1 is happy with EC=1600 and I dilute that down to EC=1400 for plant 02. Plants are looking good!
2020-07-18 Last day of the week. Plant 01 is completely insane. It is so tall that I keep having to supercrop the top as more colas try to hit the light. I obviously let it veg for way too long but I struggled early on with nutrition so I didn't know what would happen when I finally dialed everything in!!! I am gonna take them to the end, I just hope I don't have to cut any colas off that become unmanageable. I have to be way more aggressive with my LST next time. Very very light nutrient burn on plant 2. Still running EC=1600 and EC=1400 for plant 1/2.


@Fabii
Follow
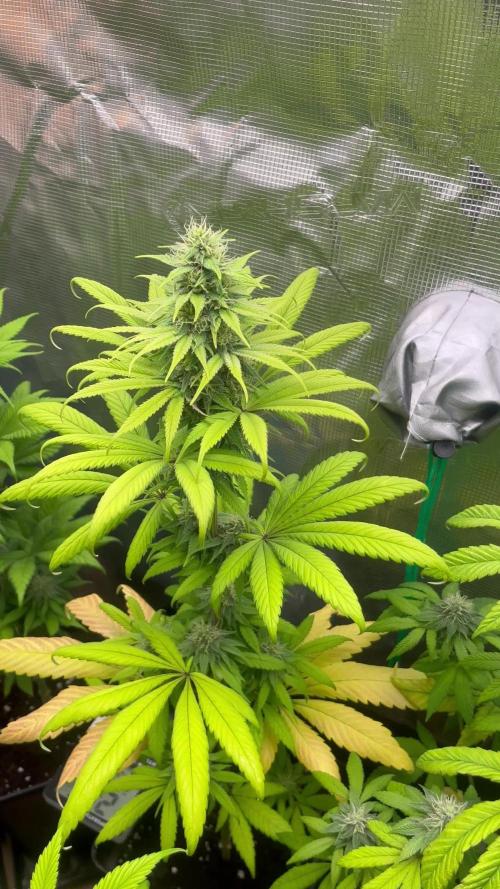
I pretty much stopped All Nutrients only giving small doses of A&B once every other watering soon i will only pour regular Water (not ph) just a couple of videos this time not to many because they haven’t gained size .
Pure Videos today of both Mazari & Strawberry OG.



@eldruida_lamota
Follow
Que pasa familia, vamos con la quinta semana de floración de estas Green Gelato feminizadas de RoyalQueenSeeds.
Vamos al lío ,se trasplantaron en macetas de 7 litros definitivamente.
El ph se controla en 6.0 , la temperatura la tenemos entre 24/20 grados y la humedad ronda el 50%.
El ciclo de floración puse 12h de luz, el foco está al 80% de potencia.
De momento van creciendo a buen ritmo y tienen un buen color.
La flor también va formándose y engordando, también empieza a producir tricomas, estaban muy bien enraizadas al realizarle el trasplante se notaba la abundancia radicular.
Agradecer Agrobeta por el envío del kit gold series en cuestión, unos maestros 🙏
- os dejo por aquí un CÓDIGO: Eldruida
Descuento para la tienda de MARS HYDRO.
https://www.mars-hydro.com
Hasta aquí todo, Buenos humos 💨💨💨


@MadeInGermany
Follow
Hi everyone :-)
This week a lot of nice things happened in the flower tent :-)
Everyone looks super nice, and is growing stronger and more beautiful week by week 😍👌.
The blue cheese smells like a dream ;-) As usual from this variety 👍.
The kosher tangie is also very, very tasty 👏🏻.
Both got Pk 13/14 this week for the last time :-)
Everyone else is developing very well 👍, That will be the last diary with several strains together :-)
In future everyone will come individually 👌.
I wish you a lot of fun with the videos, have a nice weekend, stay healthy 🙏🏻 and let it grow 😎👌


@TerpTurtle
Follow
12 day dry @ 58-63RH & 60-66F in blacked out dry tent | Glass Jar Cure
LOUD N STANKY, opening a jar gives you the duck face funk face
Early taste test & this Bud KOs leaving you in major terp sweats! Hitting like a Sumo wrestler sitting on you tickling all over! Flower hits with overwhelming squeeze & flavor like drinking a smoothie!
Breaks down chunky, greasy & has a vivivd dark purple color.
