


Likes
Comments
Share


Likes
15
Share


@moritz
Follow
Temp & Humidity still controlled by my Mycodo System. VPD range still set to 0.4 - 0.8 for now.
08.04. Week 2 of Veg begins and the plants really start to grow like crazy. Especially the Strawberry Lemonade and Fullgas seem to be bigger every day! I had a little PH issue on the last watering, but it should not be too worrysome.
10.04. I‘ve noticed some yellow tint starting to form on the newer leaves of the Strawberry Lemonade. For now I will stay on the lookout, but I hope it‘s nothing too dramatic. I also switched the VPD to be around 0.8 - 1.2 which it doesn‘t completely hit for the moment as i do not have a dehumidification option but the additional humidification was stopped.
13.04. Week 2 is nearing it‘s end and things are going great. The discoloration has vanished and the plants are growing steadily. VPD at around 0.7 kPa.


Likes
3
Share


@thefrozenking
Follow
Day 28.
Oh no! i lost a plant. GOAT'lato met an sad ending. I was careless and knocked it over. attempts to revive were unsucessfull.
that said... would you look at NYC Sour D. its already 18" tall.
BubbleGum is looking good. Grow dots and recharge are doing their thing.


Likes
Comments
Share


@Barzenegger
Follow
Removed the damaged leaves and topped 4 of the plants.
One of them is looking really light green/yellow-ish. That plant also has some weird growth, some deformed leaves and hardly any branching. The others are fine. Tried using some of my 12 years expired Canna Terra Vega.
Likes
21
Share


@TheGanjaFarmer
Follow
One or two more days and she’s getting chopped smells unbelievable


Likes
23
Share


@adam_pawloski87
Follow
This week went very well! One will be getting cut an hung to dry while the rest finish up with one more week of flush ! These ladies are smelling so lovely I hope you all enjoy! Stay tuned for next week! Cheers 😤💨💨💨💨💨


Likes
9
Share


@Krautbauern
Follow
those nugs are getting bigger and bigger each day. They‘re just soaking up the fertilzers. We have to water them every second day 2l per plant

Likes
5
Share


@Gingercannacat
Follow
Beginning of flowering phase and they already stretched 7 cm in 3 days only. The topped one reached 38 cm and the LST only is 42 cm . The smell is strating to come out , smell quite nice. Not intense yet.
Fertilizers
Top Vulcan 1 table spoon each. No more repetition
Plagron alga bloom 4 ml & power bud 1 ml power roots 1 ml , alga grow 4 ml and vita race 4 ml. I Will repeat the same every 4 days for the for 1st two weeks of flowering .
As you can see I am growing other strains but the lemon orange stand out for now. They are larger, busher and smell amazing 😍
Likes
11
Share


@BruWeed
Follow
🍀13/07 - Empieza su séptima semana en semana en etapa de floración.
🍀Esta llena de tricomas, cada semana le agrego el Top Bud que ayuda mucho.
🍀Estoy tratando de que la temperatura en el armario sea baja, en algunas fotos se nota que de apoco estan tomando color violeta.
🍀No tuve problemas hasta el momento, dentro de dos semanas ya la podo.
🍀La planta entera esta en un 60% ambar.
🍀Esta cumpliendo 86 dias de vida en total desde su germinación.
🍀En estos dias seguire subiendo más imágenes de como viene.
🍀🇦🇷😶🌫️Podes seguirme en Insta gram como @bruweed_arg🍀🇦🇷😶🌫️

Likes
8
Share

@Chubbs
Follow
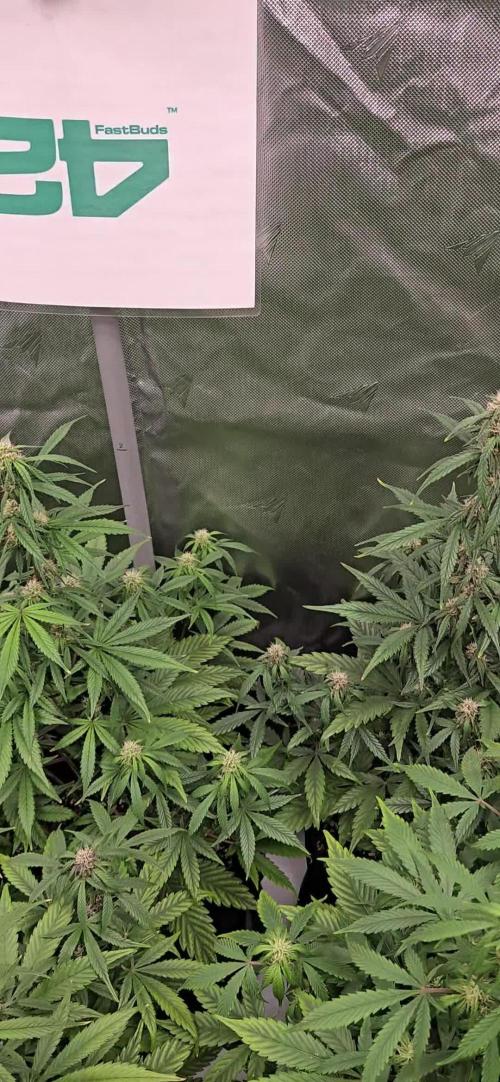
Weekly update on these lovely ladies. This week has been fun to watch the flowers form and swell. They definitely are starting to smell, as soon as you open the tent it hits you like a ton of bricks. I'll be doing my final dedoliation this week taking off some of the bigger fan leafs allowing more light to the lower flower sites. All in all Happy Growing
Likes
4
Share


@GaliforniaWeeds
Follow
Día 5/10/20 día 29 de floración
Acaba de amanecer un nuevo día y todo continúa bien. Seguimos alimentando las nenas con 1,6 de ec y 6,1 de ph. De momento el engorde no es abrumador pero si constante y si nada cambia obtendremos unas buenas flores!!
Día 7/10/20 día 31 de floración
Hoy nos vemos forzados a retirar algunas hojas que tapaban demasiada luz y que podríamos considerar sumideros de nutrientes. Por otro lado el riego de hoy ha sido solo de agua más zyco kleanse así prevenimos la sobrefertilizacion.
Día 9/10/20 día 33 de floración
Hoy preparamos un nuevo tanke de nutrición y lo hacemos a 1,75 de ec y a 6,1 de ph. En los siguientes días observaremos cómo se adaptan a esta nutrición x si tenemos que realizar cambios. No te lo pierdas!!
Día 11/10/20 día 35 de floración
Hoy te reina la semana 5 de floración y lo hacemos preparando un nuevo tanque de nutrición con el tanque totalmente limpio. La solución está a 1.8 ec, 6.1 ph y a 20 grados. La temperatura de la sala se mantiene a 23 6 la humedad al 47% para evitar la aparición de hongos en sus últimos días de maduración , algo que se puede apreciar en el avance de sus flores. No te lo pierdas!!


Likes
22
Share


@bypado_farm
Follow
Day 57:
Watered each plant with 1L with nuts
1588 ppm, 3380 us/cm, 3.3 EC (purple punch, strawberry banana, wedding Cheesecake)
1690 ppm, 3595 us/cm, 3.5 EC
(gorilla cookies)
2 different feedings for the 10 plants
Day 60:
Watered each plant with 1L with nuts
1563 ppm, 3325 us/cm, 3.3 EC
Day 62:
Watered each plant with 1L with nuts
1726 ppm, 3712 us/cm, 3.7 EC (purple punch, strawberry banana, wedding Cheesecake)(I gave them more than usual, by mistake)
1528 ppm, 3525 us/cm, 3.5 EC (gorilla cookies)
2 different feedings for the 10 plants
Day 63:
Watered each plant with 1L with nuts
1563 ppm, 3325us/cm, 3.3 EC (purple punch, strawberry banana, wedding Cheesecake)
1523 ppm, 3301 us/cm, 3.3 EC (gorilla cookies)
2 different feedings for the 10 plants
Day 65:
Watered each plant with 1L with nuts
1518 ppm, 3210 us/cm, 3.2 EC (purple punch, strawberry banana, wedding Cheesecake)
1359 ppm, 2891 us/cm, 2.9 EC (gorilla cookies)
2 different feedings for the 10 plants
Next feeding I will start to flush some plants, 1st week with flawless finish, 2nd week clean water, 10x the pot, 150L each
Day 67:
Watered each plant with 1L with nuts
1379 ppm, 2908 us/cm, 2.9 EC (1 purple punch, wedding Cheesecake)
1250 ppm, 2687 us/cm, 2.7 EC (gorilla cookies)
285 ppm, 606 us/cm 0.6 EC (3 strawberry banana and 2 purple punch) (2L each)
3 different feedings for the 10 plants
Started to flush all the strawberry banana and 2 purple punch with flawless finisher. (1st week flawless finisher, 2L each, 2nd week clear water, 150L)
Processing
Likes
25
Share


@EelGrows
Follow
Week 9:
Day 57-60: Seemed to have gotten the deficiencies(rather PH fluctuations causing them) under control. 4AM#3 took a while to recover but it has stopped progressing for the time being and the buds have continued to bulk up while the pistols start to orange out. 4#1 and #2 are doing good. They recovered faster and started to really bulk up. I'd say 4AM#1 has about 50-70% orange pistils while 4AM#2 and #3 are at about 10% by day 60. Damn like I said last week 4AM#2's buds are gona get huge! One of them tipped over on day 60, had to add support, but quite hard to find a spot when half the branch is the bud...
Day 61-63: Continuing to bulk up, the 1.25x Calmg dose on day 60 seemed to do them well! 4AM#3 hasn't been showing any new signs of deficiencies, so that's good! Hoping she won't be too premature when I chop the plants(I am chopping days 73-74, only days I have time), but the pistils are starting to go crazy! Around 50% orange pistols now on 4AM#2 and #3! And 4AM#1 has about 90-95% orange pistils. When I used the handheld microscope, which is hard, the trichomes are almost all milky and some 5% amber on 4AM#1 and about 30-50% milky and a few amber on #2 and #3, seems like it will be just right! Can't wait! Gave em their last big feed of blume nutes on Dy 63, will be giving them plain PH'd water with Regulator till harvest.
10 Days left! almost there! 4AM#3 might look ugly but she still frosty and thicc as hell! Oh and they smell delicious!!! 😵
EDIT: Oh and just wanted to say thank you for all the help you all have given me so far! Oh and shout out to FastBuds, which sent me a message last week saying they were interested in me growing their genetics! They're sending me some free seeds for my next grow! How awesome is that!

Likes
121
Share


@NuggetPawn
Follow
So she was chopped (wet trimmed) yesterday (F74) and is now hanging up to dry at 55% RH and temps between 15 and 18ºc.
I made fresh frozen dry ice hash today using a 160 micron bubble bag, a flat surface, 8kg of dry ice and a couple 5 gal buckets. I already have the weights for that, which far exceeded my expectations. Those figures I will post once she is dried and in 1 quart screw top glass jars.
People suppose dry ice hash is inferior quality vs bubble hash. I am not experienced enough to comment on that but must say it is extremely easy to make hash with dry ice, it took 40 mins to process 995g of trim which included sugar leaves, some stems and popcorn buds. I then pressed it into 3.5g briquettes for storage using a pollen press. As you can see from videos, this stuff is all blonde - and after already trying some today with some friends, it knocked our boots off!
Will be back in 5-7 days with harvest figures, smoke analysis and other details!
Happy growing all!
P.s I ticked defoliation this week - the only week I intentionally cut any leaves off for the entire grow 😉


Likes
1
Share

@MrMaabra
Follow
German:
Ich hatte mit der Keimung zu Beginn Schwierigkeiten und Zeit verloren, da ich immer nur ein Samen genutzt hatte. Erst mit dem dritten von vieren hat es dann geklappt.
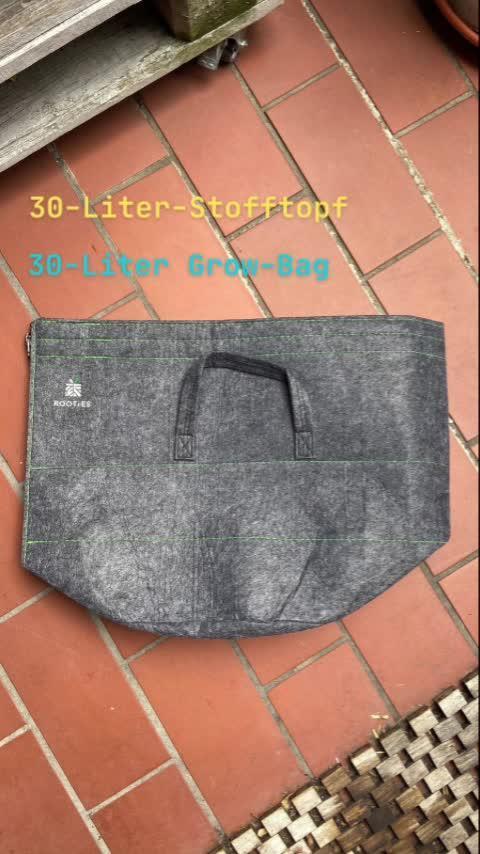
In der ersten Woche habe ich parallel zum Keimen meinen 30-Liter-Stofftopf mit Living Soil vorbereitet. Als Mulchschicht verwende ich unbehandeltes Kleintierstroh. Zu Beginn wird das Living Soil von Sonnenerde mit 15% des Topfvolumens angegossen, ohne, dass ein Drain (überschüssiges Gießwasser) entsteht. Das wäre eine Anzeichen, dass zu viel gegossen wurde und wertvolle Mikroorganismen und Nährstoffe aus der Erde gespült werden und das wollen wir nicht.
Für die beste Kontrolle der Bodenfeuchtigkeit nutze ich von Blumat einen digitalen Feuchtigkeitsmesser. Idealbereich liegt zwischen 80-130. Diesen Wert werde ich im Laufe des Runs noch erklären.
Parallel lasse ich einen Samen der Mandarin Punch FEM im Wasserglas Keimen — an einem dunklen, warmen Ort. Bei mir ist das in einem Küchenschrank. Nach drei Tagen ist der Samen aufgepoppt und kam in ein kleines Anzuchthäuschen mit ungedüngten Kokos-Tabletts, mit dem Ziel, nach einer Woche und guter Durchwurzelung direkt in den Finaltopf umzuziehen.
Im Video bereite ich den Topf vor.
__________
Englisch:
I struggled with germination at the start and lost some time because I was only popping one seed at a time. It finally worked out with the third out of four seeds.
During week 1, while waiting for germination, I prepared my 30-liter fabric pot with living soil. For the mulch layer, I’m using untreated small animal straw. To start, the Sonnenerde living soil is pre-watered with 15% of the total pot volume. I made sure to get zero runoff, as drainage would mean overwatering — which washes out valuable microorganisms and nutrients, and we definitely don't want that.
For optimal soil moisture control, I’m using a Blumat digital moisture meter. The sweet spot is between 80 and 130. I’ll explain what this value means later in this run.
Meanwhile, I’m germinating a Mandarin Punch FEM seed in a glass of water, placed in a dark, warm kitchen cabinet. After three days, the seed cracked open and went straight into a small humidity crib using unamended coco coir pellets. The plan is to let it establish a solid root system over the next week before transplanting it directly into its final pot.
Check out the video to see how I prepare the pot!

Processing
Likes
12
Share


@Piablo
Follow
Day 21: First topping. Happy to removed the light-stressed part of the plant from the equation if only for cosmetic reasons. I waited for 5 nodes before the topping.
Day 22: Godammit, the light failed again. Turned it off and waited for it to cool down. Turned it back on and it worked. Lost 1 hour of light.
Day 23: Because of previous light stress and canopy temperature, I felt that 35cm is a good distance for the light.
Day 25: First LST on the new growth tips. Started the mainline.
Day 26: Again the light is failing to come on. I rewired once again, cursing my very existence, and it worked again. Again lost an hour of light in the morning. Continued refining the LST, and seeing how far I can push it. Noticed a slight tear at the base of one of the mains. Since the plant energy is coming from below and there is no noticeable affect on growth I'm going to ignore it. Checked the roots - look healthy. Though the new growth tips are not completely symmetrical, those leaves look good enough to eat. Trimmed the excess fan leaves. Topped up with a small amount of nutrients.
Day 27: light didn't come on again. I rewired again, but this time it was stone cold refusing to do anything. Again I cursed my existence and all of life. Returned to grow store, turns out bulb was defective after all. Again lost 4 hours of light. But at least now I know the problem is solved. Rene at the grow store is a champ though, very helpful guy. The new bulb is noticeably brighter also. Maybe this was affecting growth? Also once this issue was fixed, I noticed some small amount of nutrient burn on the leaves tips. Rebalanced nutrients. Was 1.9 mS/m lowered to 1.65 mS/m, then to 1.48 mS/m. Must be more careful in future when upping the dosage but the water conductivity is now less than before (1.55 mS/m) so this should be ok. Also lowered pH of water slightly since it was 6.0. It's currently showing 5.2 but experience has taught me that this measurement will comfortably go back up to 5.7. water pH is seemingly constantly rising as the plant grows, and adjusting pH is really more art than science. (Edit: It was 5.7 the next morning, so ya ... )
Likes
3
Share


@Lazuli
Follow
What an amazing smell she has so lemony. I start overdrive monday (its friday now) so she will be cut in 2 weeks and 2 days