
Likes
Comments
Share


@GrowMeistro420
Follow
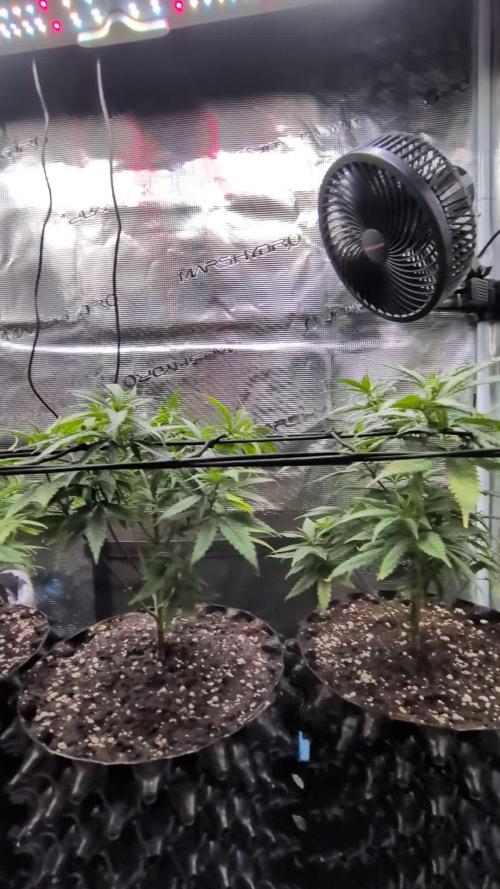
Week has been going well. Had a really bad underwatering while I was unable to look after the plant, which stunted it for a few days sadly. Started to LST her as u can see on the video
But other than that, its looking good and growing fine

Likes
3
Share


@GREENderdays
Follow
2nd week began with small problems that progressed
but we decided to replace them with a solution and connected another air pump
new pump for four channels, 160 liters of air per hour


Likes
4
Share


@GLOrganics
Follow
Plant are under the structure i build. It will he used to provide shade, protection against moths and shelter from heavy late summer rains. Every now and then plants were trained through LST. I watered twice a day about 2% of total volume.

Likes
49
Share


@AsNoriu
Follow
Day 43. Girls will get heavy training later today. They grow ... and because of that i had to move 3 Kushes to other tent and i will make separate diary for theirs flowering time.
3 Auto Blue Tooth by Real Gorilla Seeds took theirs place.
After todays training i will give them 4-5 days to recover and will send them to flower hopefully on sunday after 24 hours of darkness.
Skunks grow bigger plants, than Cheeses, despite theirs quickest germination and obvious lead in first 3 weeks or so ...
Day 46. 3 days left to flower, finally made heavy training, way too busy for LST grows... but result is good, girls hopefully will show off in bloom !
Day 47. Girls loved training, 2 more days, 24 hours darkness and tuesday latest flowering starts. Got full feed of Biobizz, feed charts updated. Next feed = water + silica.
Happy Growing !!!

Likes
16
Share


@Bigbankbossshit
Follow
I’m very satisfied with my grow. Next week will be my final week of veg then I will be flipping to 12-12 very excited and I will also start setting up my trellis net. These girl are about to take off 🚀🚀🚀


Processing
Likes
15
Share


@Fibro_Witch
Follow
The older plants really found their stride this week and have put out some good growth so hopefully it'll be exponential from here on out. I'll probably pinch the smaller one this afternoon.
The bugs have become more interested in the autos this week so I sprayed with a little Safer brand Neem oil concentrate.

Likes
149
Share


@CBD_Sweden
Follow
Hi all the happy people here in GrowDiaries.
This is my second cultivation ever and it will be fun to try a bigger space than my closet grow.
First, I'm just going to say I'm done with the construction of my new growroom.
I put some pictures on the construction here in week one.
The room is 2.14 meters by 1.7 meters and has a ceiling height of 2 meters.
It provides a floor area of 3.6 square meters.
I use a 54 Watt Lightwawe T5 for germination and 2 Pcs 400 Watt HPS lamps.
I have a channel fan that replaces the room air about 40 times an hour to get a comfortable theme in the room, the air enters a fresh air intake from the outside.
The air is purified through a carbon filter to then leave the room to the rest of the basement.
Then I use that heat to heat the rest of the basement.
I will use 8 pcs 15 liter Autopots to grow with and a 100 liter water tank that supplies the pots of water and nutrition.
I will grow completely organically in soil and will watercure my buds to get the best possible medicine for me.
But there are no cultivation rooms to be displayed here, so I continue with what is most important.
Today I have put my seeds in my moisture dome and hope the seeds have germinated within a few days.
I am very excited to see how the new growroom will work and how this Blue cheese Auto from Royal queen seeds will turn out.
Blue Cheese automatic cannabis seeds are a cross of Blueberry Automatic and Cheese Automatic that has been perfected over five years of breeding and careful selection. The result is a feminized, autoflowering strain with superior yield, flavor, and effects to either of its distinguished parent strains.
THC: 16%
CBD: Low
Yield Indoor : 325 - 375 gr/m2
Yield Outdoor: 60 - 110 gr/plant
Height Indoor: 40 - 70 cm
Height Outdoor: 60 - 110 cm
Flowering: 7 - 8 weeks
Harvest month: 9-10 weeks after planting
Genetic Background: Blueberry x Cheese x Ruderalis
Type: Sa 35% In 40% Ru 25%
Effect: Cerebral and uplifting
Climate: Mild
..............................................................................................................................................................................................................................................................................................................................................
2017-09-11. Kl 12.00. Week 4 starts. I have cleaned the whole room for the new week and gave the girls water and nutes. Added videos and pics. Girl nr 1 is 27 cm high and girl nr 2 is 50 cm high and nr 3 is 15 cm high.
-------------------------------------------------------------------------------
2017-09-12. Kl 10.00. New pics and video. Nr 2 has grown 5 cm in 23 h, its incredible.
---------------------------------------------------------------------------------------------
2017-09-13. Kl 22.00. Everything is great in the garden right now. Updated with new video.
----------------------------------------------------------------------------------------------------------------------------
2017-09-15. KL 10.00. New pics and videos. Girl Nr 1 is 33 cm high, Nr2 is 70 cm and girl Nr is 22 cm. Nr 2 has grown 20 cm the last 3 days. Look at the stem of girl Nr 2 😍
The girls are starting to smell a lot now. Its a intense smell in the grow room.
-----------------------------------------------------------------------------------------------------------------------------------------
2017-09-16. Kl 10.00. The girls grow like crazy, i have to defoliate about 20 leafs a day. Nr 2 is 76 cm tall now, i wonder when she slows down?. Added 2 liters of water and nutes this morning and 2 new videos.
------------------------------------------------------------------------------------------------------------------------------------------------------------------
2017-09-17. Made a time laps of the girls first 28 days.


Likes
1
Share


@Dabking
Follow
My favorite strain I've grown from Divine Seeds thus far.
I chopped the plant on day 97 from seed .
She produced 67 grams (2.39 ounces) of very dense nugs.
The smell is incredibly pungent. She is SUPER sticky.
Currently in grove bags curing. I'll update on the terps and such once I do a smoke report in a few weeks.

Likes
6
Share

@therealgrowmie
Follow
Week 9 is here, and the biggest change this week is the introduction of the SCROG net. After settling into their 12L Air-Pots, the Amnesia Haze girls have started pushing outward and upward again, making it the perfect time to begin shaping the canopy.
The transplant recovery phase appears to be largely behind them. New growth is coming in vigorously, and several tops are now reaching the net. The goal from here is to continue guiding branches horizontally, filling as many squares as possible before the eventual stretch begins.
The structure is looking much more organized than a few weeks ago. Earlier topping sessions are paying off, with multiple healthy tops developing across each plant instead of a single dominant leader. The canopy is still uneven, but that's exactly what the SCROG is there to fix.
A few older fan leaves continue showing signs of previous nutrient stress, with some yellowing and minor edge burn visible on the lower foliage. However, the newest growth remains healthy and vibrant, suggesting the plants are moving past those earlier issues. For now, I'm focusing on stability rather than chasing perfection.
The root systems seem to be enjoying their larger homes, and growth has noticeably accelerated since the move into the Air-Pots. Over the next week, the priority will be tucking shoots under the net and encouraging lateral growth to create an even canopy.
📊 Stats so far:
💧 Watering: When necessary
🌡️ Temp: 26–28°C
💦 Humidity: 80% RH
📈 VPD: ~0.64 kPa
💡 Light: ~500 PPFD
Likes
39
Share


@MrSpooky882
Follow
Das Blatt Blüte Verhältnis war sehr sehr gut! 👌
Ich habe die Pflanzen dieses Mal nicht komplett getrimmt, sondern mit Zucker Blätter aufgehangen um ein schonenderen trocken prozess zu bekommen und ich Maniküre die Pflanze dieses Mal erst wenn sie trocken ist das verhindert Verletzungen der Pflanze die ein zu schnelles austrocknen zu Folge haben!
Es ist mehr Arbeit weil man die Pflanzen Doppelt und dreifach in der Hand hat aber es lohnt sich, ich habe die komplette ernte fertig getrimmt in ein Cvault 21L für 2 Wochen Fermentiert mit einem 62 Prozent boveda, ich habe jeden Tag gelüftet und jeden zweiten Tag muss man es wenden vorsichtig! 👌 😊 Und raus kam richtig Premium gras ♥️♥️♥️😁
The leaf to flower ratio was very, very good! 👌
This time I didn't trim the plants completely, but instead hung leaves with sugar to get a gentler drying process and this time I only manicure the plant when it is dry, which prevents injuries to the plant that would result in it drying out too quickly!
It's more work because you have the plants twice or three times in your hand but it's worth it, I finished trimming the entire harvest in a Cvault 21L for 2 weeks. Fermented with a 62 percent boveda, I aired it every day and every other day you have to turn it carefully! 👌 😊 And out came really premium grass ♥️♥️♥️😁

Likes
3
Share


@UrbanBoer
Follow
Believe or not, this baby just started flowering, I think my decision to defoliate will bare results, like how lamb’s breath turns out.
She’s the last to flower but she’s one of the first plants I planted, it took longer than I expected to start flowering,
Likes
4
Share


@Slobasian
Follow
Sunday last day of week 11 expecting to cut it down fed banana, molasses, and honey for a final flush with ice, Friday final ice flush. In the dark for 12 hours then cut down for harvest

Processing
Likes
1
Share


@IMILYSETPOSR
Follow
Very strong week. Stopped Rhizotonic. Began LST.
After feeding the gelato just pH water the paleness subsided and more colour came back to the plant. Gelato starting to grow bushy, strong growth from both plants.

Likes
41
Share


@Roberts
Follow
Sorry I missed missed several weeks. Gd was not working right, and I choose not to fight it once it rejected any update. She has filled out the tent. I increased the light to 100 percent today. I will likely do some hst to keep buds out of the light. She has been doing great so far this time in a warmer environment. Thank you Doctor's Choice, Athena, and Spider Farmer. 🤜🏻🤛🏻🌱🌱🌱
Thank you grow diaries community for the 👇likes👇, follows, comments, and subscriptions on my YouTube channel👇.
❄️🌱🍻 Happy Growing 🌱🌱🌱
https://youtube.com/channel/UCAhN7yRzWLpcaRHhMIQ7X4g.


Likes
10
Share


@Bleko
Follow
Day 45 of flower today. Seedsmans Gelato.OG (far, left) In House Genetics Terple (center, left) Sirius Seeds Critical Plus (center right) Barney's Farms Pink Kush (back, right). Everything really decided to start fattening up in the last few days. Pink Kush is starting to turn Purpleish pink, and fall all over her self like a drunken, top heavy, 30 something, ex-high school prom queen addicted to xanax and boxed wine.

Likes
16
Share


@TobiGrows
Follow
Welcome to the sixth week of flowering. 😊
This week everything started to feel very much more relaxed for me. To see her buds getting bigger was mostly my whole job in this week. I gave her the same nutrients as before, so not much to tell about this week.
Her broken branch healed so good that i had to put in another picture of the now good looking wound.
Love to see her growing 😍
Thank you for visiting and until next week 😊
Likes
9
Share


@JamaweedOPO
Follow
Crescendo forte e rápido, nenhum sinal de estresse pelo treinamento diário.💪🏽 As temperaturas vão começar a cair e a umidade tende a aumentar.
🏽
Likes
2
Share


@Growstopher
Follow
3.23.25
Fastbuds LSD-25 auto #1
Germination 1st week
Only watering with spring water. Going to be using foop nutrients with Humboldts secret cal/ mag and nectar for the gods ph up and down!
Here we go!
Likes
11
Share


@RFarm21
Follow
Week 2 november - 8 november
I will not fertilize this week because the All mix soil is rich in nutrients.
seems to have a slight deficiency of phosphorus or calm, if it doesn't improve in the next few days I add 2ml of bio bloom
the humidity in the last few days has been very high.
Led: 180W