


Likes
Comments
Share


@GirlGoneWeed
Follow
I would try growing this strain again if It was giving for free and this time I would attempt outdoor to see the difference. Im not sure if I had bad luck with my seed pack of if this strain just need to work on its quality in terms of resistance.

Likes
146
Share


@Natrona
Follow
Sour Jealousy Auto FastBuds 2025 Outside Grow
Week 14 June 29- July 5 FLOWER 8
We have had less rain this week and I was able to feed Sour Jealousy 3 times. I’m still treating areas of bud rot in hopes of saving some of Sour Jealousy. She survived another week. Let’s see if she can hang on through this week of extreme heat and anticipated rain.
TPS1 4ml/g
Signal 3ml/g 2 liters
As aways, thank you all for stopping by, for the likes and most of al growers’ love and support.
Stay green, growers love 💚🌿
💫Natrona💫

Likes
44
Share


@PotCasso
Follow
Stinky, strong and delicious absolute 🔥
Smells of fuel with a strawberry and pine undertones. She has the most delightful exhale like and almost like watermelon candy. 🔥


Likes
48
Share


@Truro
Follow
25/12/18 Week 5 Flower
Merry Xmas! All 4 plants are doing well, growth seems to have slowed down so I think the next few weeks are just packing on weight and then ripening. Gonna give them all some pk 13/14 on Friday - had a small problem with fungus gnats in my bathroom which eventually led them into my grow tent. Been waiting extra long between waterings to minimize the chance of them spreading - I know they love wet, mouldy coco. Got some peroxide just incase they become a problem any way. Looking to chop 15th-22nd Jan, depending on how the trichomes are looking. Lots of users commenting on how much weight GZ packs on, really hoping to get some nice dense golf-balls. My previous grow, which was two plants yielded just under 1.5oz, would really love to see a yield around 2.5oz with my current 4 plant set-up. Merry Christmas - more updates in the new year!

Likes
7
Share


@TJHeadley
Follow
Going to pull her out of the light tonight and put her into darkness. Very happy with the way she turned out!!
Likes
6
Share


@Broffel
Follow
Week 10 of flower and going slowly to the end, think need 1more week.
Harvest hulk 2 and it's 358gr wet nice sticky denced buds.
And hulk 1 gets darkness for couple days before I harvest her.
Last day of week 10 of flower and harvest hulk 1 and she giff me 354 gr wet buds. Will update dairy when the buds are dry

Likes
6
Share


@Bread_n_Buds
Follow
London Pound Cake is a fantastic strain that I'm just now learning about.
We have two plants, one in a 20-liter pot that's growing nice and tall, and one that's growing very straight.
Plant #2: Created with a main line without LST, it was very successful, resulting in a plant that's not very tall but nice and fat.
Plant #1: Left to grow like a "Christmas tree," it's ready to become a truly beautiful plant; everything is beautiful and well-proportioned.
Nutrition // We're at the beginning of flowering and we still have to wait to add the Green Sensation.
- 4 ml/L Alga Bloom
- 1 ml/L Pure Zym
- 1 ml/L Power Roots
- 1 ml/L Silic Rock
- 1 ml/L Sugar Royal
- 1 ml/L Cal Mag Pro
- 1 ml/L Power Buds
Choose your method and calculate your grow schedule at www.plagron.com
All nutrients are available on the Zamnesia website. Also try the live soil and the fantastic new Zammi product line.
You can find this famous strain here:
https://www.zamnesia.io/en/11114-london-pound-cake-zamnesia-seeds-feminized.html
(Google it if the link doesn't work; it's a national link.)
Zamnesia Description: London Pound Cake is a delicious hybrid that satisfies both the palate and the soul. Derived from a potent cross between Sunset Sherbet and Larry OG, this strain combines intense dessert flavors, high potency, and lush growth, making it a true delight for growers and connoisseurs.
In the grow room, London Pound Cake displays vigorous growth and a textbook indica structure, with sturdy branches and dense, trichome-covered buds. With just 9-10 weeks of flowering, London Pound Cake offers impressive yields, up to 600 g/m² indoors and a whopping 900 g/plant outdoors by October. The aroma is decidedly enveloping: sweet, creamy, and citrusy, with hints of vanilla and spice that fill the air like a warm oven.
With 22% THC, London Pound Cake's effects are deep, relaxing, and euphoric, enveloping the body and mind and promoting a happy and fulfilling state of mind. Perfect for evenings, creative relaxation, or as a special treat after a long day, London Pound Cake combines flavor and potency in impeccable balance.
For those who appreciate high-quality flavor and performance, London Pound Cake by Zamnesia Seeds is a strain that offers pure comfort, satisfying pleasure, an irresistible aroma, and a deeply satisfying high.
"The best that nature has to offer"
www.zamnesia.com
Likes
26
Share


@BillMonroe
Follow
Cool plant. Strong stems. Big trichomes.
I reset the clone, and it rooted in 5 days... the speed of this plant is really unbelievable!

Likes
16
Share


@sunshinegroww
Follow
Very good looking just transplanted into final 9l airpot and looking happy

Likes
14
Share


@UKBUDDOCTOR
Follow
The wedding cookies so far is smelling really sweet and a gassy diesel aroma. Thc is starting to stack now. I didn’t really have any high hope for this as I bought it not really knowing about genetics and breeders! But it’s starting to do me proud lol as of the Bruce cookies which will be the biggest one you see In the pics has been doing great the whole time. Also I will probs just do an all in one diary for!!! 😄

Likes
5
Share


@botanimancer
Follow
Week 0 (germination week) 4 seeds directly into
Strain chosen for Yield, this run will be about increasing yield, LST, & Defoliation techniques.
Any advice any of you may potentially have for Training auto-flowers would be greatly appreciated
Here is to a great Cycle and bountiful harvest!
Likes
39
Share


@sandspur
Follow
Well I was out at the beginning of the week. These things are coming along and will be ready for harvest soon. The branches starting bending over in places but this is okay since it keeps them from being burned by the light. Again humidity is too high but we're keeping the fans going.

Processing
Likes
39
Share


@King_Geedorah
Follow
Day 28 from cutting they are EATING GOOD! I feel they were a bit hungry but are so happy now. They are reaching for the sky! Watered on Dec 14 with a ppm of around 900 of 6ml /gal A+B 6 ml FS 2ML golden tree. I'm seeing some signs of a few things that I have pretty much eliminated down to either a nutrient deficiency or a need to transplant either way this weekend I'm going to do it and we will see what the results are!
Likes
28
Share


Likes
75
Share


@DevilsBud
Follow
New week for the Banana Punch
There doing great nothing to complain
Will be updating Tru the week
Likes
6
Share


@Magical_Surgeon
Follow
After you found some good sector and clone it you let the mycelium grow and fill almost all the petri dish like I did last week.
So now you're ready to move forward.
Making grain spawn!🍄🍄
For grain you can use Organic Rye Berries, but you can also get away with wheat berries, or brown rice or even corn kernels(which I used myself) !
And you'll need some mason jars or honestly I used some jars that I had home just clean them very well and sterilise before using
Making a grain spawn can be broken down into 6 easy steps.
🍄Hydrate Grain By Soaking
🍄Make Specialized Lids
🍄Simmer, Drain and Dry The Grain
🍄Sterilize
🍄Put your agar in the jar
🍄Colonize
🍄Soak the grain by placing it in a bucket, covering in water, and leaving it for 12 -24 hours. Easy.
🍄Drill 1 hole on top of the lid. Right in the center and cover with a small dab of high temperature silicone sealant, and leave it overnight to dry. And your jars are done. There other diff types for different methods like liquid culture etc. But I'm just going roughly through what Ive done.
🍄The next step is to simmer the grains on the stove. This will thoroughly hydrate the grains, and will soften them to make them easier for the mushroom mycelium to consume.
Cook soaked grain on the stove for about 15 minutes. You don’t want to cook it too long, because eventually all the grain will crack and you’ll get some mushy grain spawn. We don't want that. 🧐After the grains have simmered on a low boil, you’ll need to drain them off. What I did is I drop them in the sink with the drain cover on. The grains will drain over an hour or so, after which you can go ahead and fill your jars.
🍄Once your jars are filled, they need to be sterilised.This kills off all the other nasty contaminants in the grain cover the lids in tinfoil (to prevent water dripping into the lid) and then just pressure sterilise them for about 90 minutes at 15 psi.
🍄After that let them cool down. Get your SAB, wipe down the walls with some alcohol wipes and place the jars inside. And wait untill they will be warm to the touch... not hot and painful 😤patience is key. Bring in your plates that had been stored by you in a dark place. And what u have to do is sterilise your scalpel and just accurately and efficiently decide your mycelium into about 10 pieces and quickly place them in your jar. And complete for every jar u make. You have to be very quick. The more you keep you're jar and your agar plates lids open the more cans they will get contaminated. There certain technics you can see online..
🍄Ones you're done close all your jars lids tight and Jake your jar so the mycelium pieces will mix around the jar and place them in the dark place to colonize. And just keep waiting... 😅 Untill the mycelium will conquer your grain. Keep your eyes on the jars, any weird smells or colour during the waiting time.. because that would mean you got a contamination going on. Oh yeah and when about 55% of your jar is filled with mycilium shake the sh*t out of it so it will break the mycilium inside and make spread more faster.
Likes
27
Share


@ButterfliesLittleFarm
Follow
Hello Diary.
Here we are at the end of the last, seventh week of flowering for the Haze Berries. Their roommate Fat Banana is now drying in a box between them. 😎
Although there are two Haze Berries on the “farm,” I only photographed one for the diary. I do too many photos with one anyway, with two it would be really too much. But before the harvest I will take a few photos and another Haze Berry. 😉
Basically, the Haze Berrys exceeded my expectations, they grew big beautiful plants full of flowers. This will be perhaps the biggest yield for me so far. 💪
As can be seen in the first photo where all the plants are, it can be seen that the Haze Berrys did not grow even remotely similar. The second Haze Berry has grown twice as short as the first. The structure of the plant itself is different, but will be seen in the final photos.
Watering is every three days, the last two weeks I water with clean water which I regulate p.H at 6.3.
Conditions on the "farm" are almost ideal, the temperature in the Box is about 25, 26 degrees, the humidity is about 40%, sometimes even lower.
Now everything is ready, here and there I see some brown trichomes so I will still have to wait a day or two until harvest. 😀
Here’s what the last week of flowering looked like.
28/11/2020 - Day 65.
Watering. I regulated the p.H of water to 6.3.
Temp / Humidity on the farm - 25.5 degrees and 40% humidity.
1/12/2020 - Day 68.
Watering. Like three days ago. It was the last watering for Haze Barry before the harvest.
Temp / Humidity on the farm - 26.3 degrees and 37% humidity.
3/12/2020 - Day 70.
Usual photography for the end of the current week.
Temp / Humidity on the farm - 25.6 degrees and 40% humidity.
In the end I can say that I am very excited about the harvest, it will be interesting to see the outcome in the end. Stay connect, and thank you for supporting all this past weeks. And sorry for so much delay with the posts but I have a bunch of photos to edit. So when other obligations come together, then this is what it looks like. 🙏
Likes
Comments
Share
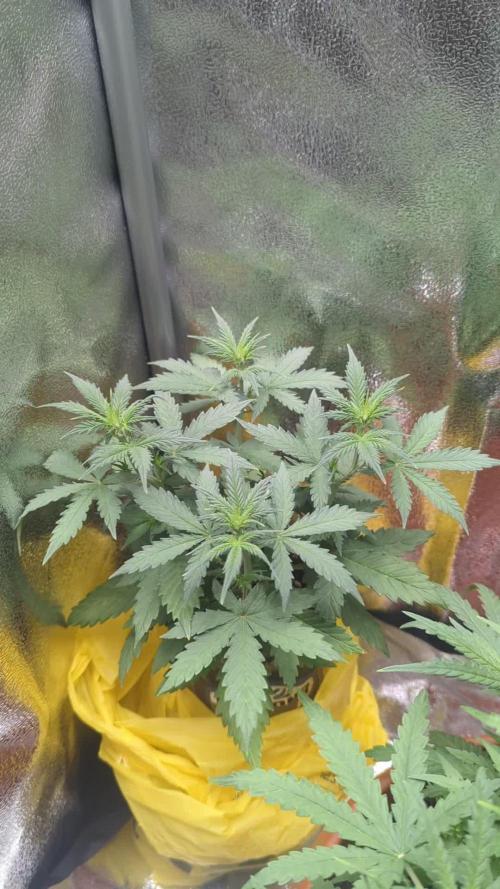



Likes
11
Share


@Buddyhighs
Follow
Here we go for another run. I was recently made aware that a seedy I had germinated was not what i thought I was, so here I am making it right with a tastebudz seed directly from their website. 😁
The strain I have chosen for this run is moon berry. Germinated in a coco coin that has been soak in water with a little bit of mycroboost from living soils. At 25 degrees and between 70-80% humidity.
This run will be an organic living soils run.
Coco coin has been planted straight into her final pot, which is a 5gal fabric pot. Soil is previously amended but was only used for a week. Using Biobizz light mix and worm humus along side living soils amendments and beneficials. Mulch is made up of cover crop which was chopped dropped and reseeded. Soil also has worms in.
Light is marshydro led 150 watt first week running only 1 at 25% 45cm away from soil. Light have been running 20 hours a day this week now dropping to 18 while the power is upped to 50%.
Only one 4” fan running atm with no extractor this week and only this seedling is in the whole 80x80cm tent.
I am buzzing to get this going. Let’s get this work! 💪🏽💪🏽💪🏽💪🏽