


Likes
Comments
Share


@Mr_nugs_lover_David
Follow
Her aroma it's just super cheesy,I love the autoflowers from this seedbank they have amazing and original aromas and flavors,she's not gonna ve very productive however I love how she smell it's gonna be a pleasure to taste.

Likes
12
Share


@Archieballs
Follow
Started LST she’s growing but not as fast as I would think for a 9-10 week plant. I hope she finishes out timely as I’ve been excited for this strain. I forgot to PH her feed so if anyone has any ideas on how to mitigate that I’d appreciate it.

Likes
14
Share


@MrReeferMadness
Follow
Plants are doing well. the Psychosis is catching up
I've taking a video of my room too show the inside a bit better.
Noticing some issues with my room set up. The 2" air stones are making too much noise at random points of the day/week. I assume the stones move slightly and cause a rattle noise when the stone is at a certain angle
*** ill update this week more today after I have been to the hydroponic shop to pick up a few things
Having some issues with the 2"airstones. Due to screeching and rattling. The let the perfect amount of air out for my 19l pots but the noise isn't worth it.
Here is and 18" air curtain. Super silent and works great. I bought 30" curtains too.. They let even more air out and form around the pot better 👍


Likes
3
Share


@stephandjo
Follow
Sugar Bomb Punch
THC Bomb X (Critical Orange Punch x Bubba Island Kush).
Harvested on 63 th day of flowering.
A cool strain to grow from Dutch Passion 👍
4 on 4 on germination rate.
The 4 ladies were slightly different from each others but they gave some very cool buds !
The "black one" was a real beauty 😍

Likes
60
Share


@MrSpooky882
Follow
The week was completely normal with no problems, I'm more and more excited about the next few weeks 😁 they already smell very, very tasty 😏😍
Likes
14
Share


@Uglys_buds
Follow
Tuesday February 28th I dropped 5 Exotic Genetix “Yikes” in ph’d to 6 water. After 8 hours they’ll go into paper towels. Eventually ending up in rockwool. This is my first time running a RDWC system. I have to thank @budz_alot for helping me get this all together!!!


Likes
8
Share


@R1pp3r
Follow
Sigue manteniendo su misma altura, pero se ah estirado bastante a los lados.
Ah llegado a expandirse unos 8cm aproximadamente a los lados ya lleva unos 53x53 cm aprox

Likes
24
Share


@The_Good_Twin
Follow
29 May 2021
I started the flowering stage yesterday, 5/28/21, and plan on defoliating and topping my Blue Ox baby today. I wanted to get any and all stressful alterations done before we got too far into flower to limit potential damage it can’t spring back from. The light is on a timer now, so from here on will be 12/12 schedule. I’m also adjusting the nutrients to flower, and starting this week at the “Transition to Flower” levels. I’m also starting to give a whole gallon of water for the first time as well. H2O was chilled to 41 degrees F, and contained: CALiMAGic 5ml, FloraMicro 7.5ml, FloraGro 7.5ml, and FloraBloom 7.5ml. The initial pH was 6.7, and didn’t require adjustment. The TDS going in was 807 ppm. Runoff pH was 6.2, and TDS runoff was 2103 ppm. The tent temp was 75 degrees F, and humidity was 50%. I practically stripped her naked today, and after finally getting a look at her branches will most likely do some LST in the coming days. I also took some cuttings to clear up space to control the grow better. I may try to clone them, but I haven’t decided yet.
31 May 2021
My Blue Ox is looking great! She adjusted to me practically taking all of her large leaves off without any issues. She looks so much better than she did before. I’m still using the “Transition to Flower” level nutrients with a gallon of chilled water (47.1 degrees F). I fed: CALiMAGic 5ml, FloraMicro 7.5ml, FloraGro 7.5ml, and FloraBloom 7.5ml. The initial pH was good at 6.8, and TDS going in was 924 ppm. The pH runoff was 6.2, and TDS runoff was 2400 ppm. Tent temp was 79 degrees F, and humidity was 44%.

Likes
9
Share


@caspersaints1
Follow
Day 27- day 1 flower
Flip to 12-12
Day 28-day 2 flower
Calmag -0.8ml
Coco A - 1.5
Coco B- 1.5
Roots -0.2
Day 29-Day 3 flower
Calmag -0.8ml
Coco A - 2.5
Coco B- 2.5
Active boost -2ml
Roots -0.2
Day 30- Day 4
Watered
Coco A - 2.5
Coco B- 2.5
Active boost -2ml
Roots -0.2
Day 31–day 5
Watered
Day 32– day 6
Watered
Day33- day 7
Watered
Day 34-8
Watered last night so nothing today
Day35–9
Watered
Day 36-10
Watered
Day 37-11
No feed,
Day 38–12
Fed 1.5L
Day 39-13
Watered
Day40-14
Fed pk
Day 41-15
Fed 1.7 coco a
1.7 coco b
2 ml boost
1 ml Pk
Day 42-16- started adding pk
Fed
Day 43-17
Fed
Day 44-18
Fed 600 ml just before lights out
1L lights on
Day 45-19
Fed 1.6 L
Day 46-20
Fed 1.5L
Day 47-21
Fed 1.5L
Day48-22 signs of potassium deficiency so keeping the food levels up for few more days , started with light feeding but now doing heavy feed chart .
-Starting to give off a berry and gas smell .
Day48-23
Fed 2L
She’s thirsty today . Usually start to see runoff after 1.2 Lbur nothing
Ml/L
Watered 2.5 coco a
2.5 cocoa
2 sumo boost
2ml by accident instead of 1
Day 49-24
Fed 1.5L
Day 50-25
Skipped feed to try lower humidity
Day 51
Fed 2 L but no run off . Think she’s thirsty from no water yesterday . Will do another 500 ml to see run off if not I’ll leave it at that .
Likes
19
Share


Likes
44
Share


@Bretwalda
Follow
Gave her last feed yesterday, thinking tomorrow, maybe later tonight, i will start with a flush for 7-10 days going by trichomes some are still clear but i think most are cloudy and a couple ambers here and there.


Likes
4
Share


@GreenForMiles
Follow
This strain was a mystery from the beginning. I planted 6 plants and got 4 drastically different phenos. Surprisingly they all have similar aromas but visually they’re much different. She stretched a lot and needed two layers of the sCrog net. One plant had 2 random seeds so I’ll probably be planting her again. Next time I’ll use a low stress method to see her at her full potential!

Likes
9
Share


@Ryno1990
Follow
Wedding glue from @fastbuds is flowering along nice an stacking up the trichromes as the gelato from @herbies is comming along a little slower as i feel like the gelato has a longer veg cycle by a week or 2 but shes comming along beautiful just like last time i grew her

Likes
25
Share
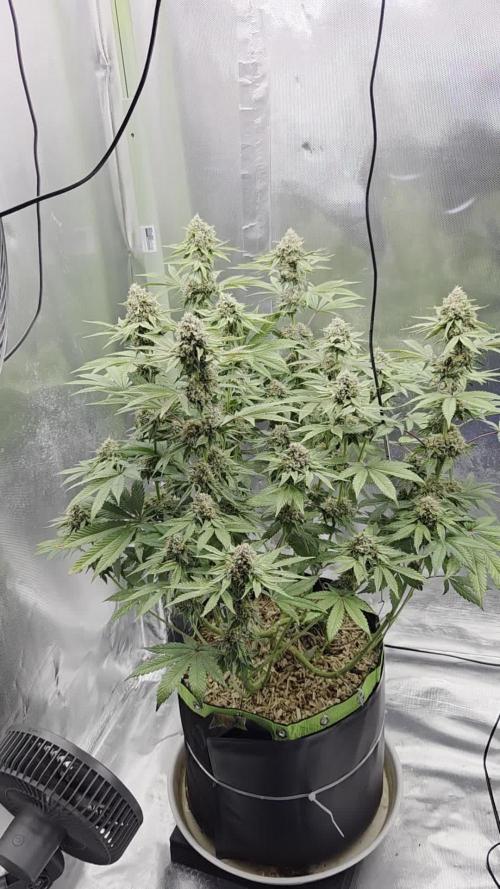

@Borberad
Follow
Woche 13
Die Pflanze ist für diese Zeit schon weit entwickelt, es wird voraussichtlich die letzte Woche in der dem Gießwasser noch Nährstoffe zugesetzt werden.
Tag 87 Sie hat noch ordentlich Durst, die Blüten werden dicker und dicker evt. benötigt sie doch noch ein paar Tage länger zusatzlich etwas Dünger.

Likes
6
Share


@potatolord111
Follow
This Genetics are so clean. This is the best veggi I ever had.
The weather was not good but my lamp is free and so I use this for bad days and some extra hours of light in the evening.
Startet with a small amount of nutrients this week.
I think inhave some spider milts and will buy some neem oil.


Likes
6
Share


@Spearfish
Follow
Safe to say we're heading into flower.
I'm pretty close to full strength on the nutrients at this point.
Still defoliating and filling in the screen. Plant on the right is slightly behind as far as kicking into flower.
Some yellowing browning just starting a tips. I'll change out the water tomorrow (on day 49). Averaging water changes every 12 days.
Day 49: Did not change water today, will on day 52 or 53 instead. Decided it could just be the light being too close. Moved it up and did a little lst above the screen. All done removing branches and leaves. Great end to the first week of flower.

Likes
62
Share


@Santica_Garden
Follow
So apart from the really low yields.... Which I expected from 80% Indica dominant strains just not that low considering how dense the Budz were. But I can say my growing skills have been consistently improving and it is showing with each grow.
With these ladies I should have definitely put them in a 12Litre pot or smaller and still would have gotten the same results if not better. So I lesson learnt for future grows..... To take into consideration the size pots I'm using on the strains I'm running! 👍🏾
But in all very great smoke, even more excited for the next rows that I have coming with the improvements I will be making. 👍🏾🌱💚
Another thing I will say is that I will be putting more effort into how I document my harvest for you guys.... More pictures, better videos showing off the Budz.... Not many pictures because I done smoked it all 😅😅🔥🔥🔥 but still I want to do better for you guys, I want to give people the best view/review of the strains that I run... The information will help someone that decides they might want to run this strain in the future!
Any questions guys just ask away 👊🏾😎

Likes
37
Share


@Kirsten
Follow
So the plants survived without light in my garage for 2 days, thank goodness!
FBP2 is the best plant by far. She had stacked lots of tight buds, orange pistils coming in nice. Nice bushy structure to her. Super happy with her progress.
Royal Critical is doing great, progressed further than all the others so far, lots of orange pistils, curling inwards towards the buds, still white pistils too, so not ready obviously. Not as dense a structure as FBP2, but much better than FBP1 and FBP3, which you can see are way behind both the others. They're looking super straggly. Not sure that they'll improve much at this stage unfortunately.
Still I'm pleased overall with this grow, as it's my first and I have learnt a lot about the necessity for LST, and genetics being different from plant to plant.
Hopefully we'll be able to harvest the Royal Critical here soon, then FBP2. As for the other 2 plants, I guess I'll have to wait and see.