


Processing
Likes
Comments
Share


@Ensign420
Follow
Week 02 Introduction
This week has been a bit of a struggle. Had my first experience dealing with slime and brown algae. But I think adding enzymes and increasing the beneficial bacteria helped to fix the issue. Also experienced nutrient burn for the first time. My nutrient solution strength got as high as 671 PPMs. So backed it down to about 430 PPMs during the end-of-week reservoir change. Also cut Hydroguard (expired?), CaliMagic, and Superthrive from this grow. Now she's still stunted, but is starting to recover. Hopefully...
[START OF WEEK 02]
Day 01 - Monday - 08/10/20 - Total Days: 008
-----------------------------------
- [0830]: Still looks a bit yellow. But getting larger!
--- Solution strength was at 248 PPMs.
--- Just topped off with a bit of distilled water
--- PH went up to 6.1 so PH'd down to 5.8
--- Ran the top feed for a bit to wet the hydroton.
- [2130]: She's looking even more yellow now.
--- Even the new leaves are really yellow.
--- Decided to add more base nutes.
--- Added 4ml of Sensi A
--- Added 4ml of Sensi B
--- Now at about
--- Solution Strength went up to 304 PPM.
--- PH was at 6,
--- Also raised the water level a bit more.
--- I really hope it's a nutrient deficiency and not an over-watering issue.
--- Please live!
Day 02 - Tuesday - 08/11/20 - Total Days: 009
-----------------------------------
- [0830]: Looking less droopy. But still yellow.
--- Decided to do a reservoir change.
--- 4.5gal of distilled water
--- 8ml of Sensi Grow A
--- 8ml of Sensi Grow B
--- 8ml of Voodoo Juice
--- 4ml of B-52
--- 4ml of CaliMagic
--- 4ml of Hydroguard
--- 4 drops of Superthrive
--- PH'd down to 5.8
--- Solution strength: 302 PPM
--- Since I didn't want to risk over-watering the rockwool, I did not to do a top feed, may do one tonight after the sleep cycle (lights are still set to go off at 10am and back on at 4pm).
--- As I was doing a reservoir change, I noticed that the tubes and bucket were a bit slimy. Didn't really stink or anything. Is this normal? Maybe due to the Hydroguard and Voodoo Juice?
--- I hope she gets better soon!
- [2215]: Getting larger! But still yellow.
--- Also can see a root growing through the net pot! Tiny little thing but it's there! Will have to start dropping water once more appear.
--- After looking over a few DWC diaries using AN nutes, seems like my solution strength is still too low. Most around this stage average around 500 PPMs with about 4ml per gallon.
--- Top fed for a minute to wet the top of the hydroton.
--- Solution strength went down to 263 PPM.
--- Added 8ml more of Sensi A
--- Added 8ml more of Sensi B
--- Now base nutes are at 16ml for 4.5 gal of water.
--- PPMs went up to 411.
--- Still lower than 500 PPMs, but that's okay.
--- PH was at 6. Not sure if I should adjust PH using AN nutes. So going to not ajdust unless PH goes above 6.1.
Day 03 - Wednesday - 08/12/20 - Total Days: 010
-----------------------------------
- [0830]: Looks like more root growth!
--- She still looks yellow. But leaves are perky.
--- PH was at 6.2 so lowered down to 5.8.
--- Solution strength was at 394 PPMs
--- Since roots are still growing, I decide to lower the water level a bit. Now water level is a bit below the net pot.
- [2200]: Root is getting longer!
--- Slime is returning. Not sure why.
--- Solution strength: 357 PPMs
--- PH: 6.1
--- Decided to add an enzyme along with more beneficial bacteria to hopefully cure the slime.
--- Added 16ml of Sensizym
--- Added 5ml of Hydroguard
--- Added 8ml of Voodoo Juice
--- New solution strength: 430 PPMs
--- New PH: 6.1
--- Top fed for a minute.
--- This slimy residue is really freaking me out! I hope the added enzymes will help eliminate the slime.
--- Going to do a full reservoir sterilization/nutrient change over the weekend. Please survive until then girl!
Day 04 - Thursday - 08/13/20 - Total Days: 011
-----------------------------------
- [0930]: I think the enzymes worked! There is little to no slime now!
--- Although I think the root was also dissolved in the process. It's now just a little stub sticking just below the net pot. The enzyme is also suppose to dissolved dead roots too but guess that root was too weak? Not sure what happened there. But I think the slime is cured!
--- Solution strength went down to 395 PPMs. Decided to add more base nutrients.
--- Added 8ml of Sensi A
--- Added 8ml of Sensi B
--- Added 4ml of B-52
--- Solution strength went up to 598 PPMs.
--- PH was at 6.1
--- As long as the PH is between 5.5 and 6.3, I'm not going to use PH Up or Down. But still will monitor PH levels.
- [1715]: Checked up on her after her nap and shes looking alive but stunted. But no slime!
--- Decided to add some sugars to help maintain the enzymes and beneficial bacteria.
--- Solution strength was at 587 PPMs.
--- PH was at 6.2
--- Added 8ml of Bud Candy
--- Solution strength went up to 671 PPMs.
--- PH also went up to 6.3
--- Lowered water level a bit to hopefully promote more root growth.
--- Top fed for a minute.
--- She is getting bigger, but still looks yellow.
Day 05 - Friday - 08/14/20 - Total Days: 012
-----------------------------------
- [0915]: Leaves look a little burnt on the tips. Still no slime.
--- Going to back off on the PPMs to hopefully fix the nutrient toxicity.
--- Solution strength was at 632 PPMs
--- PH was at 6.3
--- Added/Removed water until PPMs were at 536.
--- PH was still at 6.3
--- Raised water up a bit, then top fed for a minute.
- [2200]: Looking better. Still yellow though.
--- Solution strength: 514 PPMs
--- PH: 6.5
--- Added PH down.
--- New solution strength: 518 PPMs
--- New PH: 5.2
--- PH was kind of high. So decided to PH down. Had to use quite a bit to bring it down. But eventually got it to drop down to 5.3. A little low, but so far, the PH has always gone up so wanted to start it really low.
--- Ran the top feed for a minute to re-saturate the top of the hydroton.
Day 06 - Saturday - 08/15/20 - Total Days: 013
-----------------------------------
- [0830]: She looks stunted. leaves are still yellow.
--- Solution strength: 514 PPMs
--- PH: 5.6
--- Top fed for a minute.
--- Not sure what to do at this point. Going to do another reservoir change soon. Hoping she lives until then.
- [2145]: Looking pretty much the same.
--- A bit of slime has returned. Since I've been diluting the nutrient solution, the enzyme ratio has dropped. So I guess this is expected.
--- Also noticed that slime build up was on the air-stones. Never really checked the stones so not sure how long that has been there. Looks brown too, which can't be good.
--- Going to do an H202 sterilization of the system (minus the net pot) tomorrow so did not add anything.
--- Lowered the water level to below the net pot.
--- Then top fed for a minute.
Day 07 - Sunday - 08/16/20 - Total Days: 014
-----------------------------------
- [0900]: STERILIZATION DAY!
--- Decided to skip today's night cycle for a deep clean.
--- I'm hoping that skipping a night cycle won't be too stressful.
--- Temporarily moved her to a new bucket.
--- Used about a half of gallon of straight distilled water to flush out the net pot.
--- Drained the system and wiped up all the brown sludge. Also removed the air stones and cleaned up all the goo.
--- Filled the system with 2 gallons of distilled water and at least 30ml of food grade hydrogen peroxide (35% strength).
--- Yea its a lot, but since I'm not going to sterilize the system overnight, I went with a really high doseage. Basically I kept adding until I started to see little bubbles start to form.
--- Then I ran the water pump.
- [0915]: Boiled the air stones in tap water for about 10 min. Then reconnected them to the airlines.
--- I let the air stones and hose soak in the sterilization solution for about 5 minutes so the peroxide can absorb into the stones. Then ran the air stone to help mix and agitate the solution.
--- Occasionally, I'd repeat the process of turning the air pump off for a few minutes to let the stones soak.
- [1000]: Covered the top two row of holes of the net pot with some aluminum tape. Hopefully this solves the light leaking in through the hydroton.
- [1200]: Used an old toothbrush and scrubbed the pump clean. Then drained the system.
--- Refilled with more distilled water and peroxide. Again added a lot.
--- Ran system again to sterilize even more.
- [1530]: Drained the system and refilled with distilled water to rinse.
--- Ran the system for a few minutes, then drained and rinsed again.
--- Did this a few more times over about an hour.
- [1630]: Added 4 gallons of fresh distilled water.
--- Added 15ml Sensi Grow A
--- Added 15ml Sensi Grow B
--- Added 12ml of B-52
--- Added 16ml of Voodoo Juice
--- Added 16ml Sensizym
--- Solution strength was at 430 PPMs
--- PH was at 5.6
--- I was going to add Hydroguard, but I think the bottle is expired. Since 2017 or 2018!? I think Hydroguard is good for up to 2 years from the date on the bottle or 6 months after opening. So not going to use from now on. I wonder if this could have contributed to the slime build up.
--- Also removed the CaliMagic and Superthrive too. Going to only use AN products to eliminate the chance of incompatible nutrients.
--- Placed her back in the bucket and top fed for a minute.
--- Here's hoping for the best. Going to let it ride until morning! Please feel better!
[END OF WEEK 02]

Likes
20
Share


@Vegetoo420
Follow
New week they are good , I put second pheno into the big room with her sister!
Add green sensation to the soup!

Likes
2
Share


@Fyko12
Follow
Anfang vierte Blüte Woche Pflanzen sehen gut aus
Habe sie generell wenig gedüngt

Likes
7
Share


@Messypies
Follow
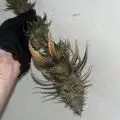
In the second week the plant has now started to produce its first set of single bladed leafs.

Likes
3
Share

@4hundert20
Follow
Alle Samen haben gekeimt, jedoch sind zwei der drei Keimlinge auf unerklärliche Weise gespargelt.. während der Übrige normal, wie aus dem Bilderbuch heranwuchs.
Das ungute Bauchgefühl ließ mich zwei weitere Samen (als Backup) zum Keimen bringen.. kurz darauf knickte mir der erste Spargel ab.
Seltsamerweise hielt sich der andere mithilfe einer Wäscheklammer (universell nutzbar im grow, für mich unverzichtbar).
So habe ich nun 4 mal Sour Diesel in unterschiedlichsten Stadien, Größen und Formen 😂 solche Voraussetzungen sind zwar weniger gut, aber ich werde mein Bestes geben, um die Ladys durch Vegi+Blüte zu begleiten.
Dünger, Boden, ph, ec, könnt ihr dem Protokoll entnehmen, jedoch ändert sich diesbezüglich nichts zu den vorherigen Grows.
Heute bekamen alle einen neuen Topf (1,5L) und sollen nochmal schön wurzeln, sodass sie dann in ihren finalen 27L Topf umziehen können. Das sollte in 10 Tagen soweit sein.. Aber wer weiß das schon, bei so einem Start 😂😂
Wünscht mir Glück!

Likes
13
Share


@BB_UK
Follow
A great week for these autos! I’ve slowly increased the feed as I go and they’re loving the environment! I was doing better last time but this is the things with autos they run in their own fashion! Just spring into action when ready different phenos and characteristics which change late sometimes! But proved the comparison by not using dynomyco this time (only in the photos) shows the difference in the early stages!

Likes
17
Share


@Smokwiri
Follow
Welcome to my Sun of a Peach by Anesia Seeds diary
The topped one is doing better than the other, if you want to know why, i'm referring to the pictures to see for yourself.
I think it wont take long before the first defoliation will be done, waiting for the older leaves to turn a bit yellow.
This plant loves the organic menu, you can see it...

Likes
5
Share


@StonedandSteady
Follow
VIVOSUN®️ @vivosun.official VS2000w & VS1000w Grow-Thank You so Much J Bro!!! I'm Honored and Very Grateful of you and your Company for taking me on to your Team/Family! I #FlippedToFlower today Friday 6/24/22 ShoutOut to our Bro @soillife420_2 for Gifting us this VS®️ VS1000w LED Grow Light! Sponsored VS®️ VS2000w LED Grow Light with Samsung LM301 Diodes & Sosen Brand Driver, Dimmable Lights, Sunlike Full Spectrum with Grow Room Glasses for Seedling Veg & Bloom Plant Growing Lamps for 4x2 Veg & 3x3 Flower Grow Tent or Grow space! Lower Cost & High Efficiency: VS®️ VS2000w LED grow lights use the latest LED plant light technology including Samsung LM301 Diodes, high-energy efficiency with 2.9μmol/J; Extremely high output but consumes only 200W of electricity, making it more efficient than traditional HID lamps and other plant lamps on the market! It comes equipped with 3000k Warm white Diodes that Boosts Bloom, 5000k Cool white lights that Promotes Germination and 660nm Red lights for Higher Yields! Thier attached to a Durable, Waterproof Aluminum Heat Sink with Low Noise and only weights 9.03lbs. with a 5 year Warranty! SuperCropped3rdTime #TransPlanted into 3GallonPots from 1GallonPots #Lollipopped ToppedThe3rdTime #LeafTucked Transferred into our 6×5ft. #ChronicCave BasementFlowerArea and Growing under our Brilliantly Bright VIVOSUN®️ VS2000w-VS1000w with the 12/12 lighting schedule, Dimmed⬇️=50% around 35-40" Over Canopy's We Love to use Team @tnbnaturals @tnb_naturals #TNBNaturals #TheEnhancer #Co2DispersalCanister for Vigorous and Great Growth for our Grows! ShoutOut to Bro @dr._weedman I'm Growing from Team @ilovegrowingmarijuana_strains #HeroMixpack #ILGM #SkywalkerOG-Fem #BruceBanner-Fem #BlackWidow-Fem and started Up a New phenoz of those, my Team @nirvana_seeds nirvanashop.com #Zkittlez-Fem and a New pheno of that! Thanks Again Everyone!!! #BudBrothers4-L Happy Growing! Cheers Famz!!! Much Props and Much Pars!💯VS®️💡's+⛺'s=🏆's
#LoveWhatYouGrow
#BringGreenToYourLife
#vivosun #vs1000 #vivosungrowlight #vivosungrowtent #vs2000 #vs3000 #vs4000 #vs1000e #vsf4300 #hcf1600 #hcf3200
https://linktr.ee/vivosun.official
https://www.linkedin.com/uas/login?session_redirect=%2Fcompany%2F77743591%2F
https://youtube.com/c/VIVOSUN
https://instagram.com/vivosun.official?igshid=YmMyMTA2M2Y=
https://www.facebook.com/198734887125319/posts/1724749361190523/?extid=a&mibextid=baczqb
https://mobile.twitter.com/VIVOSUN/header_photo
https://pin.it/2uORZDs
https://www.tiktok.com/@vivosunglobal?lang=en&is_from_webapp=1&sender_device=mobile&sender_web_id=7110614037704197678
https://www.amazon.com/stores/page/A2F7F49B-7130-4423-BF67-59CE3EC5A44F?maas=maas_adg_01A961034EF443FE5006848DB5A6C70B_afap_abs&ref_=aa_maas&tag=maas&ingress=3&visitId=3e0468ed-290c-4c15-9d06-7a22afdff345&mc_cid=e5417eb03f&mc_eid=69bad0aef8
https://www.amazon.com/stores/page/3EDD8CEC-742A-44F6-90C4-0930E78DD730?ingress=2&visitId=6cfb6992-f86f-4c85-a5ad-4cb5d1c06d07&ref_=ast_bln
Limited-time deal: VIVOSUN 6-Pair 1/8 Inch Adjustable Grow Light Hanger, Heavy Duty Rope Hanger with Reinforced Metal Gears, 8-Ft Long and 150 lbs Weight Capacity Rope Rachet for Grow Light, Inline Fan https://a.co/d/1WezHcI
Likes
14
Share


@eldruida_lamota
Follow
Vamos familia cuarta semana de vida de estás Punch Pie de RoyalQueenSeeds .
Que ganas tengo de ver el progreso de esta variedad, las plantulas están sanas, se ven con buen color.
La cantidad de agua cada 48h entre riegos.
Esta primera semana ya añadimos nutrientes de la gama Agrobeta.
Tuve problemas de trips en un indoor y tengo todas plagadas pero ya las e tratado con aceite de neem y un insecticida genérico, también añadí tiras de color azul para controlarla, trataré esta semana y la siguiente.(esta semana me llegará el aceite de neem y el jabón potásico)
Trasplanté directamente a macetas de 7 litros.
Estas próximas semanas veremos cómo avanzan.
Mars hydro:
Code discount: EL420
https://www.mars-hydro.com/
Agrobeta:
https://www.agrobeta.com/agrobetatiendaonline/36-abonos-canamo
Hasta aquí todo, Buenos humos 💨💨.


Likes
15
Share

@MrMaabra
Follow
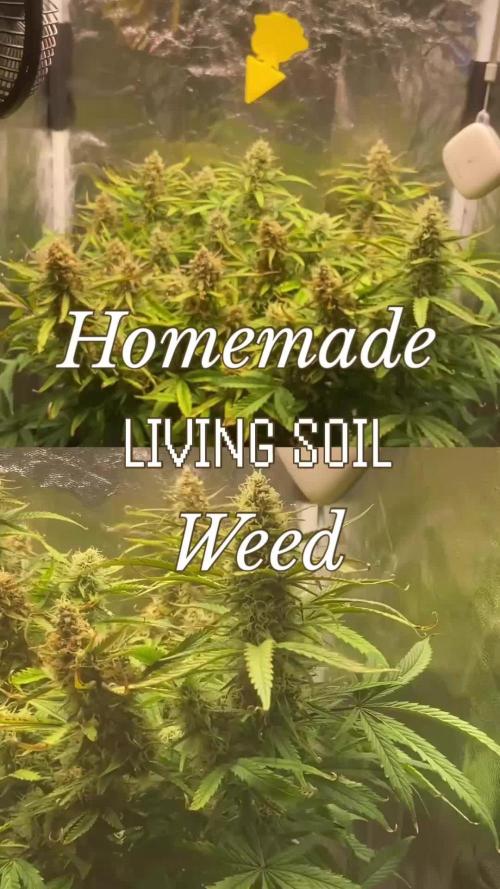
Hallo Leute, diese Woche gab es kein Wurmtee, da sehr wenig davon entstanden ist. Das lag sicher an den vergangenen kalten Tagen und Nächten. Erste Maßnahme: Wurmbox anfüttern, feuchtes Papier und leicht durchmischen, damit die Mikrobiologie beim Zersetzen Reste den Würmern behilflich ist - s. Video 1.
Ansonsten ist die Lady erwartungsgemäß in ihrer letzten Phase angekommen, was die herbstliche Färbung anzeigt. Die Pflanze zieht Nährstoffe aus ihren Blättern. Eine Vielzahl der Pistillen sind bereits orange-braun gefärbt - die Ernte ist nicht mehr lange hin - s. Video 2.
Es ist jetzt schon ersichtlich, dass die Buds um 1/3 geringer sind, als bei dem Grow davor mit 30 Litern. Das wird auch mein künftiges Set-Up für die Bio Hanferde von Sonnenerde - 30.
Die Luftfeuchtigkeit und Temperatur sind weiterhin mit 52% und 23 Grad stabil. Die Leistung der Lampe habe ich für die restlichen zwei Wochen auf 60% erhöht, um die Entwicklung der Buds zu pushen. Der Geruch ist zurückhaltend, aber wehe, man kommt versehentlich an die Blüten, explodiert es förmlich in einer süßen und cremigen Note - unaufdringlich gut.
Die Trauermücken sind erledigt und entwickelte sich nicht zu einer größeren Problematik. Ich bin weiterhin zufrieden mit der Gelato Auto.
__________
Hi everyone, there was no worm tea this week as very little was produced. This was likely due to the recent cold days and nights. First step: feeding the worm bin, adding damp paper, and mixing it slightly to help the microbiology break down scraps for the worms – see Video 1.
Otherwise, as expected, the lady has reached her final stage, indicated by the autumnal colors. The plant is pulling nutrients from its leaves. Many of the pistils have already turned orange-brown – harvest isn't far off now – see Video 2.
It’s already apparent that the buds are about 1/3 smaller than in the previous grow using 30 liters. That will be my future setup for the Sonnenerde organic hemp soil – 30 liters.
Humidity and temperature remain stable at 52% and 23 degrees. I’ve increased the lamp power to 60% for the remaining two weeks to push the bud development. The scent is subtle, but if you accidentally touch the flowers, it literally explodes with a sweet and creamy note – unassumingly good.
The fungus gnats are gone and didn't turn into a major issue. I’m still very happy with the Gelato Auto.
Likes
38
Share


@Snakeking
Follow
chopped
I will update about the weight
Sweet like candy and awesome taste
For the first real growth i think i did good.
Our building smells like skittles:)
Gz#2 520g dried bud
Gz # 1 470 g
Gz # 6 425 g
Gz # 3 350 g
Gz # 5 460 g

Likes
29
Share


@Caertner
Follow
Toller Start in die Woche an Ostern...
Letztes mal Dünger... EC bei 2,5 jetzt muss sie nur bulken.
Processing
Likes
39
Share


@InnerCityGardens
Follow
This is the final week in Veg, just tucking the tips down to maintain an even canopy. Coming along nicely. #FloodAndDrain #RecycledSystem #PeyoteCookies #Cinderella99 #BlueGelato41 #GorillaZkittlez #BarneysFarm #HerbiesSeeds #FreeSeeds #GrowTent #MeizhiLED #Meizhi300 #CustomLED #UkGrown #TheUKGrowsToo #CannabisCommunity 🇬🇧

Likes
68
Share


@Prototype0181
Follow
I gave the lady's a litle haircut at the start of the week, and started using Bud ignitor on the Canna feed Cherry's to speed things up a bit😉 I also Switched the lady's to 12/12 on the 10th of november.
Rock on Growmies 🌱


Likes
44
Share


@Cogollo_eu
Follow
**Encontrarás la traducción a español al final de la descripción**
From/Desde: 10/05/19 || To/Hasta: 16/05/19
From day/Desde día: 78 || To day/Hasta día: 84
You can find the Money Maker Diary here:
** Podéis encontrar el diario de las Money Maker aquí:**
https://growdiaries.com/diaries/25667-gorillamakingmoney-gorilla-vs-money-m
-----IMAGES & VIDEOS-----
5 - HomeMade Organic & Cheap CO2 generator (more info in week summary)
9, 10, 11 & 12: The bud on the right is a Gorilla one, the buds in the left or/and in the middle are Money Maker ones.
15 - Same Gorilla plant buds, one affected by CO2 in the roots and the other not.
-----WEEK SUMMARY-----
The smell is more sweet and intense every day, friends that came home turned them eyes into crystals when they see this little babys. The size isn't awesome, but the high ammount of buds full of crystals plus the strong sweet aroma makes them awesome. Buds are growing and fattenning very very well.
This week i added a boost of HomeMade CO2, i never measured the results of this invention so i can't give CO2 measurements. This method is widely used in home aquariums and there is where it comes from. For those interested i'm going to write here more detailed instructions. The 4 liters i've made will last for about 2 weeks.
---NEEDINGS---
- 250 ml Bottle
- 6~10 l Bottle
- 400 g Sugar / l water
- 1 Envelope of organic baker's yeast / l water (CHEMICAL WILL NOT WORK)
- 3 mid plastic tubes 40~50 cm
- 1 short plastic tube 5~6 cm
- 4 tube adapters
- Hot glue to seal adapters
The process of creating CO2 is simple, mix water, organic yeast and sugar in a bottle, and the sugar will free CO2 in the process of fermenting to alcohol due to the yeast.
1. Make a hole in the center of the big bottle cap, insert an adapter and secure it with hot glue
2. Make 3 holes in the small bottle cap and glue the other 3 adapters
3. Link both caps with one of the mid tubes and insert the other tubes on free adapters
4. Insert a short tube in the bottom of the small cap in the adapter that came from the big cap
5. Watch the Video!!
-----WATERING CALENDAR-----
Plants are beginning to drain the pots a bit faster so from now on i will raise the water ammount on each watering day 0.25 l.
11/05/19 - 1,5 l with All week nutrients -(Nirvana & Blombastic) also Big Bud half dosed @ PH6.4 & 2 E.C.
14/05/19 - 1,5 l with Bud Candy, Big Bud, Nirvana, B52, Bud Factor-X, Sensizym & Blombastic @ PH6.4 & 1.5 E.C.
*****ESPAÑOL*****
-----IMÁGENES Y VÍDEOS-----
5: Generador de CO2 casero, barato y orgánico (más info en el sumario semanal)
9, 10, 11 & 12: El cogollo que sale a la derecha es de una Gorila, el de la izquierda y/o el de en medio son de una Money Maker
15: Dos cogollos de la misma planta, uno afectado por CO2 en las raíces y el otro no
-----SUMARIO SEMANAL-----
El olor es más dulce e intenso día a día, los amigos que vienen a casa a verlas se quedan ojipláticos al verlas. El tamaño no es una maravilla, pero la gran cantidad de cogollos llenos de cristales añadido al aroma que entra por las fosas nasales las hacen increíbles. Los cogollos crecen y engordan de maravilla.
Esta semana he añadido un boost de CO2 casero, nunca he hecho mediciones de los resultados por lo que no puedo darlas. Este método es ampliamente usado en peceras caseras y de ahí saqué la idea. Para aquellos interesados dejo aquí instrucciones más detalladas. Con los 4 litros de agua que he preparado yo da para unas 2 semanas.
---NECESITAMOS---
- Botella de 250 ml
- Botella de 5 a 10 litros
- 400 g de azúcar por litro de agua
- 1 sobre de levadura de postre orgánica (LA QUÍMICA NO FUNCIONARÁ)
- 3 tubos de plástico de tamaño medio 40~50 cm
- 1 tubo de plástico de tamaño pequeño 5~6 cm
- 4 adaptadores para los tubos
- Cola caliente para pegar y sellar los adaptadores
El proceso de generar CO2 es simple, mezcla agua, levadura orgánica y azúcar en una botella, y el azúcar liberará CO2 en el proceso de fermentación a alcohol.
1. Haz un agujero en la tapa de la botella grande, inserta un adaptador y séllalo con cola caliente
2. Haz 3 agujeros en el tapón pequeño y haz lo mismo con los otros 3 adaptadores
3. Conecta los 2 tapones con uno de los tubos y conecta los otros 2 tubos a los adaptadores restantes
4. Conecta el tubo pequeño en la parte libre del adaptador del tapón pequeño que viene del tapón grande
5. Mira el vídeo
-----CALENDARIO DE RIEGO-----
Las platas comienzan a secar los tiestos un poco más rápido, asi que de ahora en adelante incrementaré 250 ml de agua adicionales en cada riego.
11/05/19 - 1,5 l con todos los nutrientes semanales -(Nirvana & Blombastic) BigBud mitad de dosis @ PH6,4 & 2 E.C.
14/05/19 - 1,5 l con Bud Candy, Big Bud, Nirvana, B52, Bud Factor-X, Sensizym y Blombastic @ PH6,4 & 1,5 E.C.


Likes
Comments
Share


@Mr_nugs_lover_David
Follow
She's looking absolutely gorgeoys very bushy with 12 main colas,wish I could have had more time to grow her in vegetative stage however she's eating very good,no problems at all,she went trough a bad week where she was lacking some nutrient I don't know why because she is in a living soil like her sisters and none of them had any issues however she's starting flower,actually she started force flowering with her sisters on August 3rd


Likes
20
Share

@Prof_Weed
Follow
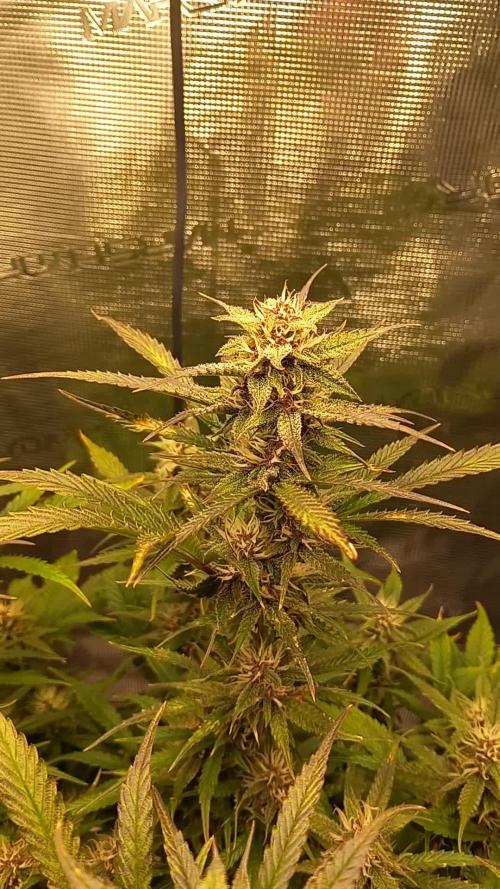
Reduced the light a little bit, she is prayin and stackin now.
Overall healty, no bugs no deficencies.
The buds are swelling and smelling, i like it!
Some cool purple colors, and she is sticky and fruity.
I love fruity strains.
Thanks to Sebastian Good from Good Genetix for the Tester.
And thanks to Bionova for the vegan line.