


Likes
18
Share


@Spliffing_Around
Follow
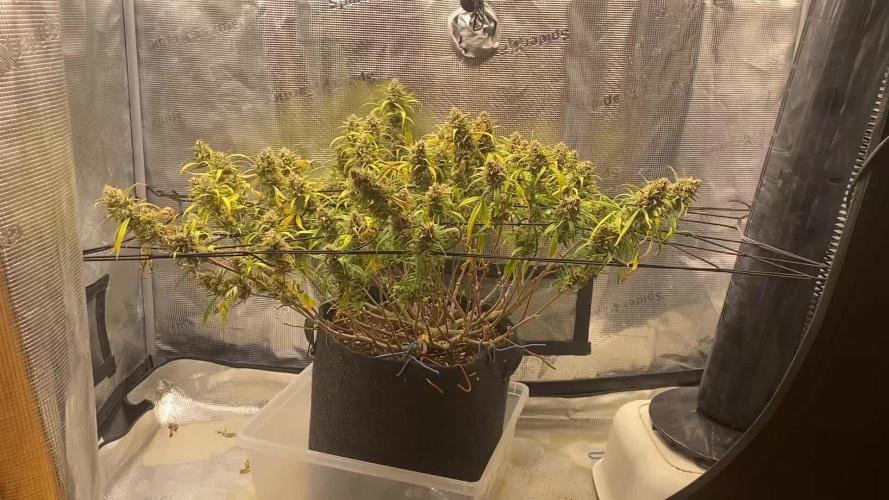
Terps on point on each pheno , 2 of them turned killers, it’s a pity I didn’t save any clone.
after almost 2 month cure and testing with Gemma cert the THC levels were around 16%. The plants were initially growing in a tent, were moved a lots. I hope that I will be able to achieve higher results with fast buds in the future. Despite the small number , the hit is really strong and has an indica side to it .


Likes
6
Share

Likes
3
Share


@CeGrow
Follow
week 3
day 16: about 15cm in height
day 17: about 16cm in height
on day 17 I repoted her into a 12 litre pot
I set her deeper in the soil, about 3-4 cm
Soil: compo sana classic Qualitäts Blumenerde
day 19: I started LST (see video)
day 20: further LST
I think she is doing well so far
during night every second day under the lamp

Likes
10
Share


@KurtThePlantGuru
Follow
Things have been coming together very nicely, packing on very nice frost, buds have been foxtailing not too much but just enough, in result I lost some density to the buds which I don't particularly mind (my preference).
The Terps are really nice and has simplified compared to last week when they were ever-changing. They know boast a black Cherry Punch forward Superboof flavor. Notes of ripe/rotten dank black cherries with that classic Superboof Orange rind/dankiness. The leaf rub gives a more sweeter black cherry wine almost smell with hints of bubblegum.
Very nice change from the usual candies you see constantly nowadays.
This is a dank one, every morning I wake up to the dank dank aromas of this plant filling the house. Quite a beautiful thing if I may say.
All in all, one of my most favorite grows I've done too date!
She's getting close to harvest if day another 2-3 weeks at most! Gonna check on trichomes soon but she's absolutely covered in trichs! I'll try and get better pictures!

Likes
59
Share


@Coopmc
Follow
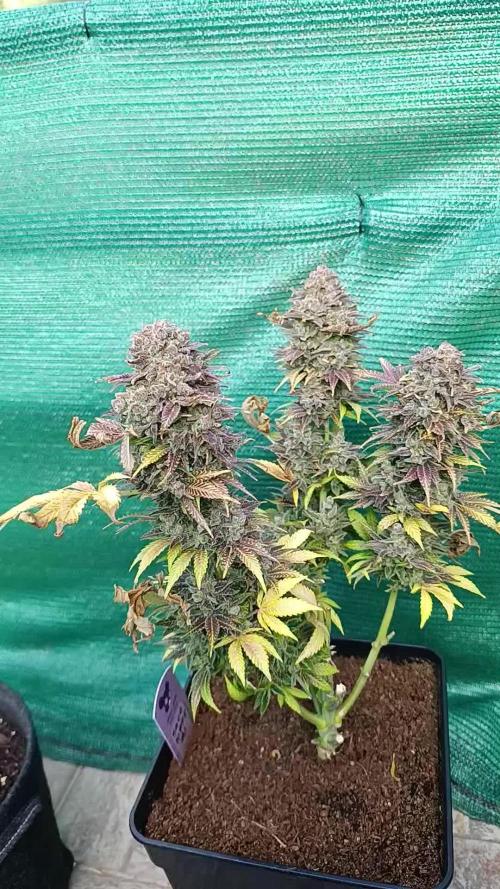
Two distinctly different phenos one smells a bit sharp Citrus on Berry the other is a soft sweet skunk smell
Chelated LW 2 give her a week LemonWalker 1 gets 2 more weeks
Likes
81
Share


@Hou_Stone
Follow
Récolté 53ème jour de floraison
Superbe variété vraiment productive et avec une odeur de bonbon sucré 😋
Mon Instagram 👊
https://www.instagram.com/hou_stone420/

Likes
31
Share

@420DeepGrow
Follow
📆 Semana 12
Cogollos completamente maduros, duros, compactos y con una producción de resina muy alta. Los tricomas se encuentran mayoritariamente lechosos con presencia creciente de ámbar, situándose en plena ventana de corte.
Aparecen tonos finales morados y rojizos, acompañando el fade natural mientras la planta consume sus reservas en hojas grandes. La estructura se mantiene firme, sin cambios más allá del acabado final.
El perfil aromático está en su punto más alto, intenso y bien definido, reflejando una maduración completa.
Lista para cosecha según el efecto buscado. 💪

Likes
9
Share


@Siriuz
Follow
Alright guys so last time we went from 1400 to 900 ppm only adding plain water
She is doing great, developing more new buds and fattening those small pop con buds you get below where lights wont get thru with that much intensity....
Smells wicked good and should taste awesome once its dried and cured
Im still going to week some more weeks
I dont know if is the region but my plants over here since is always spring and SuMMer they tend to produce and last longer i just noticed because even tho we at week 15 they still growing new buds which is kind of amazing
I still got one gorilla girl xl
This one is going to grow using only
LST / HST and defoliation at the latest
Otherwise it will slow down production
Learned the hard way with this strain
My first one died the second one got eaten by a worm go figure and this third seed made it so far and when she was flowering I accidentally main line her, good thing duct tape was near me so I could help her heal and with so much caring she was finally up again and did not lose any buds but that took too much energy while pre flowering did not create many spots but good dense fat buds full of crystal and at least you get to see those impressive colors
Thanks for giving me support
Likes and comments are always welcome
You can also suggest me things as well
I am all ears brothers happy growing
Follow me for more at the Instagram
@cannagrowersiriuz
Have fun
P. S.
ADDING MORE CONTENT AS IT GOES!
Enjoy the videos and my thoughts about
Gorilla Girl XL from sweet seeds
At week 15 from seed
Schedule 18/6

Likes
31
Share


@Callys_Garden
Follow
I've realised I've got my weeks mixed up somewhere! This was 7 days after the last update.
Likes
1
Share

@PapaTerps
Follow
British Delight - Wizard Trees
Day 55 - Watered with 2L of RO tap water with nutrients mixed individually and in order, then finally pH'd to 6.3. She has stretched really well, but is quite bushy, so she'll require a good bit of defoliation at her canopy soon. I've lollipopped her to remove all her lower most nodes and leaves, allowing her to focus on developing her canopy 👍🏻

Likes
256
Share


@Terp1
Follow
12.09.2023
Tag 52 - Woche 8 / Tag 3
Licht: 45cm – 80%
Lichtzyklus: 18/6
Luftfeuchte: 58%
Temperatur: 26°C
VPD: 1.4 kPa
Bemerkungen:
Höhe Apricot: 46cm
Höhe Watermelon: 34cm
Es gab ein paar Probleme mit dem Mischungsverhältnis, aus dem die viel zu zeitige Blüte der Wassermelone und guter N Stress bei beiden Damen hervor ging. Insgesamt haben die Beiden das Alles aber gut überstanden und hauen nun dicke Nuggets raus. Ich gieße täglich gut 2 Liter H2O an die Damen und genieße ihren Duft nach Feierabend. 😍
Es gibt mehr Updates die Woche.
##########################################################################################################################################################################################################
15.09.2023
Tag 55 - Woche 8 / Tag 6
Licht: 40cm – 80%
Lichtzyklus: 18/6
Luftfeuchte: 60%
Temperatur: 27°C
VPD: 1.5 kPa
Bemerkungen:
Ich habe es ein wenig mit dem Wasser übertrieben. Die Wassermelone zeigt Anzeichen von Überwässerung (könnte auch N sein). Aber nur wenig, deswegen mache ich mir keine Sorgen. Freunde, es geht weiter mit dem großen Wachsen.
Es gibt einen Neuankömmling im Zelt. Ich weiß noch nicht, ob es ein Tagebuch geben wird, aber die Dame wird zumindest immer wieder Gastauftritte haben... und es wird eine sehr schöne Dame werden... FastBuds Crystal Meth.
Terp 💪😎


Likes
16
Share


@Willy_Balls
Follow
27.11
Bud swell a little bit delayed because of the lower temperatures overall this time of year.
It is around 21-22 degrees inside the tent in comparison to 26 in the summer.
I hope they will be done by Christmas. I ve had a little problem at my spot and have to clear everything out for a few days. Bummer.
Plants are on vegetative irrigation schedule. 6, 150 ml shots followed by 3 replenishment shots. About 10-15 % runoff.


Likes
16
Share


@eldruida_lamota
Follow
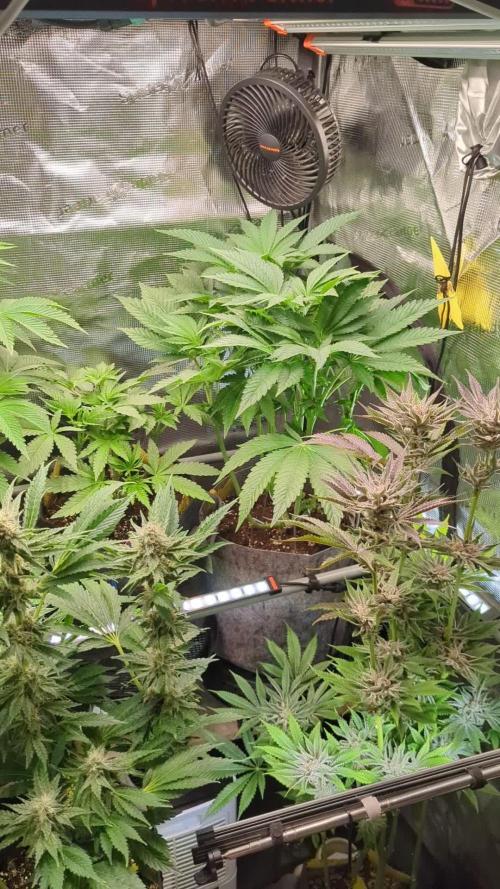
Que pasa familia, va de vuelta empezamos con la floración, primera semana con el foco cambiado a 12/12.
Aumentamos un poco los nutrientes, todo va bien están sanas van vigorosas y poco a poco van estirando.
Hice poda de bajo esta semana, aproveche para sacar esquejes y regalarlos a un amigo cercano.
En las fotos podréis comprobar que hay distintas podas en cada ejemplar pero los bajos la llevan todas.
Han empezado a marcar sexo, parece que todas son hembras.
Tengo muchas ganas de seguir progresando este proyecto semana tras semana, y ver al final los resultados en si, buenos humooos 💨💨

Likes
8
Share

@all_about_420
Follow
Am Tag der Ernte zeigt die Purple Lemonade eindrucksvoll, was in der Fast Buds Genetik steckt. Die Pflanze steht in perfekter Struktur da: Die Colas sind massiv, steinhart angeschwollen und biegen sich fast unter der Last der harzigen Blütenmasse. Die herbstliche Auszehrung (Fade) hat perfekt gegriffen, während die tiefen, lila-purpurnen Kontraste in den Buds im Zusammenspiel mit dem extrem dichten, weißen Trichomteppich für eine mörderische Bag-Appeal sorgen. Alle Stigmen sind restlos braun eingezogen – das absolute Maximum an Reife und Potenz ist erreicht. Mit diesem makellosen Erscheinungsbild verabschiedet sich die Pflanze direkt auf die Trocknungsleine. Ein absolut legendäres Finale!
Likes
15
Share


@CornishFarmer
Follow
--- Day 43 ---
15/06/2021
Starting to water 3L today, she's looking really good. Shes finally starting to stretch out a bit, up till now her canopy was quite crammed and close. Some of her branches are starting to grow up and the whole thing is stretching out a bit, which is nice. She's now 51cm/20" tall.
I've watered her again with 3l of 23C, 1000PPM, 6.0PH water with the above nutrients
--- Day 44 ---
16/06/2021
I'm really happy with the way her canopy shape is looking, it's all pretty even and level, considering the accident I had, I think she's doing just fine.
I've watered her again with 3l of 23C, 1000PPM, 6.0PH water with the above nutrients
--- Day 45 ---
17/06/2021
She's now just over 23" tall and she's filled the tent. The light is as high as it can go, and she's touching the walls of the tent. She can't get any bigger, else we have issues. I'm going to have to get a bigger tent...
I've watered her again with 3l of 23C, 1000PPM, 6.0PH water with the above nutrients
--- Day 46 ---
18/06/2021
Shes now over 24" tall and she's filling the tent quickly. Also, I noticed today the first signs of her going into preflower, you can see really small white pistils showing 😀
I've watered her again with 3l of 23C, 1000PPM, 6.0PH water with the above nutrients
--- Day 47 ---
19/06/2021
Shes growing really well, there are so many bud sites growing on her now, it won't be long before I'm watering 4L.
I've watered her again with 3l of 23C, 1000PPM, 6.0PH water with the above nutrients
--- Day 48 ---
20/06/2021
Shes starting to get way too big for the tent, I'm going to need a larger one. The humidity is also worrying, it's constantly at 98% even with the dehumidifier and ac on.
I've watered her again with 3l of 23C, 1000PPM, 6.0PH water with the above nutrients
--- Day 49 ---
21/06/2021
So, I got a new tent. I went from a 60x60x160cm one to a 90x90x200cm one. Ive also upgraded to the AC Inifity T4 extractor Fan system to help with the ventilation and humidity issues, it's really cool. I'm going to start watering 4L tomorrow. She's looking really good.
I've watered her again with 3l of 23C, 1000PPM, 6.0PH water with the above nutrients

Likes
17
Share


@AmokNewb
Follow
So where to begin I got 108.83 ounces wet from two plants in a 2.3x2.3 on my first attempt not including larf. I can’t complain about that. Took me 14 hours to trim the last plant and boy that was a marathon.
I will update this once I get some dry weights and everything goes into curing.

Likes
12
Share


@Aceboogie441
Follow
Sorry been away for so long. Been super busy at home and at work. Had turned my favorite pheno of the zkittz berry ade and turned into mother
