


Likes
Comments
Share


@Peeman
Follow
Oct.7 day 68 buds are still stacking and getting harder every day & trichomes on all plants are now milky except for Trainwreck #2 which has turned into a long flowering sativa. Powdery mildew has gotten a little out of control on most of the potted girls so I started the long & tedious task of harvesting 1 plant per day starting with Blue Fire #1. Being a one-man operation I’m not looking forward to all the work that lies ahead however judging by the look and smell of these babies, should be well worth it in the end.
Oct.8 day 69 cut down all the main colas on Blue Fire #2 & Strawberry Banana #2. Giving the lower branches a few more days to finish then chop chop and into the freezer. 😜😁👌
Oct.10 day 71 cut down all the main colas on Godfather OG #2 and keeping the rest for fresh frozen water hash. Also started trimming Godfather OG #1 eight days after she was harvested. First time drying in the garage which is detached from the house and is not insulated. Average temps in there this week were low 50's-60's F and 55-70% humidity. My concern was temps being too low and the fluctuating humidity. So far after eight days of hang drying in the garage with 2 small fans lighty blowing directly on the colas, God father OG #1 was dry and ready for final trim. That worked out better than I hoped. 🙌
Oct.11 day 72 Trainwreck #2 got chopped whole and is hanging. I would normally trim it up quite a bit before hang drying but I need a break today.
Oct.12 day 73 Strawberry Banana #1 finally got chopped today. I shot a video of it in time lapse which compresses my five hour chop time to about one minute.
That concludes the harvest of all my outdoor girls this season. Stay tuned for more photos, final weights and reviews.
...till next time
Thanks for stopping by
See ya and stay safe


Likes
15
Share


@DRO420
Follow
Just repotted these clones ... They have amazing roots... Looking very healthy

Likes
7
Share

@MrLahey
Follow
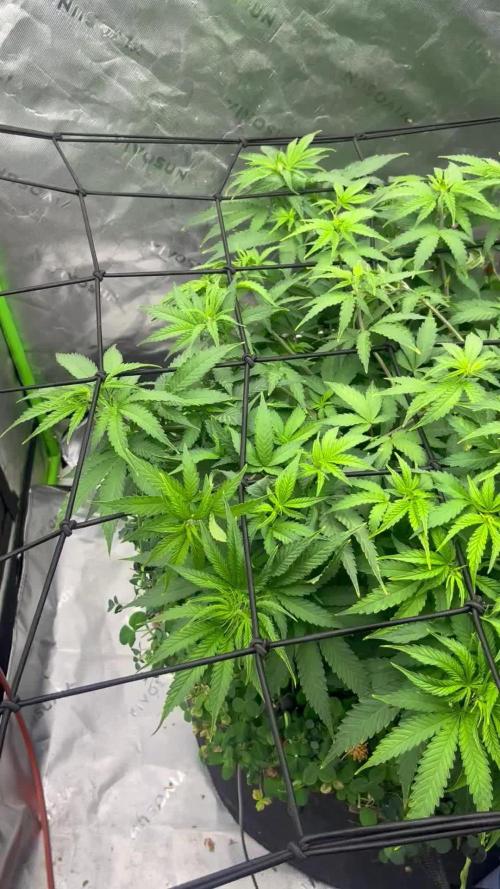
Flipping to flower in the next day or so. Will do a big defoliation on the bottom portion of the plant. She is bushy!



Likes
6
Share


@traxxx
Follow
Monday the seeds came and I started 5 blueberry kush autoflower from Nirvana. The plan is to put the best 2 in the grow tent the rest outside in a fabric pot .
Likes
58
Share


@GreenHouseLab
Follow
143gr for the Larger pheno and 97 for the shorter, very respectable yield in total for 3 Wk Veg. Total 240gr even they each had 1.5’x1.5’ of space. Big yielder, buds are 10/10 & very easy to grow . Could be prone to mold in an uncontrolled environment.


Likes
15
Share


@SweetheartOG
Follow
Girls are doing well with the LST. Kosher cake was topped last week and now has what looks like 8 heads.
3rd of June have given the girls living soil veg.

Likes
30
Share

@Naujas
Follow
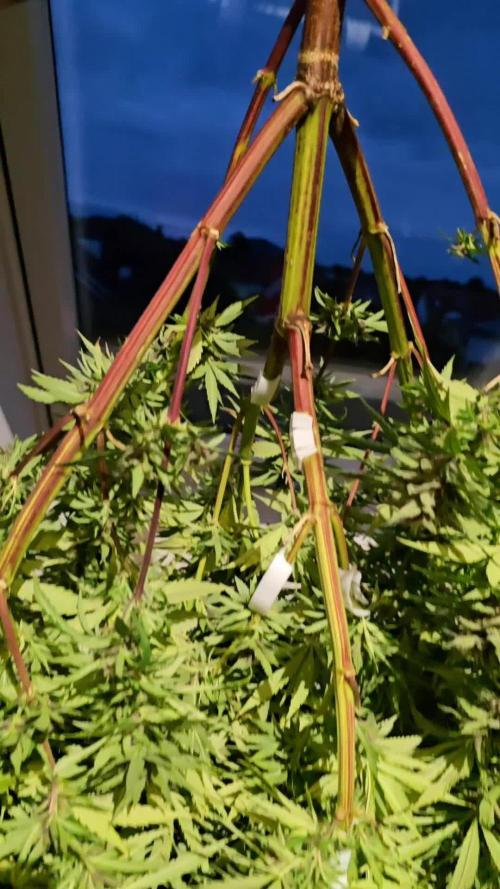
159 dienos!!! Na, mano projektas baigėsi, tad visas šis augimas buvo neįtikėtinai įdomus :) ir aš jau pasimokiau iš savo klaidų ir padariau išvadas, ką kitais metais darysiu kitaip :) Nors tai autoveislė, jai prireikė daug laiko, kol pražydo, todėl mano balkonas ilgai buvo gražus :) jai reikėjo dar savaitės brendimo, kad išskleistų apatinius žiedus, bet, deja, oras labai pablogėjo ir pradėjo daug lyti, per vieną naktį pamačiau 2 supuvusius pumpurus, tad nerizikuoju ir nuimu derlių :) „Biotabs“ maistinės medžiagos išgelbėjo šį augimą, nes turėjau atostogas, kai mergytė liko viena, tuo metu negalėjau jos maitinti vandeniu su maistinėmis medžiagomis, išskyrus gryną vandenį per atstumą su „Wi-Fi“ laistymo įranga, todėl nusprendžiau į žemę pasėti „Biotabs“ tablečių (jos nuostabios), žydėjimo metu vis duodavau jai papildomų „Plagron“ stimuliatorių (jie fantastiški), po pirmojo laistymo pastebėjau ryškų, gardų terpenų kvapą, o jų žieduose gerokai padaugėjo :) Taip pat surinkau daug cukrinių lapų, iš kurių gaminsiu burbulinį maišą :) taigi, apibendrinant: neįtikėtinai smagus augimas, daug sėkmių, įgijau naujų žinių, kiekvienais metais mano mergaitės atrodo vis geriau ir geriau, esu labai laiminga :) ir sėkmės visiems, (po derliaus nuėmimo bus atnaujinimas :)).
Likes
28
Share


@eldruida_lamota
Follow
Que hay familia, vamos con la octava semana de floración de estas Apple Fritter de Zamnesia.
La temperatura está entre los 21/24 grados, la humedad está entorno al 55%, y el ph lo mantengo ahora al principio en 6.2, el foco por supuesto está enchufado 12 horas , estan creciendo bien fuertes.
Y aparte añadimos nutrientes de Agrobeta, que no puede faltar semejante gama.
Todo correcto hasta ahora, ya van madurando las flores y ya están bien resinosas, estas próximas semanas veremos cómo avanzan.
Os comento que tengo un descuento y para que compréis en la web de Zamnesia de un 20%, el código es ZAMMIGD2023
The discount 20% and the code is ZAMMIGD2023
https://www.zamnesia.com/
agrobeta: https://www.agrobeta.com/agrobetatiendaonline/36-abonos-canamo
Mars hydro:
Code discount: EL420
https://www.mars-hydro.com/
Hasta aquí es todo, buenos humos 💨💨💨.
Likes
4
Share


@Ryno1990
Follow
The Snow Panda from Atlas seeds is looking good so far on her 2nd week of veg starting to shoot up under this medic grow fold 6
Snow Panda from Atlas seeds is comming along good as shes starting to pick up a little size
Likes
16
Share


@valiotoro
Follow
Hello everyone, all good for this week 😎
They grow fast and with a beautiful green colour on the leaves!
In this grow i will be testing out Plagron Nutrients and Spider Farmer SE7000
Tropicana Cookies from Fast Buds 🏝️🍪
Likes
37
Share


@Aedaone
Follow
The temperatures, humidity, height, and watering volume(if measured) in grow conditions are all averaged for the week. The pH is soil pH. Any watering done by me is well water which is 7.6 pH and 50° F. Any listed nutrients are ml/gallon of soil spread evenly across the top of the soil.
Day 1 we had high temperatures of 79° and skies were mostly cloudy. The lows at night have begun to drop below 60°F. It has been extremely humid with tons of dew in the morning. I'll continue to defoliate and spray with biofungicide to get this powdery mildew under control.
Day 2 we had early morning rain followed by mostly cloudy skies. High temperature was 77. The rain took care of the watering today. I'm treating with arber again and more defoliation.
Day 3 we had a high temperature of 81°F, skies were partly cloudy, and I watered 3-4 gallons from the hose.
Day 4 we had a high temperature of 83° with sunny skies. I watered 4-5 gallons from the well. I treated with Arber.
Day 5 we had a high temperature of 88°F. Skies were clear and sunny. The humidity was around 90% today. I watered 4-5 gallons from the well. I finally got most of the infected leaves off and have one more plant to do tomorrow. I treated with Arber again today.
Day 6 we had high temperature of 89°F. Skies were sunny. I watered about 4-5 gallons with well water. I've been treating these with Arber biofungicide but it's hasn't had much affect. I stripped all the infected leaves and lollipoped two today. I'll get the third tomorrow. I'll treat these tomorrow with growers ally fungicide and see if they can be saved.
Day 7 we had a high temperature of 86°F with partly cloudy skies. We're expecting rain tonight and it's super humid today. The weather is not cooperating while I'm treating for powdery mildew.
This week was a success. The plants gained on average 6 inches in height. They've slowed down their upward growth and are transitioning into flower. The weather has been atrocious for cannabis. These girls are super healthy but the humidity and cool nights have caused perfect conditions for powdery mildew. I began treatment with Arber biofungicide, but it wasn't doing much. I lollipoped and defolated heavy on two of the plant and finished the third after photos on day 7. The non infected leaves are responding ok to the Arber. I'm switching now and will treat late day 7 with Growers Ally fungicide. I defolated pretty heavy, but I expect a full recovery and increased production as there will be more light penetration.


Likes
9
Share


@GardenOfHerbs
Follow
pics are from right before harvest on day 60 of flower. 9.5 weeks of flower


Likes
14
Share

@Erik99
Follow
Muy contento en esta tercera semana de flora, se le hizo la ultima limpieza de bajos y un poco de defoliación.
Ya se pueden apreciar perfectamente las preflores y sus distintas coloraciones, ya que al ser de semilla aunque todas sean la misma variedad cada planta muestra sus fenotipos dominantes.
Likes
31
Share


@Sider79
Follow
First week flush with off gassed tap water at a ph of 6.5 to 6.9. I'm pushing them extra long and so far results are responsive and look very promising 🍾 . On the suvineer box the seeds came in was labeled with 7 to 8 weeks indoor an 9 to 11 weeks outdoors.
Very happy with this from Victory Seeds ..... dripping with resin. 👌🤪👍

Likes
13
Share


@TrueNorth
Follow
-Strain: Cream Cookies - Fast Buds
-Tent: 5x5 Gorilla Grow Tent
-Lights: Budget LED Grow Lights 2 x 250 Watt
LED Full Spec/Red Spec mixed boards
-Light Cycle: 18/6
-Soil: Fox Farm
-Air Circulation: AC Infinity Cloudline T6 Inline Duct Fan
WECLOME BACK GROWMIES! Week 12 here with our CREAM COOKIES by Fast Buds!
February, 09, 2020 (DAY 78) - YOO GROWMIES! Welcome to week 12 of our CREAM COOKIES! week 6 of flower to be exact! She is so thick it blows me away, i remember how affraid and sad i was when it wasnt working out in the beginning but like everything else in life with patients you will see progress and growth, and you to will succeed. She is stacking and thickening out more daily and im so happy.
purple hues in the buds are appearing and it looks great, trics are everywhere.
February 12, 2020 (DAY 81) - WHAT UPPPPP!!!! here we are folks another update. the purples are getting so VIBRANT!!!!! think she is getting flushed starting this weekend. this will be the last feed then its onto that FLAWLESS FINISH by ADVANCED NUTRIENTS. hopefully im making the right choice......maybe another week wouldnt hurt....


