





Likes
8
Share


@Elguacho420
Follow
Buenas a tod@s... Bueno otra semanita más para las niñas... Las dark devil... De momento va todo bien, todo en orden, las eh pasado a la maceta de 7 lt para q ya estén ahí, un buen sustrato y un poquitito de nutrientes para las raíces... A esta altura no podemos hacer mas q darles cariño y dedicación... De momento esto, luego más y mejor, a seguir trabajando duro... 💪🏻💪🏻 Buenos humos para tod@s... 😎⚕️💪🏻💪🏻
🇦🇷🤝🏻🇪🇦


Likes
31
Share


@The_Doctor_Green
Follow
Hola a todos! Esta semana relice 2 riegos foliares una con aceite de neem para controlar unos trips que han aparecido y otro con un fertilizante organico MEN. Luego otro riego con PS.
La planta de tierra la voy llevando para los costados para que no crezca para arriba, ya que de noche la luz de la calle llega a donde esta.
Likes
2
Share


@CuriosityWebster
Follow
Loving how these girls are growing
Fastbuds mystery #1 finally catching up, and may possibly in the end being a better producer than the RQS plant, which is surprising to me because of how badly I stunted this plant. Got me curious how good this plant could’ve been
Likes
18
Share


@PakkaFarm
Follow
Defoliation day 33.🌿
Humidity variation 40-70%💧
Start with 1ml/L bio bloom and top max day 35
Likes
18
Share


@lino06000
Follow
09/08/22 1 er jour 2eme semaine jusque la tout va bien! j'ai entamer le programme de nutriment de bio biz les pots en tissus me plaise énormément.
12/08/22 elle s'adapte très bien, je suis le processus bio bizz a la lettre pour le moment je lui donne 500ml a 800ml par arrosage.
16/08/22 bonjour dernier jours de la semaine qui c'est très bien passer r.a.s ,mademoiselle mesure 9 cm et bien portante
Processing
Likes
32
Share


@PuffPuffy
Follow
========27.9 - day 37======
Not looking any better today ,little bit more yellowing and dying foliage.
******** Fed all the plants 🌱 with a mild strength EC 0.7 PH 6.5 ***********
========28.9- day 38=======
today I see some perky top leaves on the widow and the banana 🍌
hopefully This is some signs of recovery....
Cleaned off the dead leaves 🍁 And not doing much today ,letting soil dry ...
what do you guys think about this ? The strong ec helped bring plants to life or was it the mild feeding that did the magic ? Let me know what you think in the comments below 🙏👊much love to all the
awesome growers on this platform for sharing your knowledge and time with noobs like myself 🌱🙌💪💚
=======29.9 - day 39=======
Just fed 650ml to all plants with 1.0 ec 6.5 ph , heaven grow and bloom .
=======30.9 - day 40=======
Plants doing they’re thing , I fed yesterday so nothing today ...
Took some photos when hps turned off...
Also looking to buy new led grow light the hips electric bills and temperatures are too high ... I’m done with that nightmare 😂🤯
Next diaries will be led 👊
=======1.10 - day 41 =======
Pots are light so all been fed again , this time added TOP MAX into the mix ( 1.5ml per liter)
PH 6.3
EC 1.0
Praying leaves on the banana and white widow again
=======2.10 - day 42 ======
Drying out and chilling :)
Still not so sure I fixed the problem 100% , not exactly what I was hoping for with this grow ...
I’m sure this will mess with the final results 🥊 Good chance for learning a thing or two.


Processing
Likes
24
Share


@Grnhead
Follow
This was a fantastic plant to grow, and although it doesn't have the strongest resistance to mold, I think that if I were to grow it again I could avoid the issue.
I am starting to figure out how to maximize my grow space! Come check out my next grow when you get a chance!


Likes
21
Share


@NSABND
Follow
Hi there start of week 11 today 😏
today (Day 78) the weather is cold and very high humidity because of rain 😲😩😕
Day 79 same shit weather then yesterday with very high humidity and rain 😵😲😵😲😵
Day 80 autumn has arrived 😱😨😰 cold with rain and high humidity 😲😵😭
Day 82 there are no Updates sorry 😵
Likes
6
Share

@Northern_Ent
Follow
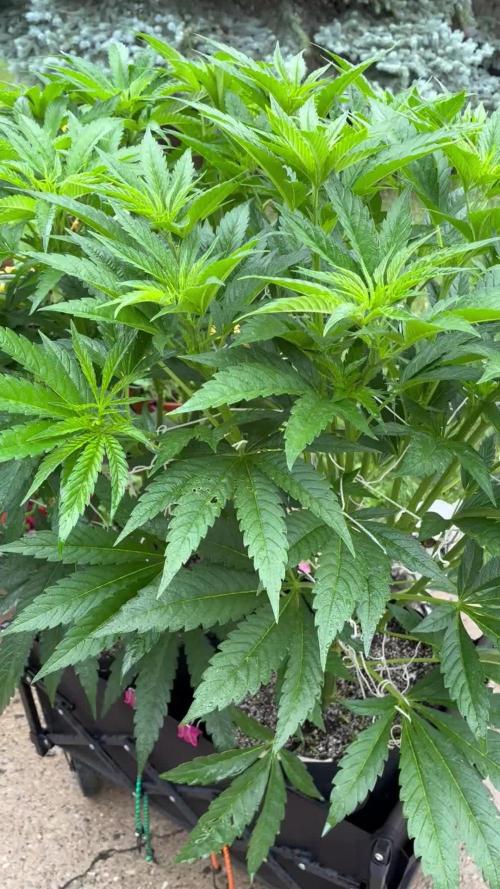
July 19: first night of force flowering last night. Plants in dark garage at 9:30 pm and out again at 7:30 am for 10 h darkness.
Also using 730 nm far red light at transition to dark which puts the plant into dark mode two hours faster so it’s like getting a 26 h day with 12 h of darkness.
Force flowering for 2-3 weeks to make a solid transition into flowering and to get the buds ripening under the stronger summer sun.
July 22: Foliar spray with Epsom salts and potassium silicate this morning. The magnesium in the Epsom salts seems to help with yellowing on the new growth.
July 23: added another loose Scrog net layer. Tied to water bottles to open up the canopy to sunlight.
July 25: watering yesterday included some water leftover over from steaming beets for dinner. That likely contained lots of N because beets are high in nitrate and the plants are very green this morning.


Likes
139
Share


@JieGrow
Follow
Well we started flushing the day after we updated the last diary, so it is our end week for our first grow and I must say, it's been a roller-coaster but we made it there in the end lmfao!
Critical kush has been amazing to grow, she has stood strong throughout all the stress I've put her under with my learning mistakes and she has still turned out superb, I'm looking forward to smoking her if she smokes as good as she smells then ill be amazed! The smell she gives off is a fruity, sweet smell with a strong undertone, hard to explain but it gets my taste buds going! 6 hours later and hella sticky fingers... not my usual type lol... We have the girls down and trimmed, the wet weights are below from each plant and we have separated them in different tiers in the drying net so we can show an accurate wet and dry weight from each plant, intrigued to know how much we will loose once dry as the wet weight is a whopping 1,405g!!
Plant one weighing in at 261g
Plant 2 is weighing at 242g
Plant 3 is weighing at 236g
Plant 4 is weighing at 321g
Plant 5 is weighing at 345g
51 ounce wet weight with slight stems.
Will update harvest section next week once dry :)
Happy growing!
Likes
6
Share


@Izlti_ocelopilli
Follow
I’m using KIS organic a soil with fermented inputs and water soluble calcium, I’m using a KNF bloom and FPJ for nitrogen, and aloe for vitamins, and humic and amino acids. NO chemical fertilizers

Likes
Comments
Share

@Bdog7878
Follow
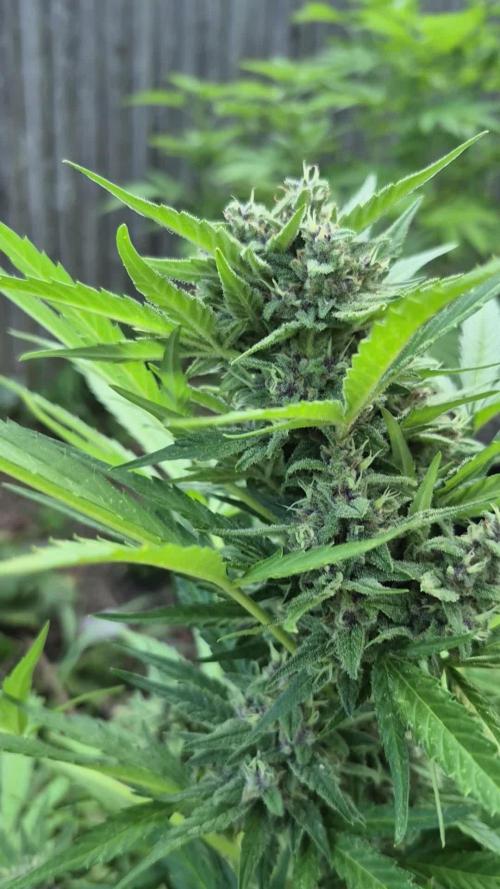
Everything is good been feeding light doses every other water and using recharge the other watering. Buds are stacking nicely and trics are building. The purple one smells unreal and the other one has some serious trics and definitely some purple hues coming in. Still got a couple weeks left. The purple one looks insane i personally haven't grown something anything close to this purple so im pretty happy with this strain. It has been super easy to grow i had a few issues through the grow but they came out great
Likes
10
Share


@MooseMan420
Follow
The video is actually from 4 days after I planted my germinated seed. Found the vid after I already posted Week 1! With the seed being an autoflower I was worried it looked a little small at first, but I was wrong...

Likes
43
Share


@420DeepGrow
Follow
Gracias al equipo de Kannabia Seed y XpertNutrients, sin ellos esta magia no seria posible.
🍁💐 Runtz (Auto):
Si esta cepa se ha ganado su popularidad a pulso, esta versión autofloreciente es digna heredera de sus atributos. No es de extrañar que nuestros criadores hayan acertado con su programa de reproducción, al combinar dos de las cepas más fascinantes de la actualidad: Zkittlez y Gelato.
planta resistente y robusta, de cuerpo esbelto y fuerte ramificación lateral, que se puede cultivar prácticamente en cualquier entorno; pero prefiere los veranos largos y cálidos, tal y como quiere la madre naturaleza, donde bañada por el sol se eleva hasta los 120 cm. para producir unos rendimientos muy gratificantes de 100-150 gramos por planta.
En interior, y tras solo 70 días desde la semilla, también recompensará con cosechas abundantes de hasta 500 gr./m²
Inmediatamente después de encontrarte con ella, lo primero que notarás es su aroma descaradamente afrutado, con un toque tropical cortado con reminiscencias terrosas y amaderadas, que se entremezclan de forma agradable para ofrecer un combo que hace salivar las papilas gustativas.
Ofrece un sabor confitado, refrescante y similar a sumergirse en una piscina de frutas cítricas y flores de fragancia intensa. Al inhalar, obtienes la bondad de la dulzura; al exhalar, el humo se convierte en suave y cremoso, dejando suficiente profundidad en cada bocanada para satisfacer a aquellos que buscan los matices más complejos.
⛽ XpertNutrients: es una empresa especializada en la producción y comercialización de fertilizantes líquidos 🍶y sustratos🐛, que garantizan los mejores resultados y cosechas de la más alta calidad. A través de una cuidadosa selección de materias primas y un proceso de producción avanzado, sus productos son sinónimo de resultados confiables.
🛒 Consigue aqui tus fertilizantes:
https://xpertnutrients.com/es/sobre-nosotros/#:~:text=Xpert%20Nutrients%20es%20una%20empresa,de%20la%20m%C3%A1s%20alta%20calidad.
📆 Semana 8:
Se pueden apreciar unos lindos erizos 🦔, pese al mal tiempo que hizo un par de semanas atras, el tamaño está quedando bastante bien XD.
Ahora empieza a cargarse de resina y a formarse los futuros cogollos 😍✌️

Likes
4
Share


@distant_lights
Follow
first week of flowering ...
vegetation phase done,i think,greatly...
looking forward..
23 january 2019
__________________________________________________
Likes
44
Share


@Cogollo_eu
Follow
**Encontrarás la traducción a español al final de la descripción**
From/Desde: 22/03/19 || To/Hasta: 28/03/19
From day/Desde día: 29 || To day/Hasta día: 35
You can find the Money Maker Diary here:
** Podéis encontrar el diario de las Money Maker aquí:**
https://growdiaries.com/diaries/25667-gorillamakingmoney-gorilla-vs-money-m
-----IMAGES & VIDEOS-----
Video 1:
Exactly the same video as 2 but accelerated +400% to fix it to 1 minute for instagram.
Video 2:
7 days (29~35) TimeLapse, 1 image each 60 secs @ 30 fps
Video 9:
An overview video not as awesome as it's music 😂💪
Video 10:
Myself working on the babies, lowering tops, topping & training.
Video 12:
Full working on the secondary Gorilla, twisting some branches, topping & training.
-----WEEK SUMMARY-----
Well, now i'm getting a bit scared as i adventured myself into Photoperiod, high training, full topping... in indoors at once. I feel that plants are going good, but i really don't know what am i doing, and if i'm doing well. Also i don't know how much time should i give them of vegetation stage, because i don't want to eternalize myself with this tent, so i'm planning to leave this upcoming 6th week and maybe the 7th of vegetation, but no more. Anyway they look pretty atm 😻. In video 10 the main-linning Gorilla suffered an accident as i grabbed the main left branch from a weak point and it has broken (sec 39 aprox.) so it has one less node than the right branch.
-----WATERING CALENDAR-----
24/03/19 - 1.000 ml with all week nutrients @ 0.9 E.C. PH5.8
*****ESPAÑOL*****
-----IMÁGENES & VÍDEOS-----
Vídeo 1:
TimeLapse, exactamente el mismo vídeo que el 2 pero acelerado a un poco más del 300% para ajustarlo a 1 minuto para Instagram.
Vídeo 2:
7 días (29~35) TimeLapse, 1 imagen cada 60 segundos @ 30 fps.
Vídeo 9:
Un vídeo general no tan increíble como la música de fondo 😂💪.
Video 10:
Trabajando en las pequeñas, rebajando las alturas, haciendo topping y entrenando.
Video 12:
Trabajando a pleno en la segunda Gorilla, girando algunas ramas, haciendo toppings y entrenándola.
-----SUMARIO SEMANAL-----
Bueno, ahora estoy empezando a estar asustado. Me he aventurado a probar con fotodependientes, entrenamiento fuerte y super topping, todo a la vez. Siento que las plantas van bien, pero realmente no se lo que estoy haciendo ni si lo estoy haciendo bien. También tengo dudas sobre cuanto tiempo más dejarlas en estado vegetativo ya que no me quiero eternizar con este armario, por lo que estoy planeando dejar esta sexta semana de crecimiento y quizás una séptima, pero no más. Aun así y con todo, las nenas se ven preciosas 😻. En el vídeo 10 sufro un accidente en la Gorila con main-linning ya que amarré el final del tallo principal izquierdo por un punto débil y este se partió (sec 39 aprox.), por lo que tiene un piso de topping de más en comparación con tallo derecho.
-----CALENDARIO DE RIEGO-----
24/03/19 - 1.000 ml con todos los nutrientes semanales @ 0.9 E.C. PH5.8

Likes
7
Share


@Cultivatorcarlos
Follow
Week 7 she is fat af and sooo frosty. Camera honestly doesn’t even don’t it any justice and it still looks frosty on camera too. All videos and pics are from the same day which was week 7 day 1 of flower. Ive currently been flushing so only dechlorinated tap water phd to around 6.3-6.5. Ive been watering every two days. Im very excited to chop her down. She has a sweet smell kinda vanilla like honestly. She also smells super lemony like pinesol almost. I was also told it smelled like coffee Where as my last grow smelled just like skunky weed. This one definitely has more terps to it. I didn’t post week 6 and wont be posting week 8 or harvest. I will however post the trim day before curing the buds.