


Likes
Comments
Share


@Dunk_Junk
Follow
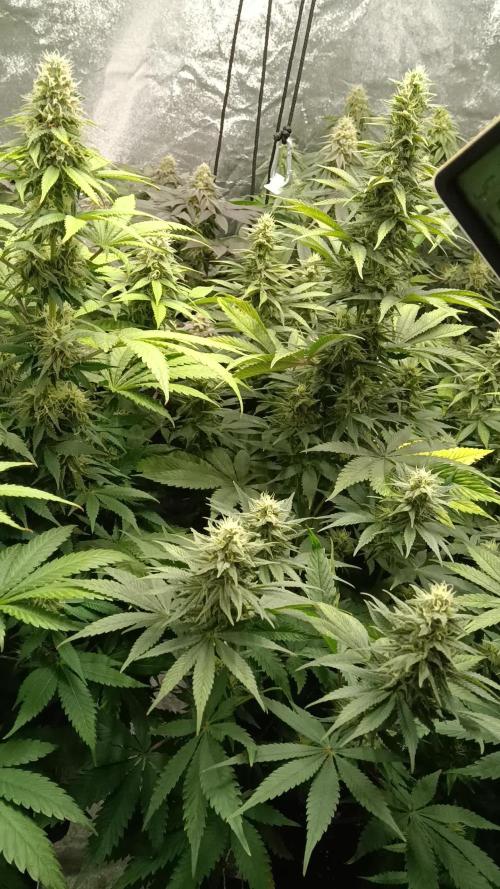
9cm vertical growth this week.
Lots and lots of flower sites. 😎
Very bushy.
Very Kushy 😂 😍


Likes
14
Share

@HazeLiebhaber
Follow
Die Lemon Orange und die Grapefuel Gelato haben bereits ordentlich an Blütenmasse zugelegt und auch so einige Orange-braune Pistillen entwickelt. Die beiden werden wohl als erstes fertig. KISS und Amnesia fangen gerade damit an, an Blütenmasse zuzulegen. Denke die beiden werden mind. eine Woche länger brauchen, um fertig zu werden, als die anderen beiden.
Die Pflanzen im Video: vorne-links Amnesia, hinten-links Lemon Orange, hinten-rechts Grapefuel Gelato, vorne-rechts KISS.



Likes
9
Share


@Naujas
Follow
the girl is hot, it's 31° in the tent, but she continues her work :) the rings look great:) the girl got 3 liters of water with 6.3 ph this week :) not much left until the finish line :)

Likes
13
Share


@Popothamio
Follow
Esta semana he empezado a regar solo con agua en teoría las plantas son de 55-60 días aproximadamente y el día 19 cumplen 60 días.. aunque los tricomas están 50% blancos y 50%
transparentes espero que maduren un poco más durante esta semana por que ya tienen bastantes signos de carencia en las hojas que les quedan por que se le han caído bastantes también


Likes
Comments
Share


@n1mbu5
Follow
OK guys I've shut them down to 4hrs light a day for 2 days now. They have really filled out those buds and are looking extra sugary.
I have been watering with 140ppm water at 6.2-7 pH with flawless finish for 6 days now.
I have just given them probably the last watering will leave them for another 3-5 days on 4hr schedule before turning lights off for 2 days and then harvesting.
Next diary will be the harvest!! I hope nothing goes tits up from here😂

Likes
12
Share


@NearlyDeadGrows
Follow
Week no.13
The Ice Cream Cake auto grows good.
She build her Buds day for day...
Bigger and Bigger.
She is already so sticky , i never had any Strain what whas so sticky like she is actually.
I am sure it is because i use the "Supplement" Lights ( I give more per Day )
And because i give her more P-K and the Nutrients from @xpertnutrients.
Lets see when she will be finaly finish
18.11.2024: Is it time to chop?
17.11:
Die Lady wächst immer noch.. Baut ihre Buds immer dichter und breiter!
Ist deutlich mehr "sticky" geworden. Der Duft ist wie eine Sinfonie von einer verbotenen Liebe

Likes
4
Share

@Durango
Follow
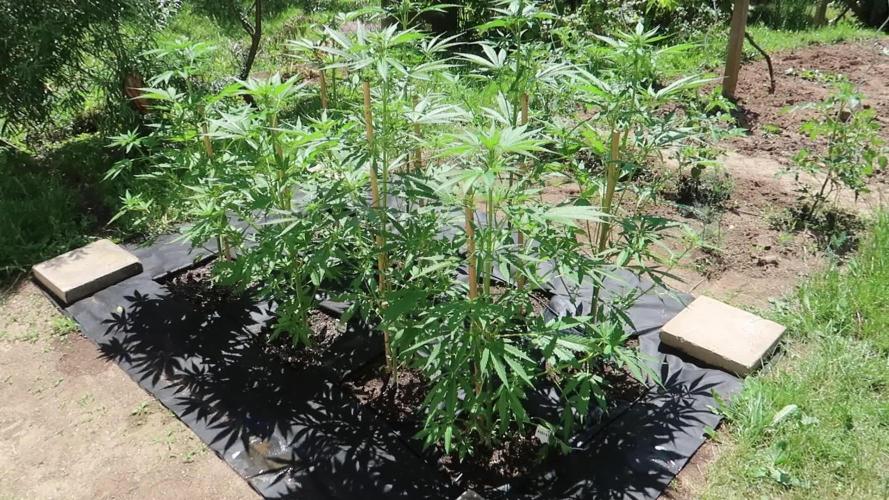
Hello everyone.Update from 6.6 2026.
All the plants have been blooming for a few days now. Two out of three lemons have purple buds and they bloom faster than gorillas.
Measure: Lemon Cherry Cookies from 92cm to 105cm, Strawberry Gorilla from 94cm to 119cm.
Likes
31
Share

@Kirsten
Follow
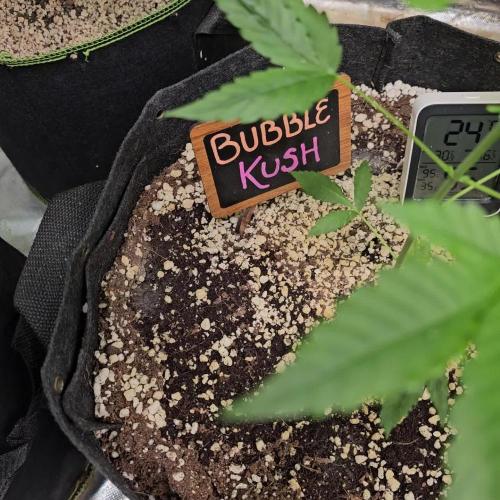
Bubble Kush.
This week, I FIM'ED the plant on 18.8.25. However, the new growth doesn't seem to show any more tops. I'm not sure what I've done there. but regardless, I will have to wait and see.
Other than that, everything is fine, and I'm happy with the progress this week.
The plant is still a nice, healthy green colour, and after I FIM'ED the plant, there was quite a lot of new growth.
20.8.25:
I watered with 2L of dechlorinated water PH'd to 6.0 with;
💜 2ml Trace
PH: 6.0
PPM: 340
The soil is still drying out due to fungus gnats appearing. I am getting some sticky traps, just waiting for tgem to arrive. There are so many, and it's definitely come from the soil. I am never using this again.
Thanks for checking in this week and hanging out in the comments 😊💚✌️🍃🙏

Likes
41
Share


@Hawkbo
Follow
They grew pretty well. Obviously 1 had alot more veg time and extra training where the other 2 had no training. Could have been better if I had both arms and didnt have the one bad feed where my meter was off and burnt the tips. Easy strain to grow I highly reccomend to any level grower.

Likes
459
Share


@Ju_Bps
Follow
Hello my friends 👨🌾👩🌾,
This week was good, I've continue to train the plants, I've removed some leaf 🍃,
Plant healthy with a sweet green and growing well 😊.
The Vanilla and the Bisous Au Thc, have a similar size, looking good for the scrog, after the fat banana harvest.
💦 I give water each 2 or 3 days
350 ml/plant
Water + rhizo + tera vega
Water + Rhizo + canazym
PH@6
Lamp is 100%
Thanks community for follow, likes, comments, always a pleasure 👩🌾👨🌾❤️🌲
Merry Christmas 🎅 🎄 and happy nice end year,
See you next week
Mars Hydro - TS 1000
https://www.mars-hydro.com/ts-1000-led-grow-light
Mars Hydro - FC3000
https://www.mars-hydro.com/fc-3000-samsung-lm301b-led-grow-light
Mars Hydro - SP3000
https://www.mars-hydro.com/sp-3000-samsung-lm301b-greenhouse-led-grow-light
The High Chameleon - Vannila T
https://www.thehighchameleon.com/shop/vanilla-t-5

Likes
6
Share


@RandomStreetMerchant
Follow
Premium cultivars has got a banger here, week 3 started the frost over.
The plant seems to be darkening up in a beautiful way, I love how this plant is looking!!!
She is starting to form nice dense buds these next few weeks will start to be even better.
Till next time growmies ☮️ 08/28/23
Edit: 09/2/23 holy shit guys this girl is putting out some serious frost wish I would have got a clone of her. But at least I got one more seed of this to make into a mother!!! 10/10 so far!!!!

Likes
34
Share


@PrairieFrostGrow
Follow
*****Week 13 growth – March 6 to 12, 2021 – Week 5 flower ******
These Mimosa girls are looking very well. Pheno 1 is going to be awesome to trim......very little leaf. As she matures the second pheno is looking better all the time as well. Buds are swelling and getting taller.
Bud Fusion being introduced this week. Into the last phase of feeding during flower now. Nitrogen is continued to be reduced as its late flower. Keeping up the feeding ppm this week as we are getting to the end. May be pushing them a little more than I should but finding out how they react for next run.
Still continuing to play with the light intensity and seeing how the girls react to my environment conditions when pushed harder. Could have backed off and stayed with 100, 300, 600, 900 PAR levels at the different stages but I have trying to go a little higher in the late stages and going over 1,000 PAR.
Little more detail…..
Mar 6/21, Day 29
- Dry out day
- Changed light cycle to 11/13 today to help with light intensity and reducing DLI.
- Light power reduced to 425 watts
Mar 7/21, Day 30
- Keeping up the feeding but reducing nitrogen.
- feeding with micro – 1.5, bloom – 2.5, ult B – 0.5, carbs – 1, B Storm – 2, S Storm – 2.5, Bud Fusion 0.15gr/l, Terp – 1.5, Jet Fuel – 0.5, Rezin 1
- 1150ppm and 6.0pH
- MM1 – 4L and MM2 – 2.5L
Mar 8/21, Day 31
- Watering with 2L feed from yesterday and 16L plain water
- Over shot the pH
- 400ppm and 5.9pH
Mar 9/21, Day 32
- Feeding again with Grow – 0.5, Micro – 1, Bloom – 1.5, Carbs – 1, Magnifical – 1
- Didn’t add many of the supplements
- 875ppm and 6.0pH
- MM1 – 4L and MM2 – 2.5L
Mar 10/21, Day 33
- Middle of the week and just giving some enzymes today
- Enzymes – 1.5ml
- 300ppm and 6.1pH
- MM1 – 4L and MM2 – 3L
Mar 11/21, Day 34
- Microbes again today
- Tap water with Jet Fuel – 1ml, Terpinator – 2ml, Nature’s Candy – 1.5ml, Rezin – 1ml, Ultimate B+ - 0.5ml, Recharge – 1tsp/gal
- 800ppm and 6.0pH
- MM1 – 4L and MM2 – 3L
Mar 12/21, Day 35
- Dry out day
- Been feed a couple of times this week so work with ¾ strength next week.
Likes
16
Share

@GoodTimesOrganics
Follow
Hi liebe Community and Welcome Back! 💚
Woche 12 im Vergleichsgrow seit dem Eintopfen!
Bio Tabs NL. vs. Weedefix (Stuttgart/ Germany)
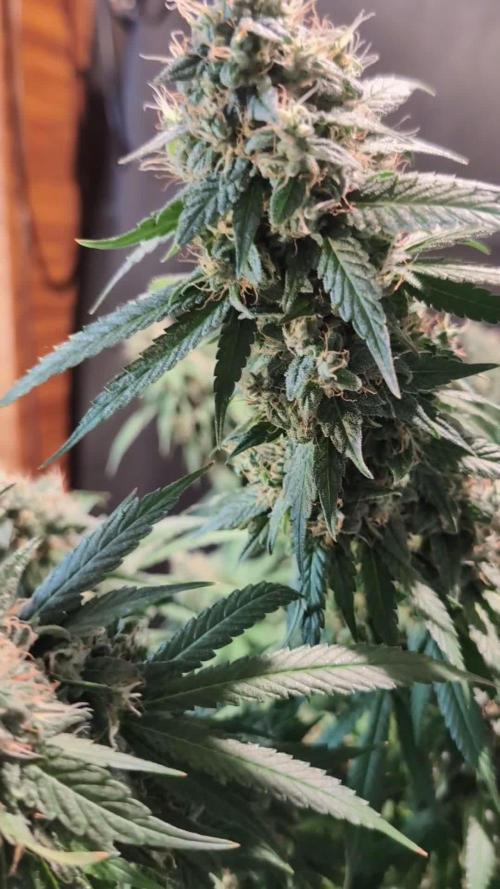
Blütetag: 50 (BW7)
Nach der siebten Blütewoche, performed aktuell die Weedefix Pflanze besser.
Nach wie vor ist der Zustand dieser Pflanze Tip Top.
Ich habe im Vergleichsgrow bewusst das ganze System an sich gleich gehalten, eben nur die Düngerkomponenten sind unterschiedlich.
Hier entwickelt sich alles wie es soll. Schöne Blütenentwicklung und eine Top gesunde Pflanze!
Die Blütenentwicklung bleibt bisher dennoch sehr ähnlich.
So langsam geht es Richtung Ende des Vergleichs.
Gegossen wird jetzt nur Wasser.
Die Bedingungen im Growzelt sind aktuell wieder top!
—————
🌞 Temp: 26
🌚 Temp: 18°C bis 19°C
💨 RH: 54%
VPD: 1,71 kPa
💡ppfd: 830 mpm
—————

Processing
Likes
10
Share


@mkrmkr
Follow
Completing the twelfth week.
Plant 1 - Completing the twelfth week of life.
Plant 2 - Completing the Eleventh week of life.
Plant 3 - Completing the Eleventh week of life.
Plant 4 - Completing the tenth week of life.
Completing the first week of flowering, I hope to know soon if they are females.
KeepGrowing.......!
Likes
128
Share


@Tropicannibis_Todd
Follow
💩Holy Crap We Are Back At It And Loving It💩
Growmies we are at DAY 35 and she's just killing💀it👌
👉Added straws within the Tiny pot to help watering in week 4 👈
So I'm starting to see she needs watering every single day and now need nutrients 🙃
Lights being readjusted and chart updated .........👍rain water to be used entire growth👈
👉I used NutriNPK for nutrients for my grows and welcome anyone to give them a try .👈
👉 www.nutrinpk.com 👈
NutriNPK Cal MAG 14-0-14
NutriNPK Grow 28-14-14
NutriNPK Bloom 8-20-30
NutriNPK Bloom Booster 0-52-34
I GOT MULTIPLE DIARIES ON THE GO 😱 please check them out 😎
👉THANKS FOR TAKING THE TIME TO GO OVER MY DIARIES 👈
Likes
3
Share


@Krautbauern
Follow
this time we got a different phenotype, the whole plant has started to turn purple, not just sporadically like in the last ztrawberriez grow. It looks beautiful and will be harvested soon
Likes
10
Share


@Pechu420
Follow
No problems throughout the entire grow, a very easy plant, literally automatic. It produced a lot of resin and smelled delicious, very good. Low production due to the small 3L pot, cold, and only 12 hours of light. But the quality is outstanding.

Likes
20
Share


@420DeepGrow
Follow
Gracias al equipo de Royal Queen Seeds, Marshydro, XpertNutrients y Trolmaster sin ellos esto no sería posible.
💐🍁Punch Pie:
Un híbrido monstruoso con un 90% de dominancia índica, ocupa uno de los primeros puestos de la lista de favoritas de Kid Dynamite.
La Punch Pie desciende de la Cherry Punch Pie de Tyson 2.0 y contiene la genética de dos índicas galardonadas: la Purple Punch y la Purple Kush.
Punch Pie tu paladar se impregnará con ricas notas de pastel de frutos rojos, repostería caramelizada y tierra. Luego, pocos minutos después de la primera calada, sentirás todo el poder de este portento. La Punch Pie proporciona un combo 1-2 que se manifiesta justo en medio de los ojos y derrite todo el cuerpo, dejándote en un estado somnoliento, hambriento y apacible.
Produce plantas compactas que alcanzan una altura de 80-110cm en interior y hasta 120-150cm en exterior. Tras 9 semanas de floración, esta señorita robusta crece con fuerza para soportar el peso de sus densas flores, y da cosechas de hasta 600g/m² en interior y 750g por planta en exterior bajo el sol.
💡TS-3000 + TS-1000: se usaran dos de las lámparas de la serie TS de Marshydro, para cubrir todas las necesidades de las plantas durante el ciclo de cultivo, uso las dos lámparas en floracion para llegar a toda la carpa de 1.50 x 1.50 x 1.80.
https://marshydro.eu/products/mars-hydro-ts-3000-led-grow-light/
🏠 : Marshydro 1.50 x 1.50 x 1.80, carpa 100% estanca con ventanas laterales para llegar a todos los lugares durante el grow
https://marshydro.eu/products/diy-150x150x200cm-grow-tent-kit
🌬️💨 Marshydro 6inch + filtro carbon para evitar olores indeseables.
https://marshydro.eu/products/ifresh-smart-6inch-filter-kits/
💻 Trolmaster Tent-X TCS-1 como controlador de luz, optimiza tu cultivo con la última tecnología del mercado, desde donde puedes controlar todos los parametros.
https://www.trolmaster.com/Products/Details/TCS-
🍣🍦🌴 Xpert Nutrients es una empresa especializada en la producción y comercialización de fertilizantes líquidos y tierras, que garantizan excelentes cosechas y un crecimiento activo para sus plantas durante todas las fases de cultivo.
Consigue aqui tus Nutrientes:
https://xpertnutrients.com/es/shop/
📆 Semana 9:
El engorde de los cogollos está prácticamente terminado y solo falta que maduren un poco antes de ser cosechada.
Gran trabajo por parte de mis colaboradores, estoy bastante contento con este grow, el próximo tendré más atención en la etapa de crecimiento, la cual es muy importante si quiero obtener una cosecha de calidad.
A partir de ahora agua hasta el fin.
Likes
84
Share


@Beans
Follow
Well this was long strange trip with 1 leaf lol. Started as an extra cutting I was experimenting with to see just how much abuse it could take before it died. I put it in my big tent from day 1, never misted or covered it and pretty much treated it like it was mature plant. It lost all its leaves but 1 and I had removed all the dead material so all that remained was 1 leaf with some green in between all the yellow. It didnt appear to have anywhere to sprout new growth, all the nodes were barren with nothing but dried up brown nubs then I decided I wanted to try to save it and I was curious if it would grow or just remain a stem and 1 leaf. I was burnt out on all the data input and pic downloading and wanted to screw around and do something fun that didnt end up feeling like a chore. For the most part I succeeded although some of those videos took me forever lol. I had never done anything like that before and that wasnt my original plan. I just started screwing around and 1 thing led to another and here we are. Hope everybody who followed along enjoyed it and I hope anybody watching in the future at least gets a couple laughs out of it. That's what this random collection of nonsense was all about...just trying to have some fun and get a few laughs along the way.
