
Likes
Comments
Share


Likes
8
Share


@HomeGrown_Medicinal
Follow
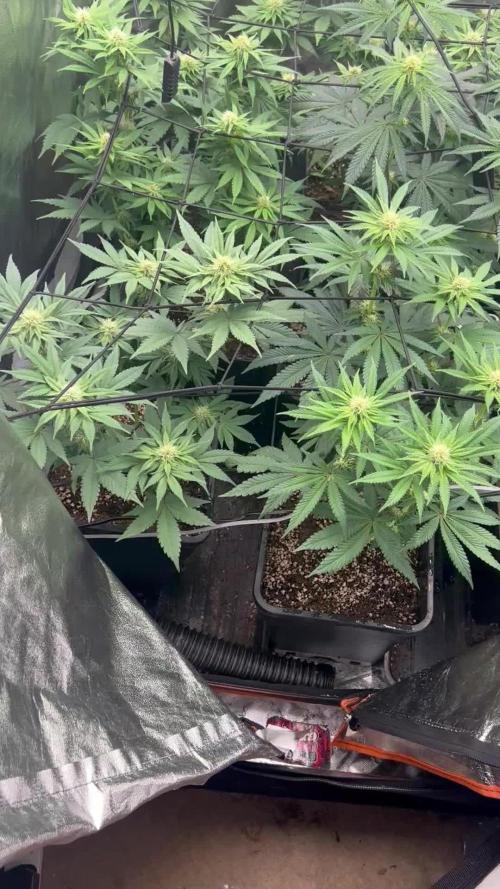
8 weeks later and these girls are getting smelly! They are also steadily packing on some weight and I'm getting excited!
This week the girls look to be in mid flowering stage and they were starting to show some kind of deficiency (maybe should've top dressed last week) well I top dressed last night and whipped up a compost tea for them too so we'll see how they react this week.
Other then that a very light defoliation for air flow and tightened up the lst wires.
Getting very excited for a taste 😋
Hope you all had a good week and thanks for checking in ✌️

Likes
10
Share


@blueslinks85
Follow
had a pretty hot week this week temperatures up into the mid-90s however nights are nice and cool everything is starting to come into really good production Bud production is nice and trichomes are looking well

Likes
4
Share


@brosef_b_baggin
Follow
The indoor plants are developing a mobile nutrient deficiency(newer growth is pulling from older leaves)in the lower leaves. Nutrients are being locked out(too much of one nutrient is locking out the others in the soil, or temperatures are too cold in the soil) or they are being tied up in solution whenever I mix the lotus nutrients(I’m adding bloom and boost into the same gallon, so maybe the chemicals are reacting with each other and becoming unavailable to the plant). On top of my nutrient dilemma, fungus gnats have found their way to my moist soil and are being a nuisance. From what I found they’re surviving off of my woody material in the soil and will soon try to establish it as a home so I’ve got to go get some IPM.
Outdoors is vibing with the pest pressure so I’ll continue to let it do it’s thing.
Likes
8
Share


@DeepRootsGrowTrees
Follow
Week #8 Baby Boom By Kannabia
Week #8 Dec.16th-23rd
Baby Boom this week she had stated to get trichomes on her buds and she's starting to get some density to her buds additionally she does have a slight hint of blueberries.

Likes
38
Share


@BlackHatGenetics
Follow
A lb from 2 plants in 69 days from sprout. You literally CANNOT beat that. Not to mention the 9g of kief I got just from my trim box. This stuff smokes like a dream, burns slow and tastes pine on the inhale, citrus/lemon on the exhale. Mephisto you guys prove time and time again why you are the elite.


Likes
82
Share


@UnorthadoxDude
Follow
Hello growmies! Welcome to week six of An Epsilon Adventure! Massive thanks to both Shogun and Royal Queen Seeds for sponsoring this grow!
So here we are at week six and every one of these girls are at a slightly different stage, it is quite fascinating to watch them develop one after the other.
Today I made the last adjustment to the light possible. I removed the adjustable hangers and affixed a carabiner which I tightly tied to the top of the tent bar. There is about 1.5 inches of space between the top of the shade and the tallest part of the roof of the tent. Plant 1 is already taller than this, and it looks like plant 6 and maybe even plant 5 are going to join it. It's a madness. I am sure you have already looked at the photos but just in case you do what I do and read the diary first...
Here is my assessment at the beginning of week 6:
Plant 1:
Height: 1st (137cm) - what can I say about this ridiculous plant? Day 36... 137cm tall. I have had to raise the light to as high as it is physically possibly to raise it and it's still not high enough. She is done stretching now, she may add 3-5cm over the next week or so but I don't expect more than that, so her top of her main cola going to have to develop above the level of the light. Nothing I can really do, nothing wise anyway. What a monster plant.
Maturation: 4th - early into flower - bud sites developing, pistils just starting to explode.
Plant 2:
Height: 4th (111cm) - this plant has been there or there abouts as the tallest plant for most of the grow, but she has topped out at 111cm. She will gain some during flower but not much more than a few centimetres. Very impressive plant, loads of bud sites, really big strong secondary branches. This one is going to be colas galore.
Maturation: 3rd - well into flower - all white pistils
Plant 3:
Height: 6th (95cm) For some brief days the tallest plant in the room, she peaked early and is now the "shortest" at "only" 95cm for this "50-70cm" strain. She is utterly dwarfed by four of her five sisters in just about every department, being quite a bit smaller even than plant 4 (although I have removed the most lower nodes from this plant). Compared with her sisters she is almost a runt... except that she is 25cm taller than the strain top-end average and matches the maximal height of the previous tallest Epsilon F1 plant I am aware of. It's not that she is small, actually she's pretty big for an Epsilon F1, it's just that the rest of the girls are on another level altogether. Plants 1, 5 and 6 are all absolute beasts.
Maturation: 1st - well into flower - first shades of brown in some pistils.
Plant 4:
Height: 5th (98cm) although only 3cm taller than plant 3, overall she is a much larger plant. Her secondary nodes are the same height as plant 3.
Maturation: 2nd - well into flower - all white pistils
Plant 5:
Height: 3rd (113cm) - one of the two thick/short girls who have grown at a similar pace all along - she is further ahead than plant 6 but not by much and I think she will probably exceed 120cm this week, though I do not think she will outgrow plant 1 or 6.
Maturation: 5th - early into flower - bud sites developing.
Plant 6:
Height: 2nd (120cm) - my predictions were correct about this girl and her continued growth. I now think she might actually outgrow plant 1, which is quite worrying.
Maturation: 6th - early into flower - bud sites forming - by far the least mature plant of the six.
###
Week 6 Day 2 23:00 30/7
Photographed. Raised the light. Rotated the plants. Inspected, measured and reported on each plant.
###
Week 6 Day 3 23:00 31/7
It has not escaped my attention that the plants that are more advanced into flower have darkened and have some burnt tips. I need to flush them and lay off the base nutes a bit. These plants are just growing and maturing so quickly that I cannot keep up.
###
Week 6 Day 5 02:30 2/8
Fertigated 3l of nutrient mix, without either COCO A or B.
###
Week 6 Day 6 01:30 3/8
photographed
---
Thanks for reading growmies! 👊
==========
Tent: 120cm x 120cm x 180cm
Light: 600w HID Elite Dual Spectrum HPS + Angel Wing Reflector
Air: 5" duct fan system with carbon filter ~300 m3/hour + RAM 9" floor fan + 4" intake fan
Pots: Air Pruner Fabric Pots 30l - UGro XL Coco + horticultural grade perlite (~20%)
Seeds supplied by Royal Queen Seeds https://www.royalqueenseeds.com
Nutrients supplied by Shogun Fertilisers https://www.shogunfertilisers.com/en
==========


Likes
143
Share


@Tropicannibis_Todd
Follow
👉Well my friends , as I've said this is the third time e I've grown this beautiful plant , she's a keeper for sure 👈
The smoke is kinda dank, but then sweet and earthy , and maybe a little dirty 😜 Shes Extremely potent facts , super strong 💪
Would definitely recommend 👌
Soil by Promix
Nutrients by Cronks
Lights by MarsHydro & Vivosun
🙃
Thanks to all my growmies out there for stopping by its much appreciated 👈
👉Happy Growing👈

Likes
43
Share


@Ju_Bps
Follow
Hello my friends,
I think it's my last week fertilizer,
Plant still healthy and love fertilizer ,😍😍,
I'll start flush in 1 week,
I think harvest in 2 or 3 week,
Trychromes start to be full milky
Have a good week,
Thanks for like and following 🤗🤗🤗
Likes
4
Share


@vidofighter
Follow
The 4. Week of Flowering begins...
Watering: ca every 3. day 1.5l per plant :
- - ->
Feed - Feed - Water only (ph 6.3) - Feed - Feed - Water only (ph 6.3) - Feed - ...

Likes
13
Share


@madlangs
Follow
All going well apart from burnt the tips a little bit with there weekly treats. Nothing to worry about
Harvested
cosmic queen 5.1.25
70 days
Purple lemonade 11.1.25.
77 days


Likes
41
Share


@BullWeedDog
Follow
Dia 62: Las plantas siguen desarrollando las flores aunque se ven un poco lento su desarrollo, ya se les nota en una gran parte buenas cantidades de tricomas, las temperatura actualmente le ha bajado un poco ya que en el exterior las temperaturas han bajado muchísimo a unos 10°C, pero intentando mantenerlas.

Likes
1
Share


@Guerillafarm
Follow
Bin auf Biobizz umgestiegen die PurplePunch hat aufgehört sich zu strecken.
Likes
216
Share

@Ju_Bps
Follow
Hello my friends 👨🌾👩🌾,
Out of Jail, great news!
The Cherry cola, continue his maturation, Buds continued to bump this week 🌲🍒🍒
Harvest probably in 7/10 days.
💦I've given this week 3x 2l/plant
- Water + terra flores + cannaboost
- Water + cannazym
- Water + cannazym
PH@6
I'll stopfertilizer, senesence look started.
Lamp 75%
See you next week and have a good week end my friends 🔥👨🌾👩🌾
Thank to Mars Hydro and @marshydrococo2 for sponsoring the FC3000 ❤️❤️, as well as @Fast_Buds for sponsoring the Seeds ❤️❤️
If you want a litle discount on your Mars Hydro order, add this coupon to your cart,
Ju_Bps
Thanks community for follow, likes, comments, always a pleasure 👩🌾👨🌾❤️🌲
Mars Hydro - FC3000
https://www.mars-hydro.com/fc-3000-samsung-lm301b-led-grow-light
42 Fast Buds - CHERRY COLA 🍒🌲
https://2fast4buds.com/seeds/cherry-cola-auto
Likes
8
Share


@AestheticGenetix
Follow
Shes a little funky lol probs not going to win the contest with this one 🤷🏽♂️


