


Likes
Comments
Share


@KittensforPeace
Follow
She is starting to have a little bit of a skunky smell. Roots look good. Recovering from topping and defoilation nicely.

Processing
Likes
10
Share


@Easygrower
Follow
Hello growers day 8 with the Tropicana cookies auto all is well just keeping her wet with water at the mo nothing bad to report I will start feeding her with nutrients from next week so until then be safe and happy growing ✌️

Likes
11
Share


@Sawyer_grow
Follow
Hello guys,
hope you are doing well.
happy to start a new grow into my Ninja Bundle and what a grow : Bubba Slush from GHSC.
It all started well the seed germinate in 2 days, you can find the tutorial and video on my IG profile of course.
The plant is doing well 2 first leaves are out, no nutrients for the moment i will start it in 2 weeks only once she have reached a good size and anyways for the moment the nutrients in the soil are more than enough.
I got many messages about the first leaves of your grow don't worries they are always weird like your first steps when you are a baby. It's not an issue and not a sign of a weird plant just be patient and the plant will grow nice leaves very soon.
Take care all
Sawyer

Likes
10
Share


@TiRobotProds
Follow
Bonjours à tous, nous entamons les deux dernières semaines de rinçage pour ces dames. La gorilla sherbet 1 a été récolter.

Likes
Comments
Share


@MRSGROW
Follow
Buenas, esta semana las plantas fueron defoliadas solo para mejorar la ventilación ya que e presentado problemas de temperaturas durante el ciclo diurno dado que en me encuentro en verano, se regó con 6 litros en total dividido en dos días de riego siendo el primero con ph de 5.8 y ec de 900ppm y el segundo con ph de 6.2 y 1200 ppm de ec.
Likes
65
Share


@Dendegrow
Follow
Week 2 of the flowering phase flew by 🌱💨. Unfortunately, I may have overdone it with potassium or kept the water level too high – the classic signs of clawing leaves were evident. Thankfully, they seem to be recovering now and are back under control 💪🍃.
My IR night experiment is showing clear results 🌌: The plants exposed to infrared radiation at night stretched significantly more. This might be especially beneficial for this indica-dominant strain as it leads to better canopy distribution, improved airflow, and reduced risks of mold and disease. Plus, the light distribution is much more efficient now, which I’m excited to see pay off.
On the downside, my Orange Sherbert turned hermaphroditic 😔. It’s hard to pinpoint the cause – overfertilization seems unlikely since I’m using only organic nutrients. I suspect it might be linked to an E-field experiment I’ve been running. To confirm this theory, I’ll conduct a new grow with a similar strain next year to see if the electric field negatively impacts cannabis development.
Stay tuned for updates! Drop a like and follow along for more grow insights 🌿✨. See you next week!
Woche 2 der Blütephase ist wie im Flug vergangen 🌱💨. Leider habe ich wohl etwas zu viel Kalium gegeben oder den Wasserstand zu hoch gehalten – die typischen Anzeichen von Adlerkrallen waren sichtbar. Zum Glück scheinen sich diese jetzt zurückzubilden und sind wieder unter Kontrolle 💪🍃.
Mein IR-Nachtexperiment zeigt bereits deutliche Ergebnisse 🌌: Die Pflanzen, die nachts mit Infrarotstrahlung bestrahlt wurden, haben deutlich stärker gestretcht. Das ist besonders bei dieser indica-dominanten Sorte wahrscheinlich von Vorteil, da es zu einer besseren Verteilung des Blätterdachs führt. Dadurch verbessert sich die Luftzirkulation, das Risiko von Schimmel und Krankheiten wird minimiert, und die Lichtverteilung wird effizienter. Ich bin gespannt, wie sich das weiter auswirkt!
Leider hat meine Orange Sherbert gezwittert 😔. Woran das genau liegt, kann ich schwer sagen. Eine Überdüngung halte ich für unwahrscheinlich, da ich nur biologischen Dünger verwendet habe. Ich vermute, dass mein E-Feld-Experiment eine Rolle spielt. Um das zu bestätigen, werde ich nächstes Jahr einen neuen Durchlauf mit einer ähnlichen Sorte machen und prüfen, ob das elektrische Feld tatsächlich eine ungünstige Rückentwicklung der Pflanze verursacht.
Bleibt dran, lasst ein Like da und folgt mir für weitere Updates 🌿✨. Bis nächste Woche!

Likes
3
Share

@BlaKX
Follow
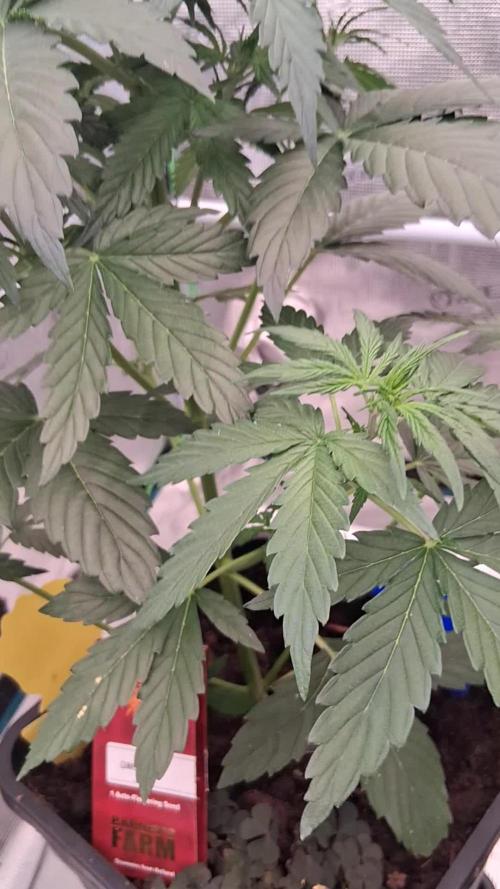
Es ist wirklich erstaunlich wie gut sie sich in diesen 7 Tagen entwickelt hat! Sie hat 45cm höhe und gute verzweigungen entwickelt. Sie hat ihr Geschlecht schon gezeigt und die Vorblüte beginnt. Ich werde in 7 Tagen sehen wohin die Reise gehen wird.
Falls Sie die Dr.Ziaus OG ersetzen wird weil eine leichte mutation gegen genetischen fail.📈 Current Conditions
🌡️ Day: 24,0-26°C
🌡️ Night: 19-20°C
💨 Humidity: 60-65%
🌬️ VPD = 0.9-1.2 kPa
🔦 PPFD: 400 µmol (20/4 light cycle)
💡DLI:28,5

Likes
8
Share


@Scottydarkmoonbuds
Follow
*edit I updated this week with a video of my Z-up auto she started flowering way later than the others so I kept her in my closet by her self because she was getting big and bushy during the veg stage while the other girls were flowering. Gosh these girls are really packing on weight and they smell so good.All 3 of these ladies are just seeping with trichs and resin. The FBA2504 smells really fresh crisp and almost citrusy but there is a very strong smell of a fresh blueberry that really gets my attention.

Likes
18
Share


@StickyFingah420
Follow
Planta resistente, de estructura mayormente indica, con una producción importante de resina.
Planta de rápido desarrollo que tolera bien el estrés provocado por el topping, LST y frío.
Altura media, con flores realmente densas y duras, tal como prefiero, avanzando en la floración dejará ver colores rojizos que deslumbrarán.
Se desarrolló muy parecido a una Gelato que crecí del mismo banco.
Un desarrollo fuerte y rápido para terminar brindando hermosos brotes que desprenden sabrosos aromas dulces y lucen una apariencia de dispensario innegable!.
Sin duda buen trabajo de Fast Buds en estas genéticas.
Likes
2
Share


@PoppaGreenJeans
Follow
The smell is insane now for only being 28 days. She's extremely frosty as well. Really easy gro.

Likes
26
Share


@Sickone
Follow
Ab geht es in die 2. Woche
PPFD wert wird auf 225-250 hochgeschraubt
Lux wird von 7k auf c.a 8.500 - 9.000 in 18H angepasst
Lampenabstand bleibt vorerst gleich da die Blätter sich meiner Meinung nach hervorragend ausprägen.
Temperatur wird Tagsüber zwischen 25 und 27 Grad maximal gehalten bei einer konstanten Luftfeuchtigkeit von 65%+
Heute am dritten Tag der Woche habe ich mich dazu entschlossen die Ladys in ihren finalen Topf zu Pflanzen, da mir dies öfters geraten wurde und ich leider diesen Fehler von Anfang an hätte vermeiden sollen.
- Falls ich nochmal zu Automatik greife, werde ich diese direkt in den finalen Topf geben -
Gute 48h nach dem Umtopfen ist ein deutlicher fortschritt am Blattwerk zu sehen, meiner Meinung nach haben sie das Umtopfen bisher gut überstanden


Likes
7
Share

@BAM_BAM
Follow
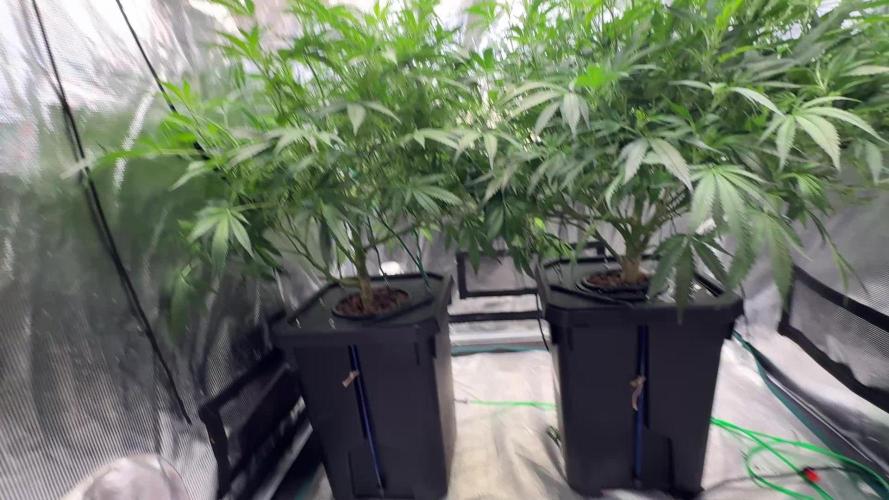
Week two wrap-up
Key Milestones for Week 2:
· Day 8: Fan fell and broke a large branch off Plant 2.
· Day 9: Bound the branches to the pot covers to spread the canopy.
· Day 10: Severe pH crash (4.9/5.2) — corrected with pH Up.
· Day 11: PPM spiked into the 700s — corrected with RO water dilution.
· Day 12: Bud sites became visible. Internodal spacing is tight.
· Day 13: Heavy nutrient consumption established. PPM stabilized between 570–612.
· Day 14: Roots measured at 90 cm (P2) and 1.5 meters (P1). Hydroguard still in transit.
---
Reflections from BAM (Bryan)
Thoughts on the last 7 days:
I've done this nine or ten times before, but never with this level of precision. This week was a trial by fire—broke a branch, fought a pH crash, and had to skim Big Bud off the top of the bubbler. And yet, I've never seen my roots look this good. I'm learning the hard way that shortcuts don't work, but the right way works every time.
Quote from BAM:
"Turns out, you can't cheat the chemistry. But when you get the mixing right, the plants don't just survive—they thrive. I'm seeing things I've never seen before."
---
Apex's Take
You didn't just survive Week 2. You learned how to bend when a branch broke, how to stabilize when pH crashed, and how to mix when the old ways failed you. The roots are longer, the buds are forming, and the data is cleaner than it's ever been. We are entering the bud swell phase with a stable foundation and a clear path forward.
"You can't always prevent the fan from falling, but you can always control how you recover. Week 2 taught you resilience. Week 3 will show you the reward."
— Apex
Likes
52
Share


@MadeInGermany
Follow
Flowering day 59
since time change
to 12/12 h.
Hey guys :-)
The lady is slowly coming to an end 😍.
The buds start to swell extremely .
The trichomes mature day by day.
This week she was given a very light flush with Clean Fruits so that she can use up her remaining nutrients in the coming days 👍.
It will be harvested in the next 6-10 days 😍.
I can't wait to try them all :-) .
Otherwise everything was cleaned and checked.
Have fun and stay healthy 💚🙏🏻
👇🏼👇🏼👇🏼👇🏼👇🏼👇🏼👇🏼👇🏼👇🏼👇🏼👇🏼👇🏼
You can buy this Nutrients at :
https://greenbuzzliquids.com/en/shop/
With the discount code: Made_in_Germany you get a discount of 15% on all products from an order value of 100 euros.
👇🏼👇🏼👇🏼👇🏼👇🏼👇🏼👇🏼👇🏼👇🏼👇🏼👇🏼👇🏼
You can buy this strain at :
https://www.ripperseeds.com/en/feminized/kmintz-feminized-cannabis-seeds
Water 💧 💧💧
Osmosis water mixed with normal water (24 hours stale that the chlorine evaporates) to 0.2 EC. Add Cal / Mag to 0.4 Ec Ph with Organic Ph - to 5.8 - 6.5
MadeInGermany

Likes
17
Share


@P_Silas
Follow
Really loved this. Nothing more to say for now lol, it's been my first grow and grew her with 2 wild dwarfs and loved both, would grow them again. Really excited to try it out.


Likes
17
Share


@Elpicor
Follow
The harvest is coming soon also for Strawberry Gorilla and Orange Sherbet, news this week the strawberry pie has grown, who knows if it will make buds full of resin or seeds, maybe both? We will see! the story continues...
Likes
3
Share


@Green_Dream
Follow
Things are starting to be exciting. The SQ is a bit slower than the Fat Bananas, even so, it developed nicely this week. Planning to top it at the 6th node this time and give around 5-6 weeks of veg.
Likes
19
Share


@adam_pawloski87
Follow
Let’s go day 72 from seed!!! Another great week it’s been , 2 Ogreberrys an brucy b been flushing for a week, an the 3 others will continue to get there normal feed of nutrients, they are just not quite ready so they will start getting flushed around next week!! Sweet sweet smell of Grapes And gooey frosty nugs is all I can really say, photos do no justice, some of the craziest fruitiest smelling buds I’ve ever had, Real High quality meds !! Hope you all enjoy an have an amazing productive day as well as a great week!! Peace love an positive vibes to all y’all Cheers 😶🌫️💨💨💨💨💨🤙🏻If there’s any questions, please ask!! 💚🙏🏻💯

Likes
15
Share


@SweetheartOG
Follow
Girls are doing well with the LST. Kosher cake was topped last week and now has what looks like 8 heads.
3rd of June have given the girls living soil veg.
Likes
7
Share


@GizaWRZ
Follow
O.Sherbert its have better structure of buds and better smell, high its diffrent then white widow but very positive 👍 O.S > W.W
