
Likes
Comments
Share


@UKauto
Follow
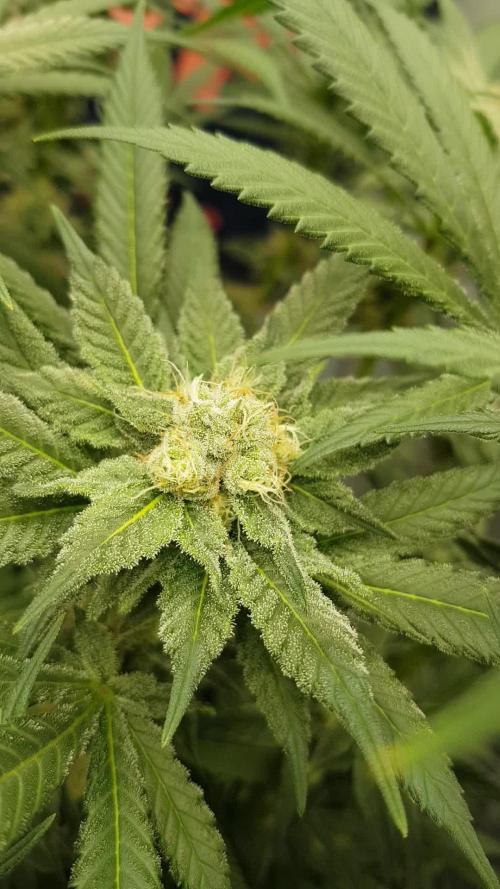
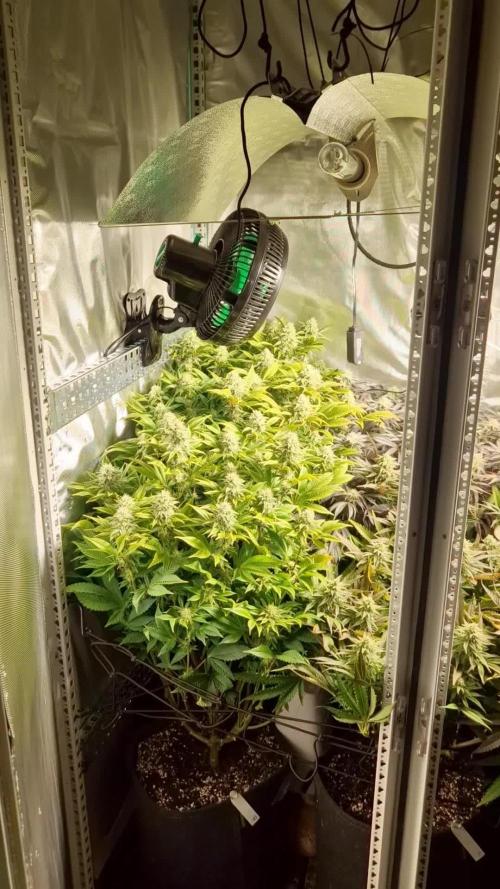
Still flushing her. I think she'll be down around Monday/Tuesday.
Still fattening up nicely though 👌🏻
Smells amaaazing too 👊🏻
Next entry will be harvest ✌️🏻

Likes
30
Share


@coyote2thick
Follow
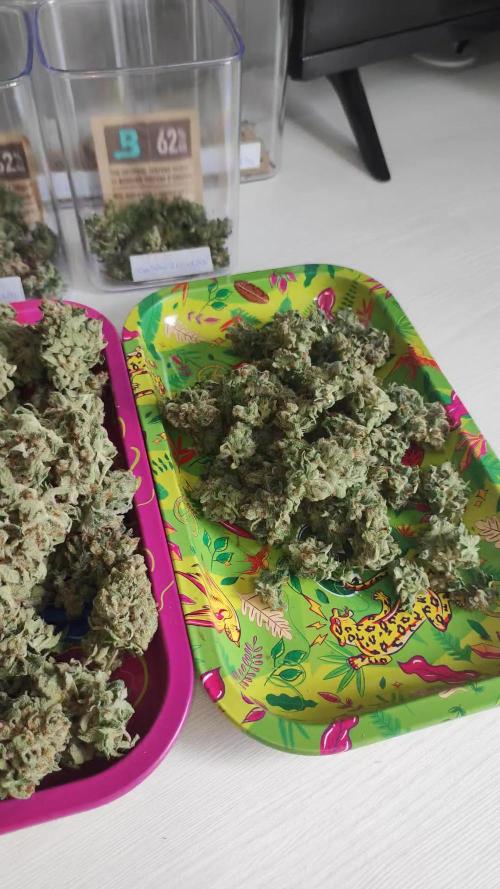
I hung dried for three days and then bagged them up in brown paper bags for two days due to the low temps and humidity before jaring them.


Likes
17
Share

@GERGrowDesigns
Follow
Welcome to Flower Week 4 of Kannabia Apple Fritter BioBoost Edition
Need a Fail-Safe Germination and Express Flowering?Kannabia Makes It Easy with BioBoost, Sproutly and Its Fast Genetics . More informations to find at The Kannabia Blog on GrowDiaries.
Check out Kannabia Seeds with my link [https://www.kannabia.com/de?ref=61966] and grab the germination device or the strains I used . Trust me – it’s worth it for sure !
Get another 20% Discount at all products using the code [GGD] at the checkout.
For this Project , I’ve chosen the Feminized Photo Strain Apple Fritter BioBoost :
Here’s what I’m working with:
• 🌱 Tent:225x150x150
• 🧑🌾 Breeder Company: Kannabia Seeds
• 💧 Humidity Range: 50
• ⏳ Flowering Time: 63 Days
• Strain Info: 24%THC
• 🌡️ Temperature: 26
• 🍵 Pot Size: 20
• Nutrient Brand: Hy-Pro
• ⚡ Lights : 600W x 2
A huge thank you to Kannabia Seeds for allowing me to try my Best with this amazing collection from Photo Strains they managed to Sponsore . Big thanks for supporting the grower community worldwide! Your genetics and passion speak for themselves!
Let’s grow together – and don’t forget to stop by again to see the latest updates!
Happy growing!
Stay lifted and stay curious!
Peace & Buds!
Likes
12
Share


@Chrisrobertson970
Follow
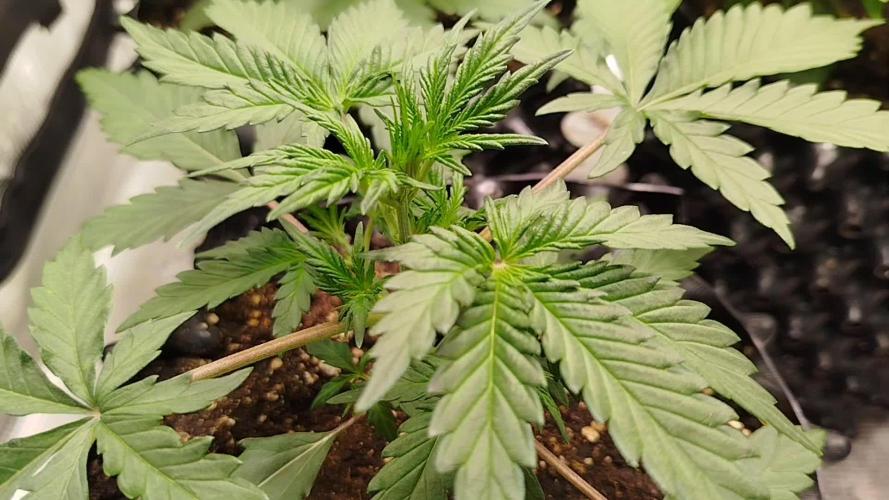
This is right on day 14. I feel they should have a bit more growth at this point. It's been raining here for 3 days now and its coming my sidewalls. Any suggestions leave it in the comments.


Likes
5
Share


@ertaverd
Follow
Empieza el adiestramiento! Corte apical en el brote central y defoliacion general😋

Likes
9
Share


@NewOfficialDrillInvaders
Follow
Smell like 🥦🍋 but like skunky little bit pungent smell kick good looks good just look at the video 😉love that orange bud looking colour

Likes
6
Share

@GreenEldritchGardens
Follow
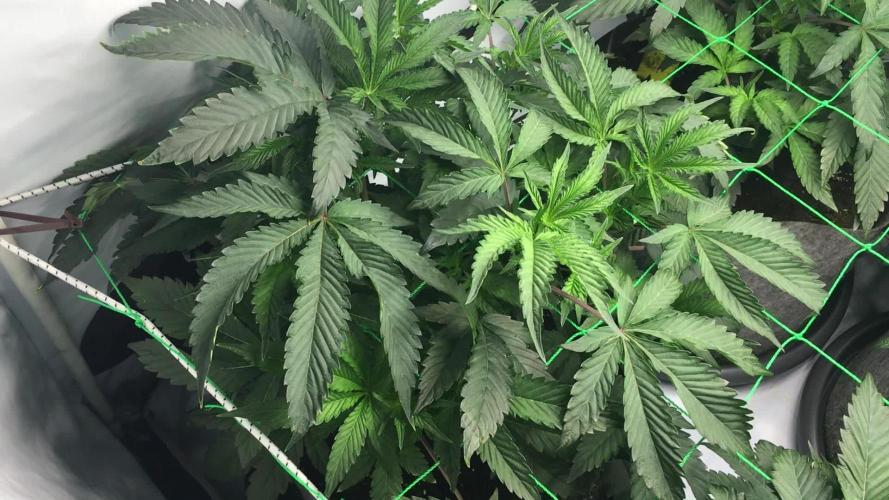
Very nice dark green with reddish stems, which seems to be a trait from gelatos to me, with amazing inter node spacing. No need for small defoliation or LST with a plant like that!
Likes
44
Share


@The_Good_Twin
Follow
22 Aug 2021
Today I’m starting to give some nutrients to assist my ladies in their development. I have been using plain pH’ed water to use the nutrients in the soil before giving anything extra.
My girls are looking bleached out and weak. Maybe trying to reduce the nutrients by using the soil for the first week or so in their new homes isn’t paying off. I was hoping to see them flourish, but they aren’t. Growing is all about trial and error, and I’m hoping that my error isn’t going to hurt them in the long run!
I’m starting the “Late Growth, stage 4” on my Flora-Trio 6 part feeding chart, but in the beginning I’m going to give them only half of the recommended amount to hopefully prevent any nutrient burn that they might experience. If there are no negative impacts seen, then I’ll adjust the amount as necessary.
Today I’m giving them a half gallon of water with the following nutrients: CALiMAGic 2ml, FloraMicro 3.8ml, FloraGro 4.5ml, FloraBloom 2.5ml, and Floralicious Plus 1ml.
The initial pH was as follows: C1 - 6.4, C2 - 6.3, C3 - 6.3. I did not need to adjust it, so I didn’t. The TDS going in was: C1 - 636 ppm, C2 - 634 ppm, C3 - 653 ppm.
I was originally planning on giving each plant a gallon of water, but I received enough runoff after only half a gallon. I guess they still haven’t developed an extensive root system enough to require the additional water. It just made it to where I don’t have to worry about making more to give them in a couple of days.
The runoff pH and TDS were as follows: C1 - pH 5.7, TDS 498 ppm; C2 - pH 6.0, TDS 562 ppm; C3 - pH 5.7, TDS 707 ppm.
It’s always funny to see how plants in the same type of soil, and given nearly the same solution still have such varying pH and TDS runoff levels. 🤷♂️ That’s all I have to say. It’s a mystery, but not an overly important one as long as they’re healthy.
The heat in the tent today was somewhat warm, but not as bad as it has been lately. The temperature was 81F, and the humidity was 56%. I’m hopeful that adding nutrients today will improve their color and get them to start developing their branches some more so I can flip them to flower in a little bit. We’ll have to see how it goes.
25 Aug 2021
Today I gave my ladies the second half of the gallon that I prepared a few days ago. They received the first half gallon on the 22nd, so I’m not going to repeat everything here again. To see what they were given read the note above.
I am going to note the runoff levels and the temperature and humidity because they are important to note.
Runoff was as follows:
C1 - pH 6.0, TDS 610 ppm
C2 - pH 6.1, TDS 546 ppm
C3 - pH 6.0, TDS 765 ppm
Again, it just weird seeing plants with different pH and TDS levels when they’re given nearly the exact same solution. 🤷♂️
The temperature in the tent was 81F, and humidity 62%.
Overall, my little ladies are looking better since starting the nutrients. They no longer look bleached out, and the green is returning to her leaves quite well. I decided to measure them today as well to document their growth. C1 is now 16 inches tall, and C2 is 15 inches, and C3 is 16 inches. C1 and C2’s lights were adjusted to be 19 inches away, and C3’s light is at 18 inches to keep the light canopy level. The difference in the light and size is due to the size of the pot C3 is in. She stands taller because her pot is half a gallon larger, but also because the pot has small legs on which it stands on so it sits higher. They’re looking better, so that’s all that I care about in reality.
Good luck, and happy growing everyone!!

Likes
6
Share

@Bncgrower
Follow
The aroma of Gelato #41 is simply exceptional, to the point that it fills the entire room with its intense and captivating fragrance. Each cultivation only strengthens my admiration for this strain, which will definitely remain one of my favorites, both for its quality and the sensory experience it provides.
*** Gelato 41 has a sweet and creamy aroma, with notes of vanilla, berries, and a citrus touch. The flavor is smooth and creamy like a dessert, with lemon and mint on the exhale.
Processing
Likes
15
Share


@AK1210
Follow
New flowering continues to develop on this lady, she seems to be swelling up day by day.
Yellowing of the fan leaves has started which usually means it's time to flush, I need to check the trichomes to see how amber they appear before I do just in case the flavour or yield could be effected.
Likes
23
Share

@foxbberg
Follow
Day 29:
Low VPD due to shitty weather....... about 0.8 kPa at 23C.
Girls happy - nothin' to bend or weave today. Still dark green - no signs of overfeeding in new foliage.
Drain (average): pH 5.9; EC 2.7
Roots keep pentrating the pots.
👍
Day 30:
Girls happy - nothin' to bend or weave today. Still dark green - no signs of overfeeding in new foliage.
Drain (average): pH 5.8; EC 2.7
Roots keep pentrating the pots.
👍
Day 31:
Girls happy - nothin' to bend or weave today. Still dark green - no signs of overfeeding in new foliage.
Drain (average): pH 5.9; EC 2.7
Roots keep pentrating the pots.
👍
Day 32:
Did a little defoliation - just cut a few odd lookin' fanleafs and some smaller foliage at the bottom of the stem. 65g total.
Further i keep opening the canopy by moving some shoots to the next square of the net
Still watering daily. Plant 3 is way thirstier and bigger than the others. Plant 2 spills out the largest amounts of drain...... but she's not far behind them other girls.
Had to crank up the vent to get humidity out..... i'll keep defoliating carefully - that'll help it ;-)
Day 33 & 34:
Now they really wanna get tall...... since they so bushy, it's a bit tricky to feed them to the 'right' next square in the net....... LST-wise i have to admit, it would have been better to 'open' the canopy by binding the shoots down, instead of just flatten it out, by supercropping. Though it produces a lot of growth, it's kind of a chaos - hard to organize and almost impossible to open up for more light. Huge fanleafs pushing out everywhere. Plenty of foliage in the lower canopy - it's a mess somehow😶
Numbers in the drain are fine now (about 6.5; 1.2) so i'll start feeding nutrients again.
Day 35:
Fed nutrients - PH 6.4; EC 1.1
Drain (avg.): pH 6.3; EC 1.8
i'm taking out some leafs of different sizes - just a few at a day...... so there will be a bit more light and air over time......
Plans for week 6:
- Organize canopy/scrog
- carefully take leafs out
- keep checking for nutrient levels


Processing
Likes
6
Share


@iamdiddy
Follow
weathet is cold and i save my qween zkittles indoor room , wheet 450 vipaspectra led 450.
feels great..31.09.19
pliace comment..


Likes
18
Share


@raulmoat123
Follow
2nd week flowering , and everything is doing fine and have all started to flower 🌼
One plant looks like is has neturient lock so will be flushing it over the next few days .


Likes
19
Share


@WulfBlud
Follow
Pretty good tester from mephisto. I found two different phenotypes with my 4 plants. Two were purple and a bit more earthy while the other two were normal color green fading to light green/yellow with bright yellow pistils and a sweet mango sugar smell.
Likes
9
Share

@Mimi420
Follow
Day 35 flower — grow diary drop 🌿🔥
Girls are looking sick right now. Canopy’s totally sealed and the colas are stacking hard — smell in the box is absolutely cracking when I open the doors. Cooler nights are doing some magic on the colours; Kush Crasher is going deep purple on the underside and some leaves are going almost black — proper kush vibes.
Quick lineup reminder (so readers know who’s who):
Back left: Wedding Cake (Portland) — frosty, resin on point.
Back center: Kush Crasher — purple toning, heavy trichome coverage.
Back right: AK-47 — denser, more classic compact buds forming.
Front left: Double Krush — airy but stacking nicely, very resinous tops.
Front centre: WAPPA — main star atm, big central cola fattening up steady.
Front right: Detroit Runtz — sticky, fruity pheno showing good bulk.
Wappa is producing a fat main cola with loads of side nodes filling in — this one’s gonna be a heavy, chunky top. Wedding Cake and Double Krush are thickening up and getting frosty fast. AK-47 keeps its compact commercial shape (good for scrog). Detroit Runtz has that crystal-sparkle and is smelling fruity even at 35 days. Kush Crasher’s colour is the eye-candy — those dark tones + the trichome frosting = lovely contrast across the canopy.
Notes from the tent:
Stretch is done, canopy even and nearly locked in.
I spotted some slight N-pull on older leaves (pale lower leaves) — nothing drama, going to tweak feed a touch.
Big aroma — open the door and the terp cloud hits. 😍
Humidity still my main worry (garage runs cold + RH spikes at night) — keep an eye on bud-zone airflow and dehumid duty.
What I’ll do next few days: one final tidy/clean under the canopy tomorrow, support any heavy tops, lean feeding into bloom (keep top-max / bloom up) and keep that Wappa center nice and happy — don’t want to stress it now.
Overall — very pleased. The tent is showing the payoff from the SCROG & LST/HST work: even canopy, lots of tops, and colour + smell coming through strong. Can’t wait to see these fatten in the next 2–3 weeks. Green vibes ✌️💚


Likes
Comments
Share


@420blazeit666
Follow
I overfeed them once,but except that all went good.Hyped to see the results after drying.
update coming soon :)


