
Processing
Likes
Comments
Share


@Snowy
Follow
Started some Fox Farms Grow Big this week, and they seem to have taken well. Growing very nicely, I'm tentatively trying a very mild LST on one of the Trainwreck plants, the one that is the smallest so far. I've never done any LST and am curious to see if this even works. Am normally partial to just letting the plants grow on their own.

Processing
Likes
1
Share


@TaZmainMan
Follow
She was not suppose to grow that long..22 weeks..but due to the issues I had with the nutrients set me back a few weeks.. a really nice strain to grow i must say..I realized that i do not have enough watts for the grow box..and this affects my yealds.. Its not the best yeald in the world but its bud i didnt have..
Really not happy with the dry weight..but its oky i understand
Only real problems i had was my Ph levels that keeps dropping but that is normal i suppose..My light coverage isnt kind of bad cause i ended up with a lot of small nugs that clearly didnt get light.. well it's all about learning..im learning as i go along..every grow gets better and better..
at least this time I'm growing a strain I'm mad about..
the 48hours darkness at the end of the ripen stage just before harvest makes a huge difference! the buds doubled in size but it will lose the density will drying..
buds are on the rack buzy drying..hence i could not give a dry weight yet.
I'm alittle gown looking at the buds almost dry and they shrunk in size and arent as big as they looked..its alittle heart breaking cause i got only a few good sized bud and the rest is just this little tiny nugs the size of my half my pinky finger nail..😞some are slightly bigger than that..and then the top nugs which was the main colons ..they are about 6 good sized buds..its okay i learned from her and its not a waste cause she did give me some buds in the end..
now the curing starts..going to cure for a month more or less will see as we go along..
Super Cheese Thank you!0
Likes
10
Share

@Bread_n_Buds
Follow
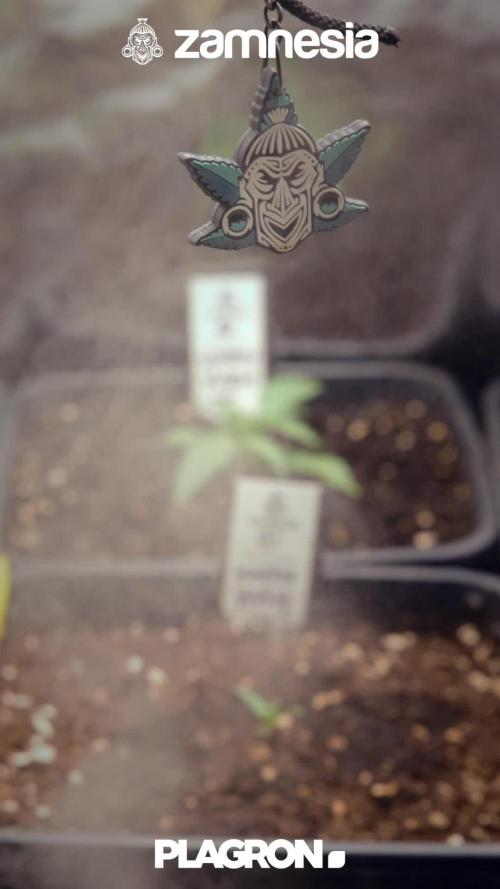
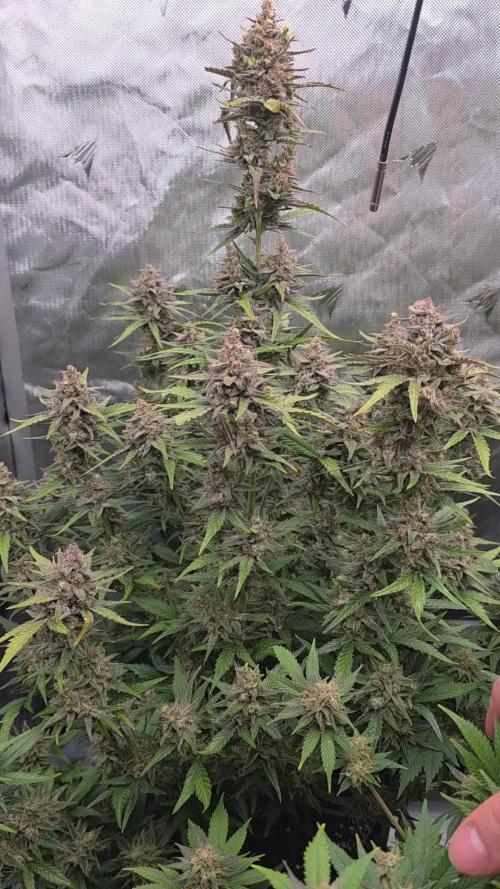
We're halfway through the first week, day 10 to be more precise at the time of the photo. We've chosen to stay on 24/7 for at least the first few weeks, as we're in a hurry to finish at least the autoflowering plants so we can have some weed for Christmas.
Our Karen Kush Auto is the best of the bunch, the queen of our autoflowering plants right now. Anything can happen, but look at the difference compared to the others. It seems incredible that she did all this in 10 days, but it happened. This is thanks to the 24/7 light, a practice that in my opinion is a bit aggressive, but one that growers in a hurry to harvest absolutely must embrace. I'm now going to switch to 20/4, but many are leaving it until the end. Naturally, it changes the nutrient intake a bit, and there are some delicate aspects to be careful about.
The chosen soil is the recently released Plagron Bio LightMix, which will allow us a more regular and reliable start without the sudden changes that liquid fertilizers can cause.
We've started fertilizing for vegetative growth:
- Pure Zym 1 ml/l
- Power Roots 1 ml/l
- Sugar Royal 1 ml/l
- Alga Grow 1 ml/l
I calculated my personalized data sheet directly on the Plagron website. If you have the organic light mix, which isn't available yet, download the organic one; the values are the same.
www.plagron.com
This seedling started out very well; the other had trouble releasing the seed and placenta, and germination stalled. I'm germinating another one; it's arriving very soon.
https://www.zamnesia.io/en/10783-zamnesia-seeds-karen-kush-auto.html
Zamnesia Description - There's no need to complain about this strain: Karen Kush Auto will satisfy even the most demanding smokers with its dense flowers, fragrant terpenes, and high THC content. Created by crossing Monster Bud Kush, White Widow, and ruderalis, Karen Kush Auto boasts first-class genetics that leave no room for complaint. Inhale its sweet, spicy, and diesel aroma and enjoy the physical buzz that envelops you. After a few minutes, the only thing you'll want is a comfortable place to relax. And best of all, you won't find this strain anywhere else, as it was created by the geneticists at Zamnesia Seeds.
www.zamnesia.com

Likes
24
Share


@Canadian
Follow
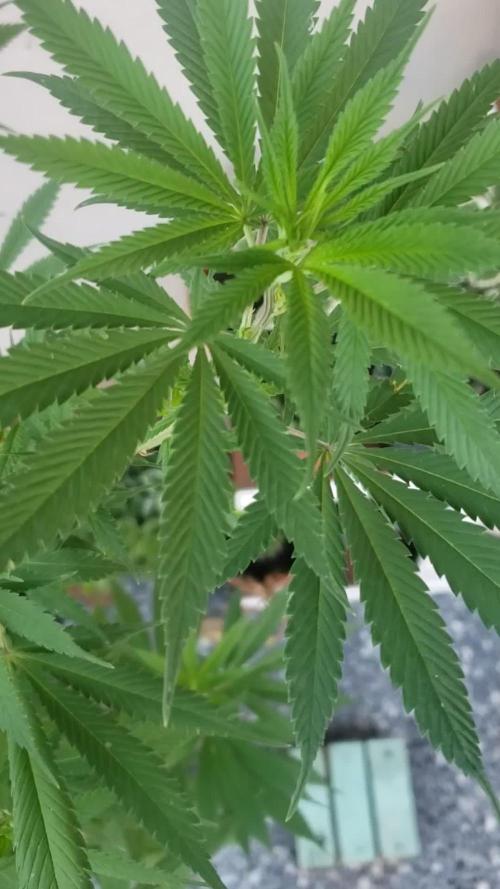
Day 57 the plant has been growing healthy and fine but she is a slow grower .
I know that most of the growers in this platform and elsewhere do defoliate and trim down all the lower branches of the plant so that the plant can concentrate all its energy into the higher bigger and better buds .and I do not do this because I drive the plants very hard with nutrients and those lower branches with small buds always give me the first sign of anything going wrong with her and that's why I leave them as a buffer zone to protect the bigger buds and that way I can push her as hard as I want.
not much to mention about her thank you for reading I will continue to update have a happy grow

Likes
4
Share


@DmbTexasRanger
Follow
Great nose and terps. Cookies beats out Humboldt in quality.
Yield was very low but that could have been growers error


Processing
Likes
3
Share


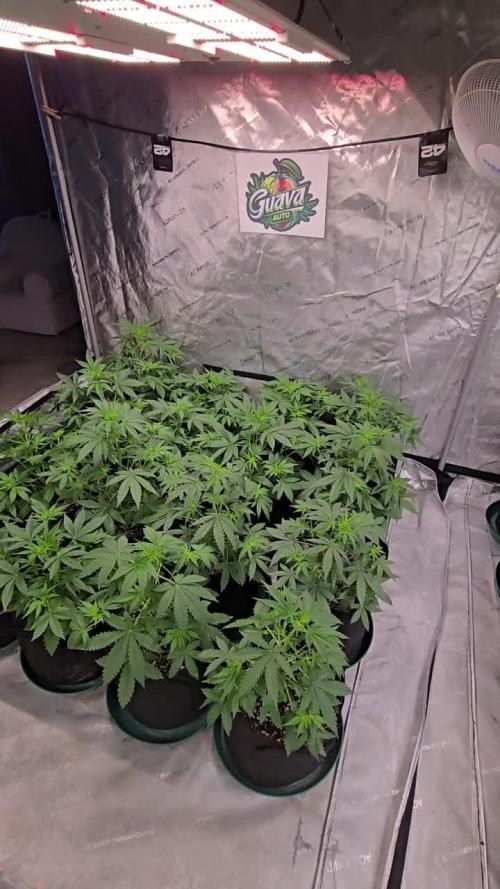
@Ogbangbang2981
Follow
week 9 was a good week I watch my pollen sacks grow into beautiful pods cant wait to use it plant doing pretty good health and strong

Processing
Likes
280
Share


@love_2_grow
Follow
D22.
The girls look so much better at the start of the fourth week of veg — vibrant colors without interveinal chlorosis and no more twisted leaves.
I hope they have enough veg time to fill in before starting to flower.
I installed the rest of the blumat drip system but haven't turned it on since I still need to hand-water in the SF nematodes to combat the fungus gnats.
I will start with LST this week, and I attached binder clips around each pot to prepare.
------------------------------
D24.
I gave each one liter of water @ pH 6.8, mixed with SF nematodes, humic acid, fulvic acid, sprouted seed tea, and bokashi juice.
I also put half an avocado on the soil in each pot to keep the worm buddies fed and happy.
Tomorrow, I'll start LST.
------------------------------
D26.
The first girl is showing variegation on one leaf. I started with LST yesterday, and the DLI was bumped up to 36.
------------------------------
D28.
We're at the end of the fourth week of veg, and I think they are heading into flower soon as they have started to smell.
More LST to spread them out, although I suspect that the second girl will stay small.
------------------------------


Likes
4
Share

@The_Doctor_Green
Follow
Hola a todos!! Esta laughing buda va creciendo bien, ha soportado todo el entrenamiento que le he dado😅😅.
Ya comenzó a mostrar las preflores, asique estoy muy emocionado,
La he regado con fertilizantes 1 dia, el resto de la semana solo lo he hecho con agua, con un ph entre 6.2 y 6.4
Creo que debería ponerla en una maceta más grande pero no tengo😒🤭😅.
Porque la riego todos los días y la maceta parece que no le hecho agua..
Realice una defoliacion en todas las ramas bajas, y también he sacado algunas ramas para dejarme unos esquejes😁. Espero que funcionen🙏😃.

Likes
109
Share


@Prototype0181
Follow
Last week was a pain in the @ss😪 batling high temps and super low humidity 😑 I used 2 intake vans to get temps down by 4°c in the tent, and pulled out my humidifier again to get above 43% RH. Sitting @ 55 now
Rock on Growmies


Likes
4
Share

@Chubbs
Follow
What up family, weekly update on these girls. I raides the lights 6in this week to allow some stretch but still keeping 400-600ppfd at the canopy level. Over all they're progressing beautifully. I started adding 2.5ml/gal of Athenas Blended line Grow A & B. Haven't seen any burnt leaf tips so I think they'll be OK adding a little boost. All in all Happy Growing.
Likes
1
Share


@Mr_nugs_lover_David
Follow
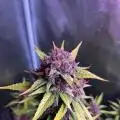
Super super frosty and sticky nugs, very dense and compact, big calyx, stinks, beautiful strain to grow the 2 plants of wedding cake Auto I have got the same aroma, this girl is being fed using nothing but a good soil prepared organically with complete organics by guanokalong and also seaweed powder, and also I added florians livings organics which is such an awesome organic super food for the plants that makes the strains performer better when when it comes the time to smoke you don't feel all that chemical stuff. Thank you so much everybody hope you enjoy! 💚🌱🎂✌️
Likes
12
Share


@Colepus
Follow
I tried wettrim and drytrim to understand what i prefer. The wettrim dried inside dryferm bags inside a drybox with ventilation that i build myself. The drytrim dried inside the tent and got a trim after 9 days. Havent tried the buds yet since they have to cure first but they smell very lemony so far. Curing happens in grovebags. Half of the bags also got a boveda to see the difference if its worth it for the future or not.


Likes
4
Share


@LoganatorDude
Follow
Day 8-
She is doing good!
Top dressed the outer perimeter with approx 1/2 tsp of Neem Cake (6-1-2). Watering with plain RO water.
Day 14-
First LST Tie-Down

Likes
15
Share


@ProfessorNusters811
Follow
Started flushing however acting on more experienced advice going to refeed and continue bloom for a while longer. Buds are really solid compared to previous grows. Really excited to do final weigh in at the end of this grow and only want to beat my personal best for weight. Hope the 5 days of flushing didn't hurt her too much as leaves have become a little brittle from over watering.

Likes
15
Share


@Brianm420
Follow
Plants are great, GROWING WITH 24 HOUR LIGHT CYCLE FROM SPROUT. I get great results with 24 hour

Likes
Comments
Share


@GreeneScene
Follow
Week#7 Day#44 Update: shes looking nice and bushy from the ponytailing. I gave her a half a gallon of water and she drank it right up . I gave it to her day 42 I believe I noticed her leaves droopy. I still have not topped her yet there’s atleast 13 main arms needing to be pinched out currently.
I’m still riding the fence with whether I’ll top dress feed her and keep her in this pot for one more month or will I transplant her up and boost the feed proportionately with the increased pot size .
Week#7 Day#45 update since I can’t seem to stop riding the fence on the methods I want to use to grow this plant I decided I atleast needed to do a heavy defoliation to expose those growth sites to encourage more branching . I could continue with ponytailing & defoliation for a while I just keep kicking the can around on whether topping will make this healthy vigorous growing plant better . It’s already doing everything I could ever want in terms of lateral growth . Could it stand to be a bit more vigorous on the upwards growth ? Sure , however I’ve still got 3 ladies maturing up in this tent that I need to move out so I’m sort of happy shes not requiring a lot of leg room know what I mean ?
I think as the fan leaves grow out I’ll pony tail up each top again .
Week#7 Day#46
No changes
Week#7 Day#47: started pony tailing her tops as the fan leaves get large enough to pin up I’ll cover as many as possible to let those lower growths get growing .
Week#7 Day#48: still pony tailing tops 😁 we’ll make her into a
Week#7 Day#49: those new fan leaves neeed to be pony tailed but are also incredibly yellow . I wanted to try putting the dry amendment at the bottom of my planter but for the sake of time I won’t experiment & have wasted a 2 weeks considering I knew last week she “ should be getting hungry “ & it’ll take 1 week of top watering before these dry amendments are available to the plant so she may stay e looking deficient. I gave her 2 heaping tablespoons & watered her in with 1/2 gallon of ph’d water with (organic)cal mag .

Likes
15
Share


@crystal_garden_0
Follow
Good week. One Mimosa cake is huge others nice .lots of buds sites .strong delicious smell. Plants are slower than the other strains I'm growing but might turn out big .
Likes
19
Share


@candiedamberfarms
Follow
Completing their first week of bloom. They’ll be measured again on Sunday but going into flower they sat at 42”. There was a runt and I was able to hoist up the xxl autopot to even out the canopy before flipping. I did a heavy defoliation but you’d never know. I’ll wait until stretch is over and really get in there to open up the airflow. Super healthy and very vibrant. Constantly praying and up taking Lotus extremely well. I expect a 10-11 week bloom. Happy growing y’all.

Likes
119
Share


@DogDoctorOfficial
Follow
And the time to flip her out came and here is day one on a 11/13 light shuttle lol she is looking amazing to my eyes and so , but so ready to flowers and deliver big fruits, lets see.
I topped 2x and they are all clean up to the top, from now on i will give her a defoliation some point on, like day 15 something like that, depending on her needs , if needed before it will b if after, after will b, she will decide if and wen i defoliate her .
I gave her still in this watering some root booster (start booster in my case) but from now on i will not give it tho her any more, started my P on them and my fruit booster ( in my case topbooster)
Gave her her last training and from here on she is capable of doing her thing, i believe in her and in the power of Aptus Nutrient line.
Tomorrow or so i will take some more pictures and post here to see how she is going, so stay happy stay tuned and i hope surrounded with love and good weed to smoke 😆💚💚💚🙏🙏🙏✊✊✊🙌🙌🙌💨💨💨💪💪💪
Day 2 and they are loving the fact that i change it to 11-13 , they wore desperate for that i think 😆 loving how they are praying like there is no t tomorrow
Day 5 and she looks happy AF and always praying to the Gods , thank you girl you doing great and im so proud of you ✊💪💪💪
As always thank you guys for your love , your time, your support and it all, i fell blessed and i am truly thankful 💚💚💚🙏🙏🙏🙌🙌🙌
All i grow is medicine for myself, for me and for my best friend with is me 😆 nothing to sell, so don’t even ask 😅💚💚💚
All info and full product details can be find in can find @
https://viparspectra.eu/collections/grow-lights DISCOUNT CODE 5% - DOGDOCTOR ( all store )
https://www.zamnesia.com DISCOUNT CODE 10% - GROWITGD ( just for seeds )
https://aptus-holland.com/
#aptus #aptusplanttech #aptusgang #aptusfamily #aptustrueplantscience #inbalancewithnature #trueplantscience #viparspectra #zamnesiaseeds #growerslove
With true love comes happiness 💚🙏 Always believe in your self and always do things expecting nothing and with an open heart , be a giver and the universe will give back to you in ways you could not even imagine so 💚💚💚
More info and updates @
https://growdiaries.com/grower/dogdoctor
https://instagram.com/dogdoctorofficial
https://youtube.com/channel/UCR7ta4DKLFMg2xxTMr2cpIg
💚💚💚Growers love to you all 💚💚💚