


Likes
43
Share


@Mz876
Follow
She’s beginning to stretch and preflower so I’m sure we’ll officially be in flower in the next week. Did some defoliation on all the babies in the garden so they can get more light penetration.

Likes
13
Share


@Tony_Montana84
Follow
Die letzte Woche hat angefangen. In 5 Tagen werde ich sie 2 Tage Komplett im Dunkeln lassen. Ich freue mich schon auf das Ergebnis 🤤


Likes
19
Share

@Flavors
Follow
Another week in the books! 📅 Red Hot Violet is still thriving — stacking leaves and holding strong 💪💚. The Amaretto Sour is still tucked in beside her, and while I haven’t separated them yet, both are adapting to the shared space surprisingly well 🤞🌿.Growth is steady, color is deep, and the canopy looks lush 🍃✨. I’m keeping an eye on root competition, but so far they’re coexisting like stubborn siblings sharing the same room 😅.Nutrients and watering schedule are locked in 🔒💧, and I’m continuing to prep for that upcoming flip to flower soon 🌸🚀.Patience and balance — that’s the theme this week. 🙏🌱

Likes
13
Share


@Laezu
Follow
Hahaha, she's gonna be gorgeous when all said and done. The **before** trim pics show off how well this girl is taking in the nutrients. Huuuuuuuge fan leaves off the bat, not seeing any nutrient issues... I also think she might be part fern 😂
The **after** pics are just getting rid of the giant leaves so the new stems can start getting some love too. LST all active stems, topped the main, and defoliated this week. I may have defoliated a little too much, but the leaves are so thick they were really dampening the stems underneath. We'll see how thick she has grown next week.
I hope the video comes through, it's the month 1 timelapse. I was not expecting the stem to do a complete 360 before the roots finally latched on.
Likes
60
Share


@MrSpooky882
Follow
Diese Woche ist ganz normal verlaufen, sie Strecken sich immer mehr und mehr 😊👌
Am Freitag wird das erste mal entlaubt und beschnitten, darauf freue ich mich schon dann kriegen alle nötigen Triebe genügend Licht ab!
Es bleibt spannend 😁👍


Likes
2
Share


@GreenFingerz420
Follow
Having sorted out the PH issue and the salt build up. These girls have enjoyed it so far... I will be looking to stack up each cola as mich as I can so I can yield as much as possible. I'm going short as I know these are high on Sativa. One plant has stretched very high compared to the other


Likes
10
Share


@FriendlyNeighbor
Follow
This Cookie had 2 translplants and more than enaught time to veg its the biggest plant I have grown so far leets see what this girl can do!!!
Sadly at the end of my last grow my living situation changed rapidly...
So I wasnt able to keep up the Diary cause I had to moove but I have a new flat now and things are going their way again!
Now that I have a time again new diaries will come!
So happy to be back
youre Friendly Neighbor
Likes
3
Share


@NigelCake420
Follow
All going well....
2 phenos superb... Others ok... Nice smell all round
Going into the final 3 weeks and they are solid and very crystalline looking....
Very happy with ethos... Thank you.... Will keep buying their genetics or I lose😁👏😂
OH boy oh boy oh boy.... Feels like oh boy 😂
Likes
12
Share


Processing
Likes
41
Share


@Hawkbo
Follow
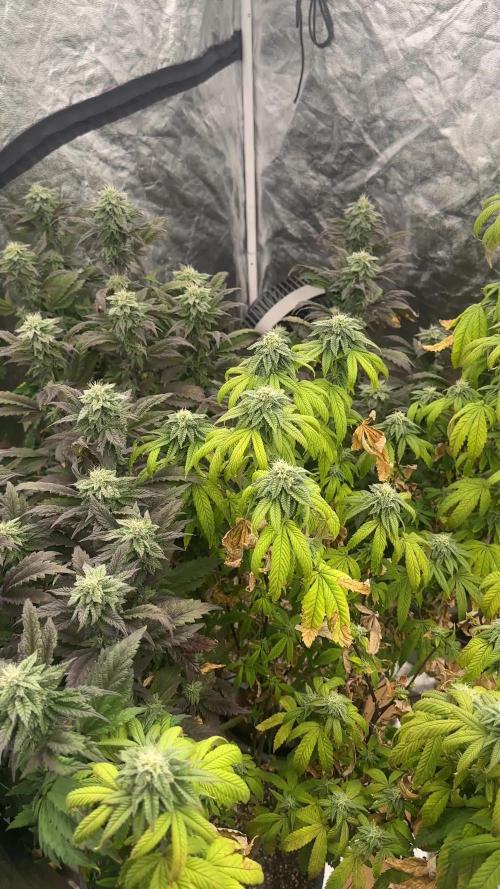
Ok folks, gunna be one armed for another 6 weeks so I'm just the conductor the true heroes will go unseen. Everything is alive atleast, had a scare yesterday as things got so dried out everything went limp but an hour after feed turned back around. Noticed some yellowing and other coloring coming thru on alot of leaves so I bumped ppm up a little bit this last feed. They dont look like they have a deficiency, it's weird, they look beautiful but with a premature fade almost. I really like Green Buzz' line up/regiment I just have to dial it in which isnt easy since it's a multi strain crop and various size plants. It's very easy to use and makes me feel good knowing it's not poison. Did a minor leaf strip around the tent just to make things fit better. I'll copy and paste this to the diaries for the rest of the crop per usual but go into a little more detail on each plant individually. Pics and vids were taken on day 28 of flower. I'm trying to keep up with these as best I can from start to finish, the flip date was 6.10.19, today is 7.9.19
#1 is a absolute beast and growing much better all around than my first run with her. I actually cant believe how much better it looks this time around the buds are much fuller at this point than last time. Shes been underwatered since she dries out so much quicker than everything else but despite that shes still thriving.
#2 is a xmas tree, trying not to defoliate too much but had to pluck a few for space. I think she'll be a hefty lady.
#3 is a runt and if anyone was paying attention early it was the one that wasnt growing vertical so I cut the head off and then she started growing correct. Shes a little further behind in development but coming alot. The weird thing is that both of the runts are the only ones in the crop in a different medium so I wonder if that's contributing to the fuckery.
My girlfriend took the pictures and I think shes better than me at it
Likes
10
Share


@HIAZ_urbanbudfarmer
Follow
Wow ready to harvest allready, flushed for a few days, trichomes are very cloudy with 10% to 15% Amber . Problem free grow 👍. I can totally recommend GREEN PLANET NUTRIENTS, virtually problem free grows since using this product & plants thrive on it, very lush colour & growth. Flowering additives work great, rezin does as the name suggests increasing rezin production,& terpenes, promotes fantastic flavours & taste. Not expecting much of this girl, very small at start of flowering.


Likes
5
Share


@Fefa128
Follow
Hey there! Welcome to this diary! I made it easy back in 2021. Sorry in advance for the Spanish audio.
For my germination method I always use both the glass of water and the paper towel. Let me explain, the glass of water only goes for 6 to 12 hrs, it's just a soak that also contains 3-4 drops of hydrogen peroxide, this way we kill all pathogens that the seed may have on the outside. Then to a warm, moist and dark place with the paper towel, this seed sprouted pretty fast using this method. Then, once it has that tiny mouse tail of it goes to the pot, I keep it moist by putting a transparent cup upside down.
Just to keep the dates, it just took from the 17th to the 19th to go from the cup with water, to the paper tower, to the soil, AND SPROUT!!

Likes
7
Share


@DEEGREEN
Follow
DAY 26 I CHANGE MARSHYDRO TS1000 WITH 2X 150W. PLANT GROWTH LAMP / PGL150FAV
Likes
17
Share


@Drtomb
Follow
Week 6 has been a goos solid week of stacking. No problems to report and everything is moving along as expected. Subscribe to follow the journey.