


Likes
Comments
Share


@Teamdirtbag2
Follow
She is shorter than her sisters. But im extremely excited. She is just gorgeous. Nice and tight, 4" and 4 nodes. And looking great.
Greenhouse is ready.

Likes
24
Share


@DogDoctorOfficial
Follow
🌱 Divine Seeds Week One Report 🌱
Hey, fellow growers! 🌿✨
We’re back with the Week One update on our exciting journey with Divine Seeds! Our Moon Rock, Opium, Fractal, and Big Demon seedlings have made remarkable progress, and we’re thrilled to share their growth story with you.
🌟 Week One Highlights 🌟
This week has been all about establishing a strong foundation. With the help of the amazing CannaKan method, our seedlings are thriving! Here’s a closer look at their journey:
1. Moon Rock 🚀
• Growth: These seedlings are reaching for the stars, displaying vigorous vertical growth.
• Health: The leaves are vibrant and green, indicating excellent health.
• Notes: Moon Rock is showing great potential for strong stem development.
2. Opium 🌸
• Growth: Opium seedlings are flourishing with grace, showcasing steady and balanced growth.
• Health: The foliage is lush and healthy, with no signs of stress.
• Notes: Their elegant growth pattern is a joy to watch, promising beautiful plants ahead.
3. Fractal 🌀
• Growth: Our shy Fractal is slowly but surely making progress, showing unique leaf formations.
• Health: Despite a slower start, the seedlings are healthy and adapting well.
• Notes: Fractal’s unique patterns are starting to emerge, hinting at its distinct genetic traits.
4. Big Demon 💪
• Growth: True to its name, Big Demon is growing strong and bold, with robust stems and leaves.
• Health: The seedlings are exceptionally healthy, with deep green leaves.
• Notes: Big Demon’s rapid growth is impressive, setting the stage for a powerhouse plant.
🌟 Key Observations 🌟
• Environment: Maintaining optimal temperature and humidity has been crucial. The CannaKan method’s stable conditions are proving to be a game-changer.
• Watering: Careful watering practices are ensuring the seedlings receive the right amount of moisture without any risk of overwatering.
• Light: Providing adequate light has been essential. We’re using a balanced light schedule to support healthy photosynthesis.
🌱 Next Steps 🌱
As we move into the second week, our focus will be on:
• Nutrient Introduction: Gradually introducing nutrients to support further growth.
• Transplanting Plans: Preparing the seedlings for their transition to larger pots.
• Continuous Monitoring: Keeping a close eye on their progress to address any needs promptly.
Stay tuned for more updates as our Divine Seeds continue to flourish. We’re excited to share every milestone with you on this incredible journey!
Happy growing, and may your gardens be ever green! 🌿💚
#DivineSeeds #WeekOneReport #CannaKanMethod #MoonRock #Opium #Fractal #BigDemon #GrowDiaries #PlantMagic #GreenThumb
Germination method 🌱 @thecannakan
Genetics
@divine.seeds
Nutrition
@aptusholland 🌿
@aptus_world 🌎
@aptus_es 🌍
@aptusbrasil 🌱
@aptus_thailand 🌿
@aptus_portugal 🌳
@aptususa_officiala 🍀
@aptusplanttechnz 🌺
@aptusplanttechaus 🍃
Ambient controls🎮
@trolmaster.eu @trolmaster.eu.support @trolmaster.support @trolmaster.agro
Soil @promix_growers_eur @promix_cannabis
LED - @lumatekeu
Watering- @autopot_usa @autopot_global
Love and attention- @dogdoctorofficial
#aptus #aptusplanttech #aptusgang #aptusfamily #aptustrueplantscience #inbalancewithnature #trolmaster #trolmastereurope #trolmastersecrets #Autopots
#GreenJoy
As always thank you all for stopping by, for the love and for it all , this journey of mine wold just not be the same without you guys, the love and support is very much appreciated and i fell honored and so joyful with you all in my life 🙏
With true love comes happiness 💚🙏 Always believe in your self and always do things expecting nothing and with an open heart , be a giver and the universe will give back to you in ways you could not even imagine so 💚
More info and complete updates from all my adventures can be found ⬆️link in the profile description ⬆️
Friendly reminder all you see here is pure research and for educational purposes only
💚Growers Love To you All 💚

Likes
22
Share


@bypado_farm
Follow
16 days of slow drying each plant with the environment controlled inside the tent with 2 meters.
I have two fans on, pointing at the floor to circulate the air
temps - 20 - 23 º
humid - 50- 60 %

Likes
23
Share

@Dottgreenthumb
Follow
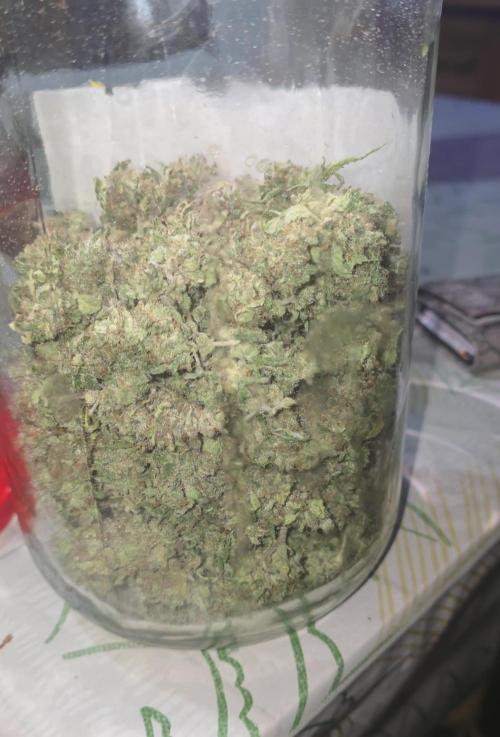
Molto energetico e creativo a lungo andare stanchezza mentale e sonnolenza fantastico per serata con gli amici al pub
Likes
262
Share


@Ju_Bps
Follow
For this grow I've used,
For the growth
1 sf1000
2 fan 15w
1 extractor 150mm 350m3/h
1 carbon filter 150mm
1 Hydro Shoot 60x60x140
1 timer
1 thermostat
Heating system for the winter month
To start pot 2l, after 8l
18 Hours On, 6 hours off light
For the soil I've used plagron light mix and rqs pellets.
For the blooming
2 sf1000
2 fan 15w
Extractor + Filter 150mm
1 Lite 60 box
2 timers
4 RQS Fabric Pot 15l
12/12
Plagron batmix + RQS Pellet
After harvest,
I'll not use my usual carton dry, last time I've got mold on few big buds, si this time I've put the stuff in a room with 15w fan (see video),
Thanks for all my friends!
And again thanks to RQS and @James

Likes
55
Share


@BodyByVio
Follow
Just got done with trimming the 4x4 @greenhouseseedco Super Silver Haze / @blimburnseeds Silver Surfer Haze tent.
The final yield is exactly 1000g plus some (kind of a lot)that I smoke in the last 2 weeks 😃
Also got 6, gallon size ziploc bags filled with good quality trim for concentrate.
To be honest I was expecting a little more but keeping in mind that this grow I did not supplemented with bottled CO2 I think I’m good with the results.
Definitely I enjoyed a lot this grow and I’ve learned even more.

Likes
91
Share


@PEAKYPLANTERS
Follow
Welcome to the enchanted valleys of Peaky Gardens
My cacti grow big and broken!
The two girls in the back probably have undergone over fertilization and maybe this will cost me less volume ... on the other hand ... the good girl from ahead and became a hot air balloon anchored to the containment network ...
xoxo for everyone
Processing
Likes
68
Share


@themartian911
Follow
hello some news on vegeation day 29, she has developed well,i put more RJ and BG,
and u can see on one pic the branch that had cracked got in shape now it's cool 💪😬
peace. 😀👍

Likes
19
Share


@A_Rolling_Stoner
Follow
All plants are fully blooming and create frosty leaves.
Caution! Very Sticky!
Amazing smell from the apple fritter and critical.
Really intense.


Likes
8
Share


@CashiLashae
Follow
Noticing a bit of changes with leaf size! Looking pretty healthy no signs of root rot, mold, or insects. Adapting pretty well to 24hr light schedule 💚


Likes
7
Share


@Fresco_Grower
Follow
La altura de las plantas oscilan entre 35 y 50cm. La semana proxima se realizara una defoliacion del conjunto. Como se observa la cobertura de la zona de cultivo es total. Se prosigue con riego lunes, miercoles y sabados.
Likes
18
Share


@ZouzouCanna
Follow
J’ai investi dans un système d’arrosage automatique Blumat avec 8 detecteurs Tropf. Fini l’arrosage, petite défoliation et c’est roue libre complète pendant un mois ! :)
I invested in a Blumat watering system with 8 Tropf sensor. No more watering for me, one more defoliation and we’re set to go for the next month !
Likes
54
Share


@Fibro_Witch
Follow
Alright folks, I hate to admit it but I messed up. I deleted the photos for this week and I was so disappointed when I realized I did. My phone was glitching after an update so I did some maintenance and made some space, thinking I'd already uploaded my photos for the week to my drive because I'd done so for the Autos, but hadn't done the photoperiod pictures😣
But at least there's a video.
On 8/1 I went to the local mushroom farmer just a couple miles down the road and got some spent hardwood substrate blocks. While there's not enough food left in them to make mushrooms, there's still live mycelium. The mycelium creates a symbiotic relationship with the cannabis plant by entering the soil and taking up residence in the root system. The roots can only take up so much surface area, but the mycelium can take up much more. So in exchange for sugars from the plant, the mycelium gives back nutrients. So in order for the mycelium to enter the soil I crumbled a couple blocks around the base of each plant and then watered it in.
I hate playing this game of catch-up but it's just been wayyyy too busy and I've had hardly any time in the garden.
Likes
22
Share


@Theknifeman
Follow
Everything is starting to fill out. 2 are really starting to get nice colas. 2 are beginning to fill in nicely and the little midget has finally started to form buds. Probably end up moving her outside to finish up, being she's lagging behind. She's starting to show potential and may end up being a little bud bush...lol.
They are all definitely going to have spaced out finish dates.

Likes
104
Share


@Lordshiva83
Follow
Olá companheiros, mais uma semana que passou, tudo está bem, a rainha continua a crescer bem, desta vez só cresceu 10cm numa semana mas as ramas laterais cresceram muito e estão muito ramificadas, uma rama de baixo partiu-se com o peso.. e ainda não tinha flores.. a planta continua com um desenvolvimento espectacular, esta semana borrifei óleo de neem para combater algumas pragas, e tudo vai bem, estou muito contente 🌲🌲✌️
Likes
4
Share


@XxDetermined100
Follow
The plant was easy to grow overall .. it grew fast and a little on the tall side which had me nervous but I was able to raise the lights up just enough to finish, so it all worked out in the end. buds came out hard and frosty no complaints . This was a freebie seed too! didn’t expect it to come out as fire as it did man was i wrong. Straight fire 🔥
Ran into root rot in the beginning of veg but the great white and hydroguard saved my ass.🙏

Likes
13
Share


@gr3g4l
Follow
Inicio de floración , fotoperiodo 12/12h. bajo 300W, ATS Pro 2,7 µmol/J.
Por lo que hace al cultivo. Una segunda aplicación foliar con Spider boom 3ml/l para prevenir posibles plagas de araña roja. Todo y habiendo unas temperaturas en el exterior de 0ºC en el interior se está bastante bién. 😋
Así de primeras diria que esta luminaria me parece de lo mejorcito que he tenido nunca, reparte la luz como ninguna otra penetrando mucho mejor. Otra es la comodidad para bajar o subir la potencia y la posibilidad de añadirle un controlador que monitorea la temperatura de la sala de cultivo, el fotoperiodo y la intensidad, así como la atenuación de potencia.
Esta semana cansado de ir bajando o subiendo la potencia del extractor durante todo el año he decidido probar un SMSCom Smart Controller. De esta manera espero no sufrir tanto por las subidas ni por las bajadas de temperatura. Muchas veces son las que por A o por B descuido el interior y casulamente son los dias que el tiempo cambia repentinamente.
Un primer foliar con Delta9 para que se pongan fuertes para lo que les viene.

Processing
Likes
2
Share


@Firepharmer
Follow
Weeks 5 and 6
I’m really loving the HLG 300 V2 RSpec
In the 3x3
Likes
22
Share

@foxbberg
Follow
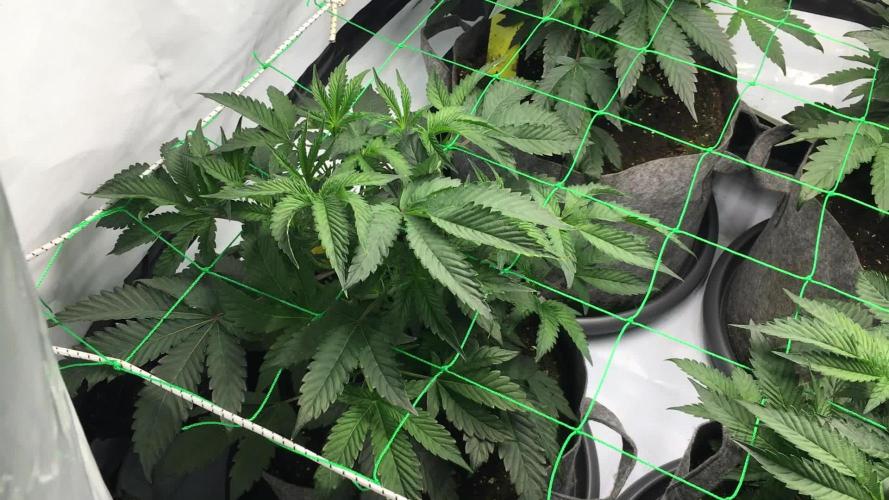
Day 29:
Low VPD due to shitty weather....... about 0.8 kPa at 23C.
Girls happy - nothin' to bend or weave today. Still dark green - no signs of overfeeding in new foliage.
Drain (average): pH 5.9; EC 2.7
Roots keep pentrating the pots.
👍
Day 30:
Girls happy - nothin' to bend or weave today. Still dark green - no signs of overfeeding in new foliage.
Drain (average): pH 5.8; EC 2.7
Roots keep pentrating the pots.
👍
Day 31:
Girls happy - nothin' to bend or weave today. Still dark green - no signs of overfeeding in new foliage.
Drain (average): pH 5.9; EC 2.7
Roots keep pentrating the pots.
👍
Day 32:
Did a little defoliation - just cut a few odd lookin' fanleafs and some smaller foliage at the bottom of the stem. 65g total.
Further i keep opening the canopy by moving some shoots to the next square of the net
Still watering daily. Plant 3 is way thirstier and bigger than the others. Plant 2 spills out the largest amounts of drain...... but she's not far behind them other girls.
Had to crank up the vent to get humidity out..... i'll keep defoliating carefully - that'll help it ;-)
Likes
57
Share

@PEAKYPLANTERS
Follow
good evening to all, my friends
God only know what I spent to keep these gems up, but in cure a thing I swallowed another!
The too much warmth in tent has arisen a reaction of strong stress in the plant by transforming their peaks from the shape of fox's tail.
This happens in some cases when the temperature is very high in a tent and makes it believe the plant that is still full summer making it bloom and vegetate at the same time
Likes
33
Share


@Roberts
Follow
Jack Herer auto is on her way out. She has gotten switched to just ph water a few days ago. The next update will ge her harvest in about a week, and a half. She is looking really good and frosty. Good aroma, and nice plant or a 100 watt grow. I should easily get a gram a watt if not 2. She grew great in the Athena blended line nutrition. Everything is looking awesome. Thank you Athena, and ILGM. 🤜🏻🤛🏻💪🏻❄️🌱
Thank you grow diaries community for the 👇likes👇, follows, comments, and subscriptions on my YouTube channel👇. ❄️🌱🍻
Happy Growing 🌱🌱🌱
https://youtube.com/channel/UCAhN7yRzWLpcaRHhMIQ7X4g