Likes
Comments
Share
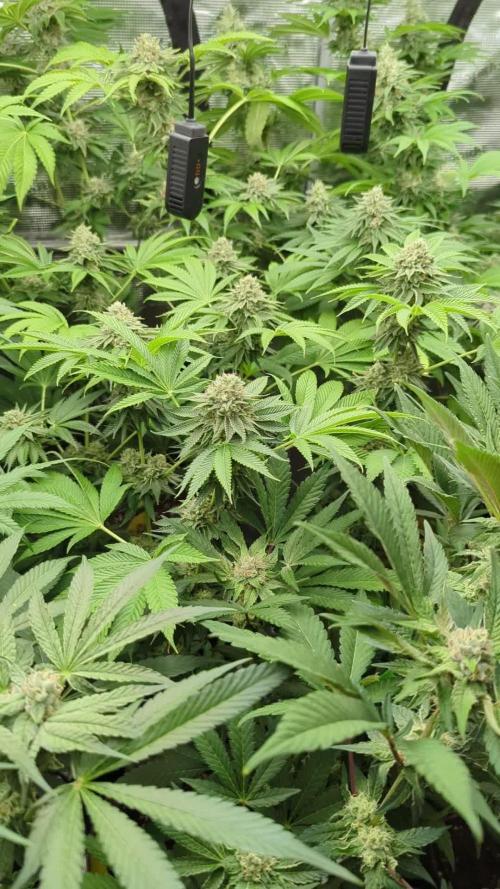
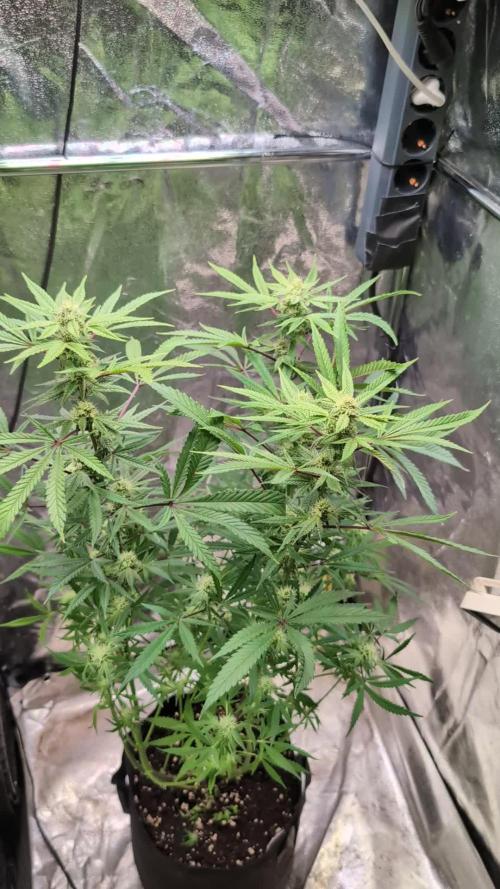
This was an amazing experience for my first grow. Was super unsure of what I was going to yield, but I think 27 grams is a realistic harvest and Im looking forward to see if I can get bit larger of a yield on the next run. I want to try main-lining, see for better energy distribution and more equal bud growth. Also investment into a proper reflector and possibly enclosed space. Note- I trimmed my plant the night before harvest morning. I removed than fan leaves to start, and then proceeded to trim the plant. I pulled out a lot of the leaves with no frost by hand. The sugar leaves had so much crystal on it I thought I would leave the smaller ones on the bud. I gave it a light trim, and used all the trim to make Isopropyl Alcahol (99%) based extract. Got about 1 gram from the run. I also had a nice little ball of finger charas from the trimming. I harvested it in the morning at about 04:30 am before the light cycle triggered at 7am. She hung and dried for about a week, where I then chopped her into buds. She cured for 2 weeks before i started smoking. Ask anything you want to know! Or if I can be more clear on any areas of the grow! One Love!
Likes
53
Share
Harvest Report: The Swift Journey of Blackberry Auto Greetings, fellow cultivators! The moment we've all been eagerly awaiting has arrived – the harvest of my Blackberry Auto. This beauty has moved through her life cycle with astonishing speed and grace. Let's take a moment to reflect on her incredible journey from seed to harvest and celebrate the fruits of our labor. Seed to Sprout: It feels like just yesterday when I planted the tiny seed of Blackberry Auto. Nestled in a Root Riot cube, she sprouted with vigor, her first delicate leaves reaching for the light. The conditions were perfect, with temperatures at a steady 28°C and relative humidity at 95%, creating an ideal environment for her early growth. Transplanting and Early Growth: As she transitioned to a small pot filled with rich soil and Mycor Mix, Blackberry Auto continued to thrive. The Mycor Mix, with its blend of various mycorrhizae species, worked wonders in enlarging her root system and facilitating nutrient uptake. Her early growth was nothing short of spectacular, setting the stage for the robust plant she would become. Rapid Vegetative Phase: Blackberry Auto quickly outgrew her initial pot and was soon transplanted into her final home – a 16L AutoPot. This setup allowed her to drink as she pleased, supported by the precise hydration of the AutoPot Aquavalve. With a foundation of Aptus All-in-One Pellets and Mycor Mix Soil, she had everything she needed for explosive growth. Her leaves grew enormous and lush, and her branches spread wide with gentle low-stress training. Swift Flowering and Stunning Development: Entering the flowering phase, Blackberry Auto didn't slow down. Her buds formed quickly, each one a masterpiece of nature. The colors were a sight to behold – deep purples, vibrant magentas, and hints of dark blue. The aromatic symphony filled the grow room, a testament to her potent genetics and the meticulous care provided. Natural Brilliance and Final Weeks: Observing her rapid progress, I ceased all feedings to let Blackberry Auto showcase her natural brilliance. Her final weeks were marked by a dazzling display of colors and an incredible pace of bud development. Each day brought new marvels, as her buds swelled and her trichomes sparkled like a constellation. A Heartfelt Reflection: From the moment she sprouted to her final days of flowering, Blackberry Auto has been a true wonder. Her speed and beauty have exceeded all expectations, and it's hard to believe how quickly she reached this point. This journey has been a testament to the magic of cultivation and the resilience of a well-bred strain. Acknowledgments and Gratitude: As we celebrate this harvest, I extend my deepest gratitude to @fastbuds_official for creating such a remarkable strain. To Aptus Holland, my main sponsor, your support has been invaluable in nurturing this beauty. A special thank you to Grow Diaries for providing a platform to share this journey, and to the community for your shared passion and camaraderie. 🌱💚 As we move forward, I eagerly anticipate the trim and smoke reports, where we'll dive into the sensory delights of Blackberry Auto. For now, let's revel in the joy of a successful harvest and the extraordinary journey that brought us here. Genetics Blackberry Auto @Fast_Buds Food - @aptusholland @aptus_world As always thank you all for stopping by, for the love and for it all , this journey of mine wold just not be the same without you guys, the love and support is very much appreciated and i fell honored and blessed with you all in my life
Likes
38
Share
01/04/2022- Hello and welcome all been away on some family matter. So today was the last day this girl got watered and will also be the last day she got light as well, she will be cut down Friday morning. The smell has gotten a lot more stronger since flush was started last week Wednesday. Will update before I chop her down.
Likes
7
Share
@Bones
Follow
This is my Northern Lights i got in a freebie pack quite a while ago. I planted it in my veg room for kicks as i have never been interested in growing an auto. Im lucky enough to have two tents so I use my Veg room for experiments and cloning as well. As you can see even though I germed it a week after my Blue Dream (check my diary :)) it quickly turned into this monster. SO For your pleasure I present my first Auto, lets see how she does!
Likes
45
Share
This ones. Coming along. Nice still. Buds. Starting. To thicken and. Form color is nice. Still. White still healthy. I did cut off the grow. And upped the. Bloom and micro. Last week noticed a claw. But manky from fan. Some n too 80% is fine so not gonna stress it. No burn or nothing and been holding. For 2 weeks. Now so just gonna. Let her so her thing. Happy growing guys.F38. Getting some size to um now. Smells coming. In and. Smells. Like fruit and. Shit. Lol. Happy growing guys
Processing
Likes
33
Share
I typically use the nutes at 1/2 tsp per gal but I have cut back on nitrogen since transitioning to flowering😎
Likes
1
Share
@mojo1985
Follow
Wie bei den anderen 3 sorten keine beanstandung... keine mutationen,stailder schöner wuchs... sehen wir was die kommenden wochen mit sich bringen. 🙏🙏🙏
Likes
35
Share
@Njaak
Follow
Setup has begun! Teeny tiny bonsai hydro is goin' down here. Comparing Mephisto autos in soil hybrid and hydro (DWC). I'm running a 1.9L mason jar with a 3" net pot that fits perfectly under the lid. Found a tiny air feed and bubbler perfect for this setup. Spray painted the mason jar purple... but in a garage near freezing so the paint job was kinda crap. Might paint over it with gloss white or black. Planning to use General Hydroponics 3 part, with Hydroguard for the fact that room temp is often high enough to worry about. Fun will be had. 8 tight little colas is the idea. Really hoping the bright Pink of the genetics will come through!
Likes
6
Share
Die Gorilla cookies auto hat sich auch wieder von ihrer besten Seite gezeigt. Nach 6 wochen blüte solche wunderschöne buds zu entwickeln ist einfach ein Traum. Ich kann jedem nur fastbuds empfehlen. Egal ob outdoor oder indoor.
Likes
11
Share
@Souri93
Follow
Belle défoliation semaine 4 et 5 petit tête qui apparaît
Likes
45
Share
@Krisis
Follow
04/22/25. Start of week 8 flower. Uh.. apparently I took way too many pictures lol. Oops. Couldn’t help it.. she’s photogenic I guess. Anyway, getting some new pretty colors now and her pistils are darkening up a lot more now. Also getting some foxtailing on the two tallest buds. Probably getting light blasted a bit much, but they’re quite a bit taller than the rest.. and I don’t want them lacking, so it is what it is. I gave her food a couple days ago, but I’ll be looking at her trichs to see where she’s at. I’m guessing she still has a bit to go, but guessing isn’t gonna do it- pistils have lied to me before. I’ve seen a bit of white in them before and had amber trichs. My guess is that the next update will not be a harvest. Guess we will see. ✌️
Likes
7
Share
@Messypies
Follow
The plant started off good. Unfortunately the environment wasn't the best to begin with but overall I think with the deficiencies still present. It turned out okay. This was grown with just the standard grow micro bloom. Due to covid, I was unable to order additional macro nutrients. Yeilds suffered as a result but overall happy for my first grow.
Likes
10
Share
@Unnamed
Follow
Added a photo of the whole tent including both plants from both diaries, next diary will most likely be a 1 tent 1 plant. Buds are swelling slightly and getting even harder, like golf balls. Leafs are bleaching more, next week I'll do a complete refill of the tank and will be going a little easier on the KMPS because it adds to much K. Had some trouble with a minor leak through the top of the tube because it was filled to the rim due to a lot of roots and really long netcups which block the tube, next tome netcups which are not as long and rather wider instead because the current ones are choking the stem which IMO is a good and bad thing, it stresses the plant so it produes more but also chokes it a little and the stem rips at the base but it heals. Values are average of the day. DATE - °C - RH% (Tent Temp/RH) 20241209 22.9 63.5 20241210 22.5 63.7 20241211 22.7 64.5 20241212 22.9 62.4 20241213 22.9 62.9 20241214 22.5 62.8 20241215 22.7 61.7 DATE - PH 20241209 6.09 20241210 6.06 20241211 6.07 20241212 5.96 20241213 5.98 20241214 6.03 20241215 6.06 DATE - ORP (mV) 20241209 61 20241210 53 20241211 41 20241212 173 20241213 134 20241214 112 20241215 103 DATE - EC(us/cm) 20241209 2151 20241210 2075 20241211 2123 20241212 2050 20241213 2110 20241214 2104 20241215 2101 DATE - CF 20241209 21.51 20241210 20.75 20241211 21.23 20241212 20.50 20241213 21.10 20241214 21.04 20241215 21.01 DATE - °C (Reservoir) 20241209 21.8 20241210 21.5 20241211 22.0 20241212 21.5 20241213 21.6 20241214 21.2 20241215 21.0
Likes
29
Share
This is my fav strain for now. I love the taste more than anything. Take a vape hit and exhale through the nose. Oh god, this is good. Despite the low light intensity, The BUDS ARE TIGHTER THAN THE FIST OF A FIGHTER.
Likes
5
Share
🌱 Ghost Train Haze — Week 4 Diary Photoperiod: 12/12 from seed Quick Recap (For New Joiners) This run follows a 12/12 from seed protocol, meaning plants are exposed to flowering photoperiod from day one. This approach typically results in: • Slower visible growth compared to veg-then-flower cycles • Earlier structural maturity • Compact, symmetrical architecture • A very honest expression of genetics Environmental conditions (temperature, relative humidity, airflow, and lighting intensity) remain identical to all other diaries in this project to allow clean comparisons across cultivars. ⸻ Week 4 Overview Both Ghost Train Haze plants are performing phenomenally. They are progressing steadily toward their 7th node, showing: • Excellent symmetry • Balanced internodal spacing • Strong apical direction • Calm, unstressed posture While growth under 12/12 is notoriously slower, this week reinforces an important lesson: slow does not mean stagnant. These plants are developing with intention and precision. ⸻ Leaf Morphology & Color One of the most striking features this week is the leaf quality: • Large, round, well-formed leaves • High surface detail and venation clarity • A lush, healthy green tone without excess darkness • No signs of deficiency, toxicity, or stress This visual expression reflects proper nutrient availability, stable root-zone conditions, and strong genetics working in harmony. ⸻ Structure & Symmetry Both plants are: • Highly symmetrical • Evenly stacked • Structurally clean and predictable This level of symmetry at Week 4 is a strong indicator of: • Stable hormonal balance • Correct light intensity for plant size • No need for corrective training at this stage ⸻ Containers & Growth Rate Observation These Ghost Train Haze plants are currently growing in plastic pots. A preliminary observation: • Growth appears slightly slower compared to plants in plastic grow bags used elsewhere in the run ⚠️ Important note: This is too early to draw conclusions. Container material, gas exchange, moisture dynamics, and root behavior need more time to show meaningful differences. This observation is logged for long-term comparison, not judgment. ⸻ Nutrition Strategy (Why They Look Like This) The plants are receiving the same locked nutritional protocol used across the project: • Balanced mineral nutrition • Root support additives • Enzymatic activity support • Controlled EC and pH Why this matters: This nutrition strategy prioritizes: • Root efficiency over forced top growth • Enzyme-driven nutrient availability • Stable uptake under 12/12 conditions The result is exactly what we see: Healthy leaves, calm growth, detailed structure, and no visual imbalance. ⸻ Studio Session Both plants were taken to the studio for a dedicated photo shoot, allowing: • Accurate visual documentation • Clear comparison week-to-week • Educational transparency for the community These visuals are part of the long-term archival value of the project. ⸻ What to Expect (and Not Expect) What to expect next: • Continued slow but consistent node development • Gradual increase in structural density • Early signs of transition in coming weeks What not to expect: • Explosive vertical growth • Stretch comparable to veg-trained plants • Immediate flower formation This is normal and correct for 12/12 from seed. ⸻ Community Note Due to YouTube community guidelines, our educational channel was taken down. While we firmly believe the content was purely educational, we respect YouTube’s decision and are actively exploring alternative platforms to continue sharing this work. 📡 Please stay tuned. 🙏 Thank you for your patience and continued support. FOR DISCOUNT CODES AND MORE JUST FOLLOW THE LINK https://website.beacons.ai/dogdoctorofficial 📲 Don’t forget to Subscribe and follow me on Instagram and YouTube @DogDoctorOfficial for exclusive content, real-time updates, and behind-the-scenes magic. We’ve got so much more coming, including transplanting and all the amazing techniques that go along with it. You won’t want to miss it. GrowDiaries Journal: https://growdiaries.com/grower/dogdoctorofficial Instagram: https://www.instagram.com/dogdoctorofficial/ YouTube: https://www.youtube.com/@dogdoctorofficial Deleted by Youtube Vimeo : https://vimeo.com/dogdoctorofficial Under construction stay tuned ⸻ Explore the Gear that Powers My Grow If you’re curious about the tech I’m using, check out these links: 🔆 Lighting & Environmental Control • Future of Grow — Advanced LED lighting technology https://www.futureofgrow.com/ DISCOUNT CODE: DOG20 • Lumiflora — Under-canopy LED lighting https://lumiflorade.com/ • TrollMaster — Environmental controllers and automation gear (past collaboration) ⸻ Genetics • Zamnesia Seeds — Genetics used in this project https://www.zamnesia.com/ ⸻ 🌱 Soil, Substrates, Boosters & Root Support • Plagron — Substrates, bio mixes, and supportive products https://plagron.com/en/ ⸻ 🎒 Storage, Curing & Preservation • Grove Bags — Curing and storage solutions https://grovebags.com/ ⸻ 📸 Photography Equipment & Tools (Not sponsors, but part of my creative toolkit) • Sony A6700 • Sony full-frame macro lens + few more • Stacking photography workflow - learning • iPhone (for behind-the-scenes shots) We’ve got much more coming as we move through the grow cycles. Trust me, you won’t want to miss the next steps, let’s push the boundaries of indoor horticulture together! As always, this is shared for educational purposes, aiming to spread understanding and appreciation for this plant. Let’s celebrate it responsibly and continue to learn and grow together. With true love comes happiness. Always believe in yourself, and always do things expecting nothing and with an open heart. Be a giver, and the universe will give back in ways you could never imagine. 💚 Growers love to all 💚 📸 P.S. – The Eye Behind the Lens All photos in this diary (for now — except for the ones showing the camera, which I took with an iPhone) are taken with a Sony A6700 paired with a Sony full-frame macro lens and a few more. Photography is part of the story — it’s how we share the fine textures, the glow, and the quiet details that words can’t always capture. I’ve also started experimenting with photo stacking — a technique where multiple images, each taken at a slightly different focus point, are layered together to create one perfectly sharp image from front to back. It’s not digital enhancement or AI; it’s pure photography — a way to reveal the plant’s beauty in microscopic depth, from trichome to petal. You’ll even see a few shots of "ghost me" capturing the shots — camera, lens, setup — because every grow deserves not just to be cultivated, but documented like art. FOR DISCOUNT CODES AND MORE JUST FOLLOW THE LINK https://website.beacons.ai/dogdoctorofficial NEW DISCORD - Official Server Invite Link : https://discord.gg/ksjAkA5T74
Likes
6
Share
harvested hb2,ww1,ob3-2nd,gc1,ww2,bg1,bg3,bg4,sp1,hb2,bg2-2,ob1-2 see all results in fotos ____________________________________________ light- and watering schedule: see photos now: 12 plants 2 x Auto Orange Bud > Dutch Passion (early80's) 2 x Haze Berry Automatic > Royal Queen Seeds (2018) 2 x Auto Bubblegum > TH Seeds (late 80's) 2 x Original Auto BubbleGum > Fast Buds Company (late 80's) 1 x Strawberry Pie Auto > Fast Buds Company 1 x Gorilla Cookies Auto Seed Stockers (2015) 2 x Auto White Widow x Big Bud > Female Seeds setup + strategy: 18 seeds 3 x Auto Orange Bud (early80's) 3 x Haze Berry Automatic (2018) 3 x Auto Euforia (late 90's) 2 x Auto Bubblegum > TH Seeds (late 80's) 2 x Auto Bubblegum > Fast Butts (late 80's) 2 x Strawberry Pie Auto 1 x Gorilla-Cookies Auto (2015) 2 x Auto White Widow x Big Bud setup: 18 x gronest 2 liter 60 cm x 120 cm x 180 cm (2 x 4) growtent 4 l humidifier 25 watt axial fan 15 watt clip fan ro-filter bath room with a 50 watts room fan (-> carbon filter not necessary) ...and a lot of odds and ends. grow strategy: max yield by stressing with: 1. tiny shoes (2 l fabric pots standing on 3 plastic rings (4 cm) for max oxygen) 2. tiny growspace (18plants on 0.72 sqm) 3. many strains (8 strains) 4. annoying neighbourhood (mixing old - i.e. bubblegum (late 80's) - with young- i.e. hazeberry (2018) - genetics) 5. no stress by light or food or water 6. unintentionally too much food plus: - no lst - no hst - just leaf tucking - positioning bigger strains (euphoria, orange bud, haze berry) or just bigger phenos on less intense light spots (end of tent + edges) - music-rotation: 24 hrs reggae (for sativas) - 24 hrs classicals (because it's scientifically proofed) - 24 hrs traditionals from the hindukush region (for the indicas) max efficiency (min electricity - max yield): - light: 23 h on - 1 h off - keeping the distance of 18" (45 cm) and dimming to the right par (lux) - value depending on growing stages (see sheet: beginning 185 par ( 10000 lux/100 watt )/end 340 par ( 18000 lux/175 watt )) => ends up in approx. 170 watts in average over max 15 weeks temperatur management: - using approx. max. half of what the lamp can do keeps temperature low: my tsl 2000 is pulling max. 360 watts of the wall - i need only 175 watts, results in less temperature than using a 175 watts lamp - adjusting the temperature by using a humidifier outside of tent: blown in humidity is soaking degrees and is transported out by fan, works much better than doing the same with pure air summer extreme: no humidifier: 36°C / 35 rh - with humidifier: 29°C / 65 rh works for 1-2 weeks of real hot summer days, no mould, no signs of stress in two summers germination: seeding in waterglass spraying "basic"-water: ro-water (22 ppm) + calmag to 180 ppm every 4 - 8 hours until sprouted man versus fungus gnat: 5 days before seeding i'm running the tent with "basic"-watered pots as if there were plants inside - led on, fans on, humidifier on. Fungus gnats coming with the soil might take the chance to come out now for breeding. i'm waiting with a 9 mm rifle. in the past i found 6 gnats in 2 of 8 x 50 l biobizz lightmix bags coming out of the soil. i could eliminate every single gnat successfully ;) rotating harvest: the little ones will be harvested completely when ready. at this point only the top branches of the big ones will be cut...and the new (basic-watered) pots of the new grow will move into the tent. 2-3 weeks later the secod half of the big ones will be cut and the second half of the new grow will move in... nutes: biobizz / soil: biobizz lightmix bloom,grow,topmax,activera,algamic + aminopower instead of bio heaven (too expensive) individual feeding schedule/once a week: veg: 200 - 600 ppm bloom: 600 - 900 ppm water: ro-water with: veg: 100-150 ppm calmag bloom: 150 ppm calmag