
Likes
Comments
Share


@GroLife
Follow
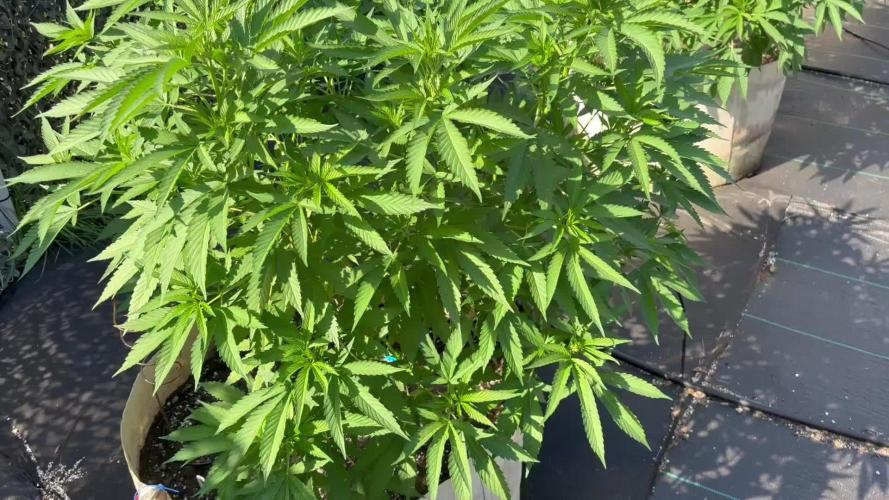
Looks like I have to invest in a humidifier can’t get humidity above 32% lowest 26% girls still look good tho so I guess only time will tell about 3-4 weeks left until harvest :)


Likes
4
Share


@jtgrow
Follow
Friday, September 25, 2020
Chopped to dry in closet. No trimming needed
Wednesday, September 30, 2020
Trimmed and jarred. Very little trimmings were thrown away.
My first indoor grow was a success! I don't have the largest tent so it was nice to keep it short. Not the biggest yield in the world but it was a fun experience. My only regret is not watering or feeding it enough. I'm main-lining my other auto grows so we'll see how those do.
Thanks!
-JTGROW

Likes
11
Share


@902EastCoast
Follow
Well it’s about that time again to make my mouth water and my eyes glisten with these sexy ladies! Day 72 from seed and she’s damn gorgeous with that Fade! Chop chop baby ✂️
Likes
11
Share

@TrickzGrowz
Follow
Ein wunderschöner dicker Headbud. Die unteren sehen auch mega lecker aus!
Likes
15
Share


@HollowSource
Follow
Roots started to show at the base of the pots so I've moved her into her penultimate pot now. Next stop the smart pot.
Her stem is firming up lovely and she's starting to show some lateral growth. Overall she looks really healthy. Once the other seedlings catch up a bit ill start to ramp up the light.
LST will start soon!

Likes
2
Share

@JVKdopegrow
Follow
Ho hum veg veg. The boring weeks that make the plant. Started with some LST but decided to give this girl the freedom to grow. Trimmed the lowest fan leaves only. Moved her around in the tent to give her some space and better light and airflow. Slight increase in nutrient strength.
Likes
2
Share


@Easygrower
Follow
Hello growers day 36 with the hulkberry auto and she is still hulking out I think she’s stopped stretching fully in flower now there are bud sites everywhere she is doing very well a beautiful plant very excited to see the buds fattening up that it until next week be safe and happy growing ✌️🏻
Likes
4
Share
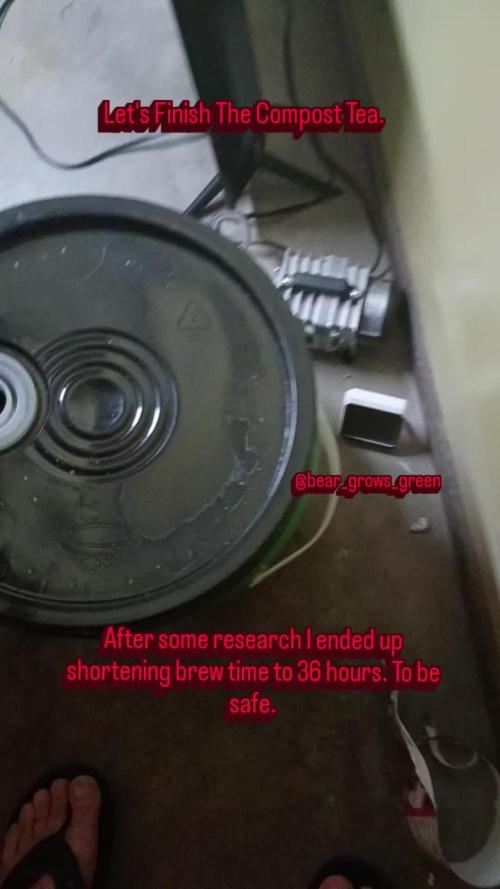

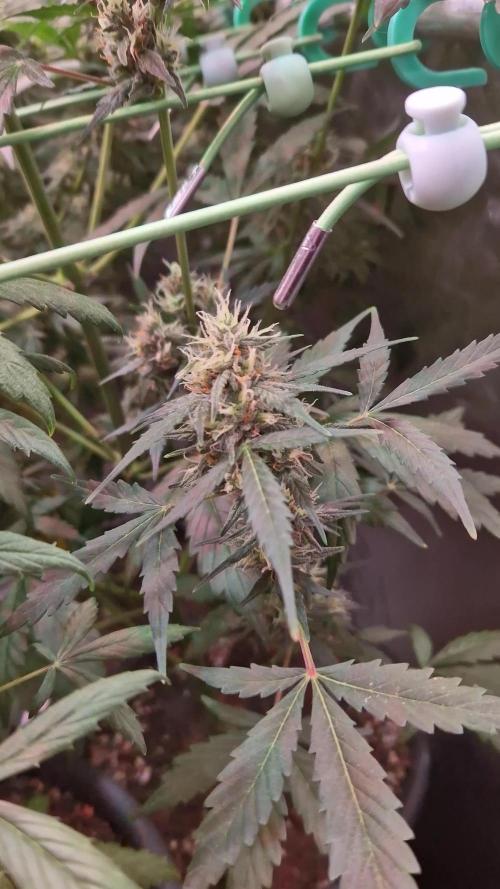
@Bear_Grows_Green
Follow
01/01 happy new year start of a new week here. Top dressed with craft blend, pushin p, and ocean blend, and 2/1 mix of buildaflower and castings .and watered in rootwise goodies just 3 gallons also raised vpd to 1.2 and ppfd to 550-600 depending on the spot.
01/02 remembered to shift the hours down to 16/8 definitely gave em to much light for to long looked pissed before lights out. Also have been adjusting light height and power to get the ppfd I want and temp. Think I got it dialed in now. Just keep tucking for now
01/05 For some reason wat I logged the last few days is now gone from here... yesterday I watered in 17 gallons total 3.5 of that in the middle with supplemental stuff. I should have kept it at 14 gallons cus in slightly over saturated in the bottom but it should be fine. Did a pretty aggressive defoliation and tucking to open up canopy and under side of plants.
01/07 got 3.5 gallons plain water 3.5 gallons of balanced tea. Tucked pretty aggressive this morning. We flip tomorrow.
Likes
7
Share


@x_grower
Follow
Last week was very challenging, two girls got really tall below the white light, while the other two below the blurple spectrum ended up being smaller and bushier, both looking fantastic. Last week I also probably went too far defoliating the shaded smaller girl which stunned it a bit for a day or two but its flowering vigorously again. Although the unexpected stretch which led to uneven light coverage overally the platns are looking solid, smelly and sugary :)

Likes
27
Share

@eldruida_lamota
Follow
Que pasa familia, vamos con la séptima semana de floración de estas Papayton feminizadas de fastbuds.
Vamos al lío, el ph se controla en 6.2 , la temperatura la tenemos entre 25/21 grados y la humedad ronda el 50%.
El ciclo de floración puse 12h de luz, el foco está al 100% de potencia.
De momento van engordando y marcándose unos aromas bastante dulces y afrutados.
COMENTAR: que una de las 3 salió macho.
- os dejo por aquí un CÓDIGO: Eldruida
Descuento para la tienda de MARS HYDRO.
https://www.mars-hydro.com
Hasta aquí todo, Buenos humos 💨💨💨


Likes
1
Share


@Ogchemst
Follow
First day in Flower! It's been... very interesting 2 weeks.. now that I survived tha, im having some lockout due to being unable to take care of my plants for the past 5 days and someone having no idea had to do the job, I'm not afraid of showing these mistakes I'm always looking forward to the outcome so I'm still having some hopes for this og kush, not everything here went as planned and that's why I want to focus on finishing up the grow and starting new ones, better ones as soon as possible, I will definitely never grow autos again as I'm just not a fan of them having to be on 18/6 schedule and I like having co trolley over my plants as sometimes things can go wrong.
Og kush had a lockout after flush it grew beautiful but still ate up some of the upper leaves.
Runtz.. yeah I like him he is a beautiful little bonsai he didn't get lockout too much but also did I'm looking forward to seeting the stretch on him if it so happens.
Cherry gusher, a tiny pheno I got this time I'm looking forward to growing 4 next time and hunt down a pheno.
They say outdoors you have to play with God and indoor you try to play God.. we are not perfect and that's why I'm looking forward to the finish line.
Will i scrog? I have the net setup but I'm not sure if I will get enough stretch.
Day 3 I noticed some light white spots on bottom leaves of the plant after a flush I did recently, I diagnose this as magnese or magnesium deficiency, I'm going to up the cal mag to 8 ml and a+b to 10ml per 5 L of water along with additives extra 0.5 ml just as a touch up. Also I noticed we are at 47cm at the tallest branch after topping and lst and this thing is an absolute bush.. I could probably hide behind it if I was a kid playing hide and seek!.
Likes
16
Share


@Plantinator
Follow
It's safe to say she was reacting well to LST so far. It's time to stop pinning down and let her grow vertically as now she is showing signs for pre-flower.
I lowered the light's position a little and cranked the DLI value up to 30.
Also, dropped down the humidity to 60%.
From this week I will give her 2.5L of water.
Likes
Comments
Share

@Anon73
Follow
Week 5 and the plants are bursting out now.
I am very pleased with the electroculture, seems like the bugs do not want to touch the plants.

Likes
7
Share


@Bakeryguy420
Follow
really easy to grow mines came out
smelling like pine Barrens mixed with lemon balm , while my wives smelled like complete skittles chem gas like. Similar to mephisto white chem tbh. Yeild awesome some nice beautiful nuggets. If you notice on mines was super leafy so I ended up using the trimbag. I used it for not even 15 seconds and results show. Stuff like this investing into products like the trimbag and my herbsnow dryer has been saving my ass and time for many grows now. End product shows everytime. Will have and updated smoke report in matter of weeks. Can easily see me growing this one again but in a bigger pot ^_^. But for 1.5s gals ill take it really happy.
Processing
Likes
2
Share


Likes
3
Share


@Willy_Balls
Follow
Two very resistant phenos. It was my first go with rockwool. Definitely going to use it again.
Likes
1
Share


@Chubbs
Follow
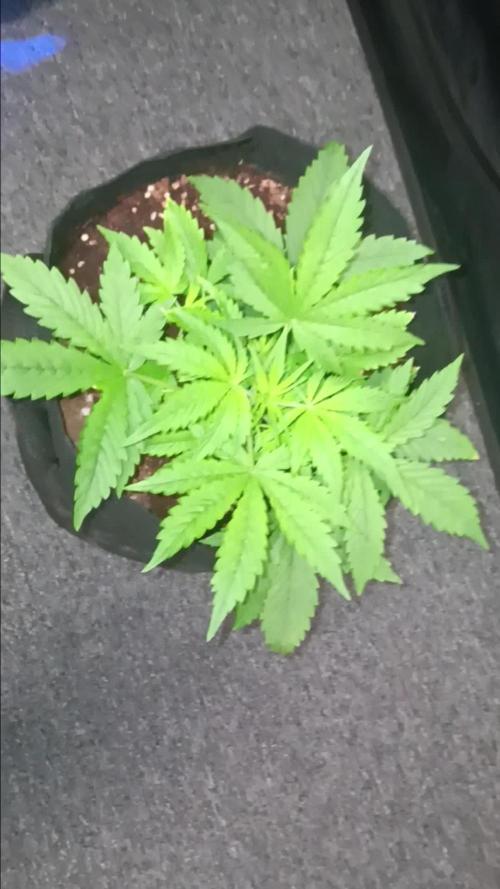
What up fam, weekly update on these gorgeous ladies. Starting week 3 of veg, wow does time fly. They've progressed beautifully, and probably doubled in size the last week. This will be the last week of veg before that preflower stretch stage appears but over all I couldn't be happier with how they're doing. All in all Happy Growing
Likes
26
Share


@Buddyman75
Follow
I saw lots of development this week.
I've top dressed with bat guano and alfalfa meal this grow to fortify the soil.
They seem to like the advanced nutrients so far as well.
It's getting a little smelly in the tent💪🏾

Likes
55
Share


@Max1973
Follow
Day 44 - Put em in flower/bloom... 12/12... they are drinking alot.....
Day 47 - Decided to thin them out and defoliate ........ pics/vids....... (video are big files, need to pause, let em buffer)
Day 48 - Posted a pic, day after defoliation.
Day 50 - more pics, recovered from defoliation, and some pics of the beginnings of the flowering....... something interesting in the day 50 pics , is the color of the light spectrum...... it looks like a yellowy sunlight spectrum..... home made DIY LED..... 😎
Globe setup is working better,
10x click- 9w - 2700k - 8000 Lm
2x osram- 10.5w - 6400k - 2160 Lm
Lightpanel- 70w (600w) - 20x blue 6400k (2000Lm) - 38x red 2700k (4000 Lm)