




Likes
105
Share


@BioBuds
Follow
FastBuds - Forbidden Runtz Showdown
We started another grow. This time we are going to start off with 2 sets of two auto's, after which we will start in three regulars right away. So we will double use the 18-hour schedule and try to save power that way.
In addition to this challenge, we are going to do a Runtz Showdown between two respected breeders with comparable strains. Her opponent will be... drumroll: the Runtz XL Auto by Sweetseeds.
Let's see where this will bring us. We did some witchcraft since we sowed the seeds by moonlight, on Imbolc; the pagan day of celebrating Bridget, the Goddess of Spring, we dedicate this grow to her. We asked for abundance and health, love and happiness and put the seeds in the ground.
The Soil
Of course, we started in our trusty organic super soil or living soil, I will include the recipe again for anyone wanting to emulate it.
The Light
And to help us again to hopefully get way over 600 grams this grow with the total grow of autos and regulars, the SP 300 by Mars Hydro will be helping us out again!
The Genetics
Fastbuds Forbidden Runtz
Taste: Earthy, Fruits, Sweet
THC: Up to 26%
CBD: < 1%
Harvest EU Indoor: 450 – 550 gr/m2
Harvest US Indoor: 1.5 – 1.8 oz/ft2
Harvest EU Outdoor: 50 – 150 gr/plant
Harvest US Outdoor: 2 – 5 oz/plant
Size: XXL
Height: 90 – 130 cm
Height US: 35 – 51 inches
Flowering: 9 weeks
Room: Indoor/Outdoor
Gender: Feminized
Genes: Sativa 35%/Indica 65%
Genetics: Forbidden Runtz Auto
Autoflowering: Yes
Thank you for checking out our new grow and for following!
Big Hug Biobuds and Sunshine.
Likes
3
Share


@MicroHidroGrow
Follow
Día 36.
Estamos en 6ta semana. Los esquejes se atrasaron debido a que han sido días muy fríos y no he logrado enraizarlos. Decidí poner el extractor de aire junto con la bomba de aire, así solamente se prende 15 minutos cada hora. Así estoy logrando temperaturas mayores a 24°C en el indoor y así voy a lograr el enraizado. La planta ya tiene un tamaño que ocupa casi todo el indoor. Pero lo importante es que la voy guiando y ya estoy proyectando como va a ir cada rama. El tamaño va a exceder lo que esperaba, pero aún así creo que si logro lo que tengo en mente, voy a sacar muy buenos resultados. Igual no me voy a arriesgar demasiado, así que si contando 10 días desde ahora, no logro que los esquejes enraicen, voy a pasar la madre a floración sola. Cómo pueden ver, las ramas están bastante gruesas, y el la ramificaciones van ganando su lugar cada una. Las raíces son demasiado grandes, aunque sé que voy a poder poner la planta en el sistema de arriba igual, aunque me voy a tener que ayudar de algo para meterlas. Es importante no utilizar las manos, ya que se pueden transmitir muchos hongos.
Voy a seguir actualizando e ir viendo que pasa. Pero ya estamos en los últimos días de crecimiento, haya o no esquejes. Incluso puede que ya pase la planta al indoor de arriba para darle mayor libertad de crecimiento. Esto me va a servir para tlmar en cuenta en la próxima camada que se vendrá. La idea de esto es hacer las cosas rápido, y no en gran tamaño. Pero siendo que ya estoy en el baile, no me queda otra que bailar.
Día 40
Los esquejes no estaban enraizando, así que decidí cambiarlos de lugar y los puse arriba de la luz, donde les da calor y luz tenue. Espero que ahora si agarren.
Y hoy fue el gran día, pasé la planta madre al módulo de arriba. Pero lo voy a dejar una semana más creciendo. De esa forma veo si los esquejes llegan a agarrar a tiempo. Y además tuve un problema en el trasplante. Primero que la planta se hizo más grande que lo esperado, y la raíz también. Cuando la pasé, hubo contacto de la raiz con prácticamente todo lo que había cerca. Sumado a que se enredó en el oxigenador, así que quedó una pidra difusora en la raíz.
Dado el alto riesgo de haberla contaminado con algún hongo, le puse una solución de agua con agua oxigenada, recirculando continuamente, para lavar las raices y de paso bajar el stress de teansplante. Mañana veremos cómo arranca el día.
En el aprendizaje me llevo que en la madre, es mejor hacer un corte en el primer nudo, o dejar las ramas del segundo y quitar las del primero. Y así que queden sólo dos ramas, para luego dejar a los esquejes en el medio. Eso planeo hacer con la próxima variedad.
Entre tanto ahora sólo me preocupa que la raíz no se haya contaminado en el traspaso. Ya en 8 días estaré pasando a floración si no hay esquejes. Si llegan a agarrar, habrá que dar unos días de crecimiento hasta que alcancen a la madre en altura. Pero ya está todo en definición. Ahora sólo queda esperar y seguir guiando a la planta. Ya tengo ganas de poner la próxima, pero falta bastante para eso. Tengo 10 semanas de flora, así que recién en 5 semanas voy a poner la nueva madre.
Likes
22
Share


@NanoLeaf
Follow
End of Week 7
CO2 is definitely increasing growth rates but also changes the game with controlling your environment now that it has to be sealed in order to not waste CO2 unnecessarily. You change one thing and it adds many other variables to keep everything in check. I am learning everyday and that's why I grow.
The trellis net is doing its job and the canopy is looking nice and even.
I also added a soil top-up and top dress of some BioBloom and Mycorhizae so it can start breaking down before I flip to flower next week (Slow release dry organic amendments). And the ladies are using up nutrients in the soil much faster because of the added CO2 (another variable to take into consideration - faster growth = faster nutrient consumption)
In detail:
-Carefully removed trellis netting
-Ammended each plant individually with my soil mixture and nutrients
-Placed them back in the tent
-Reinstalled trellis netting and trained the ladies to shape
Pest Report:
Thrips VS Ladybugs...
I decided to fight fire with fire - I purchased Swirski-Mites from Koppert (They are beneficial insects that feed on the eggs and larvae of thrips and other unwanted pests). As for the adult thrips - I got very lucky and found about 10 Ladybugs in my garden and decided to introduce them into my grow room as they will feed on adult thrips and any other unwanted pests.
I did not spray any insecticide this week and it really seems like the ladies are happy with my new method of bio-warfare and are wilting less and less often

Likes
14
Share


@CanarianGrow92
Follow
First week of flowering and its going great! The plants are still nice and green from the biogrow we gave some weeks ago, next steps is to give some guanokalong bloom nutrients and a small shot of green sensation from plagron!

Likes
18
Share


@Michigangrown95
Follow
They are eating like no other. They are getting a solution between 600ppm to 790ppm depending on run off every 2 days. Keeping run off as close to 700 to 800 as I can. These girls are doing great stretch has slowed down but nuggs are starting to grow. The white widow is definitely the best sugar producer than the og #1 is in 2nd the the Bruce bangers they have a crazy amount of hairs and are just growing differently I know they will still have great production though all in there own time. There will be some great colas forming hear really soon and so far so good thank you for your time of looking and happy growing and god bless.!!


Likes
2
Share

@REDSTUMPZz
Follow
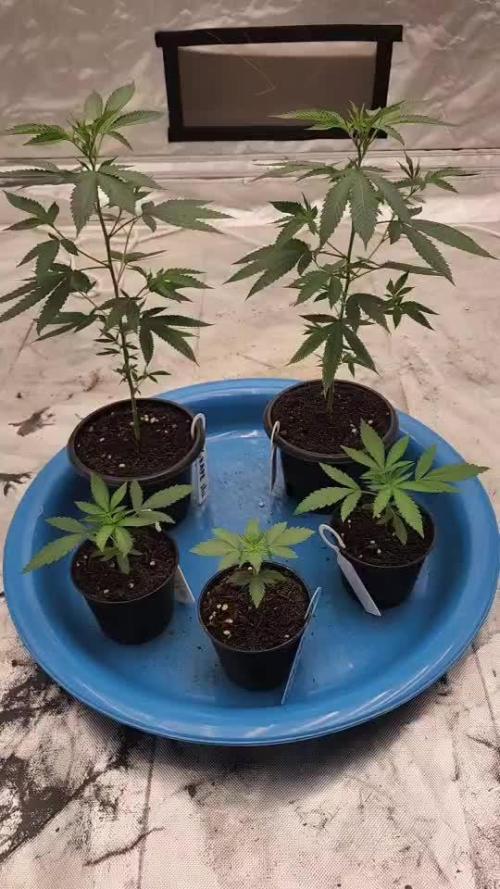
*** SS.3 WEEK 3
- RS 11 # 1
- RS 11 # 2
- GRAPE SLURRI (CLONE) # 1
- GRAPE SLURRI (CLONE) # 2
- GODFATHER * PLCG S1 SHE SMELL LIKE COCOA NIBS


Likes
22
Share


@Bread_n_Buds
Follow
There are some things that still amaze me, one of these is the huge autoflowering that I can do lately. Today I harvested the second Green Crack F1 Hybrid Automatic by Zamnesia.
** Remember that for all strains we have at least two plants, one left to grow straight and one worked with the techniques (go back in the week too see).
Technique Used // In this case we let the plant grow straight and it seems to have worked great. I think thanks to the Plagron additives we had powerful and fast growth very voracious in everything in fact it was very difficult to keep it in balance and not send it into over.
Better with the techniques or normal? This time I have no doubts, even if this wonderful one had the grace of a slightly less cold vegetative there is no comparison it is a marvel of nature queata without the use of techniques but with a wise cleaning at the bottom to have only flowers of great quality. Zero popcorn totally.
Flower quality // The plant has resined very well everywhere and unlike some autoflowering plants that fail to consolidate the flower here we have pure Carrara marble. A flower of this quality is truly a pleasure to see, touch, smell, feel. Exceptional. The trichomes are mostly milky, some transparent and some amber.
Check the article in your language // https://www.zamnesia.io/it/guida-coltivare-cannabis/333-lavaggio-delle-ceme
Feertilizers// I am very happy with how I managed to unload the plant that at a certain point before going flush was fed a few days only with additives and then went flush and we are discolored sufficiency.
All the fertilizers and additives of Plagron in the green version / 100% organic have fully satisfied me. Choose your soil based on your style and calculate the sheet on the site www.plagron.com
You can instead find the fertilizers in convenient all-inclusive packs on the Zamnesia site.
Try a seed of this strain that drives us crazy..
---- https://www.zamnesia.io/en/10677-zamnesia-seeds-green-crack-f1-automatic.html
Zamnesia Description // Forget what you think you know about cannabis. Green Crack F1 Automatic by Zamnesia Seeds is here to shake up the entire industry. Using F1 genetics, growing cannabis has never been easier. These plants offer uniform and abundant yields. Get ready to harvest high-quality buds, full of flavor and amazing effects.
Music and Frequencies // For about 4/6 hours a day my plants listen to 432Hz frequencies made especially for their well-being and sometimes a bit of black music to give them those vibrations that only music can give. www.radionula.com
All the best that mother nature has to offer is at ---- www.zamnesia.com

Likes
1
Share

@KushSorbet
Follow
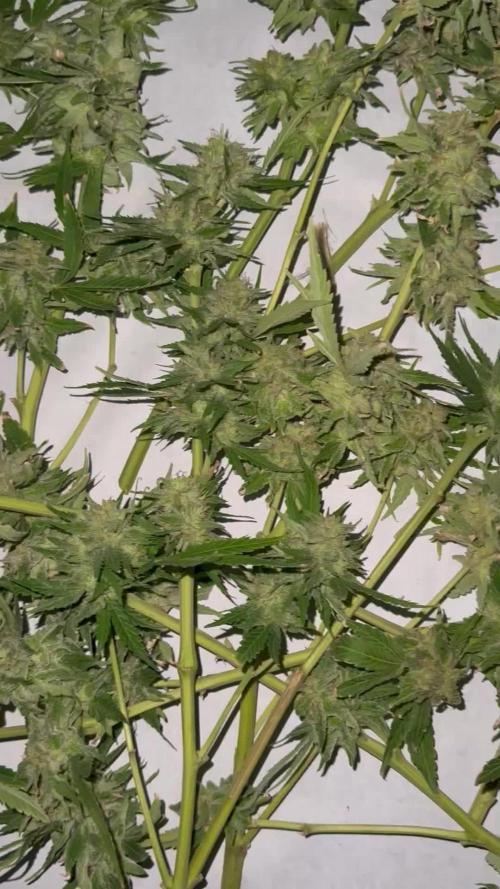
Forgot to upload earlier but overall a successful grow, had to pull the plug a bit quicker since borealis mold had started to appear slightly. Nonetheless saved almost all of the crop and opted to dry trim to preserve the quality/terpenes




Likes
8
Share

@Smoking_Joe_Frazier
Follow
02.08.2026
Hi Growmies,
welcome back to week 8 of my Fast Buds Auto Grow!
Weather and Conditions
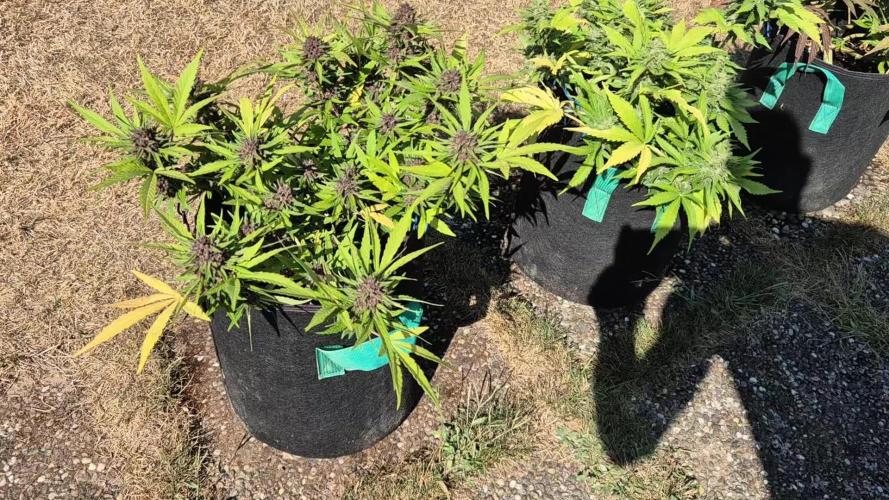
The weather has been almost perfect for the girls, with plenty of sunshine, high temperatures and still no rain at all. If these conditions continue for another two weeks, I might make it through the grow without any major issues. Fingers crossed!
Unfortunately, my rain barrels are completely empty by now, so I've had to switch to tap water.
Growth
The girls have completely stopped stretching and are now focusing all their energy on swelling their buds and producing more resin.
Papaya Cookies
No more side branches are developing, but the buds are getting noticeably longer and fatter every day.
Her smell has become incredibly intense. With the right wind, you can already smell her from the front of my house. Definitely not the best strain if you have neighbours with sensitive noses.
The colours are absolutely gorgeous as well—a real eye-catcher. I estimate she'll be ready for harvest in about two weeks.
Tangie
When it comes to bulking up, she has now overtaken Papaya Cookies with ease.
Just like in my 2024 grow, she's producing long, candle-shaped colas. The genetics seem to be incredibly consistent.
The aroma reminds me of freshly peeled oranges, and I absolutely love it. I think she'll need around three more weeks before she's ready.
Apricot
Apricot is also showing some beautiful colours, although she'll probably end up being the smallest yielder of the three.
But... she easily has the best aroma of them all. In my opinion, she even smells better than Papaya Cookies, although not nearly as overpowering.
Fast Buds really created a beautiful terpene profile with this one. Her buds aren't as large as the others, but they already look as if they've been coated in thick sugar. She's by far the frostiest girl in the greenhouse.
I have a feeling she's going to deliver a seriously potent smoke.
I also expect her to finish in about two weeks.
Feeding
Nothing has changed this week. I'm still feeding T.A. TriPart as before.
Over the next week I'll switch Apricot and Papaya Cookies to T.A. FinalPart, while Tangie will stay on TriPart for another week because of her longer flowering time.
Pests
Still nothing to report.
Looks like the grow gods are on my side this year. 🤞
Final Thoughts
Overall, it's been a solid—though not spectacular—grow so far.
Missing a feeding while I was on holiday probably cost me a bit of yield, but that's perfectly fine. The vacation was definitely worth it.
Now it's all about finishing strong and letting the girls ripen to their full potential.
That's it for this week, my friends.
Catch ya next week!
Smoking_Joe_Frazier
Likes
38
Share


@Aedaone
Follow
We had a good bit of strong wind and rain at he beginning of this week. One of the plants was blown sideways. This week has been hotter but he plants seem to be loving it. I was a little surprised that I had to start feeding these. I'm thinking the nutes were leached out by rain. I found out my ph wasn't as much of an issue as I first suspected. The problem was lack of iron. I added an organic iron supplement and it cleared up the yellowing. It also ph'd my nutrient solution to 6. The tops I took and attempted to clone didn't clone. It was a fun experiment though. Overall a great week. I expect to see some pistils next week.


Likes
10
Share


@Mo_Powers
Follow
the first week in the greenhouse is over and i think it has recovered well. still quite small but i think it will start to grow well in a few weeks. let's see. hope dies last

Likes
161
Share


@FrontRowAG_BrianG
Follow
WEEK 2 FLOWER
⭐️NUTRIENTS USED ⭐️
Front Row AG Si .5ml per gallon
Front Row AG Part A 3.3g per gallon
Front Row AG Part B 2.2g per gallon
Front Row AG Phoszyme .4g per gallon
Front Row AG Bloom 2.6g per gallon
Front Row AG Triologic 1ml per gallon
Front Row AG CleanUp .2g per gallon
This week the whole slate of Front Row AG nutrients are used. For my first experience using salt type nutrient, everything seems to be going well. No deficiencies and no signs of stress. Mixing is super easy and everything dissolves 100%.
My lights were gradually raised by 5-10% every day until 100%. Beginning the week PPFD was almost 1000, now it is almost 1500 PPFD.
To supplement all of the light these plants will get, high doses of CO2 are given during daylight hours. The room stays at 1500ppm at a minimum.
By weeks end everything under the net will be stripped and the canopy thinned of all large fan leaves. One big stressful event, so the rest of flower the plants can be left alone to bloom. It’s best to do it once IMO.
I believe things are right on track. Calyxes are already starting to form on all of the plants and things will only get better from here.
Thanks for stopping by and I’ll see you next week.
Likes
19
Share


@xbabybitchx
Follow
Good week for this tent, everything looks good, seeing decent growth on these two girls.
Look at those beautiful pistils! also notice they are almost as big as GB1
Im pushing this tent into Bloom in 9 days, nervous but excited.
I fed them today, and I used tap water so let's see how this goes. my tap water tested at 8.0 PH after adding nutes it went down to 6.9/7 Which for me is high but i'm just going to trust my gut.
I have been buying RO and distilled and i'm tired of having to pick up some jugs every few days.
I'm pretty happy about this tent and excited to see how they transition. 👽
FEB6- switched timer on lights to 16/8 to ease the transition of 12/12.
FEB10 UPDATE- girls look good, happy, switching to flower once I know if GB1 is female or not, hopefully everyone will enjoy the next life stage!!! check video for update!


Likes
13
Share


@nopes
Follow
It's getting there! Maybe a week or two for the Quick One, and 2-3 weeks for the Apple Fritter.
They are starting to show some deficiencies, but I won't bother adding any more fertilizer. But I will look into the whole fertilizing process for my next grow, so far I'm really, really happy how they are doing so far :)
Smell is getting strong, had to buy a carbon filter, so I won't bother my neighbors 😅
