


Likes
7
Share


@DRO420
Follow
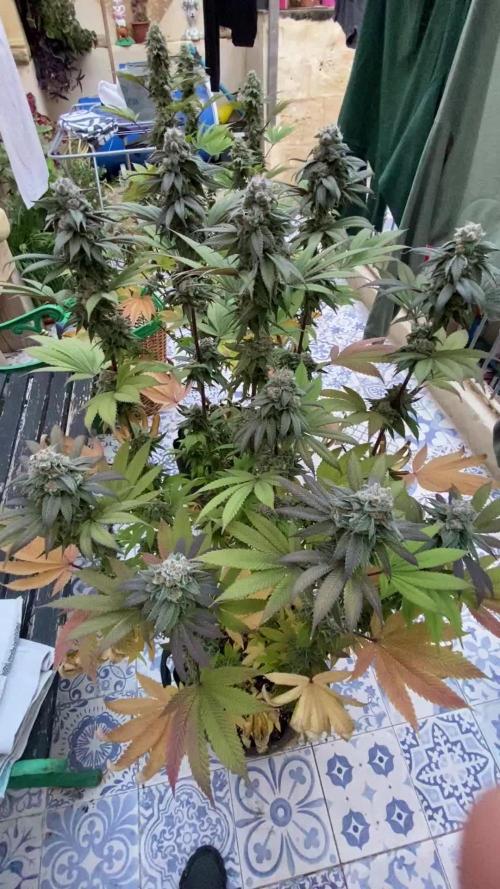
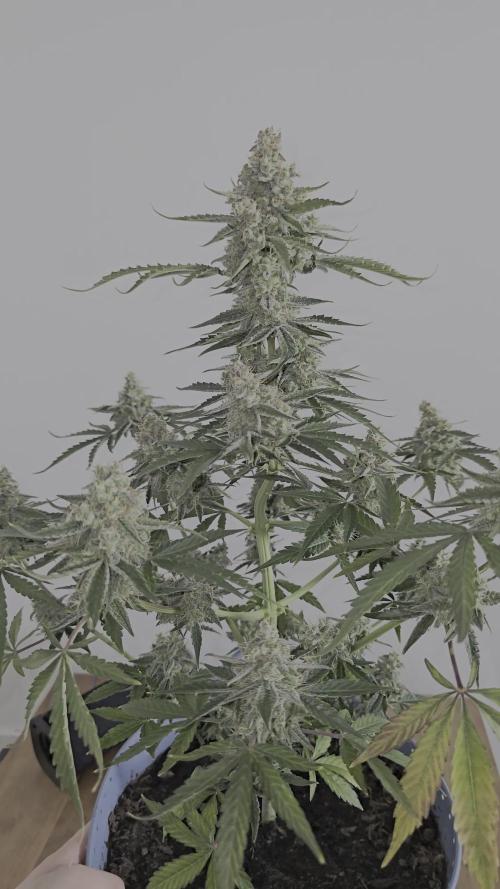
Coming into the final weeks here, about a week and a half until harvest. Trichomes are looking just about ready.

Likes
3
Share


@bigsmoke42069
Follow
Week 4 of flower 8/30/24
Defoliated a little for all the tops to get maximum light exposure.
Some strange marking started to appear on some of the leaves.
The problem was a very high salts buildup in the coco because I watered with almost no drainage for a couple of days.
EC 3, in the drainage.
PH was a little high but still at normal range.
Watered with a diluted nutrient solution with H2O2 (2.5ml a gallon).
Waited a couple of hours and watered with nutrients again same day without the H2O2 (usually I water once daily at the start of the 12 light cycle).
EC got lower to 1.6 and on the following days it got lower even more to 1.3.
The plant seems happy and there is damage only on some parts of the leaves/branches. (seems like the salt buildup was only in some areas of the roots because only specific ares of the plant got damaged.)
I like to see the daily progress in mass and trichome production :)
Noticed the plant mass increasing daily.
The smell intensified a bit
I grabbed the leaves I defoliated, rubbed the trichomes to release the oils and the smell was just incredible, It is not fully developed yet so I cannot put my finger on the most dominant terpenes, but I can surely tell the smell of tropical fruits mixed with sweet candy notes are something mega pleasant.
Watering with nutrients daily (mama likes to drink a lot).

Likes
5
Share


@Rasjavi420
Follow
Real simple week for these girls. KNF with fish hydrolysate, Build a Soil Trio (Coco, Q, and Build a Bloom), humic acid, and cal-mag.
The 5 gallon is looking good. I've grown bigger plants in this size pot but this looking like a real fast finisher, maybe 2 or 3 weeks more. It smells great too! Pine and citrus notes when I rub the sugar leaves.
The 15 gallon is .... not that great. Im thinking of pull this one and planting another plant. It's unfortunate cause I wanted to see this strain at full potential in the 15 gallon but it never recovered from the gnat issue at transplant. Sucks cause it's the last Six Shooter I had but it just means I get to grow something different in the late summer sun. We'll see what happens next week.
Also, I caught this spider coming in at night to munch on pest. Best IPM you could ask for (but I still sprayed some EM-5 lol).
✊🏾

Likes
9
Share


@Mr_nugs_lover_David
Follow
This lady has developed great! I can see long internodes on her as normal, and she has stretched a little bit looking for that light indoors, but now she has been completely moved outside as she is now a strong plant almost adult ready to give her best! Welcome 2021 outdoor season!!

Likes
5
Share


@Ewok923
Follow
It's going great just checking the Ph daily and making sure the canopy is ready for flower trimming to where I only have the very top 2 sections on all 6 of my plants

Processing
Likes
2
Share


@Greenbean15
Follow
Lots of bud development, starting to stack up a bit. Thinking I will see a lot more bud growth in the coming weeks.
The older PT is finishing up this week and starts our harvest for the next few weeks. I’ll be checking seeds on the buds I pollinated and trichomes on the others. There are a few random seeds isn’t he tent but so far it appears that the majority of the bud is seedless. I think I was able to minimize the pollen like I wanted to.
Male plant was chopped at the beginning of this week after only a few pods opened.
I only needed a few to get enough seeds to grow again in the future.

Likes
53
Share


@Mastr
Follow
Just chop her down in 75 days from seed
Veg 21 days
Bloom 54
She produce very dense nugs alot better than before I think without bloombastic won't happen I let her dry in 23° for 32 hour then 24°for 3 days then ready this is quekest way you can dry your bud without test or smell like grass its take max 5 days


Likes
Comments
Share


@Sativ_420
Follow
Tuvieron dos dias de lluvia intensa y para prevenir plagas le hice una buena poda. Hasta el momento vienen creciendo sin carencias.

Likes
21
Share


@CannabisRomania
Follow
The plants seem pretty strong and resilient, have a interesting smell.
The buds are very different from a plant to another in shape and trycome production.
I had to cut them early because of the high heat, but the majority of the trycomes were milky.
Likes
5
Share


Likes
20
Share


@L8bloomr1008
Follow
She got a nice fade going. Been feeding just ph’d water this week. Idk if she’s slowed down drinking or if my soil is a little water logged but the pots definitely staying heavier throughout the week.
Dropped my light closer to the canopy but lowered the I reality slightly cause temps were creeping into the 80’s. I think we’re cruisin. Can’t wait to see how she turns out.
Likes
22
Share

@BLAZED
Follow
Average conditions 12 days dry period:
Temps: 20.2 to 22.4 degrees
Humidity: 57.4% to 61.7%
Results:
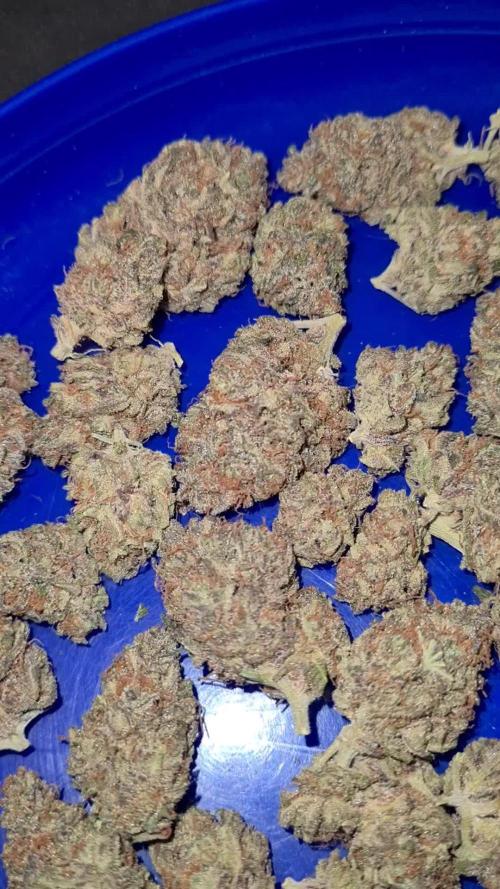
White Widow #1: Buds: 82 grams. Trim: 36.04 grams.
White Widow #2: Buds: 87 grams. Trim: 34.54 grams.
Total gram per watt: 2.22
Thanks for following this journey! See you in the next one!
(Will add smoke report soon)

Likes
4
Share


@QixxGrows
Follow
Switched to flowering. She grew 10cm in 3 days... absolutely crazy.
I took the tough decision to discontinue the TimeLapse. My tent is not big enough to have the camera in a place that kinda makes sense. So I'll be taking manual photos in the coming days and uploading those.

Likes
16
Share


Likes
4
Share


@Fingerblaster96
Follow
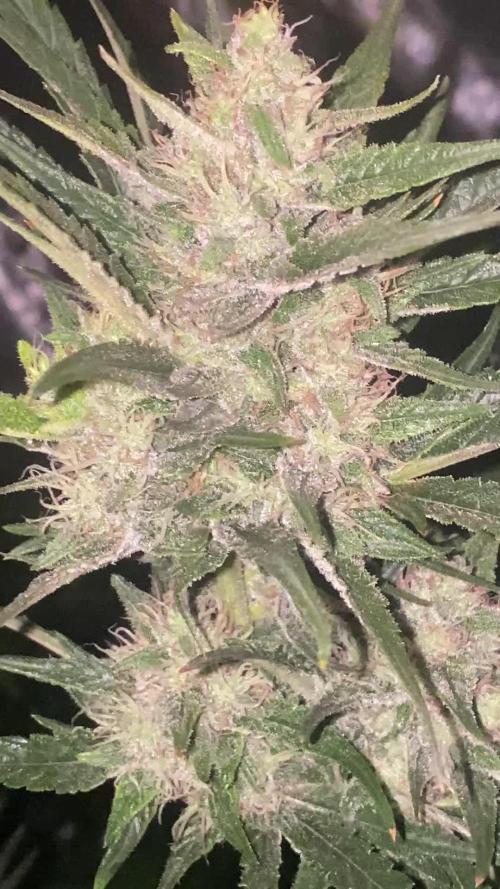
Starting to crystal up and smell strong, very lemony
hairs are starting to change to orange and its filling out a bit
i wish i veged it more but fair cop this is an experiment

Likes
13
Share

@Roberts
Follow
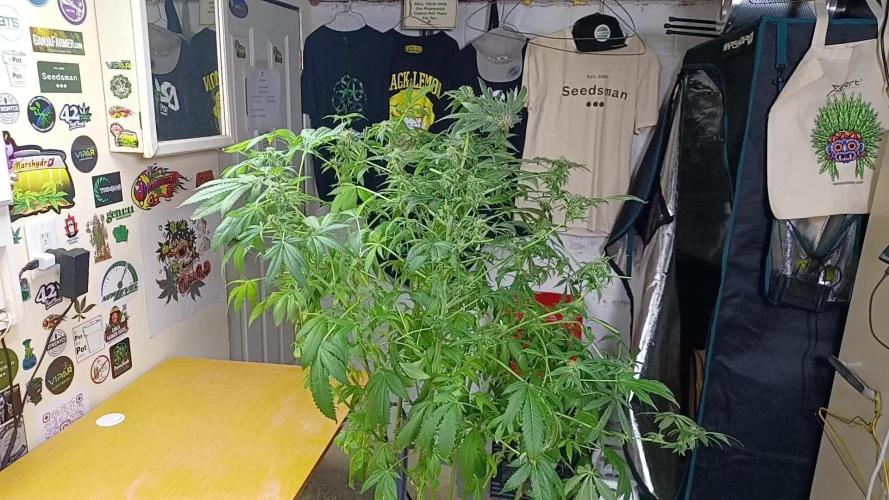
Sorry I didn't do updates in flowering. This was the smallest plant in my 4 plant run. Plus I had to turn the light way down to preserve the profile of the others that were getting in the lights. So it didn't get to grow to its full potential. Smell like a sweet, earthy, herbal smell. It's not my best grow, but it will be a nice sample of it for sure. Thank you SSSC, Dutch Passion, Athena, Medic Grow, Hon&Guan, and Spider Farmer for everything. 🤜🏻🤛🏻🌱❄️
Thank you grow diaries community for the 👇likes👇, follows, comments, and subscriptions on my YouTube channel👇.
❄️🌱🍻 Happy Growing 🌱🌱🌱
https://youtube.com/channel/UCAhN7yRzWLpcaRHhMIQ7X4g.
Likes
8
Share


@GoosengrowerUK
Follow
Hey my growmies hope everyone is keeping well just a wee update on the garden all looking swell they had a nutrient feed today comprising of:
Nukeheads uranium veg: 1tsp/gal
Vitalink CalMag: 5ml/gal
Urb naturals: 15ml/gal
Vitalink BioPlus: 10ml/gal
Vitalink PH up: PH'd to 6.8
Anyway I'm rather concerned about the lemon meringue autos as I had a cold snap last week so reckon they've self pollinated but not 100% so I've tried them with another flower nutrient feed to see if they'll spark up if not I'll just wait till harvest and drysift them 💪

Likes
14
Share

@The_Holy_Herb
Follow
Hello everybody!
This was the last week for this little Titan F1, yesterday the plant got harvested and now is hanging upside-down in darkness.
Is hanging as a whole plant, I was afraid to wet trim it before as my humidity is not always in the best value ranges.
So I preferred to be on the safe side and avoid super fast or excessively drying after a wet trim.
I will have a little more work to do during DRY trimming but is ok, is just 1 little plant.
In this last two weeks not much was going on.
Just soil flushing and constant checking on trichomes every 2/3 days.
This was the last week, the plant again got only plain water adjusted to the right pH, around 6.4.
2 liters of water every 2 days.
For a total of 6 liters this week.
Yesterday at day 85 the plant FINALLY got chopped down. A little late on the schedule, it took her around 10 days longer than RQS indicates.
Overall from my observations it looked like the plant could go longer that's why I kept her till day 85.
Also the trichomes were not ready yet (somewhere around 90%).
Before harvest I actually checked the trichomes for the last time and FINALLY they were all nice and milky. Almost 0 lucid or transparent. I chopped her in the perfect moment I believe.
In the last days I lowered a little bit the intensity of the light to 50%, I noticed that on the main cola the terpenes were evaporating. The light was too close and definitely too strong.
This was due to my latest lightning upgrade. From 70 to 100 watt. I should have kept the old lighting on untill the end of her life even if was for just 1 week.
Anyway the new light it gave her benefits, the plant definitely got more beefy with the new illumination. But also got some light burn and stress. But the most important thing is that the plant survived this journey and now is drying up.
So the last two days before harvest the light was at 50%, in fact the plant recovered so well and the main cola started to smell again. Im sooo happy.
There are some purple spots on buds 💜 from light stress and genetics of course.
Regarding drying and curing the plan is:
Drying in darkness for 7-10 days. Temp 17 celcius and around 51-53% humidity.
Curing inside air sealed jars with Boveda humidity packs for about 1 or 2 months. I dunno if go for the 62% or the Boveda 58%. I think i will start with 62% and then decide if I like it or needs couple % less.
Of course in one week after is dry I will do the first smoke test without curing it, im too excited and impatient, it was 3 months maaannn, time to smoke test it now. I will keep 1 or 2 grams and the rest will go in the jar for the final cure.
Honestly I never look at the dry weight, is a bit too vague, full o little branches, leaves... Just not important for now.
Next week when I do the dry trimming I will update with the last pictures and the final dry weight.
Thanks to everybody and see you next week.
Likes
7
Share


@Organic473
Follow
Her growth this week was extraordinary. The extra hours of light works. I will continue her in veg for another 3 weeks. Hoping she is ready before the end of November.