
Likes
Comments
Share


@Nugs_are_us
Follow
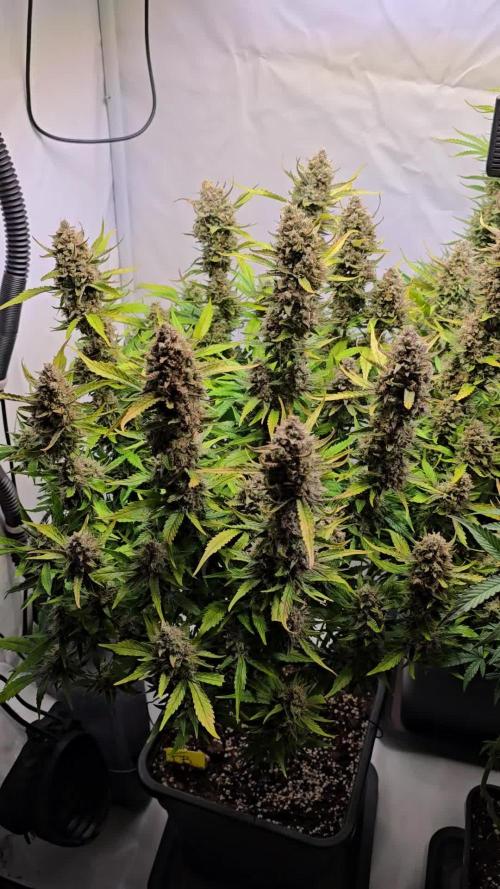
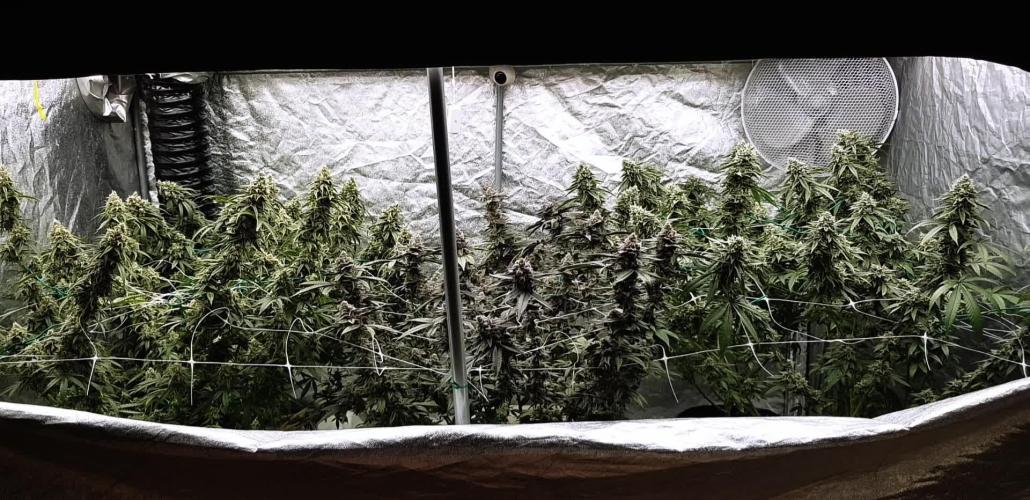
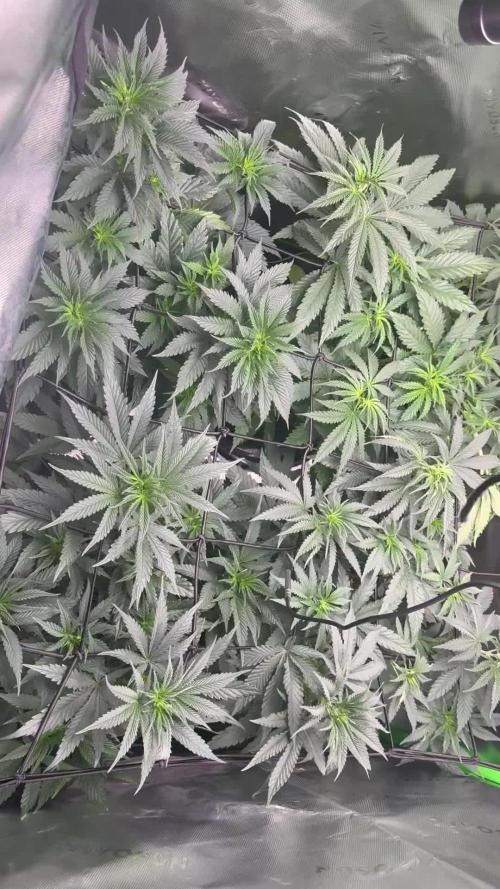
Welcome to the last week of veg the lady’s have been switched to flower last night. Nothing but buds from here on in!
This week was all about setting the lady’s bud sites up as even as I could and a little defoliation before they were flipped. All the plants are within a inch of each other and each plant tops are bang on same height.
We stuck with the feed twice a week for the last week of veg and are right on the line of nute burn on one of the girls, we will go easy on the start of the bloom nutes and wait until around week 4 or 5 to go back to the feed twice a week again.
I’m interested to see if the gold leaf will stretch out a lot more than the super skunk and big bud, if so I might have my hands full trying to keep them all under the same lights.
Until next week happy growing 🌲🌲

Likes
108
Share


Likes
16
Share

@ThatsmyGrow
Follow
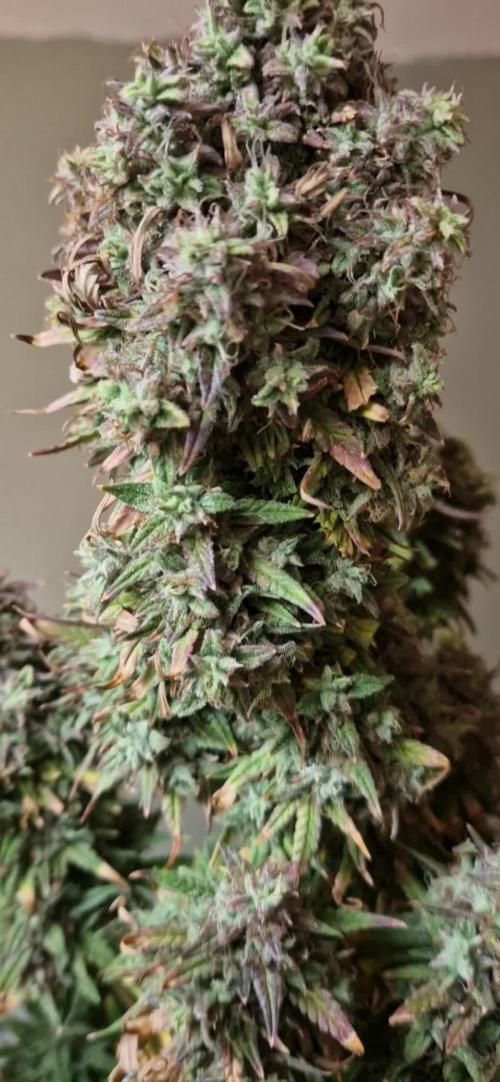
I'm keeping a close eye on the tichomes, but they're still not amber enough for my liking.
So we'll give her another week and flush her out.

Likes
44
Share


@ILoVeThiSpLaNt
Follow
Giorno 74 (14 fioritura)
Le piante stanno abbastanza bene.
Per il prossimo giro autunno/inverno dovrò stare attento con le temperature perché tra vegetativa e ora inzio fioritura hanno sofferto un po' di basse temperature (nulla di preoccupante ma preferisco avere 23/24° piuttosto che 17/18°).
Come detto la settimina scorsa ho dovuto flushare una Pink Gasoline perché tutte le foglie avevano macchie chiare distribuite in modo non uniforme.Ora, dopo dieci litri di acqua con gli ultimi due con una leggera dose di fertilizzanti finalmente i nuovi getti sembrano stare meglio.
Tutte le altre piante stanno bene, sta solo a me non dare troppo cibo e monitorare il colore delle foglie per correggere eventuali eccessi/carenze.
Non posso fare danni con questi incroci 😃 🙏
A settimana prossima sperando di vedere un po' di resina 😋


Likes
22
Share


@ChachoGreenCrown
Follow
Excelente resultado el que hemos obtenido con estas cepas de kannabia, pero esta se lleva la palma.. para mi, es la favorita del cultivo. Ha sido la más fácil de cultivar, la que mejor se adapto en el espacio de cultivo.. bastante productiva y con una resina brutal.
Sabores cítrico y mango muy acentuado.. es una pasada fumar esta cepa.
Con esto damos por terminado el cultivo con kannabia.. disculpad la tardanza en publicar... tarde o temprano siemore cumplimos!
Hasta pronto amigos! Un saludo growers 💚👨🌾🏽
Likes
33
Share

@GERGrowDesigns
Follow
Dear Growers ,
Welcome to Flower Week 7-8 Day 49-56 from Flowering , we’re excited to share a very special project with you:
NARCOS SEEDS Kingping Kush .
With dedication, knowledge, and hands-on practice, we’ll guide you step by step through the journey—watch with us as growth, development, and small wonders unfold before your eyes.
Whether you're a beginner or an expert, you are warmly invited to join, ask questions, and share your own experiences along the way!
Project Setup & Conditions:
• Brand/Manufacturer: Narcos Seeds
• Tent: 222cmx150cmx150cm
• Light: 2x 720 Watt Full Spectrum
• Humidity: 40%
• Soil: Narcos Organix Mix
• Nutrients: Narcos Products
• pH Value: 5.6
A Special Thanks To
Narcos Seeds
for the amazing collaboration, trust, and generous support in making this project possible. Your contribution is truly appreciated!
Congratulations on Your Own Projects!
We celebrate your growth, your creativity, and the passion you bring to the table. It’s truly inspiring to witness at Each visit .
Stay curious and keep up Growing —we look forward to welcoming you back for the next chapter soon!
Likes
32
Share


@TheItalianGrower
Follow
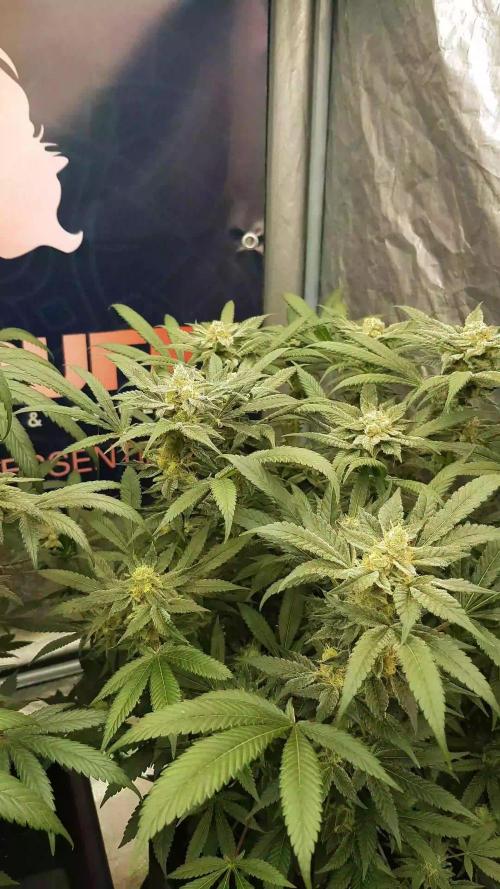
This week I had some problems with the electricity .. Now everything is fine, and the plants are fine .. They have resumed their normal growth .. Another 4 days and I will switch to flowering


Likes
73
Share


@guerilla
Follow
Stretching has stopped.. now i think they will start to get fat.
Smell is so sweet now!
💚

Likes
15
Share


@Messypies
Follow
Lovely growth on the buds this week. Struggling to smell at the moment due to my filter but once out of the tent it is smelling beautiful


Likes
3
Share

@pickonme2002
Follow
1 royal crit brought to harvest. Happy with the grow the RQS Royal Critical are well worth a grow huge yield across 3 plants. When the last one is done mid June i will update the final dry yield.

Likes
36
Share


@Fayah_Burn
Follow
Today on Day 141 and at the same time @ the end of the 9th week of flowering it is Harvest day (final harvest) for the remaining two Tropicanna Banana's (Plants #1 and #3).
Plant #4 was harvested on Day 134 (8th week of flowering) - see harvest pictures week 8
Plant #3 was harvested on Day 138 (9th week of flowering) - see harvest pictures week 9
Did not take any wet weights as i am drying the buds on the stalks and i dont wanna know how many stalkes i grew 😂
Will be back soon with the dry weights of each one of the four ladies. Some pacience is asked now 😬


Processing
Likes
10
Share


@VovaFarms
Follow
Report on week 3 of veg: I lower the RH to 50-55% while the RM stays relatively on the higher range: 27-29C daytime and 18-22 at night. I had nice visual on the 6th node of BB3, Larry Bird and Gelato plants and few cm. to avoid any eventual stem splitting, so i topped them. I guess the Gorilla will be ready for topping by tomorrow. Unfortunately i have to work with hard water so i have to keep constant eye on the water's EC. For this reason and from personal experience i wont increase the nutrients dosage any time before flowering. The high percentage of worm castings is doing wonders and help me a lot with the substrate's maintance. I did some runoff water measurements and end up with the following values: Gorilla had 2.75EC and 6.5pH, Gelato got 2.70/6.6, Larry 2.85/6.7 and BB 2.20/6.9. Substrate pH is 7.0. Once again, I have to say that Sunmaster's Dual Spectrum HPS are indeed super powerful lamps. I added another clip-fan to ensure a nice breeze around the plants. I will follow the general rule of thumb and give the plants 10-14 days to recover from the HST. Once i week i spray the plants with foliar iron-based nutrient solution👊 (Plagron Vita Race). It boosts the photosynthesis, plus it washes and cleans the leaves. P.s. only the Larry Bird is topped on the pictures. I topped other two today, but i didnt want to switch-off the lights in order to take pictures. Peace!

Likes
21
Share


@cadur
Follow
LST has gone well, branches are as far away from the middles as I can get them. Very happy so far, however grow costs are creeping up with the heater and two spider farmer sf1000s.
No leaf issues, it's paid off not using any nutrients at all so far. Just tap wate which is hard where I am.
Signs of pre flowers....will add 1/4 recommended flowering nutrients, probably at the end of the coming week.
Likes
5
Share


@Lifesgarden420
Follow
They really know how to provide great genetics
We have never had an issue with any of their strains one of our favorite brands to grow all year round thank you so much for this great contest to help bring the world together thank you again @divine.seeds
