






Likes
19
Share


@Tommy716
Follow
This week there growing vigorously some plans have gained 6-8 inches in past week!! Had to do some pruning and low stress training to keep the light just right. Went ahead and cranked up all the lights to 100% to aid in flowering as well. Enjoying the features of my new Led setup.Have started to tune the nutrients to support flowering. Taking small steps. There are no signs of stress so far. Finally added a dehumidifier to keep moisture at bay, along with a massive exhaust fan.Still have to be patient and let the lady's tell me what they want. 🙂


Likes
2
Share


@MyLittleGarden
Follow
Blütewoche 2 – Blattpflege, ScrOG & Biologischer Pflanzenschutz
Zeitraum: Vom 29. Mai bis 05. Juni
Moin zusammen!
Ich habe mir mein bisheriges Grow-Tagebuch angesehen und beschlossen, künftig auf Deutsch weiterzuschreiben, damit ich mir das ständige Übersetzen spare und gleichzeitig einen Beitrag zur deutschsprachigen Grow-Community leisten kann.
Entlaubung & ScrOG-Fädeln:
In dieser Woche habe ich die King Juice großflächig entlaubt, um Licht und Luft besser ins Innere der Pflanze gelangen zu lassen. Die Äste wurden durch das ScrOG-Netz gefädelt, damit sie sich gleichmäßig über die Fläche verteilen. Zu Beginn war sie etwa 55 cm im Durchmesser – zum Ende der Woche war sie auf ca. 60 cm angewachsen.
Biologischer Pflanzenschutz – Nützlinge:
Zum Schutz gegen Schädlinge habe ich zwei Koppert-Produkte eingesetzt:
- Swirski‑Mite Plus – enthält Amblyseius swirskii, eine Schlupf‑ und Raubmilbe, die sich besonders gegen Larven von Thripsen und Weißen Fliegen richtet
- Spical Plus – beheimatet Neoseiulus californicus, eine generalistische Raubmilbe, ideal gegen Spinnmilben, aber auch gegen andere Blattmilben
Diese Nützlinge werden in langsam freisetzenden Beuteln angebracht und helfen präventiv im biologischen Schädlingsmanagement – damit es gar nicht erst zu größeren Problemen kommt.
Pflanzenzustand:
Die King Juice hat sich zügig erholt, wirkt vital und wächst kräftig weiter. Das Blattwerk zeigt ein sattes Grün, ohne Anzeichen von Mangelerscheinungen. Sehr zufriedenstellend!
Bewässerung & Mikrobenkultur:
Das Substrat ist noch gut feucht. Deshalb werde ich wie gewohnt erst zu Beginn der nächsten Woche erneut gießen. Nochmals mit EM1 (Effektiven Mikroorganismen), um das Bodenleben weiterhin zu unterstützen.
Liebe Grüße aus Norddeutschland – bis zum nächsten Wochen-Update!

Likes
30
Share


@SAC87
Follow
Day 49 Flower
Hey Growers. I did a flush last week to get my runoff closer to 1050. I’m not sure why this happens that I get tip burn doing FFW. Maybe I start ramping up flower nutes too much too quickly. I have tip burn on my Blue Dream too. I’ve gotta come up with a solution as it buggers everything up. Flushing and Dealing with tip burn instead of packing on size.
This is a 10 wk strain so I’m not as concerned cuz there’s lots of time and I think I got ahead of it. The nugs are smaller, marble to golf ball sized but hard as a rock already. The smell is of over ripe lemon when it get that sweet and Hazey earthy woody characteristic. I’m going to feed 2 more weeks and try the Advanced Nutrient Overdrive that I have kicking around. Then flush heavy for 1 ish weeks and hopefully get a nice fade.
The Vipar spectra XS2000 is doing a great job, it has me wondering if I could use it to flower a 4x4 of autos. Its super strong. My poor man’s light mover has the plants getting a ton of light every other day with a nice rest in between. There is no light burn or yellowing, a tiny bit of leaf edge curl that goes away during its rest day. I am very happy with this light and know it’ll blow up whatever I run in here next.
Happy 420 &
Happy Growing 🌱
Likes
28
Share


@Felloffthegrid420
Follow
Only one plant is not got fire ant in it making the plant stress welp there go my year I learn every year about hit the chop it what waste of good Genetics
Likes
5
Share


@Grnthume
Follow
I’m very excited about this strain. I’ve wanted to grow this one for 20 plus years. Laws have prevented me from doing that. But now that it’s all gravy baby. I say LETS GROW!!! This plant is true to its name white widow. The buds are covered with white milky Trichomes and the buds are big and super dense. Definitely recommend and I’m going to keep one of these ladies growing at all times so I can trim off a clipping and grow it from there since this clone did so well. It was only 2/3 the time to grow. than starting from seed.

Processing
Likes
13
Share


@BanditHigh
Follow
So guys , after 4 days o germination in 0.3L pots , i decided to move them for 10-14 days in 2L plastic pots . I use the BioBizz Light Mix Soil , first time also , but until now i ve used beside the feeding scheudle also Soil with High Levels of NPK , so we burned the plants and stoped them grow.
A LUMIX 250 W vegetative light bulb keeps them warm and in 2 weeks abot , i will do tge last transplant in the 15L fabric pots .
Gold Label Nutrients and Supliments , whole professional line in small bottles ( think some of them will last for years ).
Visible Mistakes and worries :
- dont know if the Light Height is good now
- when should i start the spider-mites and other acarians treatment or pre treatment
-what level of humidity should be inside in diffrent growing stages
-I m so scared about Male plants , i have no experience at all how to spot them
I had a hard week , hope you had a better one . See you later !


Likes
6
Share


@Steelseries66
Follow
3rd week now about to setup filter and extractor fan also will be starting LST in a day or 2. Everything is going well so far for a first grow hope it stays that way. Also added the humidifier at the weekend which has upped the humidity 15-20%

Likes
11
Share


@LaughingDragon
Follow
What a wonderful week of growth and flowering! been watering twice a day at 250ml per watering session, usually morning and evening.
Not being able to plug in a humidifier has resulted in me misting twice a day as well.
Likes
11
Share


@Ferelite
Follow
Harvested #2, 40/60 amber to cloudy trichome ratio, couldn't weigh wet
25/10/24 - Harvested #1, 50/50 amber to cloudy trichome ratio
Haven't weighed #2 final dry weight yet, still in the process of trimming
#2 final dry weight: 273.9g, just under 10 ounces.
02/11/24 - #1 is dry, haven't had time to trim, in jars until I have time. Estimate #1 will yield more then #2
#1 final dry weight: 351.8g, 12.5 ounces
625.7g total off both plants
#2 has better bag appeal, smell is very floral and piney. #1 is not as nice looking in appearance but takes the win for smell, has a strong skunk smell, get a whiff of cat piss whenever the jars are opened as well. Was very prevalent in the final week of flower, kept thinking the cats had got into the room and peed somewhere.
Overall happy with the results.

Likes
18
Share


@Silverback_Guerilla
Follow
11/30:
I harvested the first 6 today, flushed 5 more for the second time, and fed everybody else for the last time.
I washed all the branches using the 4-step method ascribed by Doc Bud at High Times/420magazine and many other notable cannabis connoisseurs, with slight modifications:
4 x big plastic totes/bins
8 x ounces of 12% hydrogen peroxide (or 32 ounces of 3%)
2 x cups of concentrated lemon juice
2 x cups of baking soda
10 x gallons of water in each bin
Unless your tap water stinks, you're safe to use tap water for the procedure, but I used an inline carbon hose filter to fill my buckets.
Bin #1 - 10 gallons of water mixed with the hydrogen peroxide
Bin #2 - 10 gallons of water mixed with the lemon juice and baking soda
Bin #3 - 10 gallons of water as hot tap water
Bin #4 - 10 gallons of cold tap water
I was mainly concerned about removing as much lint and cat/dog hair as possible, but also rinsing off any residue left from all the various foliar applications of humic/fulvic acid, kelp, axiom, big bloom, and tiger bloom I did. First, I put my leaf blower on low speed and blasted my plants thoroughly, one at a time, replicating 50-60mph winds for about 10 seconds and watched as a whirlwind of debris and hair flew out the back door.
Bud-washing:
Pluck any necrotic plant material and any old fan leaves off while they're still on the plant. Then, take a handful of branches and submerge them in Bin #1 for about 30 seconds, agitating it, removing from water, submerging again, agitating, etc...then remove it and let it drip out for a few seconds...then repeat the process with Bins #2-4. Let it drip dry overnight with a little bit of airflow, then dry as you normally would...baskets, boxes, etc..
I hadn't watered these plants in a few days, so they were almost in draught, but after doing this procedure, they were fully hydrated(turgid) and seemed to have brighter colors than before. Nice!😍
12/1:
The bottom part of the closet seems empty with only 9 plants in there.. 😟
I cut the harvested plants up and put them into drying baskets in the top of my closet with a small oscillating fan on. I've got the temperature fluctuating between 68f and 75f and the RH is staying between 48% and 52%.
To do that, I had to take down the small light in the top of the closet to fit the drying baskets up there. So, I moved the 3 shorter plants still up there down to the bottom and put them on top of buckets. Now the bottom of the closet looks full again!😃
I'm anxious to finish up this grow so I can get busy growing the Fastbuds Fast Flowering Photo Testers!!! When I harvest the next 5, I'll flush the remaining plants really well and that will be all the flushing they'll get..I'll let them dry back out for a few days and harvest them. I've got to make some minor improvements to the garden (adding UV, blue and red/far red booster panels and intake fans) That should put me on track to start germinating them by mid-December if all goes well.
12/3:
...early a.m...
The harvested plants are already dry!?!?? And have excellent texture??? Wow..bud washing is for real..roughly 48 hours after I hung them to drip dry, and 40 hours after I put them in baskets in 50% RH/70f conditions with moderate airflow...usually takes 4 or 5 days to get a good slow-dry in the same conditions, so I'm convinced that this must be attributed to the bud-washing procedure. I'm sold!
Here's the talley so far:
plant #1 - 115g (plus 13g larf) - Candy Cane [F2]
plant #2 - 108g (plus 18g larf) - Candy Cane [F2]
plant #3 - 119g (plus 15g larf) - C4ndycaine [Candy Cane x C4]
plant #4 - 92g (plus 6g larf) - Candy Cane [F2] - the smallest plant in the main area
plant #5 - 112g (plus 22g larf) - Candesia [Candy Cane x Amnesia]
plant #6 - 75g (no larf) - Candesia [Candy Cane x Amnesia] - grown in upper area under 200w
...afternoon:
I flushed 6 of the last 7 plants for the first time today and harvested 4 more of them. I washed them and hung them to dry.....my dripping wet bathing beauties!😍
Likes
Comments
Share

@Hempel420
Follow
Week 3: Goodbye Lazy, Hello Mainlining & Tent Issues!
Another week in the books! Since my last log on September 20th, things escalated pretty quickly. We officially ditched the strictly "lazy" mindset, made some major training decisions, and even had to deal with an unexpected tent emergency. Here is the daily breakdown of Week 3:
September 21st: The EC Component Benchmark
I spent Day 1 of Week 3 doing some lab work for optimal nutrients. I took the time to measure and log the exact EC increase contributed by each individual nutrient component. Going forward, this will allow me to dial in custom nutrient ratios much more precisely rather than blindly following stock formulas. You can find the exact readings at the bottom of this days report.
September 22nd: Water Top-Up & The Light Leak Emergency
Noticeable uptake! I topped up each bucket with 300 ml of remineralized RO water to counteract a dropping EC level. A falling EC is always music to my ears because it means the girls are actively drinking and consuming nutrients faster than water.
Later that night, I noticed light leaking through a small puncture in the tent wall and the zipper also seems to have problems.
What leaks out can also leak in! To prevent catastrophic light pollution during the future flowering stage (and avoid any hermie risks down the line), the main outer cover of the grow tent had to be replaced immediately. Doing a full tent skin replacement solo with only one working hand was completely out of the question, so I called in some much-appreciated reinforcement. Emergency handled!
September 23rd: Mainlining Decision & Top-Feeder Strategy
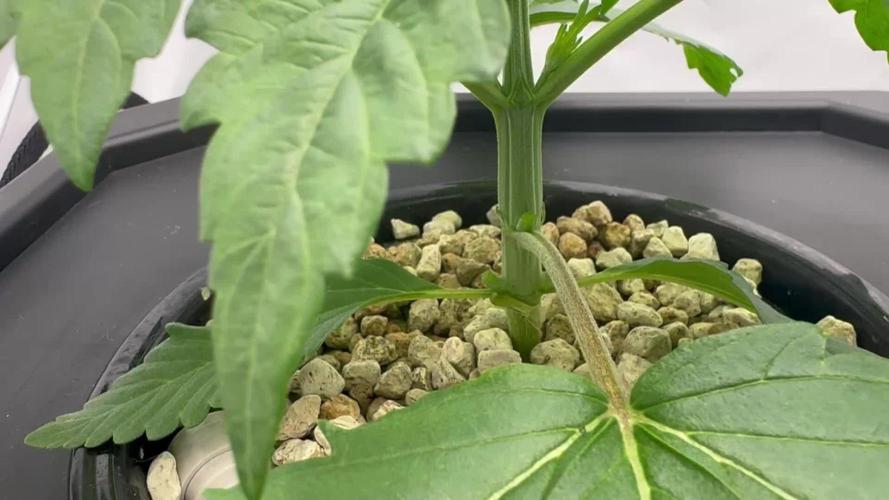
Since I already had help on standby, I figured it was time to drop the "Lazy Grow" label (or at least rename it to Not-So-Lazy). Decision made: we are mainlining!
To kick things off, I pruned away the side branches on nodes 1 and 2 to stop energy wastage and force all growth momentum directly upward toward the top node.
I also turned off the DWC system's top-feeders on both buckets. The root networks are now fully submerged in the main reservoir and thriving. Moving forward, I’ll only run the top-feeders while I’m actively working on the plants, keeping it strictly airstone-only for the rest of the time.
September 24th: The Big Chop (Topping & Defoliation)
I’m generally not a fan of stressing young plants too heavily in one go, so I waited until today to top them above the 4th node. I also completely cleaned out all growth at the 1st and 2nd nodes. Thanks to the massive fan leaves, those lower sections were sitting completely in the dark anyway and if a leaf can't catch light for photosynthesis, it’s just stealing plant energy and has to go!
September 25th: Smooth Cruising
Just a minor pH adjustment today, bringing it back down from 5.8 to 5.5. Plants are taking the topping and defoliation like total champs.
September 26th: Drop in EC & Reservoir Strategy
The EC dipped below 1.3 mS/cm today. Rather than just topping off the tanks with fresh nutes and guessing which specific minerals were consumed, I’m planning a full reservoir change out. Fresh start, clean water, and precise nutrient ratios for the next stage.
Note: Today, Sept 27th, is dedicated to editing footage and putting together this week's log! I also bought a new Grow-Cam … but I haven't figured out how to get the files from SD-card to Computer. there are some format issues and that's a problem for tomorrow Hempel.
Not planned but we did a complete reservoir change to a fresh EC 1.5 mS solution because it feels like the plants are hungry.
Now that the mainlining structure is set and the plants are recovering seamlessly, let's see how fast those new main mains explode in Week 4!
As promised, the Lab Day:
I prepared my Base water (CaO + MgO) and landed at a picture-perfect 0.272, basically a carbon copy of the original calibration. Then Vega A went in and only delivered about 90% of the EC bump I was expecting.
Note to self, shake that bottle harder, sediment is not your friend.
Vega B and Cannazym behaved exactly as predicted, Rhizotonic did its usual "not touching your EC" routine. Then the plot twist: I bumped the pH with 1.4 ml of pH+, and instead of holding steady, the EC actually dropped from 1.430 down to 1.375. Correcting the pH back down afterward didn't bring it back either, which rules out a fluke reading and points to a small calcium precipitation event: dump pH+ in one big shot instead of small sips, and you can spike the local pH high enough to knock calcium out of solution as an insoluble salt before it ever gets a chance to mix in properly. Filed away for next time with smaller pH+ doses and more patience.
Closed the 0.125 gap with 6.05 ml each of A and B, and the meter read exactly 1.505. Sticking the landing after a session with that many curveballs felt genuinely satisfying — following Canna's own chart to the letter would've left me nowhere close. Moral of the story: trust your meter, not the label, and the girls get exactly what they came for.
So if you are interested, here is the working feeding chart of Canna Aqua Vega to reach EC 1.5 mS in 10 Liter Base Water (EC 0.27):
Canna Aqua Vega A - 17.55 ml - EC 1.070
Canna Aqua Vega B - 17.55 ml - EC 1.432
Rhizotonic - 13.5 ml - EC 1.432
Cannazym - 16.85 ml - EC 1.496

Likes
8
Share

@ThatsmyGrow
Follow
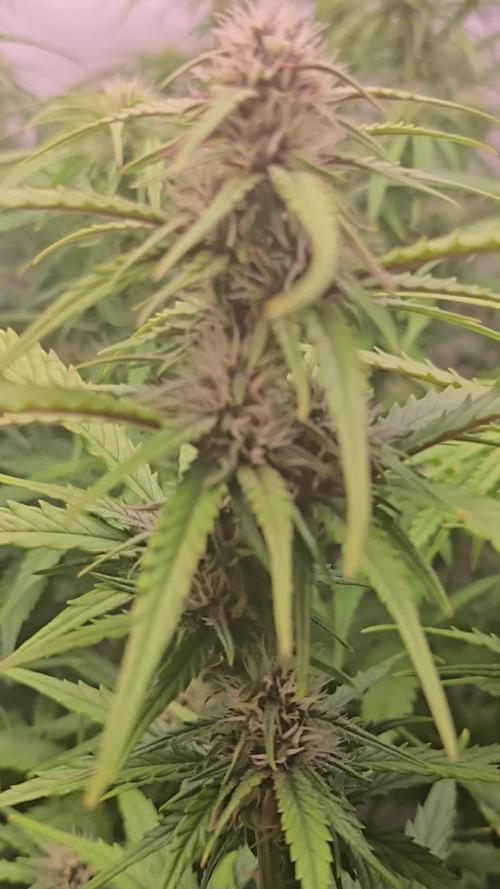
The cookies strain from fastbuds are sooo amazing. This pheno looks again so yummi, love it.
Likes
2
Share


@Ninjabuds
Follow
The Bubble OG plants are looking really good. They're all pretty big and have a similar structure. It'll be fun to see how they develop their own personalities as they keep growing.
Well, another year has come and gone. Yesterday was New Year's Eve, and I want to wish all of you a happy and healthy 2025. May this year bring you all the things you've been wishing for. Let's make this the best year yet!

Likes
3
Share


@KushManAdam420
Follow
Been a good week no signs of shock at all.
I have only been watering them with Mills Vitilize silica supplement , i think ive been doing 1 mls per gallon, slowly increasing the dosage.
topped 2 plants in here , now am i wishing i did it for some of the others .
Day 1 for all of these was the 03-08-24

Likes
12
Share


@MUZ_Farms
Follow
Small yield but great outcome on the quality , bad thing is by this point I still hadn’t realised it was a hermie

Likes
9
Share


@Gruenerfinger85
Follow
Ab jetzt werde ich meine 3 hübsche WW spülen, ich hoffe das die letzten 2 Wochen Blüte noch ausreichen das die Buds noch an Größe gewinnen, die Trichom Bildung ist reichlich vorhanden, und der Duft lässt ein schon ungeduldig werden. Das ist mein erster grow mit White Widow automatic, und mein erster grow überhaupt mit automatics.
Ich konnte einiges an Erfahrung bei diesem grow sammeln. Ich habe Fehler gemacht die ich beim nächsten mal zu verhindern weiß.
Ich werde euch auf dem laufenden halten bis dann wünsche euch dicke Knospen.👍🏻

Likes
517
Share


@Legendaryseedthumb
Follow
170g dried buds
Mars hydro TS-1000
Increase Yield & Crop Quality in Led Grow
Newest SMD Led technology provides the highest Par/Lumen output, makes you get 30% higher yield compare old led lights, can get up to 2.5g/watt yield.
Only 150 watts true output so you don't have to check your bill every month. 342 pcs LEDs, more scientifically and energy-efficient! Perfect for 3'x3' (100x100cm) veg stage and 2'x2' (60x60cm) bloom stage
https://www.instagram.com/marshydro_aliexpress2/
Peace & love - L.S.T🌟
Likes
2
Share

@GrowHero420
Follow
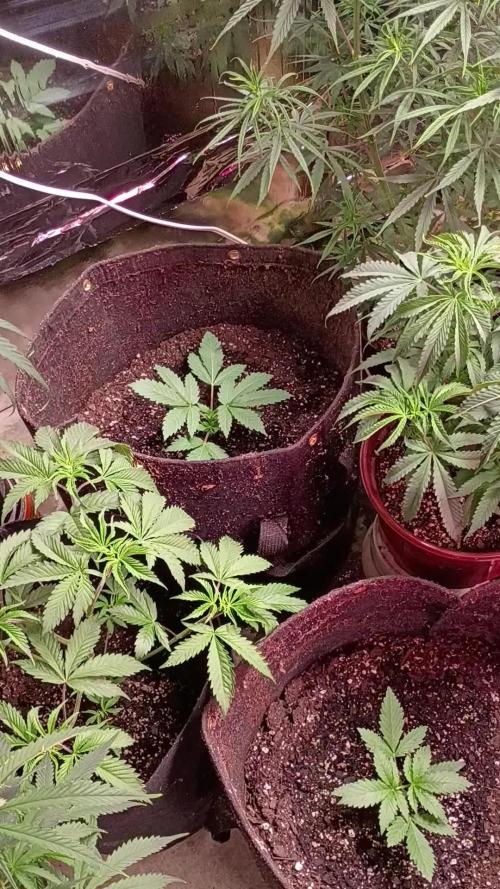
Freakshow,topped,with big bud sprouts, very green and healthy,big ridges starting leaves, Very unique strain.Autos starting to bud!!Amazing Week 3.


