


Likes
Comments
Share


@Donbehzad
Follow
The LST i did in the past few weeks is starting to pay off. The plants are spreading nice and even, not bad for a first timer but it can be better.
In this week, i’ll try to water more to boost their growth because in the past few weeks i only water them once a week for the reason that I always wait until the top soil goes dry and it took almost a week for that to happen. I read in an article that you should carry your pot after a day of watering the plants to able to know that is the weight of the pot when it has water, so you can determine if the pot is light that means you can water them even the top soil is still wet. I’ll try this method lets see if i’ll end up overfeeding my plants or not.
In this week will be doing same routine like last week, always monitor humidity and temperature. Spread the fan leaves so the leaves underneath can receive enough light.

Likes
12
Share


@CeezarMoolawn
Follow
Seeds are in a Container/ Dome , Sitting between 80-90 Percent humidity , Using 600w Air cooled vent with fans to keep temperature around 75-80 .
Day 3 , all seeds show signs of sprouting, The wifi X zombie kush is moving along well!
The 1 purple punch x animal cookies is having a hard time coming out of the cube! but should push up Tonight/tomorrow morning!
Once i see some roots on the bottom of the cubes i will be transfering into my pots and starting the ebb n flow.


Likes
55
Share


@Vincent_Van_Grogh
Follow
Can’t be a Central European summer without hiking up some 🇨🇭 mountains! The scenery is just majestic at times… and of course the doggo is loving those cowbell sounds!
Likes
27
Share


@w33dhawk
Follow
Hallo liebe growmies, ich hoffe euch geht es allen gut! die Woche war wieder eine erfolgreiche Woche 😁 ich muss sagen ich bin erstaunt wie gut die runde bis jetzt läuft und wie schön sich meine Ladys entwickelt haben, bis jetzt habe ich noch keine Mängel vernehmen können und die Damen sind meines Erachtens nach auf dem besten Weg zur sicheren ernte aber nun zur Woche
Am 08.03.23 also einen Tag bevor diese Woche begann habe ich den compost Tee angesetzt dafür habe ich 2,5L Wasser was ich ja eh in der Tonne ab stehen lasse entnommen und habe es in einen leeren behälter von destilliertem Wasser getan, dem ganzen habe ich 2x luftstein hinzu gefügt mit Belüftung's Pumpe (Eheim 200) eine kleine mini heizung für 8 L Aquarien (regelbar) auf 20 Grad eingestellt. Dem ganzen habe ich dann 15g/L wasser compost Tee (37,5g bei 2,5L Wasser) hinzu gefügt bactrex drauf 1g/L wasser (2,5g bei 2,5L Wasser) und 5ml/L orgatrex ( 12,5ml bei 2,5/L wasser) gab es auch noch hinzu das ganze habe ich dann 24 h belüftet und bei ca 20 Grad Wassertemperatur gebraut (Bactrex gab es jetzt 1x bei dieser gabe hinzu,bei dem nächsten compost Tee fällt bactrex dann weg) hab jeder Pflanze von dieser Lösung jeweils 0,5L an die Pflanzen basis gegossen vorher habe ich die Ladys aber natürlich Gewässer mit 2,5L Wasser und Dann Die Lösung oben drauf. Danach saß ich Dann knapp 4 Std vor dem Zelt und hab ausgeschnitten unten rum (alle Blätter und Triebe unter dem netzt entfernt) danach hab ich noch ca 1 Std damit verbracht Triebe von oben heraus zu entfernen die zu dicht an anderen standen ( war echt nicht einfach da nicht zu viel weg zu schnippeln) aber ich glaube ich bin auf nem guten Weg. Den Rest der Woche habe ich nur noch gehofft das sich die Pflanzen gut erholen von dem was ich ihnen angetan habe, und hab die Fächer Blätter so gut wie es geht täglich runter gedrückt unters netzt damit genug Licht eindringen kann in den Baldachin, aber irgendwie hat die Damen das harte ausrasieren nicht wirklich gestört da wie auf den Bildern zu sehen ist, ist der stretch immer noch in gange ist, aber schon deutlich weniger geworden zum Ende dieser Woche.
Am Sonntag dem 12.03.23 gab es nur Wasser zum trinken hab jetzt 3,5L Wasser gegossen und somit den Topf komplett mit Wasser gefüllt es kamen dabei ungefähr 20 ml Wasser unten raus, was halb so wild ist, aber immer hin Weiss ich jetzt die gieß menge um den Topf gleichmäßig zu füllen.
Ich wünsche euch allen eine schöne erfolgreiche Woche! Cu ihr growmies!

Likes
19
Share


@Changman
Follow
The ladies are looking incredible and so far they are still stretching, might add a secondary trelis net


Likes
2
Share


@Topshelf_only
Follow
This is around the time first grow I thought I was pushing it to hard with the nutrients and flushed realised just wants more added pk top and wateringnevery 3rd day in stead of 4
Likes
24
Share


@Richard_Harrow
Follow
I'm sorry I'm a little late for many reasons, but everything is fine, the harvest had to be done a little earlier because mold appeared due to high humidity. I liked the effect, it's a good sativa and energetic and I will definitely grow it in the future kannabiaseeds💚

Likes
2
Share


Likes
Comments
Share

@Space_kydebt
Follow
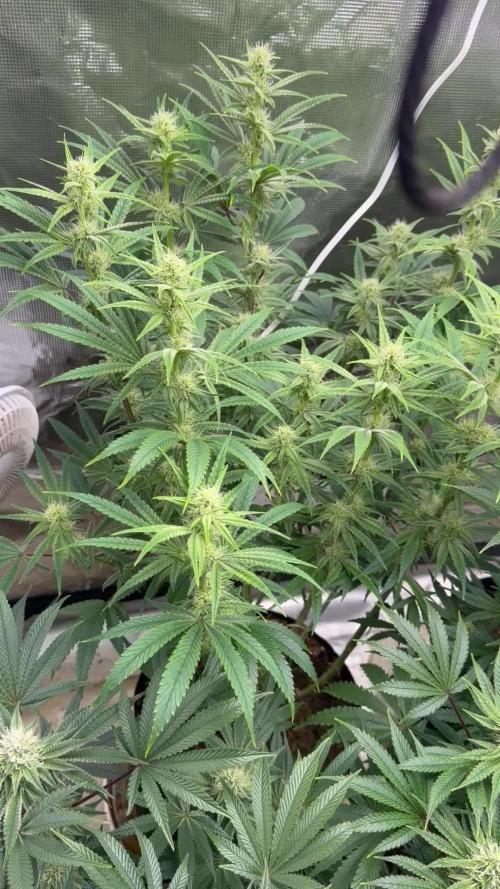
This plant has should me that it never stop growing buds site it super explosive in flower it just doing great one is doing it sativa thing which is not bad at all again not going to able to harvest all at once . It crazy but these plants are actually my favorites cause they all show different types and phenos lol which is great cause they all will smoke some what different. Great plant and great genetics for not a arm and a leg
Likes
Comments
Share

@Count-Dooku
Follow
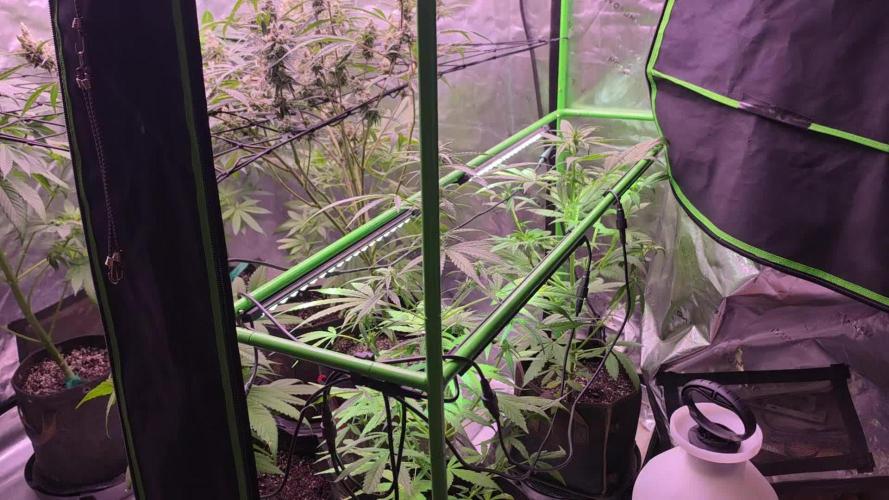
Weird bud growth, hoping what look like fox tails fill out real well in the future.
Have been saturating well and going lighter with the fertigation on this plant, in the future I think going into flower I will just cut the n part of my feed completely unless I see deficiency of some sort. As the bloom component still has some n in it.
7/26 Read EC in base at 2.5, definitely acceptable. Will continue not giving N to this plant, while the rest get get A.B.E. 3/3/1.5
Likes
25
Share


@Kakui
Follow
Veg44, defoliación grande, y ajuste de amarras. Siempre digo que será la última defoliación y termino defoliando más, ahora a qué crezcan un poco más antes del cambio 12/12
Veg46, las plantas están ya recuperadas y creciendo a buen ritmo.
Veg48, riego con solo Sensizym y Sensi CalMag, con pH 6.3 y EC 0.8, drenaje de EC 1.9 y pH 6.1(ok). Debido al crecimiento de debe ajustar amarras y quitar una que otra hoja.

Likes
2
Share


@Olduffybastard88
Follow
Week 4 fpr the tropicanna sorry for the confusion I'm getting more seeds to start from week 1 I have my other page on twitter just starting out here

Likes
46
Share


@Crwfz1
Follow
She's a absolutely beautiful monster ohh myyy gawwwddd I'm so stoked to smoke this shit it is soooo stinky my entire house is absolutely wreck of citrus skunk thanks @originalsensible this shit looks fire she's old but it is huge and buds are Soo tight and heavy I'm super impressed beautiful purple on there but she's not liking the cold temps I have I think but buds so still fatting leaves keep turning yellow tho not sure if it's natural dying off or not but shes gonna pull out till the end gonna be kick ass !

Likes
16
Share


@HowtoBubatz
Follow
My camera died serveral times so i had to do some photos for this week. I hope i get it repaired for the next week.
Another week passes by and i defoliated some leaves again.
I LSTed the plant for the last time and will now let it grow without influence as possible.
Maybe i should use a trellis net now would be the perfect time.
Likes
49
Share


@Hashy
Follow
Light settings
12/12 on at 9.00am off 9.00pm
Light power= 62% 150w
Radiator settings
LIghts on
Turn on if temp drops below 23c
Turn off if temp goes above 23c
Lights off
Turn on if temp drops below 19c
Turn off if temp goes above 19c
Dehumidifier settings
LIghts on
Turn off if humidity drops below 60%
Turn on if humidity goes above 60%
LIghts off
Turn off if humidity drops below 62%
Turn on if humidity goes above 62%
Extractor settings
temperature 24c with 1c steps
Humidity 54% with 2% steps
Max speed 9
Min speed 4
VPD aim 0.8-1.2
Wednesday 1/3/23 Day 36
Autofeed 5 15 minute runs
Water 10L Ec=0.21 Ph=6.5/7.0
3L left
Roughly 2.3L each.
#2 run 0.1L Ec=3.86 Ph=5.7
7.15pm Lowered light 3cm
#2 DLI= 25.5
Thursday 2/3/23 Day 37
10.00pm
Extractor settings
temperature 24c with 1c steps
Humidity 54% with 2% steps
Max speed 10
Min speed 5
Friday 3/3/23 Day 38
Autofeed 5 15 minute runs
Feed 10L Ec=1.73 Ph=6.3
2.5L left.
Roughly 2.5L each.
#2 run 0.6L Ec=2.14 Ph=6.1
Saturday 4/3/23 Day 39
5.00pm
#2 Height= 30CM Dist= 38CM DLI= 26.6
Lifted lights 3 clicks and Lst and defoliate
Sunday 5/3/23 Day 40
Bit of Lst and scrogging
Monday 6/3/23 Day 41
Autofeed 5 15 minute runs
Feed 12L Ec=1.78 Ph=6.3/6.3
4.5L left
Roughly 2.5L each.
#2 run 0.25L Ec=2.4 Ph=6.1
#2 DLI=26.9
Lifted light
#2 Height= 31CM Dist= 45CM DLI= 20.7
Tuesday 7/3/23 Day 42 (Day 14 flower)
Radiator didn't come on when it should have. It was cold today and I don't understand why the sensor didn't trigger the Radiator.
#2 Height= 31CM Dist= 45CM DLI= 20.7
The 2nd week of flower has gone well. I have tried to keep the canopy of the overall grow as level as I can, the only problem with running different strains is they all have different traits and grow at different speeds. Nearer the end of the week the weather started getting cold again so the radiator is going to be working a bit more over the next week or 2.
#2 Tropicana Cookies FF stil hasn't started stretching, she is mega bushy and has quite a cool funky look to her, I haven't managed to spread her out as much as I wanted to so I'll hope she will be OK.
Power used for week
Light
(1.77+1.84+1.84+1.84+1.84+1.83+1.84)=12.8Kw
Extractor
(0.19+0.24+0.25+0.27+0.31+0.31+0.41)=1.98Kw
Fans
(0.48+0.47+0.47+0.47+0.47+0.48+0.48)=3.32Kw
Dehumidifier
(0.69+0.65+0.0+0.01+0.6+0.02+0.69)=2.66Kw
Radiator
(3.3+3.98+3.38+3.16+3.8+3.31+4.07)=25.0Kw
Water pump.
(0.02+0.0+0.02+0.0+0.0+0.2+0.0)=0.24Kw
Total for the week=46Kw
Back in a week.
Thanks for stopping by.
Likes
6
Share

@Chucky324
Follow
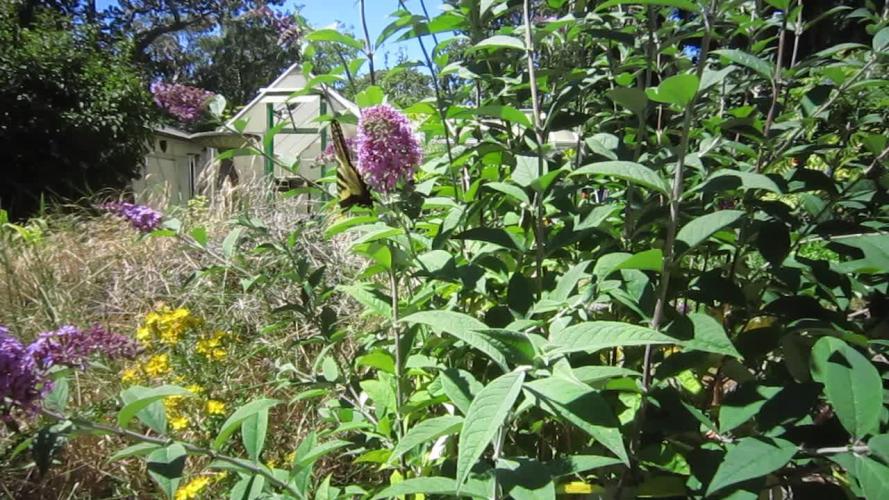
Hello. This is the end of week 1 and the beginning of week 2 of flowering.
The plant is doing good and growing well.
It's stretched a bit last week being week 1 of flowering.
And she will stretch more this week too.
The next trim-up will be, before the end of week 2, before the resin starts flowing, around week 3.
Be Great.
Chuck.