


Likes
Comments
Share


@Romepucks
Follow
4weeks into flowering, halfway she is starting to smell mostly sweet, never got a chance to water her much last week, had to move the plans was pulling to much attention there.

Likes
Comments
Share

@all_about_420
Follow
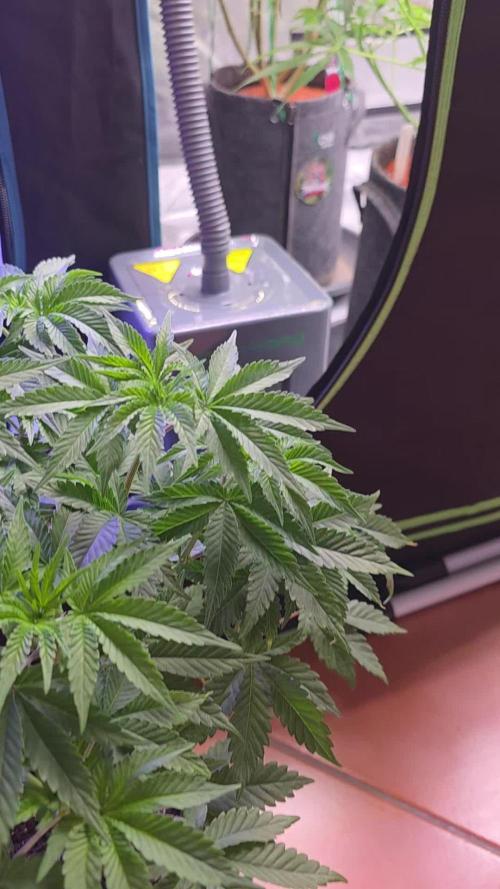
Die Booberry Cookies RBX strotzt in der sechsten Vegetationswoche nur so vor Vitalität und hat den einstigen Urlaubs-Schock vollständig hinter sich gelassen. Zu Beginn der Woche präsentierte sich die Pflanze bereits mit einer beachtlichen Blattmasse und ausgeprägten Seitentrieben, die durch das vorangegangene Training kraftvoll emporgeschossen sind. Der Stamm hat deutlich an Dicke zugenommen, und die Nährstoffaufnahme über das Advanced Nutrients Schema läuft weiterhin absolut reibungslos. Zur Mitte der Woche wurde die Schere erneut gezielt angesetzt: Das zweite Topping stand auf dem Programm. Durch das Kappen der neuen Haupttriebe wird die hormonelle Dominanz weiter aufgebrochen, um die Energie der Pflanze noch gleichmäßiger in die Breite zu verteilen. Die Struktur im 3-Liter-Stofftopf baut sich dadurch extrem buschig und homogen auf. Die Internodien bleiben kompakt, während die Verzweigung perfekt für die spätere produktive Fläche vorbereitet wird. Die Genetik reagiert hervorragend auf diese High-Stress-Maßnahme und zeigt keinerlei Ermüdungserscheinungen.

Likes
12
Share


@NONSENSE
Follow
Hello everyone!!
Everything is going well. the baby has already been born.
I drip a little weak fertilizer every other day.

Likes
5
Share


@AlpenZilla
Follow
🗓️ Week 10 – Flower Week 6 (MAC n Cheese only)
📉 Nutrient management:
At one point this week, MAC n Cheese showed elevated runoff EC values up to 2.2, signaling salt buildup.
Through adjusted watering and reduced feed strength, the runoff was successfully brought down to a stable ~1.6–1.7.
🌿 Plant status:
She looks vital and healthy – deep green foliage with no signs of fresh deficiencies or toxicity.
Responding well to the current input EC of 1.0–1.3.
📝 Summary:
Salt levels were close to the edge earlier in the week, but MAC n Cheese recovered well with a more balanced nutrient approach.
Bloom development is now progressing evenly.
Next week: Switching from Big Bud to Overdrive.

Likes
78
Share


@AsNoriu
Follow
Day 172. Some strains ended up frosty, smelly and nuggy, so I already have 76 g from first Strawberry, rest should bring some buds too, couple plants will go untrimmed to my friends as presents, one was already given away ... Think I will have like 300 g easy, and my friends got same amount as presents. Not a bad project, with loads of issues, happily almost no care was given or needed, so I count it as a result achieved :
1. I know that Hermie is bringing other hermies.
2. UK weather is only for autos, that lesson should be learnt long time ago, but I still hope to find mold resilient strain...
No updates or other strain harvests will be done, have no time to play ...
Happy Growing !!!
Likes
2
Share

@Organic_G
Follow
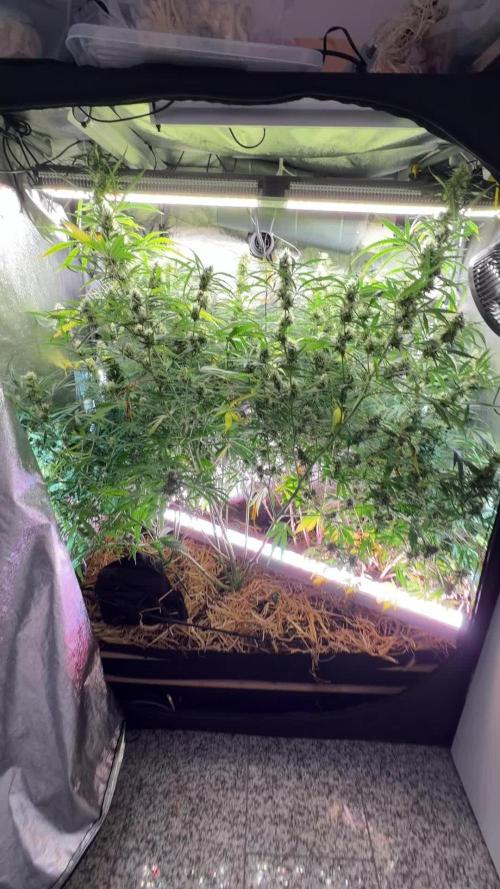
Langsam wirds was
Die kleineren performen zwar nicht so optimal dafür die zwei großen um so besser
Terps sind bei einer Top, bei einer eher Garlic, nicht so mein Fall

Likes
Comments
Share


@jporfiado
Follow
Esta semana aplique la tecnica lst. Hubiera preferido hacerlo antes pero estaba esperando por que antes queria trasplantarlas. Pero no he podido comprar macetas, ni el medio de cultivo. Entonces decidi hacerlo en las macetas actuales para comenzar a guiar la planta, ya que va creciendo muy rapido.
Junto con la tecnica lst tambien hice defoliacion a todas las plantas.
Comence a regar con fertilizante en polvo Green House para la etapa de vegetacion. Uso 0.5g / 1L . Ocupo unos 2L para regar cada planta.

Likes
67
Share


@Nordicislandgrower
Follow
Week 4
She is starting to look more normal, still on the 12/12 cycle but that will change in a weeks time.
I'm going to tie her down tomorrow, because she has no budsites on one site so i might aswell tie her down on that side.

Likes
209
Share


@Rock_n_Roll_Randy
Follow
GAME ON FOR A CRAZY GROW!!!. I HOPE IT GOES GOOD. 46 PHOTOPERIODS AND 12 AUTOFLOWERS IN THE 8X8 GROW TENT WITH THE NEW FC-E6500, FC4800 AND TSW2000 🤘
BREEDERS AND SEEDS:
DIVINE SEEDS:
MAZAR, OPIUM, WHITE WIDOW, OG KUSH, PABLO ESCOBAR, DIVINE INDICA.
AUTO WHITE WIDOW
AUTO PABLO ESCOBAR
AUTO WHITE RUSSIAN
AUTO FRACTAL
AUTO MONTREAL
AUTO OPIUM
AUTO KABUL
AUTO MAZAR.
WEEDSEED EXPRESS:
GREEN CRACK, GHOST TRAIN HAZE, LITHIUM OG, CHEESE.
DOCTORS CHOICE:
DC KUSH, AUTO NIAGARA, AUTO ROCK MACHINE.
SPLIFF SEEDS:
MASTER KUSH REGULAR SEEDS.
EXOTIC SEEDS:
HIPPIE BERRY, MALASANA GELATO, EXOTIC ANIMAL.
GENE/MEME SEEDS:
BUMBLEBEE, BLACK HELL.
ORIGINAL SENSIBLE SEEDS:
PURPLE PUNCH COOKIES, WEDDING CAKE, PURE KUSH, GORILLA COOKIES.
SWEET SEEDS:
BLACK JACK, GORILLA GIRL, SWEET ZKITTLES.
EMERALD TRIANGLE SEEDS:
GORILLA GLUE, MASTODON KUSH.
SEEDSMAN SEEDS:
BLACK SUGAR, PEYOTE FORUM, PEYOTE WIFI, BADAZZ COOKIES OG, PURPLE GHOST CANDY, STRAWBERRY BANANA GRAPE, L.A. PEYOTE KUSH, PEYOTE WIFI CBD, FUEL DOG, CRITICAL PURPLE KUSH.
AMSTERDAM MARIJUANA SEEDS:
GIRL SCOUT COOKIES EXTREME, GREEN CRACK.
QUEBEC CANNABIS SEEDS:
BRUCE BANNER, GREEN CRACK, QUEBEC CBD 20:1.
I 💚 GROWING MARIJUANA:
SKYWALKER OG, BANANA KUSH, BLUEBERRY CBD.
FOR EVERYTHING MARS HYDRO VISIT:
www.mars-hydro.com
PROMO CODE: rocknroll
VISIT THE ALIEXPRESS STORE:
@marshydro_aliexpress2
Instagram: @marshydropenny
https://youtube.com/channel/UChU5ZWwNi-DvnO3oWVU3ceA
https://greenbuzzliquids.com/
#greenbuzzliquids
@GreenBuzzLiquids
https://greenbuzzliquids.com/en/shop/
PROMO CODE: rocknroll
https://www.youtube.com/watch?v=8hEqyS1jPpI
https://growdiaries.com/diaries/112437-grow-journal-by-rock-n-roll-randy/week/593118
Thanks for taking the time to read and check out my shit🤜🤛
New FC-E6500 Led Grow Light-FC-E6500 grow light with 3978pcs OSRAM BridgeLux Diodes & Moso Driver, market-leading PPF 2.7 µmol/J, Max 2.5g yield/watt with 30% higher Average PPE, more cost-effective compared with other same type lights.Only consumes 650W, perfectly cover 5x5ft (personal), 4x4ft (commercial) grow space.Innovative Precise Uniform Lighting-Built-in removable bars interval & dimmability enable the exact & dynamic PPFD control over each of the plant growing stages, FC-E6500 detachable bars deliverSuperior Heat Dissipation: Real Aluminum heatsink together with 6 slim profile passive cooled bars (THINNER & LARGER surface) and detachable Meanwell Driver, create less heat, save 50% energy than other old grow lights! Driver can be mounted remotely on the side of a grow tent/rack or on an adjacent wall to remove heat from grow space.Full Spectrum UV IR LED: With Yield Max spectrum (660nm Osram enhanced Deep Red,2800k-5000k,730-740nm IR,380-410nm UV LEDs), Average PPFD FC-E6500 LED grow lamp enable cultivators to produce Density Buds, perfect for full-cycle hydroponic,soil,grow tent/room growing.
Dimmable Commercial Grow Light: Cost-efficient,easy dimming & daisy chain max up to 20 lights, IP65 Waterproof, master light easily controlled for commercial & home horticulture.
GET THE MAX FROM MARS👍: Welcome one of the newest members of the Mars Hydro family🤜🤛🤘. The Mars Hydro FC 4800 480W LED Grow Light can accommodate up to a 4' x 4' area for flowering. It has OVER 2000 LED chips consisting of the best selling Samsung LM301B diodes which has a Luminous Efficacy of: 220 lm/W
0.2 W, 3 V mid power,
Osram 660nm Diodes, Infrared light and UV LIGHT👍. It boasts the incredible efficiency of 2.8 µmol/J, maximum 2.5gram yield per watt with 30% higher Average PPFD. This High-intensity spectrum is beneficial for plants at all stages - from veg to bloom, and creates Big dense Buds👍. achieve 50% higher yields & quality compared with the old lights! Only consumes 480W for 4x4ft personal grows, and 3x3ft for commerical grow. It comes with a dimmer and daisy chain function with a maximum of up to 15 lights, the master light controls the rest👍. Wide 6-bar design offers even & wide canopy coverage and can maximizes your grow space. slim 180° FOLDABLE DESIGN... YES I SAID FOLDABLE🤘🤣 , making it compact and easy to install, it's IP65 WATERPROOF and will give you no worries while growing in a humid environment and makes it a flexible high performance commercial grow light for enormous SUPER FROSTY yields.😛😛😛. MARS GETS EM FROSTY BOYS👍
AWESOME HEAT DISSIPATION: The Low energy consumption FC4800 growing light has 6 passive-cooled bars and an aluminum heat-sink a removable driver you can upgrade later or have it outside your tent. with zero noise you can save up to 50% in your electricity bill compared to HID's or HPS lights!
It also has a removable driver so you can upgrade it in the future or have it outside your grow space for better heat control in your growroom👍
UPGRADED FULL SPECTRUM: Yield Max Spectrum with enhanced red (Top-Bin Samsung 3000k-5000knm, Osram 660nm Deep Red), speed up blooming & fruiting, perfectly suited for full-cycle growing. The FC4800 LED grow lamp was born for Big Buds, perfect for commercial, grow tent, grow room, hydroponics, and all soil grows.👍
THE BEST SAMSUNG DIODES: THE FC4800 has Top Bin genuine Samsung Osram Diodes, combined with remarkable 2.8 µmol/J Efficacy, 30% higher Average PPFD, 50% less energy consumption, to maximize your yields. They give you a TRUSTED 3 years warranty 100% Satisfactory guaranteed!!!
The MARS HYDRO 8x8 Grow Tent interior is made of a unique diamond design mylar which is highly reflective. (Other companies mylar and reflective rate is as low as 50%, and it won't provide efficient light. They use thick 1680D oxford canvas, and being double stitched, it is tear proof and perfect for locking in the light. Their grow tent keeps 100% of the light inside the tent and helps your plants absorb more light. EXTRA-THICK material means No light leaks or rips at all.👍
Strong Stable metal corner adapters and poles are the trustful supporters of the tent. It's very sturdy, neither rusting or paint flaking off. quick and easy tool-free setup. They use heavy-duty metal zippers, with double layer black lining, by far the best on the market which creates a light-proof seal.
The Easy observation windows are made by double layers of cloth. Observe the growing conditions of your plants without opening the tent and avoid disturbing your plants. The observation windows also serves to dissipate heat and ventilate the air.
The tent includes 2 removable waterproof floor trays to hold soil and water. The removable tray can be taken out to wash easily.
They guarantee the grow tents are easy to install even if you've never done something like this before. Clear Instructions and no tools needed! They also offer 30-day unconditional refunds for quality problems. Just contact their friendly 24 hours customer service 👍
Likes
4
Share


@Ninjabuds
Follow
Peeking through the soil, my rainbow melon seedling is finally here! Its tiny leaves are a vibrant shade of green, and I can just imagine the colorful melons it'll produce. I'm excited to watch it grow and can't wait to share the sweet and juicy fruit with family and friends.


Likes
13
Share


@J_diaz420
Follow
Genética muy estable, floración rápida, hermoso color y bastante generosa 💚❤️

Likes
25
Share


@Gutismoke102
Follow
The girls are growing great a lot better than I expected so I guess that’s a good thing. Switching to flower in couple weeks this shall be exciting stay tuned
Likes
14
Share


@Jazzvet
Follow
Hello again GD friends,
This week was very well, I can see pistils all over de place and the bottom of the canopy was almost fully defoliated, so
Day 37 - watered with 4L w/ 8 ml BG, BH, A-V, and 4ml of Biobloom
Day 38 - I've turned on the superlumens mode of my ballast that never been used, but Lumatek says that encreases the light spectrum, will see.
Day 41- I've noticed the plant a little bit sad and the pot very light, so I decided to encrease the quantity of water to half the pot's capacity and ferts accordingly.
See you next week
Happy growing
Processing
Likes
6
Share


@Mr_Maes
Follow
This girl is by far the healthiest plant I have ever had at this stage. By healthy I mean she is the biggest, the greenest, and has the thinckest stem I have grown yet. Today is day 28 from seed and she is as thick as a marker lol. I grow in small 5 gallon pots. My stem is normally as round as a milk jug cap. I feel like this could do better.


Likes
4
Share


@alexb420
Follow
doing great! probably gonna run the blueberry muffin again, shit smells so good. blueberry waffles right now. the two khalifa mintz are still dank, musty OG, with light almost mango tones, no mint. hoping that comes out during dry and cure.





Likes
19
Share


@GuerillaSweed
Follow
Keep on growing babies!!
Lest get it Scandinavia!!
A bit of nutrience, a joint n wee ouuut!!


