
Likes
Comments
Share


@Tweak
Follow
So I finished my slow transition to flower yesterday, I increased “night” by 20 min everyday over 21 days to get from 18/6 to 11/13. She’s def stretching but less then would be expected with this strain if it was an abrupt switch. Enjoy and give me a like!!


Likes
10
Share

@eldruida_lamota
Follow
Que pasa familia, vamos con la cuarta semana de vida de estas Mental Rainbow F1 de Sweetseeds.
Vamos al lío, las plantas se trasplantaron a macetas de 7 litros.
El ph se controla en 6.5, la temperatura la tenemos entre 24/22 grados y la humedad ronda el 70%.
El ciclo de crecimiento puse 20h de luz, el foco está al 50% de potencia.
Me gustaría estar más encima este cultivo pero la salud me está impidiendo un poco este 100% con el proyecto. Con suerte la semana que viene andaré mejor.
- os dejo por aquí un CÓDIGO: Eldruida
Descuento para la tienda de MARS HYDRO.
https://www.mars-hydro.com
Hasta aquí todo, Buenos humos 💨💨💨

Likes
16
Share


@Green_DSL
Follow
Week 3 flowering (a week is 5 days)
Both plants begin to seriously flower with some early trichomes on leaves and buds. It seems that Gori is quite in a more advanced status compared to Rilla. I also changed the nutrients compositions following the 3rd week Advanced Nutrients for coco professional program (I calculated EC of every single nutrient and made a custom dosage program for every week according to a more realistic EC value - check nutrients in my diary).
Plants are doing well, leaves are beautifully green without signs of nutrients burns, excess or deficiencies. They are watered every day in the morning with fertilized water. Every day I also correct the training of the branches, removing unwanted popcorn/bottom growth and removing leaves that covers buds and leaves that don’t perform well (i.e.: leaves at the bottom that will not take light).
🌱

Likes
6
Share


@LapsekiliTayfur
Follow
Day in and exit fan 15 min off 15 min on Van is full on
Night in and exit fan 30 min off 15 min on Van is full on


Likes
1
Share


Likes
Comments
Share


Likes
15
Share


@710_Squish
Follow
This has been a busy week for the plant. She had her 2nd nodes removed, she was topped at the 4th, and lst set. She didn't even slow down through it all.

Processing
Likes
2
Share


@Lil_Queazy
Follow
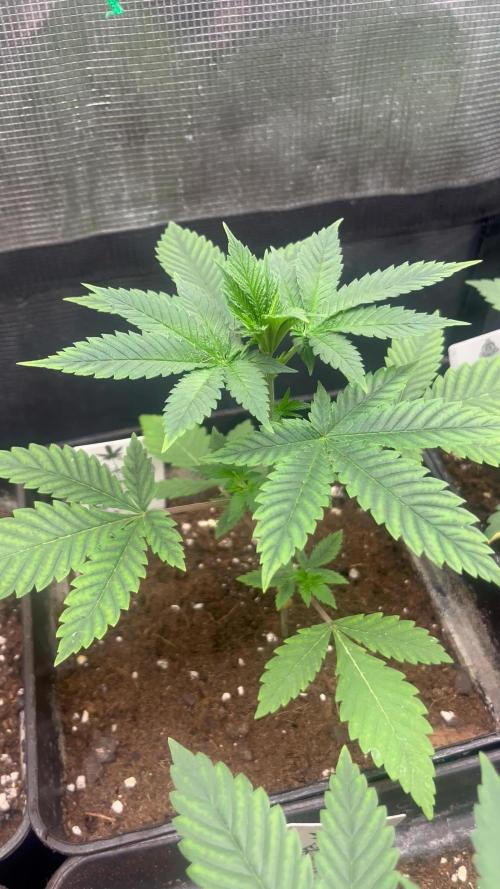
Start of week 2. Everything seems to be ok. The bottom left and right seem to have taken the lead. I switched the two biggest plants into the center. And raised the pots off the ground to help with airflow and temps. Plants are doing good. Two centers are taking the lead. Using RO water. Currently watering when top two inches are dry.

Likes
8
Share


@Bread_n_Buds
Follow
Our #Test3 from Zamnesia that we hope will soon be available to the whole world, have a wonderful genetic line and promise well from the beginning. It is one of those very elegant plants with small leaves I started to think about how I want to work on these two beauties, one will be worked with topping x 16 buds and various lst while the other will be left to grow freely with main cola. We are trying to answer the question that has no answer, we are ready to give up on main cola_ We in doubt do one and one.
The second week (including a few days of germination) we gave Power Roots 1 ml/l, Pure Zym 1 ml/l, Sugar Royal 1 ml/l, Alga Grow 3 ml/l -
Plagron nutrients are available at Zamnesia in convenient pack formats for all growing styles. I used this one with a simple search you can find the other products.
---- https://www.zamnesia.io/it/12119-plagron-top-grow-box-100-naturale.html
Try a seed of this strain that drives us crazy...
---- Strain coming soon choose another from the big Zamnesia List
Zamnesia Description // Strain Coming Soon!
All the best that mother nature can offer is on ----www.zamnesia.com
Likes
10
Share


Likes
9
Share


@Sato_Growing
Follow
My girls are going perfect no stress at all
I hope for big collas
Ty for coming to my post
Love <3
Wating 3 days with nutrients and 4 days clean wateer
Ph always 6.5
Rhino and Sensi cal mag x every day about 0.20 ml per day
at this momment i water about 800ml to 1 l water every day per plant :D
Processing
Likes
5
Share


Likes
15
Share


@MadeInGermany
Follow
Flowering day 4
since time change
to 12 / 12 h
Hey guys :-)
This week they became in set the flower tent :-)
As soon as the first hairs appear, there is a light mixture of blossom fertilizer for the first time.
Watering was done twice this week with 1.3 l each
(nutrients see table above.
Otherwise everything was cleaned and checked and fresh osmosis water was mixed.
Stay healthy 🙏🏻💚
👇🏼👇🏼👇🏼👇🏼👇🏼👇🏼👇🏼👇🏼👇🏼👇🏼👇🏼👇🏼
You can buy this Nutrients at :
https://greenbuzzliquids.com/en/shop/
With the discount code: Made_in_Germany you get a discount of 15% on all products from an order value of 100 euros.
👇🏼👇🏼👇🏼👇🏼👇🏼👇🏼👇🏼👇🏼👇🏼👇🏼👇🏼👇🏼
You can buy this strain at :
https://www.amsterdamgenetics.com/product/kosher-tangie-kush/
Water 💧 💧💧
Osmosis water mixed with normal water (24 hours stale that the chlorine evaporates) to 0.2 EC. Add Cal / Mag to 0.4 Ec Ph with Organic Ph - to 5.8 - 6.4
MadeInGermany


Processing
Likes
15
Share


@AK1210
Follow
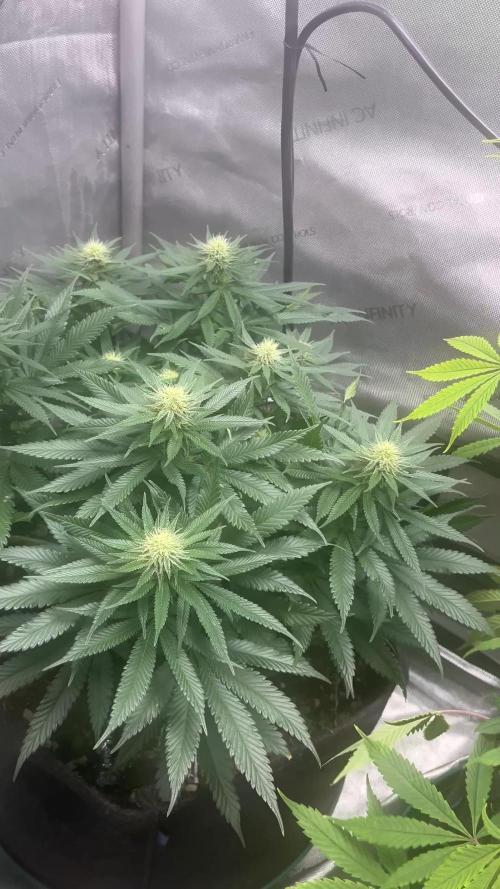
New flowering continues to develop on this lady, she seems to be swelling up day by day.
Yellowing of the fan leaves has started which usually means it's time to flush, I need to check the trichomes to see how amber they appear before I do just in case the flavour or yield could be effected.
Likes
52
Share


@Salokin
Follow
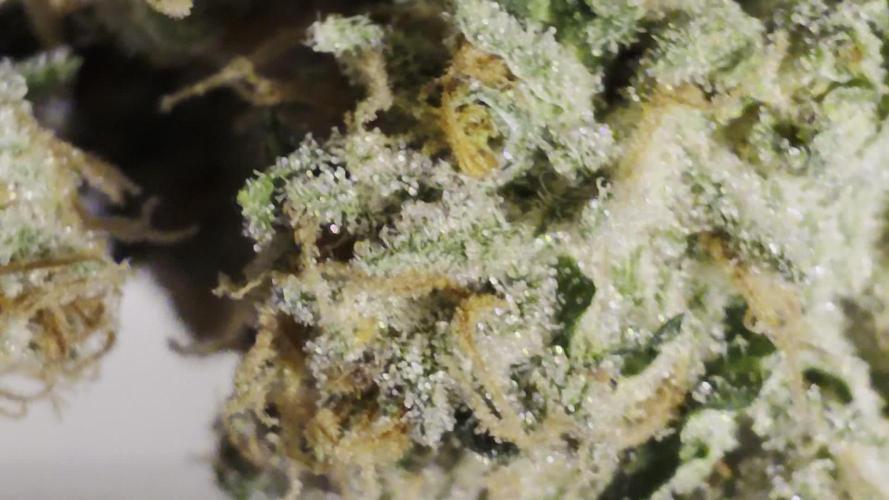
The High intensity was to strong (clearly my fault) in the beginning which stunted her overall stretch, she however still delivered super dense, terpene and trichome loaded buds.