
Likes
Comments
Share


@agustinnnv
Follow
Buenas tardes, aquí mi Sour Compassion CBD. La segunda generación y viene a todo ritmo. Al día de la fecha (29/5) lleva 36 días de flora. Una planta muy sana que se recuperó de una gran falta de magnesio por problemas de ph. Es un esqueje de la Sour Compassion CBD que coseché. Las fotos son a lo largo de su crecimiento. Actualmente está nevada y posee un olor a pino increíble. Saludos cannabicos!😎

Likes
22
Share


@HydroHerb420
Follow
Wish I could have vegged the clones another couple of weeks but the Zkitzo was just growing to fast. In hindsight shouldn’t have put a plant from seed in with the clones. Seeds always grow like mad in NFT and clones are more manageable as they don’t have a tap root. Still got some absolutely beautiful looking and smelling bud from the Zkitzo so can’t really regret it. The Gelatos are rock solid right through and look absolutely beautiful. Used rainwater right the way through on this so should smoke nice to. Better pictures as it dries.

Likes
5
Share


@StartGrowingShxt
Follow
Week 8
November 13
-another week and we have flipped to flower about 5 days ago no sign of pistils but the bud sites are starting to lighten up in color
-got some nutrient water on some of the leaves last watering so that’s not good
-also top watered to get the bloom nutrients to break down for the coming weeks
-also rigged this card board cut out to keep the top soil dry so the amendments stay moist enough to break down as I bottom
water all the established plants

Likes
14
Share


@Tried_and_Tested
Follow
Another steady week of bud development. I haven't really done much with those apart from the occasional removal of yellow leaves and tucking nuisance leaves under the net.
The plants are all still growing in line with the previous expectations, with Topping and LST being the biggest, Mainlined next and then LST only in last place. It will be interesting to see the results though.
Should only be a few more weeks until harvest, as a large majority of trichomes are already milky.


Likes
7
Share


@Smokeitup091191
Follow
This week I has gone well had a small error on my part but other than that’s seems to be going fine she is stretching well, plenty of top bud sites and hopefully the next week there will be more definitive flowers showing 👍🏼


Likes
16
Share


@HowtoBubatz
Follow
I defoliated the Plant for the first time and adjusted the LST to the growth of the plant.
I found the first white pistils shooting out from the plant which shows me she is ready to go into flower.
Until now i am very happy with the progress, still no issues :)

Likes
1
Share


@Kern420
Follow
Woche über haben sich die Blüten weiter entwickelt. Die Trichome wurden mehr und man fängt an erste Terpene zu riechen.
Wir haben Donnerstag (BT 2) stark entlaubt und schauen jetzt wie die Pflanzen wachsen.
Tropi fängt an erste Farbakzente zu entwickeln in den Buds.
Likes
59
Share

@Comfrey
Follow
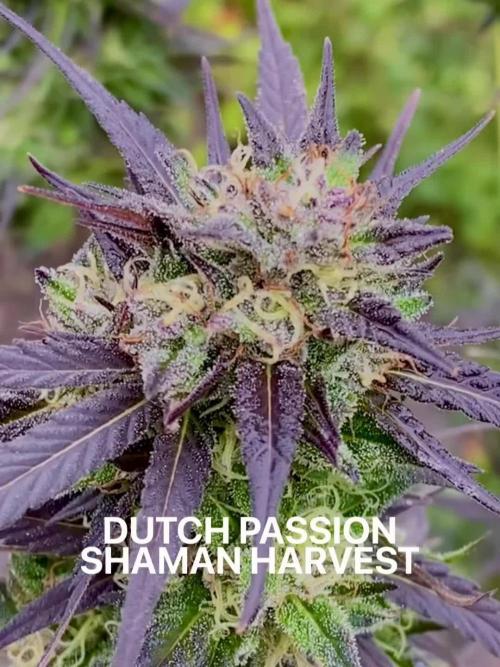
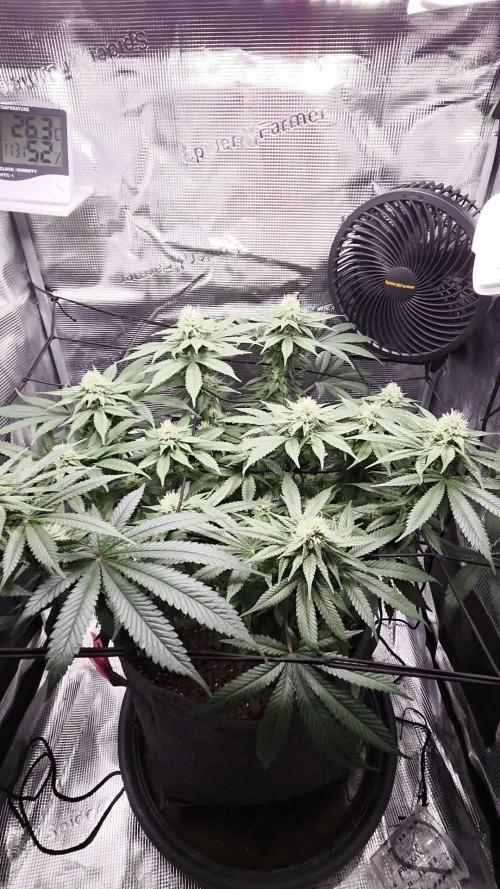
Die Blüten wurden zur Hälfte nass getrimmt. Die Trocknung erfolgte im Growzelt mit Ventilator und Abluft bei einer Temperatur von 22 Grad Celsius und einer Luftfeuchtigkeit von ca. 56 Prozent über 7-9 Tage. Bei der täglichen Kontrolle habe ich wenige Blüten gefunden, die ich entsorgen musste. Sie braucht schon etwas Aufmerksamkeit, die Shaman. Anschließend wurden die Blüten trocken weiter getrimmt und zum Aushärten mit Boveda 62% in Schnappdeckelgläsern bei 20 Grad in einem Eichenschrank gelagert. Das Endprodukt und ein abschließender Konsumreport folgen ca. Mitte November. Ich bin ziemlich happy! 💚

Likes
1
Share


@MJ_LIVINGSOIL
Follow
this week i topdressing with Fish bone meal 4-16-0 100g per plant and 4-9-4 100g 3-7-4 50g per plant
Avg. 250gram of craft organic fertilizer for plant
4-16-0 = 100g = 400-1600-0
4-9-4 = 100g = 400-900-400
3-7-4 = 50g = 150-350-200
950-2850-600 /100 = 9.5-28.5-6.0 g every 250g from fish bone and craft
So plant avg. got npk 9.5-28.5-6.0 per 1 plant from Topdressing
In next week we plan to take little N and more than K
Good phenotype it look like Berries Candy and syrup sugar


Likes
2
Share

@Professor_Little
Follow
Trichomes are developing well, still mostly clear at the moment. The plant has finished stretching and is now focusing on bulking. I slightly increased her feed and hope she’ll put on more weight soon.

Likes
11
Share


@HighOhioAn
Follow
Absolutely an amazing run each plant had its own unique trait that I loved cannot wait to see All the testers released and Thriving in everybody’s garden Fastbuds really has outdone themselves Don’t think you can get much better than this some of the most dense dankest nugs I’ve ever grown🔥💯
Likes
34
Share


@AshBrand
Follow
12/22/21 - The plants look great! We have taken some fan leaves off. Keeping the airflow moving to avoid any powdery mildew. We are going to make topical salve with trim and popcorn nugs. We usually make butter for edibles but we’ll try something new.
12/23/21 - They look really good. Today we have fresh water for a semi flush. We will begin with nutrients and then flush 10 days before harvest.
12/24/21 - The humidity is finally on our side, ranging between 40-50%. We are very happy and excited as the buds continue to grow!
12/25/21 - Merry Christmas! The plants look great! Lots of neat colors in there. Each strain is showing off its own color. Check out todays pictures.
12/26/21 - They look really good today. Humidity is at 45%. Harvest is coming up pretty quick and we are excited.
12/27/21 - Looking good today. Just feeding them and letting them flower away. The buds are getting pretty big and dense.
12/28/21 - They look insane. Going to feed them the last of the nutrients listed above and next week start plain water/flush until harvest. Check out the two videos above!

Likes
88
Share


@No_Clout
Follow
15/08/18 - all looking good got loads of roots piercing out the sides of the smart pot , I’m thinking of adding cannazyme soon to break up all the dead roots etc, I’m feeding them the usual tonight and 2 litres each 💧and I’m done with LST now im just gonna let them start to stretch🙏🏻🙌🏻
17/08/18 - saw some weird marks on a leaf or two this morning and then later on it look like the pic above, it’s only happening on older leaves it’s not affecting any new growth, I’m out of grow questions so any help would be grear ✌️🏻
20/08/18 - just watered them with the above ☝️🏻 All looking good think I’m half way through the stretch so I’ve started to add some canna boost to the solution , probably gonna do some LST later on this week.
Likes
1
Share

@PMDennismanice
Follow
War 4 Tage abwesend und hatte über Tropfbewässerung gefüttert.Das Wasser hatte ich vorher mit Weedtamine versetzt und das scheint ihr ganz gut getan zu haben.Hätte nicht so ein Wachstum erwartet,im Gegenteil,befürchtet hatte ich Totalausfall.
Heute das erste mal mit Pflanzengeflüster besprüht.
Likes
2
Share


@Organic473
Follow
The girls are smelling really nice…turned out a seed project but I sure would get some fire smoke. I’ve been feeding her 3 gallons of water daily preparing her for some charcoal ash…
Likes
3
Share

@MaltaHerbman
Follow
These seeds are easy and great to grow.
Buds have are nice and solid,she smell very nice and very sticky.Cant wait to smoke it.
Feeding Plagron Nutrients.

Likes
12
Share


@SSKNFbyHAZE
Follow
** COST **
TO RUN
- Used previous ⛺️ setup : $0.00
- Monthly electricity : $36.73 <-- other ladies sharing ⛺️
- 1 Gallon Fabric pot : $0.10
- Bonsai wire : Apx. $0.03
- Reused soil from last run : $0.00
FOR NUTRIENTS
- Jadam Microbial Solution : $0.00
- Fermented Plant Juice : $0.00
APPLYING
- JMS : 30ml / 1 Litter
- FPJ : 30ml / 1 litter
TOTAL COST : $36.86
Throughout the week, I give JSM, and fermented plant juice once each ^^
Hope you guys have a wonderful day today ^^v
*** Please Like, comment & share ***
Highly appreciated -----/-----<@
Processing
Likes
6
Share


@ganjaman24
Follow
She grows nice and quick if you Treat her well! I transplanted and made a couple mistakes so she didn’t reach 100% imo but it’s still a nice turn out! Hadn’t she not gotten pollinated I think the yield would’ve been more! Oh well still not a bad turnout will compare her to my other cut of this strain I have finishing up! Check it out, thanks for reading

