


Likes
Comments
Share


Likes
40
Share


@Dunk_Junk
Follow
Week 4 done and in the books. I tried to limit growth of the side shoots during the week by pinching & crushing the stems. I will monitor the effect this has.
Last week with her as main focus as there are some photo seeds growing alongside. I will veg them at 20h light hoping this blackberry is done before I have to flip those girls to flower. If this blackberry has to do a week or two on 12/12 so be it I'm afraid.

Likes
21
Share


@Cali_Grown_420
Follow
Plants 1 & 3 are doing good. #1 is a beast so far. I will probably start flushing plant #3 here soon, she got stunted and I don’t think she’s really packing on weight anymore.
So part of plant #2 was dry enough for jars after 5 days. Dry trimmed about an 38g. Still have about 2-3x as much left to trim. I think I’ll wet trim the other two it seems way harder to dry trim. I’ll have a total dry weight for plant #2 tomorrow.
Likes
4
Share

@SWITCH420
Follow
Hi folks,
I'm coming here to start the process of ending this grow journal. I harvested about three months ago and the weed is definitely cured. Photos are about to come — I'm doing a real studio photo shoot for those buds, they deserve it!
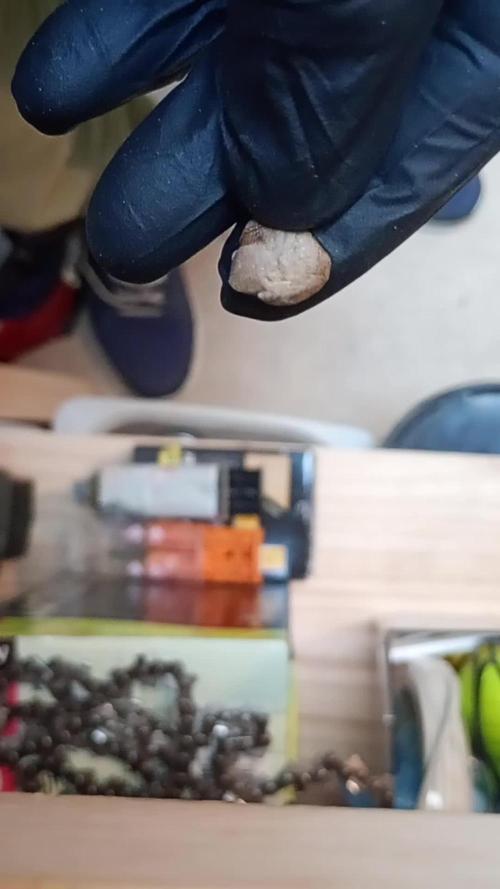
While waiting for the shots, I made some pretty damn dank hash temple balls using the iced water extraction method (solvent-free) with my little washing machine. It's a mix of the 8 strains I grew here — never ideal to mix different kinds of resin... but man, this is some serious dedicated work, so I'm making myself happy with that 14g shiny temple ball in the end 😉
Here are a few details about my process for you guys (and don't forget — you can do it with fresh material! Fresh frozen is always tastier. Also, the drying process is much more efficient and faster with a freeze dryer, but... you need the budget for that. I don't, so I go with the air drying method — check it out below):
1. Get your dry trim, then cure it properly for at least a month (I did 3 months). Smell it — mmh, sweet, dried to perfection. ✅
2. Freeze it, delicately wrapped in a freezer bag.
3. Let a large amount of tap water sit for at least 24h to remove chemicals like chlorine, then use it to make plenty of ice cubes — don't be shy, especially if you're not working in a cool environment.
4. Prep your washing machine: add trim between two layers of ice, fill up with clean water (as much as you can, large vortex is better than a smaller one), then make it seat for 30 min (45 min for thicker buds) the time that the dried green material gets wet again.
5. Prep your filtering tools: catch bag, different mesh bags, spoon, etc.
6. Wash as many times as you can before green contaminants appear, as these lower the quality of your hash — don't hesitate to go up to 8 to 12 washes if the resin still looks clean! Important: each wash has its own specific duration, and they get progressively longer as you advance through the process. Frenchy Cannoli (a true hash legend) provides a detailed timetable for this — from as little as 30 seconds to 1 minute for the first wash, all the way up to around 25 minutes by wash 8. Make sure to follow that schedule rather than using the same duration for every run or running it too long the first wash !! It could breaks to quickly your precious material before you collect all the trich's and the quality would be lower in the end.
7. Collect the wet resin in the mesh bags with a frozen metal spoon, make patties with the resin, and let them sit over some towels in order to drain as much water as possible (place a tissue made for hash collecting over the towel).
8. When the patties are a little dry to the touch, wrap them as they are in the tissue and place them in the freezer for 48h or more.
9. With an iron strainer, microplane your patties over the biggest flat surface you can get! It's important that your micro pieces of hash dry widely and don't get too compacted. Any failure in the air drying process will nucleate rot, ruining your hash in the end and making it a poor product — eventually something to throw away. Sad when you think about all the phases of the process to get to this point!
10. So, in order to air dry properly, you must — it's not optional — lower the RH of your dry room to 35% or slightly below, never above and let it dry as long as needed until the material feels like dry sand. For myself, I found 10 to 15 days is ideal. The room must be very lightly ventilated (not directly on your resin!) and in complete darkness — the goal is to preserve all those delicious terpenes! Ideally, temps around 60°F or 16°C
11. Now that it's dry, collect your resin with a large thin spatula! Make a little mound between two layers of PaperHash, boil some water, and fill up a wine bottle with it!
⚠️ From this point on, to avoid exposing your carefully dried resin to a more humid environment — which could ruin all your hard work — everything must happen in the same drying room. Keep working at 35% RH until your temple ball is tightly and airtight wrapped in PaperHash. (And don't forget to drink water — it's dry in there! 💧)
12. Start to slowly press your resin. Magical moment. Finally....
13. Press 3 times for 10 to 15 minutes in order to really decarb your hash — because that's what it's all about! Between each press, try as best you can to shape a patty... until the final press, when you'll be able to form that magical shiny temple ball (it only shines with gloves on, guys 😄)
14. You are now allowed to try it — for quality control purposes only, of course!
15. Because you want to age your hash for the sweetest 5-star smoking experience: wrap your temple ball in a large piece of PaperHash — if you can get that brand it's ideal, or another kind (check https://thepressclub.co) as long as it's organic!
16. Place the wrapped temple ball in a glass jar and store it in a dark, cool place.
17. Wait a minimum of 3 months before opening it.
18. Open, smell, touch — you'll be amazed. Roll it up with some weed or tobacco or both (I do both) / Or get a Hooka... you are smoking some true primo aged hash made by yourself! Taste the difference and realize all the path from choosing the seeds online until this first amazing puff ... 🙏
I want to credit my inspiration for making this kind of hash to the great Frenchy Cannoli, who has shared all his knowledge through amazingly rich tutorial content that you can find online with a bit of searching. 😉 Peace Frenchy 🕊️☮️




Likes
7
Share


@HighQualityH2O
Follow
Week 3. Botanicare is working wonders. I went ahead and topped at the third node. And started giving plants full grow nutes. The Banana Biscotti looks so good I might clone it. The Ice Dream Cake hasn’t bounced all the way back yet.

Likes
4
Share


@cwgrows
Follow
After finding a couple of unseen spots of mold while chopping I meticulously went through every single crevice of each nug from both plants and removed the few spots I found, this took about 10 hours straight (not including light trim and wash). Absolutely stoked with the results of this grow and so proud to have gotten both these girls all the way to the finish line!

Likes
6
Share

@CCGS1mon
Follow
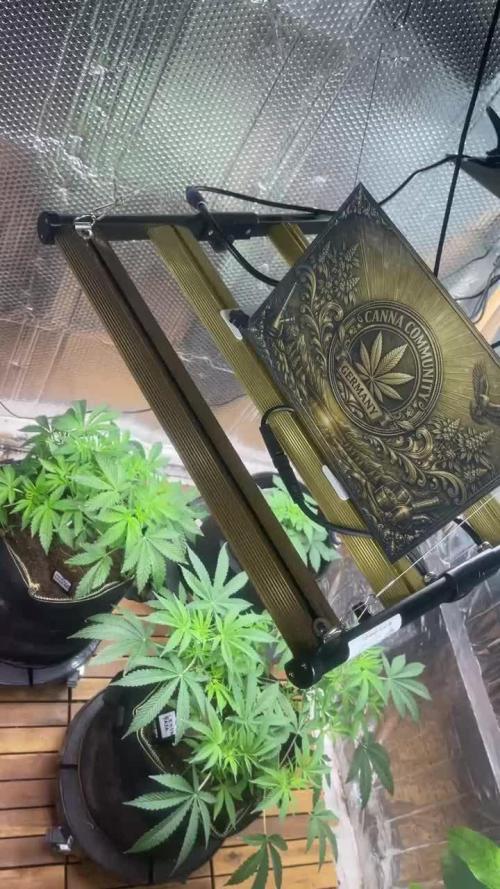
Die Pflanzen zeigen aktuell eine sehr gute Vitalität und ein gleichmäßiges Wachstum. Blattfarbe, Struktur und Standfestigkeit sind unauffällig und entsprechen einem gesunden Entwicklungsstadium.
Weitere stressauslösende Maßnahmen sollten vorerst vermieden werden, damit sich die Pflanzen vollständig stabilisieren und ihre Biomasse weiter aufbauen können.
Nach ausreichender Wachstumsphase und Erreichen der gewünschten Größe kann planmäßig in die Blütephase übergegangen werden.
Likes
100
Share


@AsNoriu
Follow
Day 85. Few days ago I trimmed most leafy Northern Lights and she loved it ! So tomorrow two most mature Alaskan Diesels go to chop room. All other plants will get defoliation too, will have space to reach all plants.
Third Alaskan Diesel is catching, but he is a week behind.
Green Cracks will fall in 2-3 weeks, Northern needs at least 4 ....
Will move my Bruce Banner's to main tent.
I still feed Northern , but all other plants are on pure water.
Day 86. Rearranged all girls, trimmed them heavy, gave new positions.
One Northern lights is still in dark part of tent, I think I need 7-10 days til last Alaskan Diesel will mature and it will be only 8 girls left.
Brought other diaries girls to main tent and added Mars Hydro SP150 as supplemental side lightning ... They miss height a lot compaired to older plants, so I hope it will help a bit . Never used lights that way before ...
Happy Growing !!!
Likes
11
Share


@eldruida_lamota
Follow
Que pasa familia, vamos con la sexta semana de floración de estas Gorilla cookies Auto de FastBuds.
Por el momento todo va bien tienen buen color, van madurando esas flores.
Alimentamos la última semana nuestras plantas con Agrobeta.
Por supuesto el ph se mide en cada riego y se mantiene en 6.2 y riego en intervalos de 48h.
La temperatura está entorno al 22/24 grados y la humedad anda sobre el 50%.
Las plantas en si ya están bien sanas, tutore la rama principal para que no se fuese de madre, y así controlaré la altura.
Yo creo que en 1 o 2 semanas podré darles machetazo, pero ya vamos viendo estas semanas.
Mars hydro:
Code discount: EL420
https://www.mars-hydro.com/
Agrobeta:
https://www.agrobeta.com/agrobetatiendaonline/36-abonos-canamo
Hasta aquí todo, Buenos humos 💨💨💨
Likes
Comments
Share


@Csokolom_tzitzi
Follow
This genetics requires a lot of heavy feeding and heavy light and a lot of space because they gonna grow like beasts. In about 79 days from seed they were ready . One of the plants had small buds but full of trichomes, rich in terpenes with a nice smooth Latte creamy smell, the other had fluffier buds with more hazey smell

Likes
8
Share


@Marihumama
Follow
Did some cuttings on her, found some bugseggs not much
It's been raining a lot but she won't be up for very much longer and I still hope for some sunny days😘

Likes
28
Share


@No_Clout
Follow
First time feeding her some bloom nutes (C4), Mills nutes having been great so far so it will be good to see what their bloom nutes are capable of as I think mills is very underrated and I’m anticipating a great harvest. I have also put the OG onto a 20litre air pot to raise up and try and level the canopy and also defoliated the bottom 1/4 of the plant.

Likes
9
Share


@sunshinegroww
Follow
Just been topped at around day 21 should done it earlier but here we go so far looking good and very healthy environment looks dialed in too

Likes
1
Share


@Huckleberry39
Follow
Getting really close now. Should be down within the week. This has been a super good grow. ILGM always comes thru with good stuff!!

Likes
5
Share

@I_roll_my_own_420
Follow
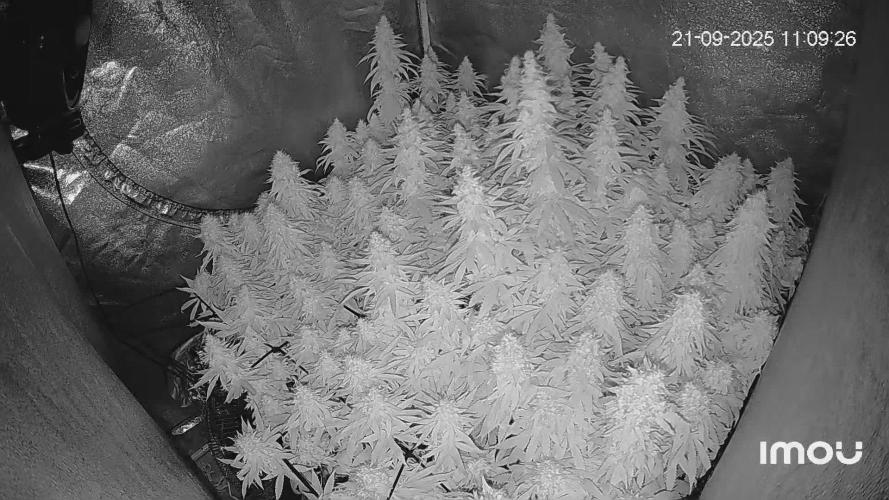
Last week of nutrients. Next week just pure water and after that, harvest


Likes
20
Share


@blady1989sqn
Follow
Plants looks healthy, they are really in good shape and cover aproximietly 1m2 each plant. They looks amazing :)

Likes
3
Share


@George1981
Follow
Hello! Another week down—we’re getting closer to our much-anticipated harvest after so much hard work. Here are some photos of my precious girls; they look so good, my mouth is watering—good heavens!
Likes
166
Share


@Wicket
Follow
So this week happened a little bit more.
All of them got their final BioTabs Mix. Each Plant 500ml of Water with 1g Bactrex and 20ml Orgatrex.
No more fertilizer now from the BioTabs Starterset, all they get now is BioTabs Bio PK 5-8 in flowering for thicker buds. Thought it would be a good idea to buy that, will see if it makes a difference.
And as you can see i did defoliate them this week also. So much more airflow, finally i can see everything and can worry less about pest and so on.
I just hope i didn't do it wrong or did too much of it, it was really scary just cutting off things which grew for such a long time, but i think for the first time it turned out pretty good.
In flowering week 3, when i give them PK 5-8 for the first time, i will also defoliate them once more a little bit when it gets out of hand again.
Since the biggest plant is about 45cm tall now i will start flowering soon but don't know yet when exactly, maybe a few days, maybe another week, until then they also had enough time to recover from defoliating and i hope everything will work out.
Would also be good to get about 5-6cm more on the other plants, so i guess i will do it around Wednesday, but i will see.
As you can see the scrog net is installed again, so this time i will pull them through the net and let it in for better division until the end.
Really looking forward to my first flowering phase and how they will stretch out, kinda scared too :D
See you next week :)
Likes
3
Share

@Ribemarti
Follow
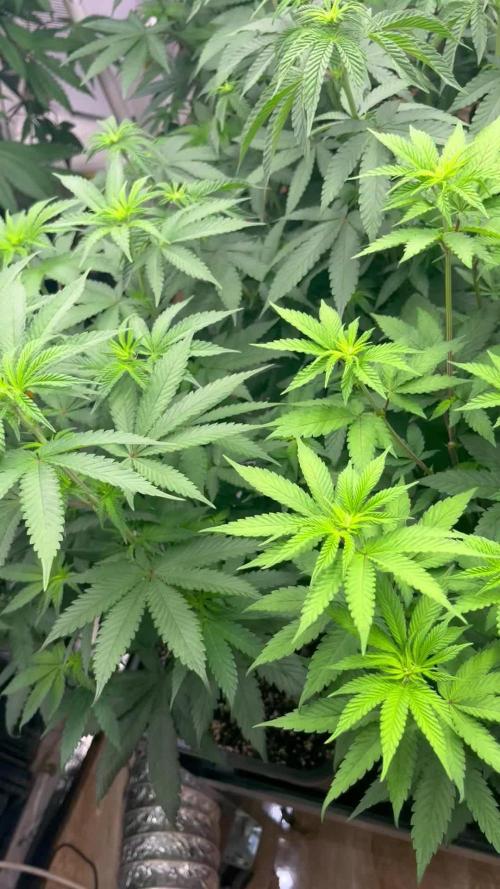
LAS PLANTAS ESTAN ADAPTANDOSE MUY BIEN AL LED 600W Y A LAS MACETAS DE 14 LITROS,
ESTOY REGANDO CADA PLANTA CON 2 LITROS Y UNA EC DE 1300 Y PH 6,5
TODAS LAS PLANTAS ESTAN PULVERIZADAS CON PREVENCIÓN, ACEITE DE NEEM I LA PROXIMA SEMANA
LA ULTIMA PASADA Y AÑADIREMOS PROPOLIX TODO NATURAL
Likes
18
Share


@PrinceOfHerbs
Follow
The taste is incredible, you think you are smoking blueberries. Very strong and sticky variety with super dense smoke. It has also become colorful
3 plants, each 100g dried plant
