Likes
Comments
Share
@Jeremi420
Follow
Questa settimana c'è stato un po' di rallentamento dopo il travaso.nella foto sono al giorno 42. Una di loro dovrà andare via, sono in un box 90x90 (3×3) e ci sarà un'altra settimana di vegetativa, per poi essere messe in un vaso da circa 12 litri (3 gal). Già 5 mi sembra saranno troppe, in caso una riceverà una defoliazione sia prima che dopo la fioritura. Vedremo. Buon cultivo a tutti ✌️. Giorno 45: travaso in vasi da 8,5 litri. Tra due giorni darò una pulita alla parte inferiore dei rami, eliminando i rami che non raggiungeranno gli altri apicali. Di 6 piante ne ho tenute 5. 1 afghan skunk in alto a sinistra nell'ultima foto.1 dos si dos 33 in alto a destra sempre nell'ultima foto e 3 industrial plants. Buon cultivo raga. ✌️ 
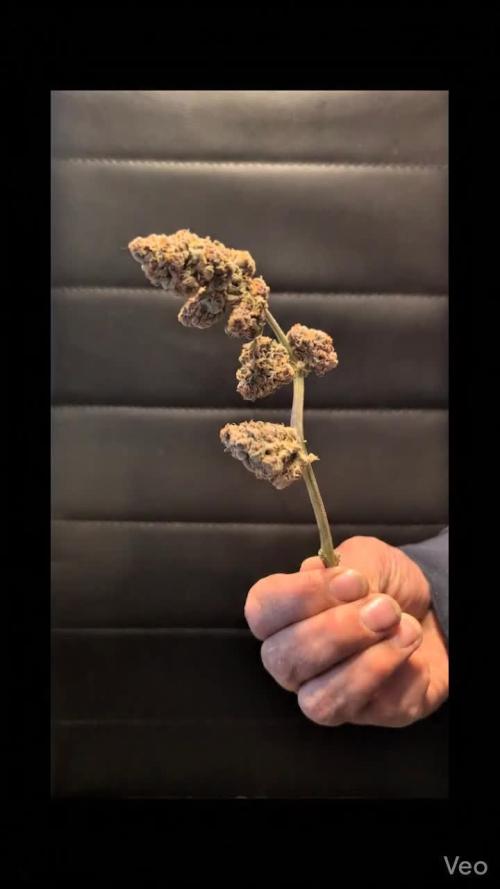
Giorno 49: ultimo giorno di vegetativa. Il video è di questo giorno.speriamo che sia poca ma buona ✌️🤞.
Likes
6
Share
The last to planted by 3 week and it the tallest already and it hasn't even stared to flower yet. I'm very excited to see what happens with this strain.
Likes
79
Share
- Sensi Seeds Research The Sensi Seeds Research breeding project has created eleven cannabis seed varieties. How? By combining new cannabis cultivars with a selection of strains from their long-established cannabis gene bank. For the first time in thirty-six years, they are opening the doors of the Sensi Seeds Research and Development Department. - 7 weeks in soil (week 7), this is where the ScrOG is a good method to keep on vegging your plants without getting too tall, saving space for the future stretch. Indoor growers are limited by the ceiling, this is the best way to keep on growing roots, more roots more fruits 😉 Sensi Seeds strains are perfect, it’s a pleasure to grow such genetics, everything is going like expected, each plants are doing their thing very well and dose respond marvelously to the plan, in time with no delays due to shitty or sick and weak plants ! 👍 - For the beginners : Setup the first trellis on the top layer, then lower each corners to the bottom level, smashing the plants and the 2 main stems to the third node where the topping has been done (see previous weeks). You will gain approximately 30cm of growth, and you will be able to keep on vegging them without getting to tall, as mentioned more roots = more fruits, and you will avoid long legs (don’t grow legs!!! They will have to be trimmed later on) where all the popcorns and small buds tend to grow. Remember, you are here to learn how to knock a ball out of the park, this method is complete, you avoid plants getting too tall and finishing with your buds too close from the light, killing all the essentials oils and terpenes (you will kill flavors and scents), you avoid to grow legs finishing with tall plants and just a ball head of canopy, you avoid small buds and popcorns by applying the incoming method in the next weeks where you learn how to clean your legs . Then , once you smashed the plants with the first trellis (you’re supercropping by doing this bro) , the junction of the stalk (at 3rd node) will probably split in half, no worries it will heal by itself. You just need to put second trellis on top ! -Watering and feeding, that is the question ? 😄 I’m looking the leaves lol 😝 They are around 2l every 4 days at this stage , I’m not watering until drains come out for the moment, I’m keeping all the good stuff inside the pots another week or two. (I’m looking for a job in the Cannabis industry as Master Grower, Mineralogist, Quality Control 🐞)
Processing
Likes
10
Share
Start of week 5! Plants are doing great! Still some P & K deficiencies showing, but overall the bud development is phenomenal on the blueberries and is coming along nicely on the super lemon haze. I am still feeding an extra 2 liters to the Slh, this time at full dosage of part A & B, this seems to have helped with this past week (4). The blueberry are super sticky and smell amazing!
Likes
6
Share
@GorkedOut
Follow
Growing very well
Likes
Comments
Share
Purple kush is the taller of the plant, and the wham is the shorter thicker one
Likes
6
Share
@mrcrop
Follow
So this lady was the biggest of all and the fastest. The smell is very nice, sweet and lemon. Was very easy to grow, all natural, only good soil and water.
Likes
65
Share
@3lementa1
Follow
Things are looking good. I'm in a bit of a time crunch so I think I'm going to harvest early. Sometime this week probably, just shy of 8 weeks. Cool strain to grow. Very interesting calyx formations at the crowns. I dried a couple small buds and threw them in my vape a few days later and the terpenes seem great. Can't wait to see how it tastes fully cured. I'm going to wash and decarb the buds before curing them, and I've never done that before, so I'll post that here too. Thanks to everyone who read and commented! Happy growing!
Likes
26
Share
@MG2009
Follow
05/19/2021 Week #7 flower. Gave her a good rinse today she was covered with pollen from nearby trees, drinking more water took 2 full two liter bottles before any runoff, soaking it up like a sponge. Couple hours later fed her some (1-3-3-1.5) N-P-K-calcium I anticipate two more weeks till harvest but we will see. Just got to keep her hydrated for next couple weeks. Apparently she is perking up! after taking a rest for a week or so. And putting on new flowers, and Tangie parentage is very identifiable in her SMELL! WOW Enjoy the videos.🙏 Ps. I decided to fix floppy stem, hopefully it will now put more effort into finishing flower! Will she swell in last weeks??
Likes
1
Share
This week is basically more LST my plant that split has repaired herself within four days and looking amazing and has the most growth out of the three Widows
Likes
82
Share
Hello growmies! Welcome to week four of An Epsilon Adventure! The girls are already transitioning into flower, I will get some photos of that later in the week. Massive thanks to both Shogun and Royal Queen Seeds for sponsoring this grow. Daily Updates: ### Week 4 Day 1 11:00 16/7 Removed some lower growth. ### Week 4 Day 2 23:00 17/7 Tallest plants were showing signs of heat stress so I have raised the light about 30cm more. Unfortunately this now means the lower plants aren't getting as much light as they could, so I have put the cycle back to 20h (I may even increase it). ### Week 4 Day 3 14:00 18/7 Photographed. ### Week 4 Day 3 19:00 18/7 Fertigated 2l. Okay these girls are now starting to concern me a little on the basis that they are supposed to grow to "50-70cm". At just over 3 weeks old the shortest of these girls is 53cm, the tallest (plant 3) is now 76cm tall. The worrying thing is they do not at all look like they are slowing down and as they are just pre-flowering now, the flowering stretch hasn't even started. So I need some genuine advice here now: Do I keep the faith and hope that they don't exceed the space I have? Do I top or super crop them now? These ladies are beastly, at the end of the week I am going to take some individual videos and more photos to really try and capture how magnificently well these girls are doing. I think I may be in the process of growing the biggest Epsilon F1's so far? Exciting to find out! ### Week 4 Day 4 21:00 19/7 James has assured me they wont go much more than 85 so I am not going to mess with them. They are due a defoliation at the end of this week though. Measured each plant as follows: Plant 1: 81cm Plant 2: 75cm Plant 3: 80cm Plant 4: 67cm Plant 5: 59cm Plant 6: 58cm Might photograph later or leave until tomorrow. ### Week 4 Day 5 10:00 20/7 Photographed and measured. Plant 1: 85cm Plant 2: 79cm Plant 3: 81cm Plant 4: 71cm Plant 5: 63cm Plant 6: 63cm So they've all grown about 4cm in about 13 hours, except plant 3 - which seems to have slowed down a lot. The top of plant 3 is also the most advanced looking in terms of pistils. I forgot to take close ups of the preflowers I will do that tomorrow. I have had to raise the light again today and it is now much further away than the younger plants than I would like. So I am thinking about adding a 300w LED into my 4x4. I have another 3 inches I can raise the light on the hangers, after that I can removed the adjustable handers and tie it to the top of the tent... that'll gain me another 4 or 5 inches. If I need to go higher my only option would be to set them up without the tent which is not an option right now. Hopefully they all just stop getting taller now and focus on flowering... but my gut tells me there's more growth to come. Watch this space! ### Week 4 Day 6 15:00 21/7 Measured. Average 10cm growth 29 hours. 😳😳😲 Plant 1: 96cm Plant 2: 89cm Plant 3: 88cm Plant 4: 81cm Plant 5: 73cm Plant 6: 72cm ### Week 4 Day 6 23:00 21/7 Defoliated. Only photographed plants 1 and 2 individually as I was short on time. Some lovely pics though! ### Week 4 Day 7 15:00 22/7 Fertigated. 2l Will photograph and measure later when they've had 24h since training. ### Week 4 Day 7 23:00 22/7 Photographed and measured: Plant 1: 102cm Plant 2: 93cm Plant 3: 89cm Plant 4: 85cm Plant 5: 76cm Plant 6: 75cm Well here we are at the end of week 4 and I am quite shocked by the growth of these girls. This strain averages 50-70cm in height. We have six plants here and every one of them is taller than the average... but would you just look at plant 1? She is a giant! 102cm!! Where will she stop? Next week will see the full transition to flower and we will start to see the bud sites developing. I have no idea at this point what the heights will look like at the end of next week. This is sort of new territory really, they weren't meant to get this big! --- Thanks for reading growmies! 👊 ========== Tent: 120cm x 120cm x 180cm Light: 600w HID Elite Dual Spectrum HPS + Angel Wing Reflector Air: 5" duct fan system with carbon filter ~300 m3/hour + RAM 9" floor fan + 4" intake fan Pots: Air Pruner Fabric Pots 30l - UGro XL Coco + horticultural grade perlite (~20%) Seeds supplied by Royal Queen Seeds https://www.royalqueenseeds.com Nutrients supplied by Shogun Fertilisers https://www.shogunfertilisers.com/en ==========
Likes
67
Share
Hi all buddies! First crop from hydro nft growth. Growth went well, I had some management problems in changing nutrients from veg to bloom which delayed the harvest for a week or two. Sensi Seeds' Skunk # 1F is incredibly resistant to mold and insect attacks, very close internodes ensure low height and compact buds. Unfortunately I chose the mother phenotype wrong, I found the lowest as I wanted but I lost the fatness of the buds present in other phenotypes, but the game was worth the same and I am very proud of it! I collected after 94 days of flowering, the last 72h 20kg ice cubes in the tank and total darkness which the last 24h without irrigation. After cutting I hung the whole plants in the tent for 24 / 48h 19 ° C 55% HR. Two days of wet trim to 8 girls and I hung their colas in the tent to continue drying. With a girl i tried dry trim but i will avoid next time. After a week in the tent I cleaned the colas and removed all the sticks, I placed everything in airtight bags in the refrigerator for 5 days 12 ° C 65% HR (daily check). Now dark storage room at a temperature of 18 ° C 65% HR. At the last weighing a few days ago it was more than 500g, from now it does not lose any more weight. Next week I will take pictures of the weigher and the finished harvest🍀🍀🍀 target!!🍀500g dry/cured🔥 Thank you GD community you are precious for everything, criticism, advice, curiosity, thanks 💚🌱✊🏼 Awesome people here on GD🔥🔥🔥
Likes
1
Share
@Rogue2803
Follow
Continuamos la floración
Likes
33
Share
@Oyziphar
Follow
FLOWERING First flowering phenomena are visible in the tops of the plants.😜 -------------------------------- GROWTH The plants are still growing rapidly. To keep the size of the plants somewhat at the same height, I use the following techniques: 😷 1. Removal of the side branches (Defoliation) -Small plants: I remove almost all side branches. In this way the small plants do not have to spend energy in the growth of side branches. -Large Plants: I don't remove anything. The plants will put energy into the growth of side branches, so the plants will not grow too fast in height. -Other plants: I remove the side branches in proportion to the size of the plants. In the course of the following days, I gradually remove all low side branches! 2. Tying the branches (Low Stress Training) -The smallest plants grow straight upwards. -The largest plants are tempered in their growth, afterI have tied them to the plant sticks with the help of plastic plant binders. On DAY 5 the plants vary in length between 23 and 41 cm AIR HUMIDITY 😨 When the lights are on, it gets nice and warm in the growing room. To keep the humidity at the desired level, I have two 7.5 liter humidifiers working almost continuously. In less than 24 hours I have to refill them. As long as the plants do not have real buds, I like high humidity so the plants to keep a low VPD. -------------------------------- WATER and NUTRITION 😱 Due to the high humidity, I don't have to give that much water. Every 3 days I give 1.25 liters of water per pot. I add 3 tablets of Easy Grow Booster to 10 liters of water. I divide this mixture between the 8 pots. This week I gave 2 x water.
Likes
43
Share
Bonjour à tous les padawans et les maîtres jedis Pour cette semaine 3 au seizième jour ma plante fais 15 centimètres et son sixième noeud apparaît je décide donc de pratiquer un LST sur ma plante. Pour ce j'utilise du fil de fer galvanisé que je plante directement dans le substrat en faisant attention de ne pas endommagé les racines car n'oublions pas que ce qui pousse dessus pousse aussi dessous. Jour 17 je pulvérise (dessus et dessous les feuille) une solution composé d'une cuillère à café de savon noir mou dilué dans un litre d'eau en prévention d'éventuels nuisibles. Je répète l'opération une fois par semaine jusqu'à la floraison. Je corrige mon LST suivant la pousse de ma plante ... Pour ma par c'est la manière dont je procède mais petit rappel de la technique du LST: Quand commencer à appliquer la technique LST De nombreux cultivateurs commencent la manipulation dés que les plantes possèdent entre 3 et 6 nœuds ou une paire de feuilles. Durant cette première étape de la croissance, le tronc encore flexible est pliable sans risque qu’il ne se casse, même si au fur et à mesure du développement de la plante il sera de plus en plus difficile de le plier. Nous pouvons continuer à guider la croissance des branches durant toute la culture, même durant la floraison, ce qui pour cette étape représente un grand avantage face à la taille, qui n’est pas du tout recommandé une fois que la formation des têtes commence, cela stressera en effet la plante, ce qui aura pour effet de retarder la récolte. Comment appliquer la technique de guidage LST Si nous sommes prudents, la flexibilité naturelle des fibres du cannabis permet de plier leur tronc et branches avec une relative facilitée, même durant la floraison des plantes. En utilisant une corde fine, nous pouvons accrocher la pointe de la plante à la base du pot par exemple ou à un tuteur que nous aurons planté dans le substrat. Nous plierons le tronc avec précaution et nous le fixerons avec la corde, à partir de là, nous pouvons augmenter progressivement la tension de la corde, chaque jour un peu plus, jusqu’à obtenir la position souhaitée. Soyez attentif à la réaction de la plante, essayez de ne pas appliquer trop de pression sur la corde et rappelez-vous que la flexibilité des branches peut varier d’une plante à l’autre. Pour obtenir de meilleurs résultats, il suffit de suivre quelques règles simples. Pour commencer, nous devons choisir une corde fine mais pas trop pour ne pas blesser les troncs au fur et à mesure qu’ils grandissent et qu’ils deviennent plus gros. Nous pouvons utiliser des crochets en plastique souple ou de n’importe quelle autre matière flexible pour éviter d’endommager les plantes. Spécialement en intérieur, utiliser des cordons en plastique de couleur (voir les diaries de @Silky) est très pratique pour voir facilement les accroches et faciliter le travail au milieu du réseau formés par les cordes, les tuteurs, les mailles ou les supports que nous aurons dans la culture. Bien entendu, en culture extérieure et surtout en guerilla nous ferons juste le contraire et nous utiliserons des matériaux de couleur qui n’attirent pas l’attention pour que notre jardin reste discret. Pour stresser les plantes au minimum, la mieux est de réaliser ces manipulations le soir ou juste après que les lampes en intérieur s’éteignent, ce qui leur permettra de se remettre durant la nuit. Normalement, le jour suivant nous pourrons observer comme les pointes des branches que nous avons pliées se dressent de nouveau vers le haut à la recherche d’une source de lumière. Que la force soit avec vous💪 Que la force soit avec vous
Likes
7
Share
Here she is the super. fast flowering pheno 1 smells like strawberry milkshake Pheno 2 abit smaller Sweet strawberries Pheno 3 Bigger denser buds ( Sweet Strawberries smell
Likes
12
Share
Going into flower like now I think..🤔 Lol, yes it’s flower time already.🤭
Likes
17
Share
almost ready to cut 🤤🌱 Day 76 1-2 days and proceed with the harvest I am aspetrating that the soil dries up well. we'll see when they give us these little girls of fustbuds