
Likes
Comments
Share


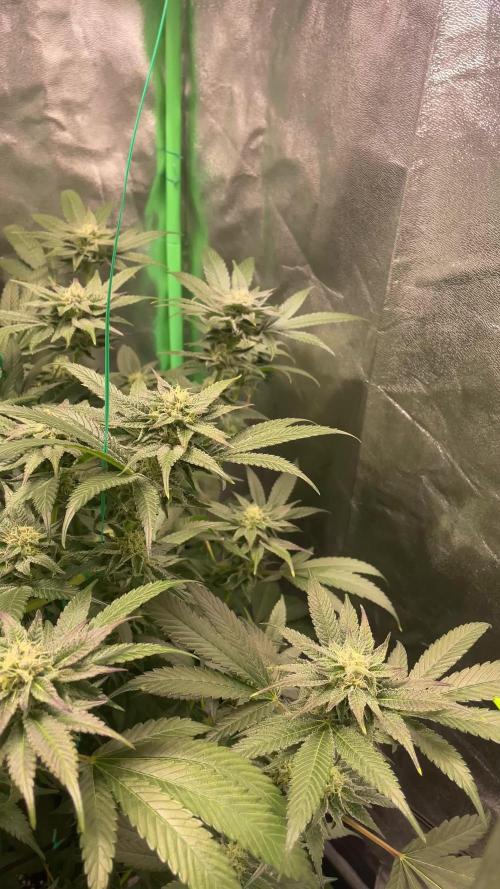
@Nedyah420
Follow
On average flowering technically truly begins 7 days after 12/12 switch...i waite 7 days because plants dont instantly Flower right at 12/12 switch most take 4-8 days to start actually flowering...it takes time for the hormones to be triggered and start taking effect, so i waite 7 days an consider that the transition period...i suggest waiting on any bloom boosters until after the transition period..also ((Brut worm casting and natures living soil is mixed into soil at listed rates not mixed into water water, all other nutrients are mixed with distilled water.))


Likes
21
Share


@JeyGanesha
Follow
Inizio 2 settiman...anche loro stanno venendo su benissimo.da questa 2°settimana inizierò anche dandogli poco Ph perfect ,.........
Oggi 17/10/2024 .queste papaya cookies auto Che mi ha regalato la cara Molly di fastbuds, stanno esplodendo di vita😉💪🙏🤣😂....
Forza belle piantine mie ...
Oggi 18/10/24 sto pensando di toppare una di ogni varietà...tipo 3 le toppo e 3 no e vediamo qual'è che viene meglio
Toppata...,....

Likes
48
Share


@TheCannaProphet
Follow
~ WEDDING CHEESECAKE FAST FLOWER by FastBuds ~
Well fam, here we go again with another epic strain from FastBuds Fast Flowering stable. After having such tremendous success growing their Gorilla Cookies Fast Flower outdoors last year, I've decided to run another of their fast flowering strains outdoors this year... Wedding Cheesecake Fast Flower!
The best description of this awesome cultivar comes directly from my friends at FastBuds which is as follows:
"A delight for the mind and body: Wedding Cheesecake FF (Fast-Flowering) is a delicious strain that offers XXL yields in a 7-8 weeks flowering cycle. This terpene powerhouse produces loads and loads of mouth-watering vanilla-creamy-cookie-scented terps with hints of citrus and cinnamon. In addition to its delicious aromas, this variety grows very well in both indoor and outdoor setups, yielding up to 650 g/m2 without extra maintenance, making it the ideal strain for beginners as it allows you to maximize yields while minimizing work. This super-fast feminized photoperiod version offers upbeat and energetic yet deeply relaxing effects that are perfect for consumers looking for a heavily focused, motivating, and creative high. It’s the ideal strain for those needing that extra energy boost to start a busy day on the right foot.
Wedding Cheesecake FF boasts chunky, large-sized buds with a thick layer of silvery-white resin and bright orange hairs scattered all over: that just screams ‘quality’. The lime-green flowers sparkle with an array of hues ranging from dark to light green, to magenta and purple, and reek of a delicious aroma that’ll remind you of fresh store-bought cheesecake.
This is an XXL hybrid that grows extremely tall in height, reaching up to 3m with one huge main cola and multiple long side branches that can withstand enormous yields of up to 650 g/m2 with ease. Wedding Cheesecake FF is extremely resilient to the elements and can be grown in almost every climate as long as you’ve got the space and basics covered, making her an excellent choice for those looking for large-scale harvests with a quick turnaround time without much effort."
________________________________________________________________________________________________________________________________________________________________________________________________________________________________________________________________________________________________________________________
The Setup:
This is going to be an outdoor grow, but I have started the Wedding Cheesecake FF indoors as our weather is still too cold to put her outside (nighttime temp's dipping regularly into the 30's℉).
The plan is simple... let her grow inside under a 19/5 light schedule until the nighttime temperatures stay above the mid 40's℉, at which point she'll be moved outside and transplanted into the soil which I have already setup and inoculated with beneficial microbes, and then let the fun begin!🤪💚
________________________________________________________________________________________________________________________________________________________________________________________________________________________________________________________________________________________________________________________
Weekly Updates:
6/9- Well, here we go into Week Eleven from seed for the FastBuds Wedding Cheesecake Fast Flower and she is looking MARVELOUS! 😍
Our weather is beautiful now with daytime high temp's in the 80's F without a lot of rain so I am watering her daily at sundown with approximately 5-7g of well water.
6/11- The FastBuds Wedding Cheesecake FF continues to explode with growth and I have been training her branches throughout the entire trellis net which she's now completely filled. I was going to install a second trellis net, but decided to just use the single net and do some HST on her to keep her canopy opened up.
6/13- I gave the Wedding Cheesecake FF a good watering today at sundown via the garden hose with straight well water.
I am planning on top dressing her in roughly 7-10 days from now with a blend of 4-4-4 and 2-8-4 along with some worm castings in anticipation of the start of flowering in the near future.
6/16- I watered today and also did a little canopy maintence, removing some leaves that were old and yellowing, along with some small shoots that would have only produced small larfy buds.
There's another week chalked up and it won't be long until this lady begins pre-flowering which will mark the start of the real excitement!
Thank you for checking out my diary, your positive comments and support make it all worthwhile! 💚Growers Love!💚😎🙏
Processing
Likes
21
Share


@Daddylongleggz
Follow
Well well this week has been a week and im actually posting a day early. This have been good so since they are like ten inch tall and i know in flower that they will jump im height so i transferred them into 5Gallon fabric pots, took a few leaves off. Havent water them yet but i did flush before transferring. Plus the soil was kinda damp so ill water later on. Also i think im off a couple of week but since this is my first Grow recorded grow i am just getting the feel of growing again and work out the rust in my green fingers..
I am planning on getting another well two more led lights. Another 1000w and 300 watt cob light that should boost actual watts up to like 550 true watts. Things are looking good so far with the help of a few masters in here. So thanks again for all the help and love. If i get this grow RIGHT thw world will be at my feet so lets take over the world my friends
Any advance please please feel free to teach me, i am willing to learn
Likes
26
Share

@Hempface86
Follow
She is starting to swell up and bud growth is at a good pace right now.... I'm really hoping for big things and some dark colors.. Thank you again to divine seeds for throwing this contest together.. Also, good luck to everybody that is in it.. Thank you guys for stopping by God. Bless and happy growing ✌️


Likes
1
Share

Likes
5
Share


Likes
19
Share


@Dunk_Junk
Follow
Been flushing in anticipation of cutting down.
Day 100 (yes I'm late) chopped the two main colas. They are very dense and heavy!!!!!
Just a few more days for the rest of the plant.

Likes
73
Share


@Roberts
Follow
Lilly x White Widow is bulking strong. Very frosty and a flowery aroma. She is growing great under the Spider Farmer G5000/UVR40 lights. I am doing my best to keep her happy for these last few weeks. Everything is going really good. Thank you Spider Farmer, Athena, and Ripper Seeds. 🤜🏻🤛🏻🌱❄️ 🌱
Thank you grow diaries community for the 👇likes👇, follows, comments, and subscriptions on my YouTube channel👇. ❄️🌱🍻
Happy Growing 🌱🌱🌱
https://youtube.com/channel/UCAhN7yRzWLpcaRHhMIQ7X4g
Spider Farmer Official Website Links:
US&Worldwide: https://www.spider-farmer.com
CA: https://spiderfarmer.ca
UK: https://spiderfarmer.co.uk
EU: https://spiderfarmer.eu
AU: https://spiderfarmer.com.au
G5000 Light Amazon Link:
amzn.to/4643esa
UVR 40:
https://www.amazon.com/dp/B0BR7SGTHS
Discount code: saveurcash (Stackable)

Likes
12
Share


@DBQush
Follow
Dear diary,
Week 5 completed and after a scare last week with magnesium deficiency, we were able to get it sorted and continue the mainlining.
🍀🍀🍀🍀🍀🍀🍀🍀🍀🍀
⏰ Day 32:
Gave a foliar of calmag water at 3.0ms 6.1ph during light off so it’s more gentle on the leaves followed by a regular feeding at 1.46ms 6.1ph.
Still seeing some deteriorating continuing on lower leaves, so will get epsom salt tomorrow to really target magnesium and increase the calmag with 0.7ml/l in feeds going forward.
⏰ Day 33:
Gave a foliar of epsom salt at 6.6g/liter(3.2EC 6.3ph)as lights went off but as I read more my ratios were off and I diluted the solution with 50% regular water.
Regular feeding at 1.45ms 6.2ph was given at lights on.
When inspecting the girls a few hours later they look a lot healthier already, so clearly magnesium was the issue.
Will give them today to recover and if everything keeps looking good by tomorrow, I will do the next topping.
If so I will have lost 5 days of progress due to the deficiency, but that’s the upside with photos I guess vs autos.
⏰ Day 34:
Another foliar of epsom salt applied and feeding of 1.5l each at 1.56ms 5.8ph.
A few hours later topping nr 2 done making it 4 tops each now and stripped the remaining growth.
I did however leave the fan-leaves attached to the new top node and for W.C #1 I left another set of fan-leaves for an extra boost as she’s a bit behind.
⏰ Day 35:
Did a quick check before lights off and they are praying and looking good considering the topping.
Then I did a regular feeding at 1.56ms 5.5ph when lights went on. Still looking good and no continued signs of the magnesium issue.
Lastly I removed the extra 2 fan-leaves I had left on WC #1 as her new tops are growing nicely and turned up the light slightly.
⏰ Day 36:
Regular feeding at 1.56ms 5.6ph.
Girls are looking healthy and enough has grown out that I can start tying down the 4 new mains.
Will probably top them again in 1-2 days if everything progresses nicely.
⏰ Day 37:
Foliar of epsom given just as lights turned off followed by regular feeding at 1.61ms 5.8ph when lights turned back on.
⏰ Day 38:
Regular feeding at 1.61ms 5.9ph.
Topping nr 3 was also done bringing it to 8 tops each and I will do the 4th and final topping as soon as the nodes have developed a bit more.
Likes
16
Share


@eldruida_lamota
Follow
Vamos familia, aquí os traigo la sexta semana y primera de floración de estas Royal Gorilla de RoyalQueenSeeds.
Vaya color, y van con buen ritmo.
La temperatura maxima es de 26.5 y la
Mínima se queda en 23.5. En cuanto a la humedad está estable en 50%
Agrobeta:
https://www.agrobeta.com/agrobetatiendaonline/36-abonos-canamo
Mars hydro:
Code discount: EL420
https://www.mars-hydro.com/
Hasta aquí es todo , espero que lo disfrutéis, buenos humos 💨💨

Likes
Comments
Share

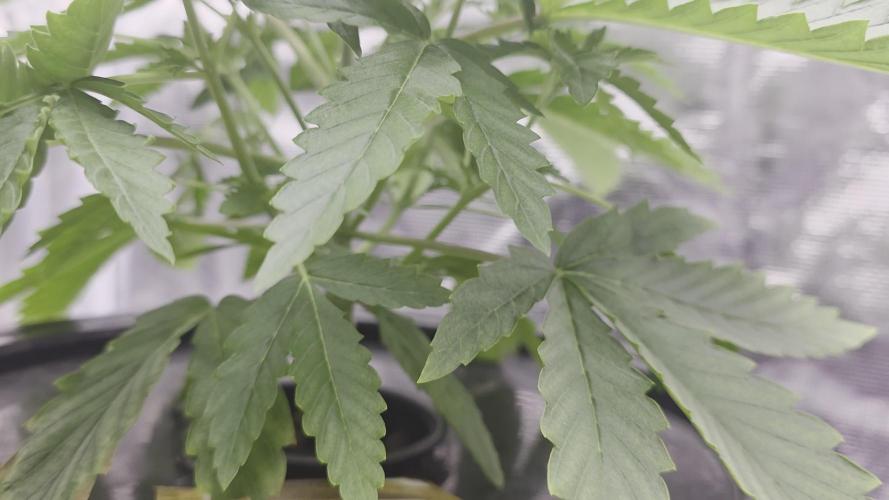
@Exr_300
Follow
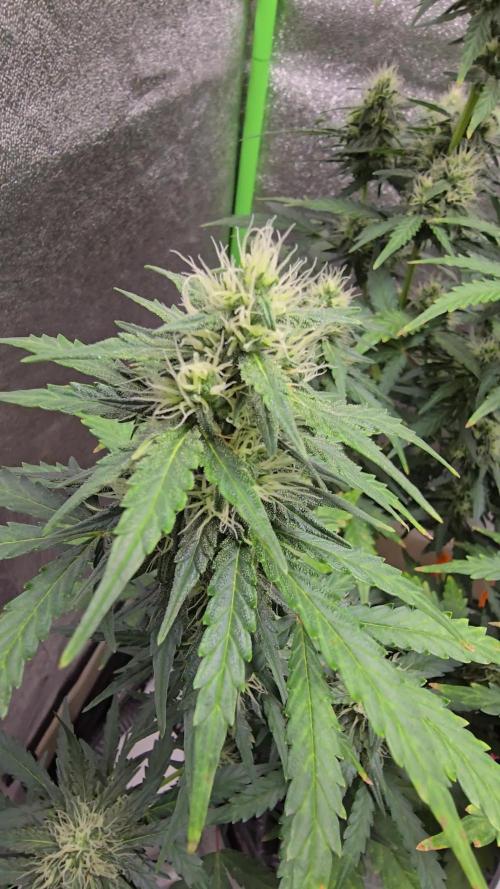
Any advise anyone what’s goin on here gpt asked it about half a dozen times says is not mold but is frost I looked it under loop it looks like icy shit but when I flake the leaves it goes everywhere !? lol
Likes
6
Share

@Brotanical
Follow
Starting Week 10, which marks the beginning of the 7th week of flowering. The buds are stacking nicely and the trichome production is ramping up. Tomorrow, I’m planning a defoliation to improve airflow and light penetration. I’ll also be tucking and organizing the canopy to keep everything tucked neatly within the 70x70 space.

Likes
22
Share


@Dankbudz84
Follow
The strain handled all my mistakes as a new grower great and is one of the reasons why I chose these strains. Just to name, bad Ph, over watering, over feeding was giving full dose instead of half, not watering to run off, not checking ppms and flushing right before harvest instead of weeks prior. I was not expecting the trichomes to look like diamonds as the video doesn’t do any justice. They really sparkle.


Processing
Likes
10
Share


@YAKDADDYDWC
Follow
starting off week 2 with a res change, had my ppm in the 500 if she struggles ill bring her back down..... roots are coming along nicely was starting to get root rot due too my temps sky rocketing and having too much water in my res....
roots seem to be coming good after lowering water level high ppm seem to be not a problem..
started folding leaves to expose lower nodes.. think i will top at end of week 3

Likes
4
Share


@Growyourownathome2x2
Follow
Thursday 16th march day 59 Harvested a couple days earlier then planned as my humidity was getting a bit high and worried about risking mold I decided to chop, have to get a good dehumidifier soon, everything looking lovely, nice and dense with very strong fruity potent smell definitely the best looking plants I have grown to date not the biggest buds but they look quality, chopped plants whole gonna do my best to keep the temp and rh% in the dry room as close 60/60 as I can to get a nice slow dry, 🍁😎 I only took the wet weight from 1 plant back left plant was 270g with large fan leaves removed

Likes
25
Share

@Dunk_Junk
Follow
Day 70 - She grew 4cm this week. Her flowers are not as developed as any of her tent mates, looks like she's going to take her time flowering. That's ok. I'm happy to wait 😀

Likes
18
Share


@HanesGrow
Follow
Harvesting my fist plant this week.
I've read that stopping watering before harvest will increase resin production.
You can see that most leafs on the bottom right plant turned yellow.
Most of its trichomes are cloudy with a few amber ones here and there.