


Likes
Comments
Share


@Silverback_Guerilla
Follow
9/10:
Coming along nicely...the big Amnesiac is the biggest seedling in the garden.
9/11:
I waited to long to transplant them and they have root problems to some degree or another...too wet for too long.
I transplanted all but the smaller Amnesiac and Lemon Cream Kush into 3 gallon pots, and those two went into 2.30 gallon pots. About 50% brownish roots on all but the smaller ones. 😕
I powdered the planting holes with myco, tricho, and other goodness.
I added two Mars Hydro 150w lights, and a 60w 6500k LED panel light since they are all spread out now. The average CCT is still a little over 4800k, even though the Mars are a little warmer color temp than the Viparspectras.
9/12:
Between the root problems and the transplant, they looked horrible, so I sprayed them with BoomBoom Spray today and will do a good root drench tomorrow with BushDoctor Boomerang.
They looked better by the end of day, but still have a ways to go to get back on track.
9/17:
I fed them boomerang only twice this week, and also fed them kangaroots yesterday. They are all looking strong, and branching well. The big Amnesiac is impressive. Great structure and amazing vigor.
The LCK is finally starting to look like she belongs in the same crop.
I'll prolly flip to 13/11 with emerson effect in the next couple of days.

Likes
11
Share


@FinesseGroup
Follow
We ain’t messing over here, new to the grow diary, so will be keeping track of all my things from the start… but for now check this one we harvested last month what a yield 💜🥊
Finessed

Likes
23
Share


@elementhc
Follow
The Ethos photos have been flipped to flower a week or so ago. Took 12 clones.
Gsc Auto will be ready to harvest this week. Others still have a few weeks.


Likes
41
Share


@DOOBS_N_BREWS
Follow
Started the week with a NFTG Mid flower feed. She's looking healthy and I shaved her legs a bit ;) definitely flowering and still stretching! almost 40 " or so as of right now =) Added a video of how I mix my NFTG solution
Day 71-NFTG mid flower feed /Mammoth P/ Recharge @ 6.5 ph
Day 72-73 No watering
Day 74- Recharge/Cal-Mag/Mammoth P/ Bloom Khaos Feed @6.5ph
Day 75- No water


Likes
18
Share


@Italianganya88
Follow
Die Plants wurden umgetopft und sind unter der grossen lampe gekommen, haben etwas stress anzeichen was normal beim umtopfen ist ,ansonsten sehen sie gut aus .


Likes
22
Share


@chupacabra80
Follow
1
glue gelato
120 cm
начал цвести в
34- 35 дней
2
runtz
90 cm еще не начал цвести.
вот вот расцветет
3
weedding cake
120 cm
начал цвести
40-41 день
4
do si dos
130 cm
начал цвести
40-41 день
5
Gorilla glue
120 cm начал цвести
40-41 день
сегодня я промыл
2 мл/1 л
floraClean,
Gorilla glue , wedding, do si dos поели по 3 литра, glue gelato 2.5 литра,
runtz меньше 2 литров,
runtz
мало ест и пока тормозит)))), в основном все нормально,я максимально не трогаю растения хочу посмотреть полный потенциал,я срезал лишь пару листьев и все,думаю это не проблема,
Likes
17
Share


@ipoke_smot420
Follow
Day 56 and looking amazing!
@fast_buds
@atlasseed
@seedsman
@sunraise
@sensorpush
@inkbird


Likes
8
Share


@SherbGrows
Follow
Ganja Farmer Seeds - AK 2.0 XL auto
Day 19 from sprout
Starting on week 3 soon
Light: ViparSpectra XS2000
Watering every other day to every 2 days
Started LST on the GaniaFarmer seeds. They have much faster growth than the Fastbuds growing in the same 4x4. I decided to LST only and not top the Ganja Farmer seeds.
See you next week!


Likes
10
Share


@Gutismoke102
Follow
The girls are doing great they are strong and healthy I did super crop some of the girls and they bounced back like a champ I’m be flipping to flower in about 5 days so stay tuned we looking good

Likes
15
Share


@Herbinator
Follow
DOH!
I've missed my window of opportunity for major defoliating and lollipopping.
https://www.royalqueenseeds.com/blog-defoliation-a-high-risk-way-to-increase-yield-n562
I don't wanna risk a hermie by stressing the plant with heavy removal of lower branches after I've gone into flowering.
I'll have to wait until next grow to do a heavy defoliation and lollipop BEFORE I flip my lights...ideally 2-3 days before.
I'll still be removing necrotic leaves as and when.

Likes
12
Share


@WestToEastBerlin
Follow
Englisch:
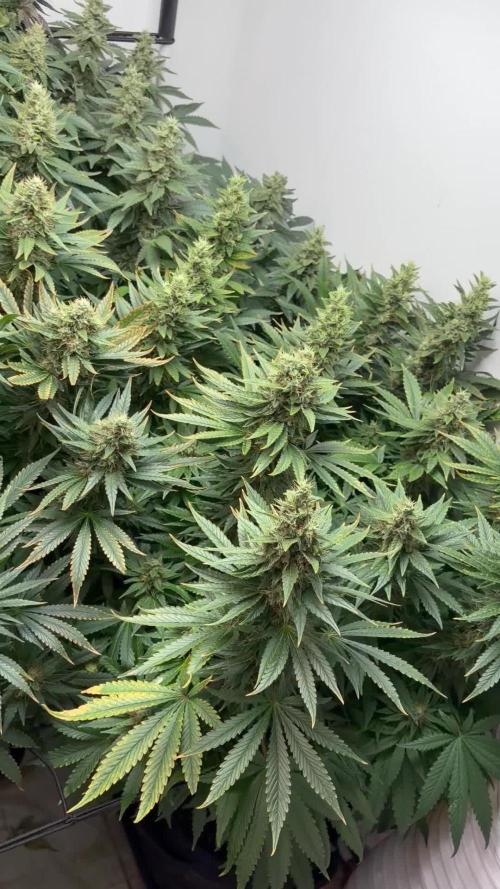
Towards the end of week 4, the ladies were planted in their final 11 liter pots.
They also tolerated it very well, especially because of the White Shark Mycorrhizae the plants had almost no stunt.
I lollipopped all the plants on day 38 and will give them another week or so to recover before flowering.
This is my first time with such aggressive lollipopping, so we'll see how they take it.
Unfortunately I have to say that the PCG Genetics are not performing as well as I had hoped, whether it's my fault or the fact that the seeds have been in the fridge for over 5 years, I don't know.
I hope that they will at least be convincing in terms of flavor, even if they are not the highest-yielding plants.
Now I have to wait and keep my fingers crossed. :)
Deutsch:
Gegen Ende von Woche 4 wurden die Ladys in ihre finalen 11 Liter Töpfe gepflanzt.
Haben es auch super vertragen, besonders durch die White Shark Mycorrhizae hatten die Pflanzen so gut wie keinen stunt.
An Tag 38 habe ich alle Pflanzen gelollipopped und werde ihnen noch ca. 1 Woche Zeit geben, um sich zu erholen, bevor es in die Blüte geht.
Ist mein erstes Mal mit so einem aggressiven Lillpopping, mal schauen wie sie es vertragen.
Leider muss ich sagen, dass die PCG Genetics nicht so performen wie erhofft, sei es mein Verschulden, oder die Tatsache, dass die Samen über 5 Jahre im Kühlschrank lagen, ich weiß es nicht.
Ich hoffe, dass sie zumindest geschmacklich überzeugen können, wenn es nicht die ertragreichsten Pflanzen werden.
Jetzt heißt es abwarten und Daumendrücken. :)



Likes
21
Share


@Felloffthegrid420
Follow
crazy week its colddddd forsure had some lil neats in my soil put about half-inch sand didnt feed going to next week broke a few heads im just let do there thing hit rm with a big bloom feed next week if i keep the temps upp should bee very nice buds sure is smelling good


Likes
8
Share

@SuparWawfflez
Follow
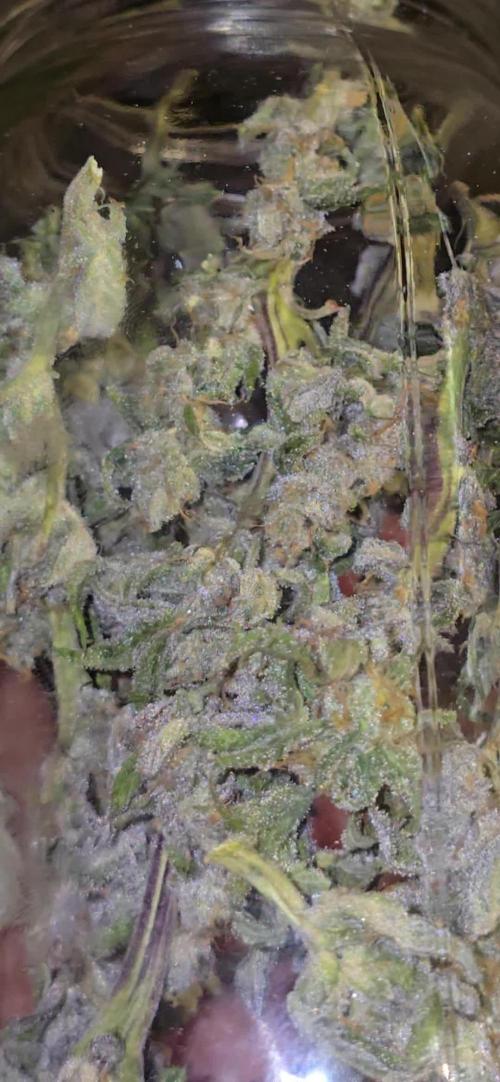
Frosty as heck but small buds, I might run it again with no lst and see if it gives bigger buds. Easy trimmer.


Likes
Comments
Share

@Hempel420
Follow
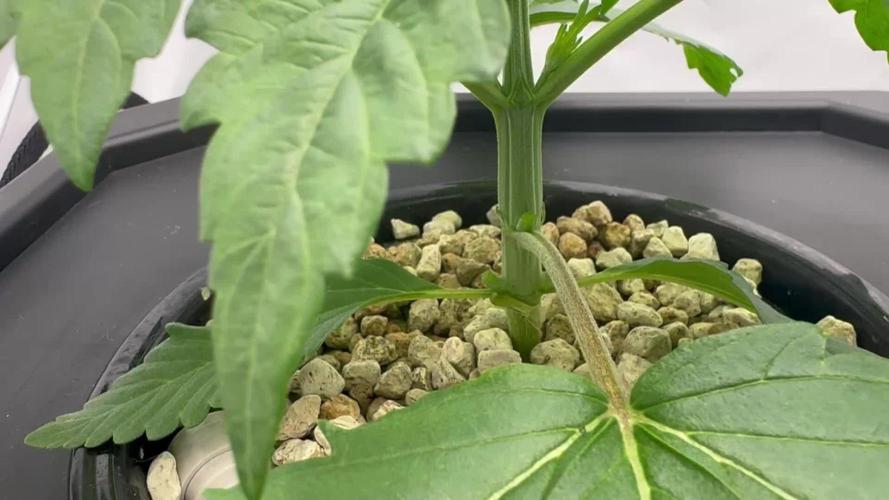
Week 3: Goodbye Lazy, Hello Mainlining & Tent Issues!
Another week in the books! Since my last log on September 20th, things escalated pretty quickly. We officially ditched the strictly "lazy" mindset, made some major training decisions, and even had to deal with an unexpected tent emergency. Here is the daily breakdown of Week 3:
September 21st: The EC Component Benchmark
I spent Day 1 of Week 3 doing some lab work for optimal nutrients. I took the time to measure and log the exact EC increase contributed by each individual nutrient component. Going forward, this will allow me to dial in custom nutrient ratios much more precisely rather than blindly following stock formulas. You can find the exact readings at the bottom of this days report.
September 22nd: Water Top-Up & The Light Leak Emergency
Noticeable uptake! I topped up each bucket with 300 ml of remineralized RO water to counteract a dropping EC level. A falling EC is always music to my ears because it means the girls are actively drinking and consuming nutrients faster than water.
Later that night, I noticed light leaking through a small puncture in the tent wall and the zipper also seems to have problems.
What leaks out can also leak in! To prevent catastrophic light pollution during the future flowering stage (and avoid any hermie risks down the line), the main outer cover of the grow tent had to be replaced immediately. Doing a full tent skin replacement solo with only one working hand was completely out of the question, so I called in some much-appreciated reinforcement. Emergency handled!
September 23rd: Mainlining Decision & Top-Feeder Strategy
Since I already had help on standby, I figured it was time to drop the "Lazy Grow" label (or at least rename it to Not-So-Lazy). Decision made: we are mainlining!
To kick things off, I pruned away the side branches on nodes 1 and 2 to stop energy wastage and force all growth momentum directly upward toward the top node.
I also turned off the DWC system's top-feeders on both buckets. The root networks are now fully submerged in the main reservoir and thriving. Moving forward, I’ll only run the top-feeders while I’m actively working on the plants, keeping it strictly airstone-only for the rest of the time.
September 24th: The Big Chop (Topping & Defoliation)
I’m generally not a fan of stressing young plants too heavily in one go, so I waited until today to top them above the 4th node. I also completely cleaned out all growth at the 1st and 2nd nodes. Thanks to the massive fan leaves, those lower sections were sitting completely in the dark anyway and if a leaf can't catch light for photosynthesis, it’s just stealing plant energy and has to go!
September 25th: Smooth Cruising
Just a minor pH adjustment today, bringing it back down from 5.8 to 5.5. Plants are taking the topping and defoliation like total champs.
September 26th: Drop in EC & Reservoir Strategy
The EC dipped below 1.3 mS/cm today. Rather than just topping off the tanks with fresh nutes and guessing which specific minerals were consumed, I’m planning a full reservoir change out. Fresh start, clean water, and precise nutrient ratios for the next stage.
Note: Today, Sept 27th, is dedicated to editing footage and putting together this week's log! I also bought a new Grow-Cam … but I haven't figured out how to get the files from SD-card to Computer. there are some format issues and that's a problem for tomorrow Hempel.
Not planned but we did a complete reservoir change to a fresh EC 1.5 mS solution because it feels like the plants are hungry.
Now that the mainlining structure is set and the plants are recovering seamlessly, let's see how fast those new main mains explode in Week 4!
As promised, the Lab Day:
I prepared my Base water (CaO + MgO) and landed at a picture-perfect 0.272, basically a carbon copy of the original calibration. Then Vega A went in and only delivered about 90% of the EC bump I was expecting.
Note to self, shake that bottle harder, sediment is not your friend.
Vega B and Cannazym behaved exactly as predicted, Rhizotonic did its usual "not touching your EC" routine. Then the plot twist: I bumped the pH with 1.4 ml of pH+, and instead of holding steady, the EC actually dropped from 1.430 down to 1.375. Correcting the pH back down afterward didn't bring it back either, which rules out a fluke reading and points to a small calcium precipitation event: dump pH+ in one big shot instead of small sips, and you can spike the local pH high enough to knock calcium out of solution as an insoluble salt before it ever gets a chance to mix in properly. Filed away for next time with smaller pH+ doses and more patience.
Closed the 0.125 gap with 6.05 ml each of A and B, and the meter read exactly 1.505. Sticking the landing after a session with that many curveballs felt genuinely satisfying — following Canna's own chart to the letter would've left me nowhere close. Moral of the story: trust your meter, not the label, and the girls get exactly what they came for.
So if you are interested, here is the working feeding chart of Canna Aqua Vega to reach EC 1.5 mS in 10 Liter Base Water (EC 0.27):
Canna Aqua Vega A - 17.55 ml - EC 1.070
Canna Aqua Vega B - 17.55 ml - EC 1.432
Rhizotonic - 13.5 ml - EC 1.432
Cannazym - 16.85 ml - EC 1.496


