
Processing
Likes
Comments
Share


Likes
Comments
Share


@Opulent_Amber_69
Follow
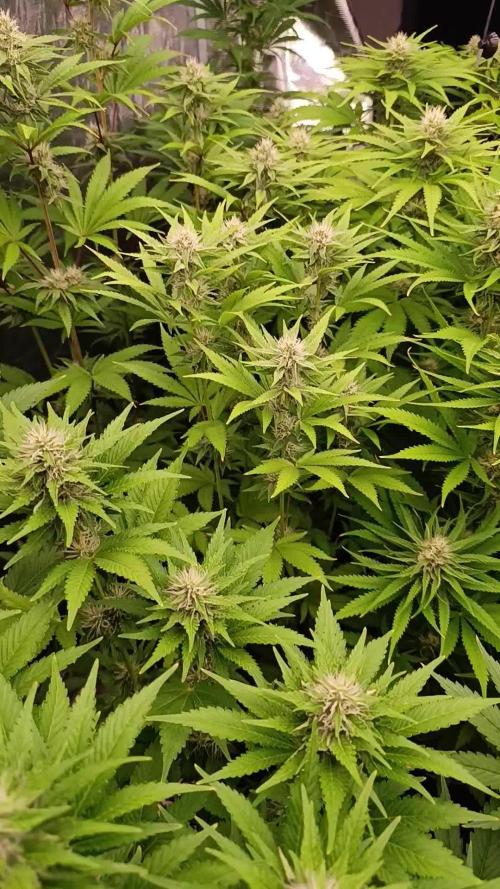
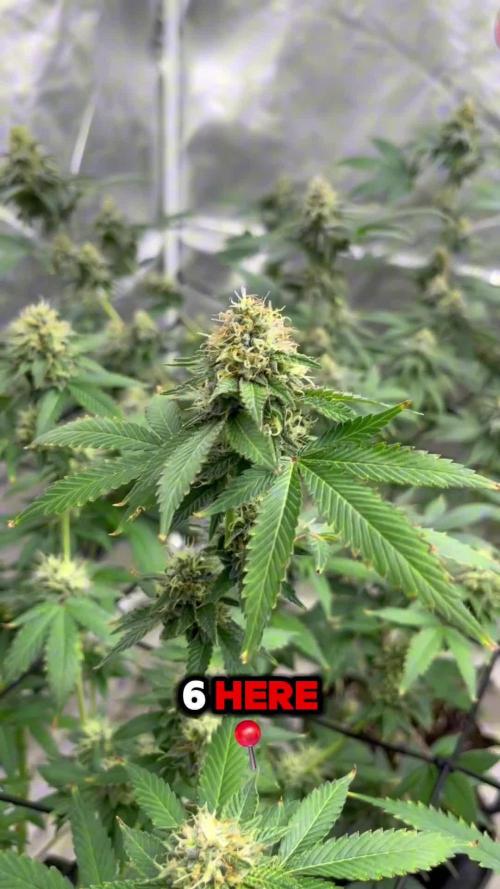
I took these on my Snapchat is why there is so many of them 😅 I'm currently doing the 48 hours of darkness to help produce more trichomes. I did SO MUCH to this plant, it looks like it will DEFINITELY have some weight to it, but you will have to wait until it's dry 😄
Likes
10
Share


@Sup3rNov4
Follow
The girls have been switched to flower due to room but the process looks fantastic so far well apart from lil timmy🤦♂️


Likes
169
Share


@SlowpokeFuegobud
Follow
🍊 🐶 💜 🍊 🐶 💜 🍊 🐶 💜 🍊 🐶 💜
SOUR TANGIE DAWG!!! Does this sound like great weed or what?! 😁😁😁
Thanks @SSSC_John for running those fun contests and for giving us a chance to grow those beautiful genetics on stage! ✨ 🙏 💜
I'm so excited for this!! 😍
It's a new variety from SSSC and there's a contest running in the contest section for this one and the Purple OG Punch Auto! 😎 Better than the Oscars, in my opinion.
Can't wait to see what my fellow growmies will whip up! :wand: ✨
I started 4 regs now, put them directly in soil, after soaking them for three hours in pure humic acid from Green Buzz. 💧
Normally I always start with 3 regs, I always have minimum one female, but this time I don't have much time, I need to be safe. It will be a drama if I end up with 2 or 3 females, I can't kill them hahaha! 😬
Thanks my faithful grower friends, for showing up here and looking at my girls! I always tell them who is looking. 😜 💚 💚 💚 😘 Love you!!
Million thankyouuus go out to my sponsors @GreenBuzzNutrients, thanks so much for your support!! 💚 💚 💚
If anyone would like to try their amazing organic products, you can find a generous discount code of 25% in my weekly comments from next week on! 😜 🙏
If you want a recommendation which product to get first.. BIGFRUITS!! 😍 I love the tasty terps with this one!!
https://greenbuzzliquids.com/
💚 💚 💚💚 💚 💚💚 💚 💚💚 💚 💚💚 💚 💚💚 💚 💚💚 💚 💚
___________________________________________________________________
Strain Info:
About Sour Tangie Dawg cannabis seeds
Sour Tangie Dawg is a sativa dominant cross between the famous Tangie and Chemdawg. Expect a combination of sweet & fruity mixed with a gassy, jet-fuel flavour. The amazing mix of citrus, tangerine, pine and gasoline produces uniquely rich, dank buds. The powerful sativa high is strong, uplifting and long lasting, great for creativity and socialising.
Chemdawg is the parent of OG Kush, all Diesel strain originate from Chemdawg. The Tangie is originally a Skunk hybrid strain but extremely fruity with the trademark Tangerine flavour. This strain is potent with THC-levels over 20% alongside very generous yields of top quality weed, very suited for hash and rosin producers. If you’re looking for a strain to produce the best tasting concentrates this Sour Tangie Dawg is a proven winner! She easy to grow and the perfect choice for SCROG growing due to her growth speed and stretch. We advise switching to 12/12 light when 75% of the net is filled. For outdoor growers the harvest period is early October. Indoors she’s finished after 9 weeks of flower - fast for a sativa dominant strain. We recommend growing in soil with organic nutrients for the best tasting weed.
Get some fantastic genetics here: https://supersativaseedclub.com/ 💜 🐘

Likes
54
Share


@GarciasGarden
Follow
Well as always This week has brought some amazing growth and all that stickiness and dankiness is finally coming in !!! The Kosher Kush #2 (very front) is definitely a little bit ahead in bud development the smell on this plant is remarkably similar to the CANDYLAND strain it has a very sweet/ OG KUSH smell to it .. best words to descrine it would be a sweet sterling silver kush smell lol!
The WASHING MACHINE’s are also starting to get their smell and you can just feel how sticky the nugs are going to be already makes your fingers stick together.. the smell off of this one is remarkably similar to Girl Scout cookies!! And you can already see the zombie look of the buds !
And finally the BLUEBERRY is smelling fantastic like a walk through a field of berries and strawberries and orange hairs are already popping out ! I had to do some HST to her but she came back by the next light cycle !
Well anyways guys im super excited for this harvest I know this is going to be some beautiful smoke 🌸🌹
~ GARCIAS’S GARDEN
P.s. CHECK OUT THE VIDEO ABOVE


Likes
11
Share

@420DeepGrow
Follow
📆 Semana 5
El engorde entra en su fase más intensa y los cogollos aumentan de tamaño con rapidez. Los cálices comienzan a apilarse, la producción de resina se acelera y el aroma se vuelve cada vez más intenso, mientras la planta alcanza uno de los mayores consumos de agua y nutrientes de todo el cultivo.
La demanda de fósforo y potasio continúa siendo elevada para sostener el desarrollo floral, sin descuidar el aporte de calcio y magnesio, esenciales para mantener un metabolismo activo y prevenir carencias durante esta etapa de máxima exigencia.
⚡ EC: 1.7–1.8
💧 pH: 6.2–6.5
🌡️ Temp: 21°C
🌫️ Humedad: 45–50%
💡 Intensidad: 1000–1100 PPFD
🔥 Nota de cultivo: La estabilidad del riego, la nutrición y el clima será determinante para maximizar el engorde y la producción de resina sin comprometer la salud de las flores.
Seguimos creciendo fuerte! 💪

Processing
Likes
36
Share


@Ganjagrandaddy
Follow
UPDATED ENTRY DAY 64-THE CULL:They have finally finished. After waiting very patiently and thinking this would go on forever, these fruity little beauties are done. I have now put them into the dark for 36 hours before I chop them and hang them for a low and slow dry ( approx 10 days at below 19°c and rh 50%) . I haven't used the Harvest option as I want to be able to complete the information correctly without going back and using edits. They have been a brilliant strain to try for my 1st ever auto run and I will definitely be on my list again if I do another. Their small stature and finish time are better suited to a more natural grow and mild lst for lights penetration i.m.o . I am looking forward to seeing their final yield as they feel rock solid on the big stemmed girls.
Will do a full report once I have a final harvest to add. peace and live folks , see you on here in about 2 weeks total.
63: I thought these would be finished at this point but from close up inspection with my loupe , we still have mostly clear trichs in the house. Their overall look is amazing. opening the ten teach day and seeing them standing proud with their beautiful colours is a blessing. I love this strain for appearance and if it smoke like it looks , I will be a happy life long fan.
#1 Is feeling nice and tacky when i touch her but also has a greasy feel too. she smells amazing of sweetness and definitely berry. Her size wont break any records but if I grew them again I would leave them to grow their normal height as #3 is.
#2 is the nicest looking for size of them all and has me just staring at it when I get the chance. They are so close to the end now and it is killing me waiting.!!!
#3 Is the girl left to grow after her very pale start and veg period sonos the tallest structure wise .She doesnt have weighty buds like her sisters but certainly looks good now.
I think it is their last week now for sure.

Likes
32
Share


@Fergie
Follow
So here we are end of week 9 and is almost the end for Betty . I think 4-5 days and she I'll be ready for the chop . Has been 10 days flush so far and just been feeding her pH water . I will get some better pics up when chopping her down got real bad lighting in my flat and only take out at night .😀
Likes
10
Share


@Notsoaveragegrows
Follow
Swapped out a light that’s slightly too big for my tent but squeezed it in with minor cuts to the tent. Probably should’ve done it sooner. Can only run the light at 50% or below.
Likes
13
Share


@KingSalomonsWeed
Follow
Hello and welcome to day40 of flowering of this little lovely plant.
The smell is incredible. Zkittlez. No joke.
Very sweet with a a
hit of Watermelon too, not so strength by now, but i will report.
Ill try to catch up some photos.
Not only that the phylaxien re going brown.
The colors on the buds, rose, Lila.(edit i was wrong Lila color was from the Greenception GC4)
Till now.
BARNEY FARM!!!
At this BARNEYS FARM grow they bring a smile on my face.
A very pretty strain
Thank you!
The BioBizz TOP MAX is from ny next noise forbidden to use because of a unholy smell it turns after some weeks.


Likes
1
Share


@Krissci
Follow
Not much done.
Usual nutrients, wether is getting warmer but still cold at night 👍
Included overdrive this week until flush
Likes
5
Share


@littlefoot
Follow
Added the trills ned back, gets to bushy lol end up with a lot of defol, see if I can stretch her out. Getting pretty healthy, if I can get this grounding undercontrol should become a nice plant


Likes
11
Share


@StartGrowingShxt
Follow
Week 10!
September 9
-Blue cheese is looking great depending on what the pistils and trichomes look like at the end of the week I will be cutting ~Day 70
-Bubble Kush is progressing nicely and is visually bulking up smells like pine sol and lemons very nostalgic reminds me of college.
-Will be watering Bubble Kush in two days as I watered over the weekend and I have a tendency to overwater this particular lady also watered the Blue Cheese lady but she will probably not be getting anymore water for the week…maybe idk great way to start the week tho peace
Likes
4
Share


@Trinidad
Follow
Dried her for a total of 10 days. Give her a rough trim nothing fancy, just enough to put her in glass jars. The final dry weigh was 83grams after smoking a couple of grams. Her smoke gives me an energy high that keep me motivated complete my chores. The taste is citrus and fruity. Good grow decent weight and final product.

Likes
3
Share


@DeepSouthDank
Follow
Pheno number #1 is white and smells like sweet exo cheese, great smoke and effect too. The rest are pretty good too. 3 and 4 lacking terps. very woody..
Great grow all in all. about 35g of premium bud per plant.
Happy growing!
Likes
25
Share


@eldruida_lamota
Follow
Venga tercera semana crecimiento de estas Casey’s rollex O.G. de Dutchfem, La verdad que se ve muy marcado el porte indicó que tiene, un color espectacular , que ganas de ver cómo florecen, a llegado el otoño y lo notamos en la temperatura siendo led.
.
La humedad anda entre 55% la temperatura está entre 22/23 grados , y como siempre el ph , ya que es de lo más importante,está en 5,8/6,0.
.
AgroBeta:
0,8 ml x L Growth black line , vía radicular.
0,2 ml x L Tucán , vía radicular.
0,15 ml x L Flash Root , vía radicular.
0,05 ml x L Gold Joker, vía radicular.
.
Hasta aquí todo gente, espero que os este gustando , un saludo y buenos humazos 💨💨💨.
